Introduction
The first time I saw an acrylic pour, I did not believe it was paint.
A friend of mine posted a video of golden, turquoise, and deep violet colors blooming across a canvas like flowers opening in fast motion.
I watched it four times in a row, convinced there had to be a filter involved.
Then she told me the secret. There was no filter. She had mixed house paint, pouring medium, and a little water in plastic cups, tipped them onto a canvas, and tilted the canvas until the colors decided where they wanted to go.
The whole thing took about fifteen minutes, plus a day of drying. She had started doing pours three weeks earlier, after watching a single tutorial.
I have been making fluid art ever since, and it is still the craft I reach for when I need to feel calm.
There is something deeply soothing about watching paint move on its own. You are not controlling every outcome.
You are setting up a beautiful situation and letting physics do the rest. For a busy mom with a full schedule, that is exactly the kind of craft that fits: low pressure, high reward, and no two pieces ever alike.
In this guide, I will walk you through acrylic pouring from the very beginning. We will cover the supplies you actually need, the basic techniques that produce the most beautiful results, and the common mistakes I made so you do not have to.
By the end, you will be ready to pour your first canvas tonight.
What Is Acrylic Pouring, Really?
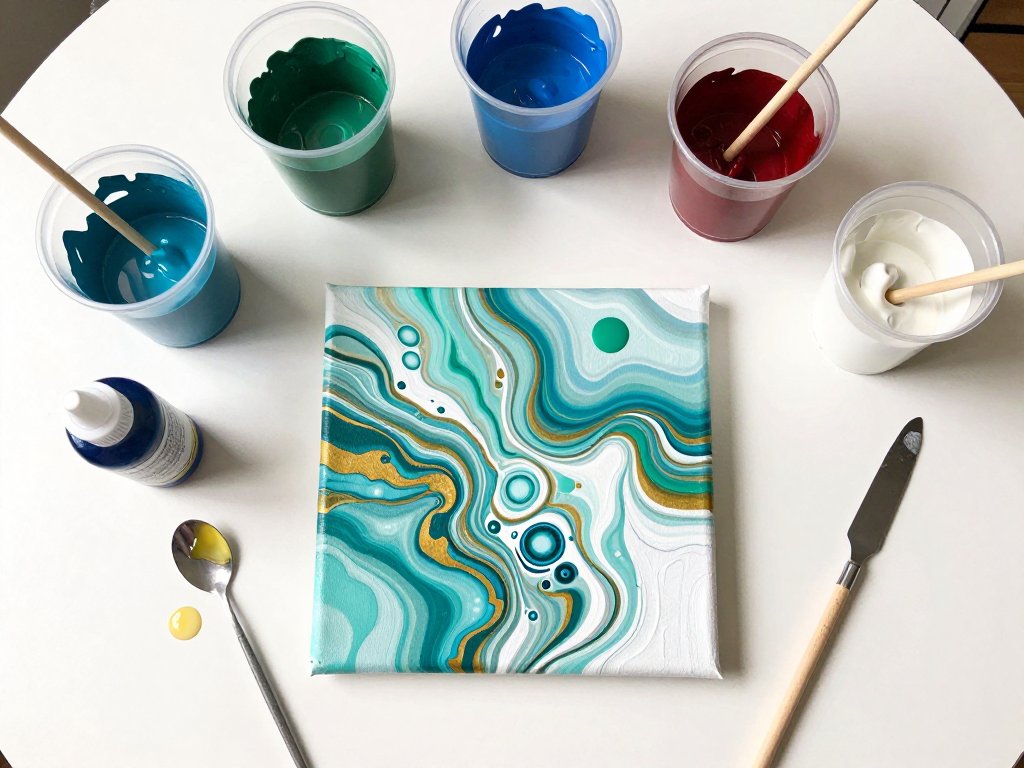
Acrylic pouring is a painting technique where fluid acrylic paint is poured onto a surface, then tilted or manipulated so the colors flow and mix on their own. The results look like marble, like galaxies, like ocean waves frozen at the exact moment they break.
The magic ingredient is the pouring medium, a liquid additive that thins the paint without breaking down its color or its binding properties.
Mixed with a little water, it turns thick tube paint into a slow, silky liquid that flows across the canvas and settles into those gorgeous cells and ribbons of color.
There is no drawing involved, no brush control to learn, no steady hand required. That is why it is so popular with beginners. The paint does most of the work, and the artist gets to make the big decisions: which colors, how much, and which technique.
You will hear people say that acrylic pouring is "easy." I would phrase it differently. It is beginner-friendly, yes, but it rewards a little patience. The learning curve is gentle, and the surprises are usually beautiful ones. That is a trade I will take every time.
The Supplies You Need to Start
Here is the good news about supplies: you do not need to spend a fortune, and you probably already own some of the basics. Let us go through the list, item by item.
Acrylic paint. Any craft acrylic works, but the student-grade bottles from the craft store are the sweet spot for beginners.
They are affordable, come in every color you can imagine, and behave predictably in a pour.
You will want at least three colors that look good together, plus a white. White is your workhorse.
It lightens, brightens, and makes every other color pop.
Pouring medium. This is the one supply you cannot skip. You can buy purpose-made pouring medium, or you can use a budget-friendly alternative like PVA glue mixed with water.
Many pourers start with the glue method to keep costs down, and it genuinely works.
Mixing ratios vary, so start with about two parts paint to one part medium and adjust from there.
Water. Plain tap water, used sparingly, helps the paint flow. The goal is a consistency like warm honey: thin enough to pour, thick enough to hold its shape on the canvas.
If your paint pours like milk, it is too thin. If it sits in a stiff pile, it is too thick.
Canvas or a sturdy board. Beginner canvases from the craft store are perfect. You do not need gallery quality for your first pours. A 10 by 10 or 12 by 12 square canvas is a great size to learn on.
Cups and stir sticks. Plastic cups for mixing, wooden craft sticks for stirring, and one clean cup per color. You can rinse and reuse everything between pours.
Protection. Cover your work surface with newspaper, a plastic tablecloth, or a drop cloth. Pouring is a little messy, and embracing that fact makes the whole experience more fun. Wear clothes you do not mind speckling, and open a window for airflow.
Optional extras: a heat gun or kitchen torch for popping bubbles, a level surface for drying, and a silicone spatula for scraping leftover paint. You can absolutely start without all of these.
Preparing Your Paints
Before the first drop hits the canvas, take ten minutes to mix your paints. This step is the difference between a pour that flows like silk and one that clumps into a sad, muddy puddle.
Start with your pouring medium and water in the cup, then add the paint. Stir slowly and thoroughly, scraping the bottom and sides of the cup.
The paint should be one even color with no streaks or lumps. Think warm honey, as I said before.
When you lift the stir stick, the paint should fall back into the cup in a steady ribbon, not drip in blobs.
Here is the patience part. Let your mixed cups sit for five to ten minutes.
This lets the bubbles rise to the surface, where you can pop them with a toothpick or a quick pass of a heat gun.
Bubbles that stay in the cup end up on the canvas, and while a few small ones can add texture, a lot of them look like a fizzy soda accident.
Mix more paint than you think you need. A cup that is only half full pours too thin and leaves gaps.
For a 12 by 12 canvas, a full cup of each color is about right.
When in doubt, mix a little extra. Leftover paint can be poured into a small tray for a bonus mini-piece later.
The Flip Cup Technique: Where to Start
If you only learn one technique today, make it the flip cup. It is the easiest way to get beautiful, dramatic results on your very first try, and it is the technique I teach every beginner.
Here is how it works. Fill a cup with layers of color, one on top of the other.
Start with your base color, then pour the others in gently, one at a time, in any order that pleases you.
Do not stir. The layers are the point. Turn the cup upside down on the center of the canvas, let it sit for a few seconds, then lift the cup straight up.
The paint collapses into a beautiful puddle of stacked colors.
Now tilt the canvas slowly, one edge at a time, to spread the paint across the surface.
Move in gentle, even motions, letting the colors stretch and mingle. Stop when the canvas is covered, or when the edges stop moving.
Over-tilting is the most common beginner mistake, because it turns the colors into a uniform gray.
Stop a little earlier than you think you should.
Lift the canvas flat and tap the edges gently on the table to settle the paint and pop stubborn bubbles.
Then leave it completely alone. I know it is tempting to keep nudging it. Do not.
The paint needs to dry slowly, overnight at least, to keep its colors from bleeding together into mud.
The flip cup produces those gorgeous, organic blooms with very little effort. It is the technique I recommend for your first pour, and honestly, it stays my favorite even years later.
Other Techniques to Try
Once you are comfortable with the flip cup, the pouring world opens up. Each technique has its own personality, and trying them is half the fun.
Dirty pour. This is the flip cup's relaxed cousin. Instead of layering colors carefully in a cup, you drop spoonfuls of each color into one cup, let them mingle a little, then pour the whole mess onto the canvas and tilt.
The results are looser and more unpredictable, with softer color blending. It is perfect for when you want to pour without thinking too hard.
Straight pour. Pour each color directly onto the canvas from its own cup, then tilt to connect them. You have more control over where each color lands, which makes it great for deliberate color placement, like a sunset or a beach scene with the horizon roughly where you want it.
Swipe. Cover the canvas with a base color, pour your other colors on top in lines or blobs, then drag a clean tool, like a palette knife or a folded paper towel, across the surface.
The swipe pulls the top colors across the base, creating those striking, elongated cells that look like ripples in water.
This technique takes a little practice, but the results are worth it.
String pour. Dip a piece of yarn or string into paint, lay it across the canvas in a pattern, then pull it off.
The paint left behind makes delicate, branching lines that look like coral or lightning. Kids love this one, and it is a great way to pour together as a family.
Whatever technique you try, the rules stay the same: mix to honey consistency, cover the canvas fully, tilt gently, and let it dry in peace. Master those fundamentals and every technique becomes approachable.
Creating Cells and Lacing
Those little circles and rings of color you see in professional pours are called cells, and they are the detail that makes fluid art look magical. The good news is they are not as mysterious as they seem.
Cells form when paints of different densities interact. The most common way to encourage them is with a few drops of silicone oil.
Add one or two drops to each color cup before you pour, and stir gently, just enough to mix it in.
When the paint hits the canvas and starts moving, the silicone creates tiny pockets that rise to the surface, pushing the paint around them into rings.
Torching helps too. A quick pass with a heat gun or kitchen torch over the wet canvas pops the top of those silicone pockets, creating the crisp, lacy edges that make cells look so striking.
Hold the torch several inches away and keep it moving. One quick pass is usually enough.
Here is the honest truth about cells: they are a little unpredictable. Sometimes a pour gives you perfect rings everywhere, and sometimes it gives you a smooth, dreamy blend with hardly any.
Both are beautiful, and both are yours. Try not to chase the perfect cell. The best pours are the ones you like, not the ones that match a picture online.
If you want to skip the silicone entirely, you can. Some painters avoid it because it needs careful cleaning, and their smooth, creamy pours are gorgeous in their own way. Silicone is a tool, not a requirement.
Common Mistakes and How to Fix Them
Every pourer makes a mess of a canvas sometimes, and that is fine. Here are the mistakes I see most often, and how to handle each one.
Muddy colors. If your pour turns into a brownish swirl, the usual culprits are too much tilting, colors that clash, or paints that were too thin.
Tilt less, choose colors that live next to each other on the color wheel, and keep your paint at honey consistency.
It also helps to use fewer colors: three plus white is a beautiful start.
Canvas not fully covered. You tilted, and the corners stayed bare. This means you did not use enough paint, or you tilted too fast. Mix more paint next time, and tilt slowly so the color has time to travel into every corner.
Too many bubbles. Pop them in the cup before pouring, and torch the wet canvas briefly after. If you do not have a torch, a lighter passed quickly over the surface works, though you will want to be careful and keep it moving.
Paint cracking after drying. This happens when the top layer dries faster than the layer underneath, usually from pouring too thick.
A thin, even coat of paint dries more predictably. If a piece cracks, do not throw it away.
Cracks can look like aged ceramic, and many artists intentionally keep them. Or scrape the canvas and pour over it again: the old paint becomes a textured base for the new pour.
The most important fix of all is the simplest one: pour again. Every pour teaches you something, and the second one is always better than the first. Keep your early pieces where you can see them, and you will literally watch your skills grow.
Drying, Sealing, and Caring for Your Art
Your pour is done, and now comes the hardest part: waiting. Acrylic pours need time to dry, and rushing them is the fastest way to ruin a beautiful piece.
Plan for the canvas to dry for at least twenty-four hours, and ideally two or three days.
Thicker pours can take up to a week. Keep the canvas flat on a level surface, out of direct sunlight, and away from pets and curious little hands.
Do not be tempted to speed things up with a hairdryer. Fast drying causes cracking and muddiness.
Once the paint is fully dry to the touch, check for tackiness. Some pouring mediums dry slightly sticky, which means dust and fingerprints will stick to your art. If the surface feels tacky, let it dry a few more days before doing anything else.
When it is finally dry, you can seal it with a clear varnish or a pouring gloss coating.
Sealing protects the surface and brings out the depth of the colors, and it is worth doing for pieces you plan to hang.
Apply the sealer in a well-ventilated space and follow the instructions on the bottle. Two thin coats beat one thick coat every time.
Once sealed, your pour is ready to hang, gift, or sell. Fluid art makes wonderful handmade gifts, because no two pieces are ever the same. Wrap it in tissue paper, and do not forget to sign the back. This one is yours.
Ideas for Your First Few Pours
If you are wondering what to make first, here are a few ideas that work beautifully for beginners and make lovely gifts or decor.
Galaxy pour. Use deep purple, navy, and black with white and a hint of iridescent paint. Swipe a little white across the top for stars, and you have a galaxy that would look perfect in a child's room.
Ocean pour. Teal, turquoise, and white, poured in layers, read as waves and sea foam. Add a sandy gold for a beachy feel. This is the piece people ask about at parties.
Sunset pour. Warm coral, orange, and gold over a white base, tilted gently so the colors blend horizontally. It looks like a summer sky the moment the sun touches the horizon.
Monochrome pour. Use several shades of one color, like all blues or all pinks. The result is subtle and sophisticated, and it is the easiest way to guarantee colors that go together.
Matching set. Pour two small canvases at the same time with the same colors and technique. They will come out related but different, like siblings, and they make a sweet pair for a bedroom or a gift for two people who share a wall.
Whichever idea you choose, remember the goal is not perfection. It is the pleasure of watching color move. That pleasure never gets old, even after a hundred pours.
Final Thoughts
When I look at my first pour, a muddled little canvas with about six colors that all decided to become one, I do not cringe. I smile. It is the proof that I started, and every pour after it got a little braver and a little more beautiful.
Acrylic pouring gave me an hour of quiet on evenings when the house finally settled down.
It gave me handmade gifts that people actually kept. And it taught me something I needed to learn: not everything has to be perfectly controlled to be beautiful.
Sometimes you mix the colors, tip the cup, and trust the paint.
Tonight, if you have a canvas and a few bottles of paint, you have everything you need to start.
Mix to honey, pour your layers, tilt gently, and let it dry. Then do it again, because I promise you will want to.
Your first pour is waiting, and it is going to be more wonderful than you expect.