Introduction: The Leaf That Started It All
I found an oak leaf pressed between the pages of my grandmother's old hymnbook last spring.
It had been there so long it was the color of weak tea, every vein still visible, every scalloped edge intact.
I sat on her porch and tried to draw it, and I was terrible. The leaf looked less like something that had grown on a tree and more like a lopsided potato with ambitions.
But here is the thing nobody tells you about botanical illustration: the drawing is only half the point.
The other half is the looking. When you sit with a leaf long enough to draw it, you notice things you have walked past a thousand times — the way the veins fork, the way the light catches the edge, the tiny story of how it grew.
That first terrible leaf taught me more than any perfect drawing could. It taught me to slow down. And that, more than talent or fancy supplies, is the whole secret of botanical illustration for beginners.
In this guide, I will walk you through drawing the three simplest, most forgiving subjects in the plant world — leaves, flowers, and ferns — using supplies you probably already own. No art degree required. No expensive kit. Just you, a pencil, and a quiet half hour.
Why Botanical Illustration? The Gentle Art of Noticing
Botanical illustration has a long, lovely history. Before cameras, it was how scientists shared discoveries — a 17th-century botanist sketching a new species from Brazil so scholars in London could study it.
The old masters of the craft, like Pierre-Joseph Redouté painting roses for Empress Josephine, spent months on a single plate.
You are not here to replicate that. You are here to slow down and look, and that is exactly the right reason.
Drawing plants is different from drawing portraits or buildings in one wonderful way: plants do not move, do not judge, and do not get bored.
A rose will sit patiently while you erase your fourth attempt at its stem. A fern will wait all afternoon while you figure out its fiddlehead.
There is no pressure, only practice.
It is also a wonderfully portable hobby. A sketchbook and a pencil fit in a diaper bag, a purse, or the glove compartment.
You can draw the weed pushing through the sidewalk crack while you wait for school pickup.
You can draw the basil on your windowsill during nap time. The whole world becomes your still life.
What You Need: A Reassuringly Short Supply List
Here is the honest truth: you can begin botanical illustration with a number two pencil and a piece of printer paper. That is it. Everything else is a comfort, not a requirement.
When you are ready to upgrade, this is the kit I recommend — and every item is budget-friendly:
- A sketchbook with decent paper. Look for something with a little tooth to it — smooth printer paper smears graphite. A spiral-bound book around 9x12 inches is a good size. If you want to add watercolor later, choose paper labeled for mixed media.
- A soft pencil (2B or 4B). Softer leads make the lovely dark lines you see in botanical drawings. A 2B is a great all-rounder; a 4B gives you richer shadows.
- A hard pencil (H or 2H) if you want to get fancy. Hard leads are for faint guidelines you can erase completely.
- A kneaded eraser. This is the magic tool of botanical drawing. It lifts graphite without smearing, and you can shape it into a point to erase tiny highlights.
- A fine-liner pen (0.3 or 0.5 mm). Optional, but lovely for finishing a drawing with crisp ink outlines. Look for waterproof ink if you plan to paint over it.
- A watercolor set and a small brush. Optional. A little wash of color can bring a leaf to life, but pencil alone is perfectly beautiful.
That is the whole list. If you have a pencil and paper today, you are already equipped. Everything else can wait until you know you love this.
Drawing Leaves: Start with the Shape You Actually See
Leaves are the perfect first subject. They are flat enough to be forgiving, varied enough to stay interesting, and available in every yard and kitchen window.
Here is the method I teach, and it is the same method the old botanical artists used, just with the fuss taken out:
Step One: Draw the Gesture, Not the Leaf
Before you draw any details, look at the leaf and ask one question: what is the big shape doing?
Is it long and spear-like, like a willow leaf? Round and heart-shaped, like a violet?
Deeply lobed, like an oak? Forget the veins for a moment and draw the simple silhouette with a light hand.
This is your gesture drawing, and it is allowed to be messy.
Step Two: Find the Midrib
Now look for the midrib — the central vein that runs from the stem to the tip.
Draw it as a faint curved line through the middle of your silhouette. This one line will anchor everything else, so take a moment to get its curve right.
Most leaves are not perfectly straight down the middle; they bow and bend, and that gentle curve is what makes a drawing look alive.
Step Three: Add the Veins with Confidence
Notice how the veins come off the midrib. On a maple, they radiate from a central point.
On an oak, they alternate down the midrib in a pleasing rhythm. Draw them lightly at first, then go back and darken the ones closest to you.
Veins are the personality of a leaf — spend time here.
Step Four: Shape the Edges
Now return to your silhouette and refine it. Are the edges smooth, toothed, or lobed?
Draw the little sawtooth notches of a rose leaf, the deep cuts of a maple, the gentle wave of a beech.
This is where your drawing starts to look like a real leaf instead of a generic oval.
Try this exercise: pick three leaves from the same plant — a rose bush, a houseplant, anything — and draw all three. You will be amazed at how different they are. No two leaves match, and your drawings should not either.
Drawing Flowers: Petal by Petal, Without the Panic
Flowers intimidate people more than any other subject, and I understand why. All those petals, all that symmetry — it feels like a test. But flowers are just leaves that showed off, and if you can draw a leaf, you can absolutely draw a flower.
Start with the Center
Every flower is organized around its center. Draw a small circle or oval where the petals meet — this is your anchor. Even a daisy, which seems like it should be a simple ring of white petals, reads as a flower because all those petals point back to the center.
Look for the Pattern
Before you draw a single petal, count them. A five-petaled flower like a rose or a geranium has a different rhythm than a six-petaled lily.
Notice how the petals are arranged — do they overlap, like a rose? Do they radiate evenly, like a daisy?
Do they hang down, like a bellflower?
Here is the trick that changed everything for me: draw the petals as simple shapes first, all around the center, before you add any detail.
A rose becomes a five-sided star of soft blobs. A daisy becomes a sun of short rounded lines.
Get the arrangement right, and the detail work is just decoration.
Front View, Side View, and Everything Between
The hardest thing about drawing flowers is that they sit in three dimensions. A tulip seen from the front is a cup shape; seen from the side it is a graceful curve on a stem.
Before you commit to a drawing, choose your angle and observe what actually changes. The petals in front overlap the petals behind.
The stem attaches at the back, not the center.
Start with the front view — it is the most forgiving. When you feel brave, try a three-quarter view, which shows a little of the flower's depth. That single shift from front to three-quarter is when your flower drawings start to look like they could be pollinated.
The Details That Make It Real
Once your petals are placed, add the details: a faint line where each petal folds, a little shading where the petals overlap, the tiny stamens reaching up from the center.
You do not need to draw every stamen — a few suggested lines read beautifully.
The goal is suggestion, not photography.
Drawing Ferns: The Art of Happy Repetition
Ferns are my favorite subject, and they are also the most forgiving thing you will ever draw. Why? Because ferns are built on repetition, and repetition hides every imperfection. If one leaflet is a little wonky, the next one covers for it. Nobody can tell.
Understand the Architecture
A fern frond is a central stem — the rachis — with leaflets, called pinnae, growing off both sides.
Each pinna is itself a tiny fern with its own leaflets. This is why ferns look so complex and are actually so simple: you are just drawing the same shape over and over, at two different sizes.
Draw the Spine First
Start with the frond's stem, curving gently from the base. This is the backbone of the whole drawing. Then sketch the pairs of pinnae as simple angled lines coming off the stem — left, right, left, right, like a fish skeleton. Do not draw full leaflets yet. Just the skeleton.
Fill In the Leaflets
Now go back and draw the little leaflets along each pinna. Here is the secret: you do not have to draw them all, and you should not try.
Draw a few complete leaflets at the base, then let them fade into suggestion toward the tip.
Your eye fills in the rest. This is called "lost and found" edges, and it is what makes a fern drawing feel like art instead of a coloring page.
Try a Fiddlehead
The curled young frond, the fiddlehead, is a wonderful little drawing. It is essentially a spiral with tiny leaflets hugging the curve.
Draw the spiral first, lightly, then add the bumps of the emerging leaflets along the outside.
It is one of the most satisfying things you will ever draw, and it takes about five minutes.
If you live somewhere without ferns, a head of broccoli or a sprig of asparagus makes a surprisingly good substitute — they follow the same architecture. The natural world is generous with practice subjects.
Look Like an Artist: The Observation Habits That Matter
Here is a secret that separates people who can draw from people who think they cannot: it is not about the hand. It is about the eye. Your hand already knows how to move a pencil; it needs your eye to tell it what to draw.
Squint First
Before you draw anything, squint at your subject until the details blur. What is left? Just the big shapes and the darks. This is your value map. A leaf in soft light has a bright side and a shadow side; squinting shows you where the shadow lives.
Draw the Negative Space
Instead of drawing the leaf, try drawing the leaf-shaped hole around it. When you draw the space between the plant and the background, your hand stops guessing and starts measuring. This one habit will improve your drawings more than any other single technique.
Measure with Your Pencil
Hold your pencil at arm's length and use it as a measuring stick. How many times does the width of the leaf fit into its length?
How far is the flower from the top of the stem? These little comparisons train your eye to see proportions instead of hoping for them.
Give Your Eye Time
Here is the part no tutorial can skip for you: spend at least half your drawing time just looking.
Look at the leaf, then look at your paper, then look at the leaf again.
Your drawing will improve the moment you stop drawing from memory and start drawing from observation.
It is a slower way to work, and it is the only way that actually works.
Adding a Little Color: Watercolor Washes and Colored Pencil
Pencil is a complete art form on its own, but a whisper of color can make your botanical drawings sing. Both of these methods are beginner-friendly and forgiving.
The Simple Watercolor Wash
Draw your plant in pencil, then mix a very watery puddle of paint — the color should be almost transparent.
Fill the leaf or petal shape with a single wash, and let it dry. This gives you a soft, flat foundation of color that looks remarkably like a vintage botanical plate.
For a slightly more advanced effect, put a second, stronger wash only on the shadow side of the leaf while the first wash is still damp. The colors will bleed together softly, and you get instant depth with almost no effort.
One caution: if you plan to add ink, use waterproof ink. Regular fine-liners will run the moment they touch water, and a beautiful drawing can turn into a gray puddle. I learned this one the hard way with a very pretty oak leaf and a very ruined page.
Colored Pencil, the Undemanding Friend
Colored pencil needs no water, no brushes, no drying time. Layer light green over the whole leaf, then add a deeper green at the edges and veins, pressing harder for darker areas.
Two or three layers of color are plenty. The beauty of colored pencil is that you can put it down and walk away for a week, and it will still be exactly as you left it.
Your First Ten Botanical Sketches: A Gentle Practice Plan
You do not need an hour a day. You need ten minutes, three times a week, and a list of subjects that will not overwhelm you. Here is the exact plan I would give a friend starting out:
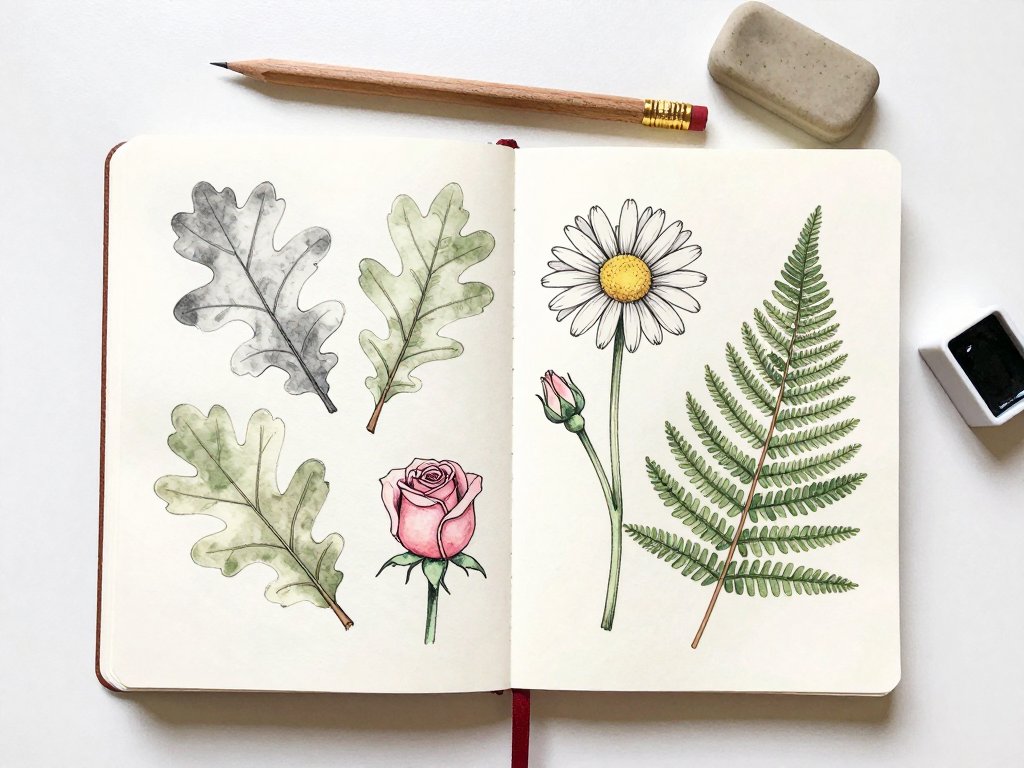
- An oak or maple leaf — your introduction to veins and lobes.
- A houseplant leaf — the same shape over and over, drawn from life.
- A daisy — the simplest flower, front view.
- A tulip or lily — a cup-shaped flower, front and side views.
- A rose bud — overlapping petals without the pressure of a full bloom.
- A fern frond — your first exercise in happy repetition.
- A fiddlehead — the five-minute spiral that always looks good.
- A weed from the sidewalk — the humblest subject, the best lesson in observation.
- A leaf with watercolor wash — your first experiment with color.
- Anything that catches your eye — a fallen petal, a sprig of mint, a berry. The point is to keep looking.
Number each sketch and date it. In a month, you will flip back to page one and be astonished at how far you have come. That progress is the real reward — more than any single drawing.
Common Beginner Mistakes (and the Gentle Fixes)
Every beginner makes the same few mistakes, and every one of them has a simple fix. If you see yourself here, take a breath — you are exactly on track.
"My drawing looks stiff."
You are drawing from memory instead of observation. Stop, look at your subject for a full minute, and notice where it bends. Then let that curve into your line. Stiffness is almost always a looking problem, not a drawing problem.
"The proportions are all wrong."
Use your pencil as a measuring stick. Compare the leaf's width to its length, the flower's size to its stem. If the stem is too skinny, thicken it. If the petals are too big, shrink them. Measuring is not cheating — it is what professionals do.
"I keep smudging everything."
Rest your hand on a scrap piece of paper while you draw, and work from the top of the page down. A kneaded eraser will lift smudges without destroying the drawing underneath.
"My lines are too dark and I can't fix them."
This is why the first pass is always light. Start every drawing with a faint hand, and save the confident dark lines for the parts you are sure about. A drawing that starts light can always be darkened; a drawing that starts dark is stuck.
"It doesn't look like the real plant."
Good. It is not supposed to. A botanical drawing is your impression of a plant, filtered through your hand and your eye and your one beautiful afternoon with it.
The old masters' plates were scientific records; yours is a memory. Both are valid, and yours is the one that matters to you.
Conclusion: Keep the Leaf You Drew
My grandmother's oak leaf still sits in that hymnbook, but now there is a second one — a drawing I made on her porch, veins and all, dated and tucked beside it.
It is not a perfect botanical plate. The stem is a little thick and one lobe wandered off on its own.
But it is the leaf I actually saw, and that makes it worth more to me than any print.
That is what botanical illustration gives you: not perfect pictures, but a way of paying attention.
A way of keeping the things you love — the garden in July, the fern by the back door, the flowers your daughter picked and handed you, already wilting and beautiful — close to you, drawn by your own hand.
Start with one leaf. Not a whole garden, not a masterpiece. Just one leaf and ten minutes. When that leaf is drawn, pick another. Before long you will have a sketchbook full of the world, seen slowly, and you will wonder why you ever rushed past it.
Your first subject is waiting. Go find it.