Introduction
Corner-to-corner crochet begins with one small square in the corner of your work. Then another beside it. Then a whole diagonal row of them, growing steadily wider until you have a blanket.
Most crochet grows in rows that run side to side. C2C grows on a slant, and that single change is what makes it so friendly to beginners.
Every block is identical: three double crochet and a chain. You are not learning twenty stitches. You are learning one, then repeating it with confidence.
If you have looked at a crochet graph and felt your eyes slide off it, you are not alone. Grids look like math homework until someone explains the one rule that unlocks them.
That rule is simple: one square on the graph equals one block in your hands. Nothing more.
This guide walks you through the graph, the color changes, and a small dishcloth you can finish in an evening or two. No pressure, no perfection required.
What Corner-to-Corner Crochet Actually Is
C2C is worked diagonally from one corner of the fabric to the opposite corner. Instead of turning at the end of each row, you build outward, one block at a time.
The block itself never changes. Chain three, then work three double crochet into the same space. That cluster is your unit, roughly one inch square in worsted weight yarn.
Because the unit repeats, counting stays easy. You are not tracking individual stitches across a long row. You are counting blocks, which your eye can do at a glance.
Why One Repeated Block Suits Beginners
New crocheters lose their place when a row is forty stitches long and the toddler needs a snack. With C2C, a row might be five blocks. That is a number you can hold in your head.
The stitch pattern is also forgiving of uneven tension. Slight differences between blocks disappear once the fabric is joined and washed, because the eye reads texture rather than perfect geometry.
What It Looks Like When It Is Finished
A finished C2C piece has a soft, quilted surface with tiny diagonal ridges. It looks far more complicated than it was to make, which is a pleasant trick to have in your pocket.
Blankets, baby mats, dishcloths, pillows, and bag panels are all the same skill at different sizes. Once you can make a seven-block square, you can make a graphgan.
Why the Diagonal Construction Feels So Different
Row-by-row crochet asks you to hold a long horizontal line in your head. You finish a row, turn, and start again at the same width, watching the edges drift if your count slips.
C2C asks something else. Each diagonal row is short at first, then longer, then shorter again. You are always working on a manageable piece of the whole.
That shape is why colorwork graphs become possible. In ordinary colorwork, a picture grows row by row and you cannot see it until you are nearly finished.
In C2C, you can lay the work down at any point and see the image forming diagonally. The corner of your graph is physically in your hands.
The One Drawback Worth Knowing
Diagonal construction means your increases and decreases create stair-step edges. Those steps are normal and they block out flat with a little steam and patience.
It also means you cannot easily work a partial row. If you stop mid-diagonal, you stop at a block edge, which is a tidy place to leave the work.
Materials: A Short, Kind Supply List
You need less than you think. A hook, two colors of yarn, and something to mark your place will get you through a first project.
- Worsted weight yarn. Smooth, firmly spun yarn shows blocks crisply. Cotton is lovely for dishcloths; acrylic or a wool blend is softer for blankets.
- A 5.0mm to 5.5mm hook (H or I). Slightly larger than the yarn label suggests, for reasons explained below.
- Stitch markers. Two or three, to mark the first and last block of a diagonal row when you set the work down.
- A tapestry needle. Blunt tip, large eye, for weaving in ends and joining squares.
- A printed copy of your graph. Paper lets you mark off finished diagonals with a pencil or a small ruler.
Why a Slightly Larger Hook Helps
Beginners tend to crochet tightly, especially when counting blocks. A tight block pulls into a narrow rectangle instead of a square, and the whole fabric leans.
Going up half a millimeter gives your hands room to breathe. The blocks relax into squares, the corners sit flatter, and your stitch count stays visible.
If your blocks are already loose and floppy, ignore this advice and use the hook size on the label. Gauge is personal, and the goal is a square block, not a specific tool.
How Much Yarn to Buy
Buy both colors at the same time and check the dye lot. A second ball bought three weeks later can be a visibly different shade in a way that only shows up in finished fabric.
For a first project, one standard ball of cotton in each color is plenty. Nothing stalls a new project faster than running out mid-diagonal.
The Three Phases of Every C2C Project
Every corner-to-corner piece, from potholder to king blanket, moves through the same three phases. Once you recognize them, the project stops feeling mysterious.
Phase One: Increasing
You begin with one block. Each new diagonal row adds one block at each end, so your fabric widens by two blocks every row.
To increase at the start of a row, chain six. Work three double crochet into the fourth chain from your hook and the next two chains. That is your first block of the row.
Then slip stitch into the chain-three space of the last block from the row below. Chain three, work three double crochet into that same space. Repeat to the end.
Keep increasing until the fabric is as wide as you want the finished piece. Count the blocks along one straight edge, not along the diagonal.
Phase Two: The Straight Middle
A square needs no middle. You increase to your chosen width and immediately begin decreasing, which produces a square by definition.
A rectangle needs a middle. Once you reach the full width, work rows that add one block at one end and remove one at the other, and the piece travels sideways at a constant width.
This is where most blankets live. It is also the easiest phase, because the rhythm never changes and the row count is steady.
Phase Three: Decreasing
To decrease, slip stitch across the top of the first block: three slip stitches over the three double crochet, then one more into the chain-three space.
Chain three and work three double crochet into that same space. The row now starts one block in, so the edge steps inward by one block per row.
Continue decreasing at the start of every row until one block remains. Fasten off and your diagonal is complete.
For a rectangle, decrease at one end only while increasing at the other, then decrease at both ends once you reach the far corner.
How to Read a C2C Graph
A corner-to-corner graph looks like a pixel picture, and that is essentially what it is. The grid is a map of blocks, not of individual stitches.
One Square Equals One Block
Each square on the paper becomes one cluster of three double crochet. A graph that is twenty squares wide produces a piece twenty blocks wide.
You never count three stitches per square while working. You count squares and trust the block to hold three stitches on its own.
Start at the Bottom-Right Corner
The first block of the project corresponds to the bottom-right square of the graph. Your work grows up and to the left along the diagonal.
Read the first diagonal as that single corner square. The second diagonal is the two squares touching it. The third is three squares, and so on.
This is why the graph and the fabric stay in step. If you are on diagonal seven, you are working the seventh row of squares counting in from the corner.
How Colors Are Marked
Most graphs shade each square in the color you should use. Read the square, pick up that color, and work the block.
Some designers use symbols or letters instead of shading, which is handy when you want to change the palette. Both systems work the same way; only your reading habit changes.
Print your graph and mark off each finished diagonal. A pencil line under the row you just completed is the single most useful habit in this craft.
Planning Where Color Changes Land
Because each diagonal row is worked from one edge inward, a color change always happens at a block boundary. You do not change color mid-block, and you never split a cluster.
Look ahead one diagonal as you work. Knowing the next block's color before you finish the current one is what keeps your changes clean.
Color Changes Without the Tangles
Changing color in C2C happens at the very end of a block. Get the timing right and the join is nearly invisible.
- Work the three double crochet of the block in your current color as usual.
- On the final double crochet, stop when two loops remain on your hook.
- Pull the new color through those last two loops to finish the stitch.
- Carry the old color up the side edge, letting it rest against the fabric rather than pulling it tight.
- Continue the next block in the new color, working over the old strand where it crosses.
The finished block reads as the old color with a new-color cap, which is exactly what you want at a boundary. The next block begins cleanly in the new shade.
Keeping Three or Four Colors Calm
Two colors are easy. Three or four invite a small nest of yarn at your elbow, so decide on a system before you start.
Keep each ball on the side of the work where it is used most, and turn the fabric rather than the yarn when you change direction. Twists happen when the balls travel; they do not happen when the work does.
Small center-pull balls help, and so does a bowl or a basket that holds the balls apart. Clothespins clipped to a project bag work surprisingly well for taming runaway strands.
If a tangle does form, stop and untwist it immediately. Crocheting three more blocks over a twist is how a small knot becomes an afternoon.
Planning a Project: From Dishcloth to Graphgan
Sizing a C2C piece is mostly arithmetic with a generous margin for gauge. A block in worsted weight measures roughly one inch, so the numbers stay friendly.
Small, Medium, and Full-Size
- Seven by seven blocks. About seven inches square, ideal for a dishcloth or potholder. Roughly 120 yards total, or 60 yards per color.
- Fifteen by fifteen blocks. About fifteen inches square, a good stroller blanket or pillow front. Roughly 550 yards total.
- Twenty-five by twenty-five blocks. About twenty-five inches square, a proper baby blanket. Roughly 1,500 yards total, split between your colors.
- Forty by forty blocks. About forty inches square, a lap blanket or small throw. Roughly 3,800 yards, so buy in quantity and check dye lots.
These are estimates, not promises. Your gauge, your yarn, and how firmly you work all shift the numbers, so buy an extra ball of the dominant color.
A Note on Block Size
Before you commit to a graphgan, crochet five blocks and measure them. If your block is 1.25 inches, a forty-block blanket becomes fifty inches, which is a very different object.
Adjust by changing hook size rather than by recalculating the graph. A graph is easier to keep than a math problem is to solve at eleven at night.
Your First Project: A Two-Color Dishcloth
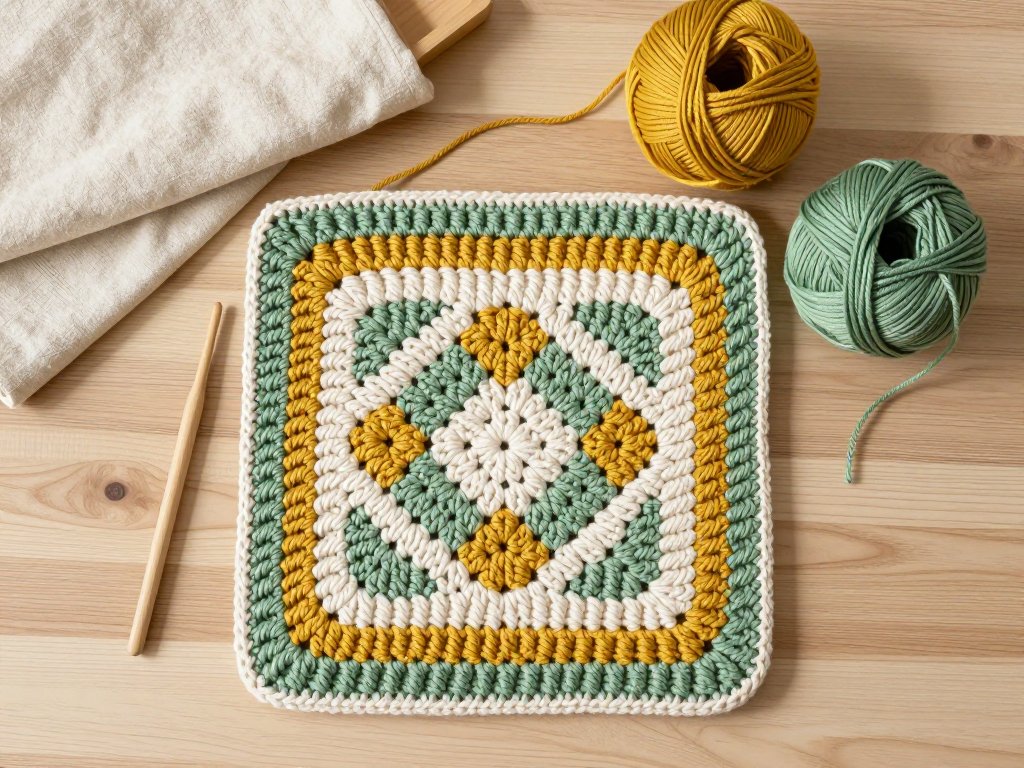
This is a seven-by-seven block square in two colors: a cream field with a simple mustard border. It is small enough to finish and large enough to teach you everything.
You will need about 60 yards of cream and 60 yards of mustard in worsted cotton, a 5.0mm hook, and a tapestry needle. One evening of stitching, honestly.
Step by Step
- With cream, chain six. Work three double crochet into the fourth chain from the hook and into the next two chains. You have your first block, and the corner is set.
- Chain six and turn. Work a block into the fourth chain from the hook and the next two chains, then slip stitch into the chain-three space of the block below. Chain three and work a block into that same space. Diagonal two is done.
- Repeat the increase row until you have seven blocks along the straight edge. Your fabric is now a triangle seven diagonals tall.
- Switch to mustard on the last pull-through of the final block of diagonal seven. Work the next diagonal without increasing at the first end: slip stitch across the first block, then work blocks to the far edge, adding one new block at the end.
- Continue this way, removing a block at one end and adding one at the other, until the mustard band is two blocks wide.
- Switch back to cream and begin decreasing at both ends. Slip stitch across the first block, chain three, work three double crochet into that space, then work across. Stop one block short at the far end.
- Decrease at both ends for each remaining diagonal until a single block remains. Fasten off, leaving a six-inch tail.
- Weave in both tails with the tapestry needle, running them diagonally through the blocks and back the other way. Steam lightly and lay flat to dry.
The stepped edges will look uneven before blocking and square up afterward. Resist the urge to tug them into shape while the fabric is dry.
If you want a hanging loop, chain twelve at the final corner before fastening off and slip stitch back into the same space.
Common Beginner Mistakes and Their Fixes
Almost every first C2C project has one of these. None of them mean you are doing it wrong; they mean you are doing it for the first time.
Tight Foundation Chains
A snug starting chain makes the first block narrow and the corner pinch. Work the initial chain six loosely, or start with a hook one size larger and switch after the first block.
Losing Count on the Diagonal
Diagonal rows are short, which makes them feel countable, which makes it tempting to count from memory. Do not. Mark the first and last block of every row with a stitch marker.
If you do lose count, lay the work flat and count the blocks along one straight edge. The edge tells you how many diagonals you have finished.
Blocks That Lean
Leaning blocks usually come from inconsistent turning. Always chain three at the start of a block and always work into the chain-three space, never between blocks.
A slightly larger hook fixes the rest. If your piece still leans after blocking, your tension is tighter on one side, which is common for right-handed crocheters working leftward.
Carried Yarn Showing Through
A carried strand that peeks between blocks means the old color is being pulled too snugly or left too loose. Aim for it to lie along the edge like a relaxed thread.
Covering it during the next block helps: work the first double crochet over the carried strand so the stitch encloses it.
Forgetting Which Side Is the Right Side
C2C has a right side, and it is the side where the block texture reads most evenly. The wrong side shows more of your carried strands and joins.
Decide which side is front on the first diagonal and keep that side facing you as the work grows. A small safety pin clipped to the front corner settles the question for good.
Fixing a Mistake Several Rows Back
Sooner or later you will spot a wrong-color block three diagonals down. Take a breath; this is fixable, and it does not require undoing the whole project.
Option One: Frog Back to the Mistake
Because C2C blocks are large, unraveling is faster than it sounds. Pull out whole diagonals until you reach the error, then rework forward.
Slide your hook out, pull the working loop loose, and wind the yarn back into a ball as you go. Ten minutes of unravelling can save an hour of negotiating with a mistake.
Option Two: Cover It
If the mistake is a single block, duplicate stitch over it in the correct color. Work the stitch on the surface, following the path of the original double crochet.
This is not a cheat; it is a recognized finishing technique. On a textured fabric, a covered block disappears completely once the piece is washed and blocked.
Weaving Ends So the Back Looks Tidy
Thread each tail onto the tapestry needle and run it diagonally through the back of several blocks, following the direction of the stitches.
Change direction once, splitting the plies as you go, then trim. The friction of the second pass is what keeps the end from working loose in the wash.
Never knot your ends. Knots work their way to the surface over time, and a woven end is both flatter and more durable.
C2C Is Forgiving Because Every Block Is the Same
Here is the quiet comfort of this craft: your hundredth block is the same as your first. There is no increasing complexity, no stitch you have to remember.
That means a mistake is small and local. One wobbly block in a blanket of six hundred is invisible, and one skipped block can be fixed in minutes.
It also means C2C fits a life with interruptions. You can put it down mid-diagonal, come back after bedtime, and pick up exactly where you stopped.
Start with seven blocks. Finish the dishcloth, use it, and let it get stained. The next one will be squarer, and the one after that will be a blanket.
If you find yourself drawn to textured stitch patterns after this, our guide to nupp stitch Estonian lace knitting is a lovely next step, and it rewards the same patient counting.
Then choose two colors you actually love, pour something warm, and chain six. That first small square is the whole craft in miniature.