Introduction
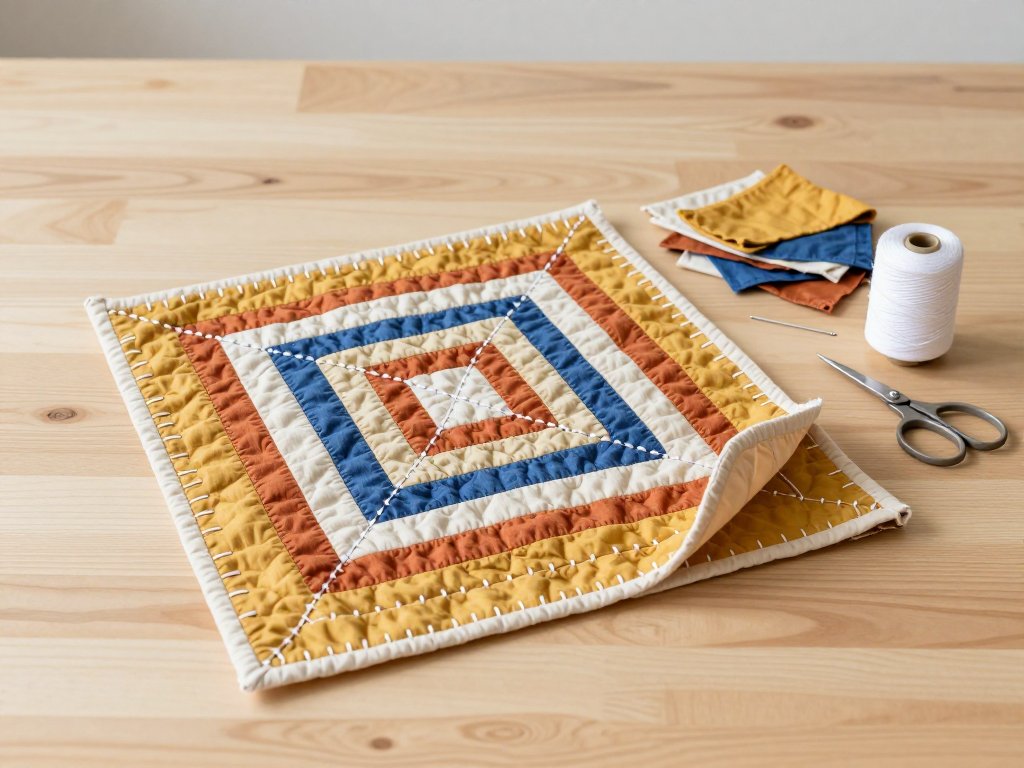
A Kawandi is a quilt you can almost read with your eyes closed. From across the room it looks like a square of colour — mustard, indigo, a wash of rust — and then you step closer and see the stitches.
They run in rows, parallel to the edges, circling inward like ripples from a stone dropped in a pond. White thread, mostly. Each row about a quarter inch from the last.
Underneath those rows is a jumble of fabric scraps: old shirts, worn sheets, the last of a favourite dress. Nothing matches. Somebody arranged them anyway, by hand, one small piece at a time.
Here is the part that matters if you are new to this: there is no pattern to follow, no measuring, no basting, and no frame.
You do not cut templates or pin layers together. You start in one corner with a scrap and a needle, and the quilt builds itself as you sew.
Your first rows will wobble and that is exactly right. Kawandi is not a technique that asks you to be precise before you begin. It asks you to begin.
Where Kawandi Comes From
Kawandi comes from the Siddi community of Karnataka, in southwest India. The Siddi are descendants of African people who arrived on the Indian Ocean over centuries, as sailors and traders, and painfully, through the slave trade.
Their quilts carry that layered heritage. African textile sensibilities met Indian cloth: a love of bold colour, the habit of using what is already in the house, the wish to make something useful beautiful.
Traditionally a Kawandi is made from worn saris, old clothing, and leftover pieces. A base cloth is laid down, and scraps are placed on top of it and stitched in place as the maker works around the quilt.
The base disappears under the scraps as you go. Nothing else is added — no batting, no second layer behind. What you see is what there is.
It is a living tradition, passed from grandmother to daughter to granddaughter, made for beds and floors and doorways. Not a trend. A practice that has quietly outlasted every trend around it.
What Makes Kawandi Different From Other Quilting
Most quilting you have seen starts with a pieced top — squares or triangles sewn into a pattern. Then batting, then a backing, then basting, then a frame or a hoop, then hours of stitching through all three layers. Then binding around the edge.
Kawandi skips nearly all of it.
- No batting.
- No separate backing layer.
- No quilting frame or hoop.
- No pattern pieces or templates.
- No binding at the end.
The scraps are the top. The stitching both holds them down and decorates them — one line of thread doing two jobs at once.
The result is thin, soft, and drapey rather than puffy. It folds into a small square and sits in a lap without stiffness, which for a throw, a cushion, or a baby mat is usually exactly what you want.
And because there is no frame, you can sew it on the sofa with a child asleep on your shoulder. That alone changes who gets to make one.
What You Need
The supply list is short, and most of it is probably already in your house.
- A base cloth square. An old cotton bedsheet or pillowcase is perfect. Cut it a little larger than you want the finished piece.
- Fabric scraps. Rough pieces, two to six inches across. Cottons, shirtings, worn sheets, quilting leftovers.
- Thread. Strong cotton or hand-quilting thread. Traditionally a contrasting colour — white on colour is the classic look — so the stitching reads clearly.
- A needle. A sharp hand-sewing or embroidery needle with an eye you can actually thread.
- Small sharp scissors. For trimming scraps as you work.
- A marker for your start corner. A safety pin, a knot of thread, a scrap of tape.
That is the whole kit. No rotary cutter, no mat, no rulers, no machine.
Choosing and Preparing Your Fabrics
Cotton and cotton-blends behave best. They hold a fold, take a stitch cleanly, and soften rather than pill when washed. Old bedsheets are ideal because they are already worn in.
Slippery synthetics — lining fabric, satin, anything that slides — are much harder to hold flat while you stitch. A little in a scrap quilt adds shine, but save it for your second piece.
Cut or tear your scraps into rough pieces about two to six inches across. Rough is the point. Tearing gives a soft frayed edge that the stitching will catch and hold.
Do not press every scrap flat. A little rumple and puff is what gives a Kawandi its softness. Pressed flat, the scraps start to look like appliqué, and the quilt loses its quilting.
Sort scraps loosely by colour into a basket you can reach without standing up. You will change your mind about colour constantly, and it helps to have them close.
Setting Up Your Base Square
Decide your finished size first. For a cushion cover, an eighteen-inch square is generous. For a lap quilt, thirty inches is a good first try.
Cut the base cloth an inch larger on every side, then fold each edge under by half an inch and stitch it down with a small running stitch, working all the way around.
This finished edge is traditional, and it is practical. It gives the quilt a deliberate border and stops the base fraying while you handle it over the next few weeks.
It also acts as your frame. Once the edge is stitched, the square holds its shape in your hands — no hoop, no frame, no pins required.
Finally, mark one corner. A safety pin through the folded edge is enough. That corner is where the spiral begins, and everything else follows from it.
The Kawandi Rhythm: Adding Scraps as You Go
You are not going to lay out the whole quilt and then stitch it. You are going to build it as you sew, one scrap at a time, in a spiral that winds inward.
Start at your marked corner. Lay a scrap right side up near the edge, close to the border you just stitched. Hold it with your thumb — that is your pin.
Bring the needle up through the scrap and the base together, and sew a small running stitch about an eighth to a quarter inch in from the scrap's raw edge. Keep going along that edge.
When you reach the end of the scrap, do not tie off. Lay the next scrap so it overlaps the raw edge by about half an inch, then keep stitching through the new piece.
The overlap hides the raw edge underneath. The new scrap covers the old one the way roof shingles cover each other, each piece protecting the join beneath it.
Continue along the edge, around the first corner, along the next side, and around again. You are spiralling. The first circuit hugs the border, the second sits about a quarter inch inside it, the third inside that.
Keep the scraps overlapping in the direction you are travelling. If you turn back on yourself, the raw edges face the wrong way and lift.
Turn the work in your lap, not your body. Small rotations keep your shoulders relaxed, and this is a project long enough that your shoulders will notice.
Every few inches, smooth the piece flat with your palm. It stops the base bunching under the layers and gives your eyes a rest from the close work.
The Running Stitch That Does the Work
The stitch is a running stitch: in, out, in, out, a straight line of small dashes. Aim for six to eight stitches per inch. That is comfortable, quick, and lets the fabric breathe.
Load several stitches on the needle before pulling the thread through. Rock the needle through three or four stitch positions, then draw the thread. This is faster, and it settles you into a rhythm.
Do not chase evenness. Slightly irregular stitches are the signature of a hand-made Kawandi. A perfectly uniform row of tiny stitches starts to look machine-made, and the quilt loses its warmth.
A slightly longer stitch is better than a short, tight one. Long stitches sit on top of the puffy layers rather than digging in and puckering them.
This is the same quiet rhythm as slow stitching — the point is not speed, it is the repetition. If you have done any hand sewing before, your hands already know this motion.
Keep your thread to a comfortable arm's length. Longer thread tangles, knots, and frays thinner with every pass through the fabric.
Working the Corners, the Centre, and the Final Edge
Corners are where a Kawandi either looks intentional or looks like it lost its way. The fix is overlap, generously applied.
As you reach a corner, place a scrap so it turns the corner — part on one side, part on the next. Stitch right up to the corner point, then turn the work and keep going. The scrap folds slightly around the point, which is fine.
What you must not leave is a gap: a bare triangle of base showing at the corner. If one appears, lay a small scrap over it and stitch it down before you move on. Nobody will ever know.
Keeping the spiral true is easier than it sounds. Use your needle as a gauge — one needle length or half a finger width between rows. Consistency matters more than exact measurement.
If a row starts to drift, correct it gradually over the next few inches. Do not unpick. A spiral that leans slightly is still a spiral, and the correction disappears once the next rows settle.
Scrap too small to stitch comfortably? Overlap it onto its neighbour, or save it for the centre, where small pieces are genuinely useful.
Scrap too large? Trim it down with the small scissors while it lies flat on the base, before you stitch. Cut a gentle curve rather than a straight line — curves sit flatter under the next layer.
Eventually the spiral closes in on itself and leaves a small hole at the centre. Cover it with one last scrap, turn its edge under if you like, and stitch around it. That patch is the quilt's full stop.
For the outer edge, run one final row of stitching about a quarter inch inside the folded border. It frames the whole piece and makes the finish look deliberate. Bury your thread tail between the layers rather than knotting it on the surface.
Size, Time, and a Realistic First Project
Start with a cushion cover or a small lap quilt. Not a bed quilt. A bed quilt is a wonderful second or third project and a miserable first one.
As a rough guide, a beginner covers about one square foot per hour. An eighteen-inch cushion is just over two square feet, so two or three evenings. A thirty-inch lap quilt is about six square feet, so six or seven hours spread across a couple of weeks.
Those hours do not need to happen all at once. Twenty minutes while dinner cooks is real progress. A row a day finishes a cushion in a fortnight.
A small piece teaches the rhythm better than a large one. You learn the corner turn, the overlap, the spacing, and the tension on a scale where a mistake is cheap.
And a finished cushion teaches you something a half-finished bed quilt never will: that you can actually do this.
Troubleshooting
Puckering. Usually the thread is pulled too tight, or the fabric was stretched while you stitched it. Let the piece rest flat, loosen your tension, and stop tugging the thread after each stitch.
Wavy edges. The base was cut off-grain, or too many scraps were crowded against the border. Pin the edge flat, press it lightly with steam, and cut your next base square following the weave.
Scraps pulling away. You stitched too far from the raw edge. Add a second line of stitching closer to the edge, or overlap a small patch over the lifting corner.
Thread tangling. The thread is too long, or the needle is too small for the layers. Use shorter lengths, let the needle hang and untwist every so often, and run the thread over a little beeswax if you have it.
A spiral that drifts off-centre. This happens when one side gets wider rows than the other. Do not unpick it. Add a slightly narrower row on the wide side and let the next few rows pull it back.
Needle hard to push through. You are probably crossing too many scrap edges at one point. Shift the next stitch slightly, and use a thimble on your middle finger.
Colours turning muddy. Step back and look from across the room every few rows. If it feels heavy, add a light scrap or a cream one to lift it.
Washing and Caring for a Kawandi
Hand wash in cool water with a mild soap. Swish it gently, let it soak for ten minutes, then rinse until the water runs clear. Do not wring it.
Roll it in a towel to press out the water, then lay it flat to dry, reshaping the edges while it is still damp.
The first wash softens everything. The cotton relaxes, the layers settle against each other, and the quilt suddenly drapes instead of feeling stiff. Many makers say this is when it finally becomes a quilt.
Never tumble dry it. The heat shrinks the scraps at different rates, and the tumbling abrades the stitching. Line drying in shade keeps the colours from fading.
Store it folded loosely rather than compressed in a cupboard, and keep it out of direct sun.
Conclusion
The thing I hope you take away is this: a Kawandi has no wrong side and no hidden work. Every stitch you make is visible, on the surface, part of the design.
That is why the wobbles do not matter. A row that leans, a scrap sitting a little crooked, a patch added to cover a gap — these are the record of a person making something by hand on ordinary evenings.
Women in Karnataka have made quilts this way for generations, without patterns or frames, using what was already in the house. When you sit down with a needle and a pile of scraps, you are joining that line.
Start with a cushion. Use the fabric you cannot bear to throw away. Let the first rows be imperfect, and keep going anyway.