Introduction
I bought a 25-metre spool of 2mm leather cord to make one bracelet. One. The spool cost eleven dollars, and I assumed I would have most of it left.
I measured my wrist, cut a length that looked about right, tied a square knot, and kept going. Twenty minutes later the sinnet was four centimetres long and my working cord was a stub.
The bracelet would not close. Not even with a hard tug and a prayer.
What I did not know: a square-knot sinnet eats roughly four times its finished length in working cord. Fold that cord in half at the start and the multiplier becomes eight. I had cut for one.
That mistake cost me about forty cents of cord and one evening. It also taught me the only piece of math in this craft that actually matters.
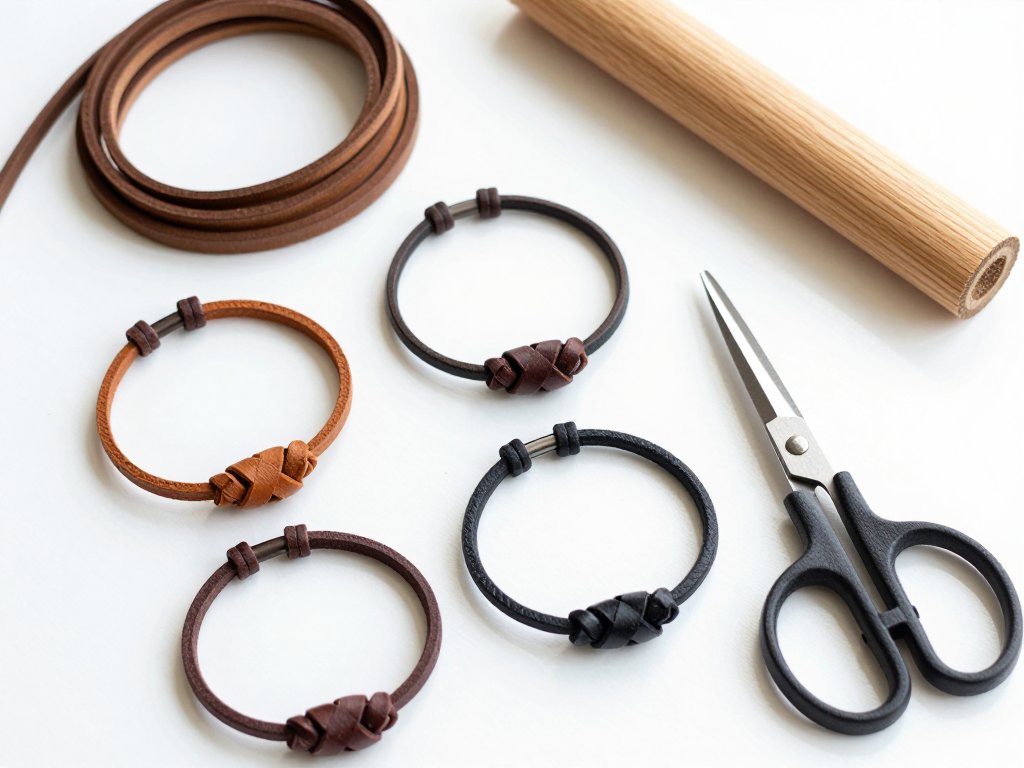
Once you know the multiplier, knotted leather stops being a gamble. Three knots, a sharp pair of scissors and a length of cord will get you a bracelet you can wear tonight.
No metalwork. No jeweller's tools. No clasp to buy and no soldering iron to fear.
Here is the whole method, including the sizing numbers and the sliding closure that makes a handmade bracelet actually fit a real wrist.
The Cord Math Worth Learning First
Every bracelet starts with your finished length, not your wrist measurement. Finished length is your wrist plus about 1.5cm of ease. That is the number the cord is cut from.
For a square-knot sinnet, the working cord needs roughly four times the finished length. Fold that cord in half to mount it, and you double the cut: eight times the finished length.
Then there is the core cord the knots wrap around. Cut it your finished length plus 30cm, which gives 15cm of tail at each end for the closure.
Two short slider cords finish the job, 25cm each. Here is what that looks like for three common wrist sizes.
- 16cm wrist: finished length 17.5cm, rounded up to 18cm. Working cord 1.44m, core 48cm, two 25cm sliders. About 2.4m of cord in total.
- 18cm wrist: finished length 19.5cm, rounded up to 20cm. Working cord 1.6m, core 50cm, two 25cm sliders. About 2.6m in total.
- 20cm wrist: finished length 21.5cm, rounded up to 22cm. Working cord 1.76m, core 52cm, two 25cm sliders. About 2.8m in total.
Round up rather than down. A bracelet half a centimetre short is scrap. A bracelet half a centimetre generous still fits, because the closure slides.
Now the part that stings in hindsight. A 25-metre spool makes nine or ten bracelets at these lengths, so the cord cost per bracelet is a little over a dollar.
The spool was never the expensive part. Guessing was.
One more thing worth knowing before you cut. If you use 3mm cord for a chunkier bracelet, the math does not change. The multiplier is the same, the tails are the same, and the only difference is a slightly heavier knot.
What You Actually Need
This is a short list, and most of it is already in a kitchen drawer.
- 2mm round leather cord. Round cord holds a square knot more crisply than flat lace. Three metres covers one bracelet with room to spare.
- Sharp scissors. Dull blades crush leather and leave a frayed end you cannot hide inside a knot.
- A clipboard, bulldog clip or strip of tape. Something has to hold the core cord still while both of your hands work.
- A ruler and a soft tape measure. The ruler for cutting, the tape for checking the work against a wrist.
- Optional: a drop of super glue for the cut tips, and one bead with a hole wide enough for two strands.
Nothing on that list is specialist. No pliers, no crimp tubes, no lobster clasp, no soldering. The closure is knots, which is why this is a decent first jewellery project for a house with small children in it.
Buy one spool in a neutral tan or dark brown to start. Neutral cord hides small differences in tension, and you will have differences in tension on bracelet one.
Set the rest of the spool aside somewhere dry. Leather cord left in a sunny window goes stiff and takes a set that no amount of rolling will fix.
The Four Knots, and What Each One Is For
Four knots cover every project in this article. Learn the first two properly and the other two take about a minute each.
The Lark's Head, or Cow Hitch
This is the mount. It attaches your working cord to the core without leaving a lump that shows on the finished bracelet.
Fold the working cord in half and lay the loop over the core cord. Bring both ends up and pass them through the loop. Pull the ends away from each other until the hitch sits snug against the core.
Twisting is the common failure. If one strand crosses over the other inside the loop, the whole sinnet leans and you will fight it for the next twenty minutes.
Before you tighten, check that the two legs hang side by side and flat, with no crossover. Then pull evenly, one hand on each leg, so neither side wins.
The Square Knot
A square knot is two half knots mirrored, and it needs four strands: two in the middle as core, two on the outside as working cords.
First half: bring the left working cord over the core, then take the right working cord over the left tail and under the core. Pull both working cords snug.
Second half: mirror it. Right working cord over the core, left over the right tail and under the core. Pull snug again.
Those two halves make one square knot, a flat little bump with two vertical legs on each side. Count halves as you work, not knots, because a half tied twice is the most common reason a bracelet looks wrong.
If you repeat the same half instead of mirroring, the sinnet spirals. That is not a mistake. It is the next variation, and it is worth trying on purpose once.
The Half Hitch
One working cord, looped around the core and pulled through, then repeated in the same direction. That is a half hitch, and repeating it builds a spiral.
Keep every loop going the same way. Change direction halfway and you get a flat band instead of a twist, which is a legitimate look but not the one this section promises.
Half hitches are also the fastest way to cover a lot of core in a hurry. On a 20cm bracelet they take about ten minutes less than a square-knot sinnet.
The Overhand Knot
The overhand is your finishing knot. Pass the end over itself, through the loop, and pull.
Use it to stop the core tails from pulling back through the sinnet, and as a small stopper at the very tip of each tail so the closure cannot slide off.
It is the least glamorous knot here and the one that keeps the bracelet together.
Building the Bracelet, Step by Step
Set aside forty minutes for the first one. The second takes twenty, and by the fourth you will stop reading the steps.
- Measure. Wrap the tape snugly around your wrist and note the number. Add 1.5cm. That is your finished length.
- Cut three cords. Working cord at eight times the finished length. Core cord at finished length plus 30cm. Two slider cords at 25cm each.
- Anchor the core. Clip or tape the core cord to the clipboard with 15cm hanging above the clip. Keep it straight, not banjo-tight.
- Mount with a lark's head. Fold the working cord in half, hitch it onto the core at the 15cm mark, and check that both legs hang flat before you pull snug.
- Work the sinnet. Square knots, alternating halves, until the knotted section is 1cm short of your finished length. Snug, not tight.
- Check against the tape. Every five knots, wrap the work around your wrist. Leather settles, and a sinnet measured flat reads longer than one curved around an arm.
- Finish the ends. Tie an overhand knot in the core tails right against the last square knot. Trim the tails to 12–15cm and glue the tips.
- Add the sliding closure. Overlap the two tails by about 4cm. At each end, hitch a 25cm slider cord around the opposite tail and tie three or four square knots. Trim and glue.
Step eight is the one people skip, and it is the one that makes the bracelet wearable. Without it you have a pretty strip of knots and two loose ends.
One detail on step five. The core cord should stay visible as a straight line under the knots. If it disappears, you have pulled the working cords too hard and the sinnet is curling into a tube.
Keep the work moving rather than perfect. A slightly uneven sinnet worn on a wrist reads as handmade. A sinnet unpicked four times reads as a project that never got finished.
Sizing, Ease and Why the Closure Forgives You
The sizing rule is one line: wrist circumference plus about 1.5cm of ease, measured snugly.
Snugly matters. A tape measured loosely over the wrist bone adds a centimetre you did not intend, and the bracelet ends up sliding around on the first wear.
Most adult women's wrists land between 15cm and 18cm. Most men's sit between 17cm and 20cm. Measure the person, not the average.
The sliding closure is why a slightly generous fit is fine. Two tubes sliding on two tails give you roughly 1.5cm of adjustment in each direction, so a bracelet cut a little long still tightens onto the wrist.
That tolerance is also why I stop knotting 1cm short. The closure and the overlap add back what you trimmed, and the bracelet closes at the length you planned.
Test it before you trim the tails. Slide the closure tight, shake your hand, and see whether it stays put. If it creeps, the tube needs another knot, not a shorter bracelet.
Three Variations Worth Making
Two-Colour Stripe
Cut two working cords in different colours, each four times the finished length, and mount them together with one lark's head. Treat one colour as left and one as right.
Every square knot has a colour that leads first. Swap which colour starts each knot and you get blocks of colour; keep one colour starting and you get a clean repeating stripe.
Two colours also make your tension visible. If the stripe drifts sideways, one working cord is tighter than the other, and you can correct it before the whole bracelet leans.
Half Hitch Spiral
Mount one working cord, then ignore the mirrored half entirely. Work half hitches in the same direction down the core and the sinnet twists into a spiral.
Use a slightly longer core tail for this one. A spiral is springier than a flat sinnet and will want to travel when you put it on.
Single Bead Focal
Thread one bead onto the core cord before you mount the working cord, and slide it to the 15cm mark. Work square knots up to the bead, then continue on the other side.
Choose a bead with a hole that takes two strands of 2mm cord, roughly 4mm. A hole sized for one strand will sit crooked and crack under tension.
Each of these is the same bracelet with one decision changed. That is the useful thing about knotting: the technique transfers, and the variation costs nothing but a different colour or a bead from the jar.
When It Goes Wrong
- Knots loosen while you work. You are holding tension with your hands instead of the clip. Anchor the core, and pinch the last knot while you tie the next one.
- The cord kinks and looks chewed. Over-tightening stretches leather past its memory. Pull until the knot sits, then stop. Roll a kinked section between your fingers to relax it.
- One side is wider than the other. Uneven tension, usually from the dominant hand. Count knots on both edges; if they match, loosen the tight side and re-dress the last three.
- The closure slips open. The tube is too short. Add two more square knots, or put a drop of glue inside the tube and slide it while it is still wet.
- The cut ends fray. Dull scissors. One clean cut with sharp blades, then a thin film of glue on the tip, pressed flat rather than left in a blob.
None of these ruin the bracelet permanently. Leather is forgiving, and a sinnet can be unpicked three or four knots back without showing where you stopped.
If a mistake repeats on the second bracelet, it is not bad luck. It is a habit, and usually the habit is pulling one side harder than the other.
Making Five at a Time
If you sell at markets, the batch is where the money is. One spool, one cutting session, five bracelets on the table by Friday.
Cut all the cords first, grouped by size in separate sandwich bags. Mounting and knotting five in a row takes about two hours once you are fluent, so roughly 25 minutes each.
Pricing sanity: about $1.20 of cord per bracelet. At 25 minutes and $18 an hour for your time you are at $8.70. Double it for wholesale, double again for retail, and you land near $22.
That number is not greed. It is what keeps a craft stall viable after the table fee, the petrol and the afternoon you could have spent doing something else.
Five at $20 covers your materials, your time and the stall. The sixth one is profit, and it is also the one you will actually enjoy making.
A Different Cord Technique
If you like the rhythm of knotting, kumihimo braiding is the natural next step: a foam disc and eight strands make round cord far faster.
Closing
That eleven-dollar spool is still in my drawer, down to about a third. It has made nine bracelets, four of them gifts, and one that I still wear most days.
I no longer measure a working cord with a ruler. I hold the core against my wrist, fold the cord over twice, and cut. A couple of bracelets in, the math stops being math and becomes instinct.
Start with one, in a colour you would actually wear. The second is easier, and the fifth you could make in your sleep.