Introduction
There is a particular kind of quiet that comes with painting a rock. The project is small, the motions are slow, and nothing about it shouts for attention.
It is one of the few crafts you can begin and finish in a single evening, with supplies that fit in a shoebox.
For a busy mom, that is close to magic.
Rock painting is cheap, which matters when craft budgets compete with everything else. A bag of smooth river stones costs a few dollars at a craft store, or nothing if you gather them on a walk with the kids.
A few bottles of acrylic paint last for dozens of rocks, and paint pens go even further.
It is portable, too: everything fits in a small box, and a rock takes less space than a coffee mug.
And it fits the rhythm of real days. You can base-coat three rocks during naptime, add dots while dinner simmers, and letter them the next morning over coffee.
Because each rock is small, you see finished results fast. That visible progress is a gift when so much of motherhood is work you cannot see completed.
There is one more thing that sets rock painting apart: it is a craft meant to be given away. You paint, seal, and leave your rock on a trail or in a park for a stranger to find. That is the heart of the kindness stones movement.
The Kindness Rocks Movement
In 2015, a mother and life coach named Megan Murphy began painting rocks with encouraging words and leaving them along the beaches and paths near her home on Cape Cod, Massachusetts.
The idea was simple: a stranger finds a small stone painted with a message like "you are loved" or "be brave," and for one moment, their day is a little lighter.
People photographed the rocks they found and shared them online under the hashtag #TheKindnessRocksProject. Others painted rocks of their own and hid them around their neighborhoods. Today, kindness rocks turn up in parks, along trails, in library gardens, and on schoolyard fences in towns all over the world.
The movement works because it asks so little. You do not need to be an artist or know who will find your rock.
You just need to make something small and true and leave it where someone else can find it.
A rock that says "be kind" in wobbly letters has exactly as much power as a perfect mandala, because the message is the point.
For many moms, that is liberating: make art without an audience, practice for the joy of it, and let the work go.
Finding and Prepping Your Rocks
The best rocks are smooth, flat, and about the size of your palm. Two to four inches across is a lovely range for beginners.
River rocks are ideal because years of moving water have worn them smooth. Gather them along creek beds and lake shores, or buy bags of tumbled stones at garden centers and landscaping supply yards, where they are sold by the pound.
When choosing, run a finger over each stone. You want a surface that feels smooth, with no deep pits or rough patches that will fight your brush, and a fairly flat top, because the flatter the painting surface, the better your dots and letters will behave.
Cracks are fine. Just avoid crumbly, chalky stones, which drink paint unevenly.
Washing is simple. Scrub each rock with warm water and a drop of dish soap, using an old toothbrush to work into the crevices, rinse well, and lay the rocks on a towel to dry.
Drying matters more than people expect: paint will not adhere properly to a damp stone, so give them a few hours, or overnight if you can.
Priming is optional but worth it. One or two thin coats of white or light gray acrylic give you a smooth, even surface, make colors pop, and give the finished rock a polished look.
Some painters use gesso instead. In a hurry? Paint directly on a clean, dry rock; the colors will just be a little more muted, and that is perfectly okay.
Your Materials, Simplified
You do not need a lot to start, and you probably own more than you think. Here is the short list.
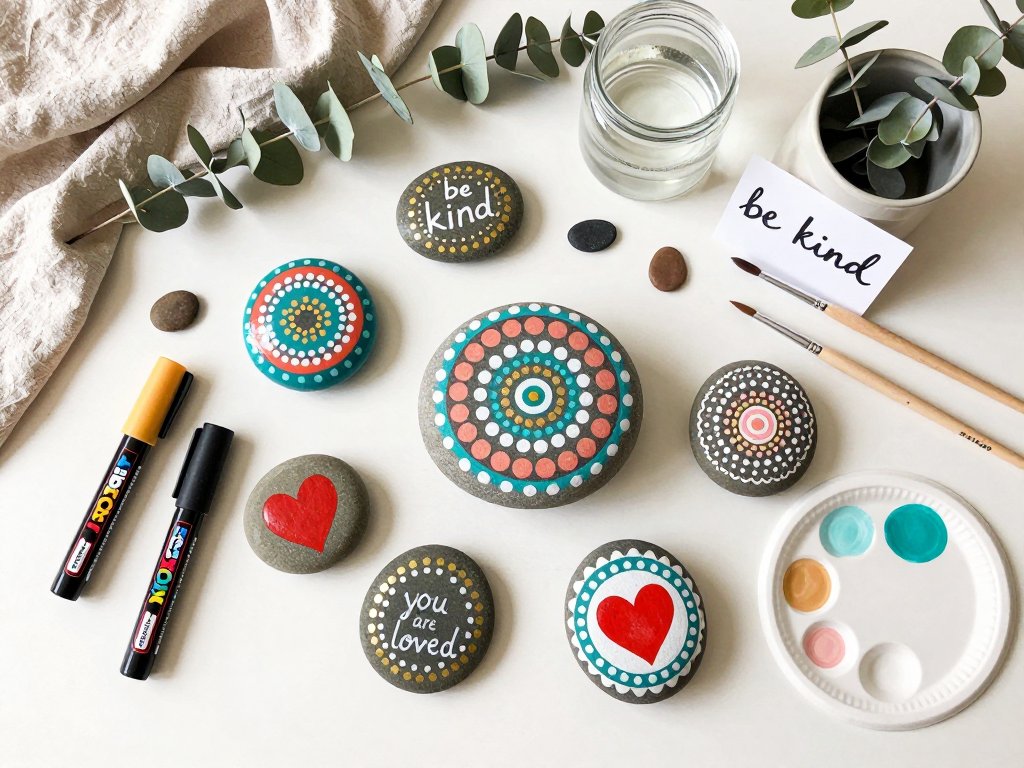
- Acrylic paint. Any craft acrylic, such as FolkArt, DecoArt Americana, or Apple Barrel, works beautifully on stone. It is water-based, dries fast, cleans up with soap and water, and costs a couple of dollars a bottle. White, black, and three or four colors you love are plenty to begin.
- Paint pens. The single best upgrade you can make. Posca pens are what most rock painters reach for, but generic acrylic markers work well too. A fine tip (0.7 mm) for lettering and a medium tip (1.8 to 2.5 mm) for dots will carry you through your first dozen rocks.
- Brushes. A small flat brush, about half an inch wide, for base coats, and a fine round brush (size 0 or 1) for details. Cheap brush sets are fine.
- Dotting tools. You can buy a set of dotting tools, little sticks with ball ends in graduated sizes, for a few dollars, or raid the house: a toothpick for tiny dots, the rounded end of a bobby pin for medium dots, the eraser end of a pencil for large ones.
- Everything else. A paper plate or plastic lid for a palette, a cup of water, paper towels, an old towel to protect the table, a pencil and a few lids or coins to trace for mandala circles, and a fine black permanent marker for the backs of finished rocks.
That is the whole kit. If you already have acrylic paints at home, you can start with one paint pen, a handful of rocks, and a toothpick. For a busy mom, that low barrier is the entire point.
Basic Techniques Worth Knowing
Before you paint a mandala, practice four small skills. Each takes about five minutes and will save you frustration later.
Base coating. Paint with two or three thin coats rather than one thick one. Thin coats dry faster, cover more evenly, and leave no brush marks.
Wait twenty to thirty minutes between coats, and do not forget the edges: hold the rock and paint around the rim so the color wraps all the way around.
A fully painted edge is what makes a rock look finished.
Making dots. Dip your tool in paint, touch the rock straight down, and lift straight up.
Do not drag, twist, or press hard. One dip gives you several dots before you need to dip again.
To keep dots uniform, use the same gentle pressure every time, and practice on paper or the back of a rock first.
Different sizes come from different tools, not from pressing harder.
Drawing circles. The secret to an even circle is to hold the rock and rotate it while your pen stays still. For a pencil guideline, trace a bottle cap or coin; on a primed, dry rock, pencil lines are easy to see and erase.
Counting for symmetry. Mandalas look balanced because their elements repeat evenly. Decide how many dots go around your center, 8, 12, or 16, and count as you go. Numbers that divide evenly into a full turn look harmonious, and 12 is a wonderful number for beginners.
A word about mistakes: dots that wander and circles that wobble are all fixable. Wait for the paint to dry, cover it with your base color, let that dry, and try again. Acrylic paint is famously forgiving. Every rock painter has painted over more mistakes than you will ever see.
A Simple Mandala Rock, Step by Step
Mandala patterns can look intricate, but they are built from one repeated action: placing a dot. Here is a six-step tutorial for your first mandala rock. Give yourself an unhurried hour, or split it across two sessions; the paint will wait.
Step 1: Prep your rock. Choose a smooth, flat stone, wash it, and let it dry completely.
Base-coat it with two thin coats of white acrylic, waiting twenty to thirty minutes between coats, and let it dry overnight if you can.
A fully dry base coat makes everything that follows easier.
Step 2: Find the center. On the flattest side, mark the center with a light pencil dot and trace a small circle around it using a coin or bottle cap. This circle guides your first ring of dots.
Step 3: Place the center dot. With a medium paint pen or your smallest dotting tool, place one dot exactly in the middle of your pencil mark, then let it dry.
Step 4: Add the first ring. Place eight dots evenly around your pencil circle: one at the top, one at the bottom, one on each side, and one between each of those. Count as you go, and rotate the rock toward you rather than reaching across it.
Step 5: Build outward. Trace a larger circle around the first ring using a lid, and add twelve dots around it, alternating sizes: small dots in the inner ring, slightly larger in the outer one. Add tiny dots between as you grow confident.
Step 6: Finish and seal. Add a final ring of tiny dots near the edge, or a row of small petals if you are feeling bold. Let the paint dry completely, overnight if you can, then seal with two or three coats of outdoor clear acrylic sealer.
Two reassuring truths about mandalas. They are forgiving: a slightly uneven ring simply looks like part of the design.
And you can always nudge toward symmetry: if a gap looks too wide, add another dot in the same color.
Your first mandala will not be perfect. It will be charming, and that is exactly how it should be.
Kindness Stone Ideas and Lettering
If a full mandala feels like too much on a given day, kindness stones are the perfect fallback. They ask for one small image or a few honest words, and they are the rocks people remember finding.
Simple designs that always work. A heart, filled in or outlined. A flower with five or six petals and a dot in the middle.
A bee with a yellow body, black stripes, and tiny white wings. A ladybug with a red dome, black spots, and a little smile.
A rainbow. A sun with rays. Any of these can be painted freehand in under ten minutes.
Words that travel well. "You are loved." "Be kind." "You matter." "Stay strong." "Smile." "Hello." "Hope." "Shine." One or two words read best on a small rock; save sentences for the backs of rocks or for notes tucked into lunchboxes.
Lettering tips that will save you. Practice the word on paper first until it feels natural.
Use simple block letters: straight lines and even heights are easier than fancy script and read clearly from a distance.
Pencil the word lightly on the rock first so you can adjust the spacing before you commit.
Use a fine-tip paint pen (0.7 mm); if the pen skips, press the tip on scrap paper until the paint flows.
And let the lettering dry completely before you touch it, because wet acrylic smudges at the lightest brush.
Combining image and words is lovely: a heart with "you are loved" beneath it, or a bee with "be kind" under its wings. Paint the image first, let it dry, then letter.
Sealing and Hiding Your Rocks
Sealing is the step that makes your work last, and it is worth every minute. Unsealed acrylic paint will chip, fade, and wash away when a rock spends its life outdoors. A good seal keeps your colors bright through rain and sun.
Choose an outdoor clear acrylic sealer; spray and brush-on both work. Look for one labeled for outdoor use, and pick a version with UV protection if you can, because sunlight is what fades paint.
Mod Podge makes an outdoor formula, and brands like Krylon and Rust-Oleum make spray sealers that rock painters rely on.
If you are using spray: take the rocks outside or into a well-ventilated space, set them on newspaper, and hold the can eight to ten inches away. Apply two or three thin coats, waiting ten to fifteen minutes between them; heavy spray can pool and cloud.
If you are using brush-on: apply two or three even coats, watching for streaks, and let each coat dry before the next.
Either way, let the sealer cure fully, twenty-four to forty-eight hours is a good rule, before the rock goes outside.
Seal the backs too, by turning the rocks over and giving the underside the same treatment.
Hiding your rocks is the joyful part. Parks, walking trails, library gardens, and schoolyards, with permission, are classic spots. Tuck a rock beside a bench, at the base of a tree, or along a fence line where it will be spotted but not trampled.
Write on the back before you seal. With a fine permanent marker, write "#kindnessrocks" and where the rock was found, such as "Found me in Oak Park!", and add the date if you like. That note lets the finder join the game, and it is how the movement travels.
A few gentle rules of hiding: avoid private property and tended gardens, avoid places where rocks will be mowed over or swept away, and steer clear of fragile natural areas.
If you find a kindness rock yourself, you can keep it, re-hide it, or leave it for the next person.
There is no wrong answer, which is rather the point.
A Craft for the Whole Family
Rock painting is one of the rare crafts that works just as well with little hands in the picture.
Kids can hunt for rocks on a walk, scrub them in the sink, choose colors, and place dots with complete confidence.
Their rocks will not look like yours, and that is the best possible outcome, because their rocks will look like theirs.
For young children, simplify: bigger rocks, washable paints, thicker pens, and permission to paint whatever they like. Praise the making, not the result. A family afternoon of rock painting ends with each person holding something they made, and no two of them alike.
Family kindness projects are especially sweet. Paint rocks together for a grandparent's garden, a friend going through a hard week, or a teacher's desk, and let each child write their own message; wobbly letters carry more feeling than perfect ones.
When things go wrong, as they sometimes will: if paint smudges, do not touch it while wet.
Wait for it to dry, paint over the smudge with the base color, let that dry, and paint the design again.
Acrylic covers its own mistakes beautifully. If a rock cracks or chips, it becomes a garden rock; nothing is wasted.
Keep a small kit by the window, a box with paints, pens, a brush, and a few rocks, so a stolen twenty minutes can become a finished rock.
Your first rock will not be perfect, and that is exactly how it should be.
The point is the quiet hour, the small act of making, and the stranger who will one day find your rock and smile.