Introduction
There is a quiet rebellion happening in the pottery world, and it involves wonky vases, lopsided mugs, and creatures with expressive faces. It is the sculptural pottery movement, and its whole philosophy can be summed up in one sentence: perfect is boring.
If you have ever stood in front of a pottery wheel feeling like your hands were not cooperating, or compared your first mug to a perfectly symmetrical store-bought one and felt discouraged, this style is for you.
Sculptural pottery celebrates the pinch, the wobble, and the unexpected — and it is the most forgiving way to work with clay.
In this guide, we will explore hand-building techniques for making funky, imperfect ceramics: coil pots with attitude, pinch pots with faces, and slab pieces with texture.
You do not need a wheel, a kiln of your own, or any special talent.
You need clay, your hands, and the willingness to let a piece be exactly what it wants to be.
Let's get our hands dirty and make something with a little personality.
Why Imperfect Is Wonderful
Before we shape any clay, let's talk about why imperfection is worth embracing — because it changes everything about how you work.
Perfect pottery asks you to control every variable. Imperfect pottery asks you to pay attention.
The first is stressful; the second is meditative. When you stop trying to make a flawless cylinder and start making a pot that leans slightly like it is curious about the world, the whole experience relaxes.
There is also a visual reason imperfect ceramics are having a moment. The slightly crooked vase, the mug with fingerprints pressed into its side, the face pot with a lopsided smile — these pieces carry warmth and humanity.
They look like someone made them, and that is exactly what makes them charming. In a world of mass-produced sameness, the handmade wobble is a treasure.
So give yourself permission to make something imperfect on purpose. You are not failing at pottery; you are practicing a different, older, friendlier kind of it.
Choosing Your Clay
Not all clay is created equal, and for sculptural work, the right choice makes everything easier. Let's sort out the options.
Air-dry clay. This is the beginner's best friend. It hardens on its own in a day or two — no kiln required. It is perfect for practicing sculptural techniques at home, and modern air-dry clays are surprisingly smooth and strong. You can paint it with acrylics once it is dry.
Earthenware. A low-fire clay that is soft, forgiving, and wonderful for hand-building. It needs a kiln, but you can often find community studios that fire pieces for a small fee.
Stoneware. Stronger and denser than earthenware, with beautiful earthy colors. It is a little stiffer to work with, which makes it great for pieces that need to hold their shape.
Polymer clay. Not true pottery, but worth mentioning for home crafters — it cures in a home oven and is excellent for small sculptural pieces like miniature creatures and decorative vessels.
If you are just starting, grab a bag of air-dry clay and a simple tool kit. That is enough to make every project in this guide, and you can decide later whether you want to explore kiln-fired clay at a studio.
Tools You Really Need
Here is the liberating secret of hand-building: your hands are the main tool. Everything else is a helper.
Keep your toolkit simple:
- Your hands. The most important tools you own. Warm hands work best, so rub your palms together before you start.
- A small bowl of water. For keeping your hands and clay moist while you work.
- A wooden or plastic modeling tool. Useful for smoothing, carving, and adding texture.
- A skewer or needle tool. For poking holes, scoring lines, and adding details.
- A fork. Perfect for scoring — pressing lines into clay so pieces join firmly.
- A rolling pin. For flattening slabs, if you want to try slab building.
- Canvas or a smooth board. A clean surface to work on and to rest pieces while they dry.
That is genuinely all you need. Resist the urge to buy a huge pottery kit on day one. Start small, learn what feels good, and add tools only when you miss them.
Starting with Pinch Pots
Every potter's journey begins with the pinch pot, and it is the perfect first sculptural form. It is quick, intuitive, and impossible to do wrong.
Roll a ball of clay about the size of a small orange. Press your thumb into the center, leaving a thick floor at the bottom — about half an inch. Then pinch the walls between your thumb and fingers, turning the pot slowly and squeezing gently as you go.
Keep the walls an even thickness by pinching from the bottom up and rotating the pot with every squeeze.
The opening will widen naturally, and the rim will develop a lovely organic edge. If the clay starts to crack at the rim, moisten your fingers and smooth it — dryness causes cracks, and water is the cure.
Here is where sculptural pottery gets fun: once the basic bowl is formed, you can push it, lean it, or pinch a face into its side.
A pinch pot does not have to sit perfectly flat. Let it settle into a comfortable tilt, and you have the beginning of a piece with personality.
Making a Face Pot
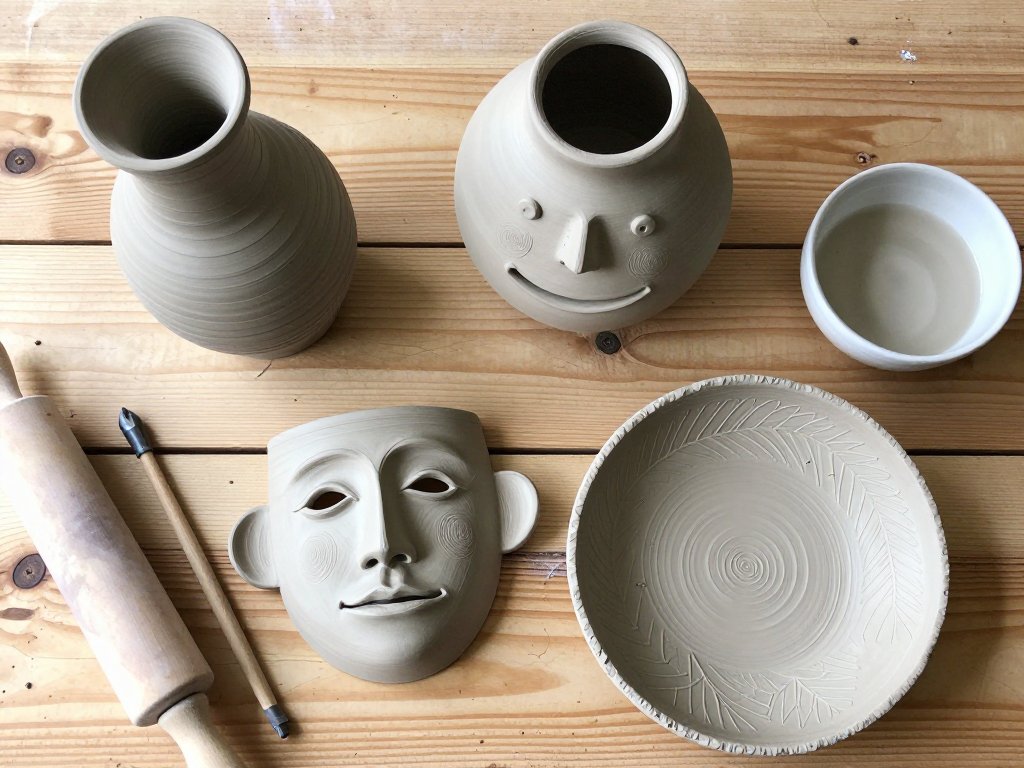
Face pots are the gateway drug of sculptural pottery. They are simple, endlessly expressive, and every single one turns out different — which is exactly the point.
Start with a pinch pot as your base, with walls about a quarter of an inch thick. While the clay is still soft, add the face features one at a time.
Eyes. Press two small balls of clay onto the pot and blend the edges with your finger or a damp tool. Or simply press two holes with your thumb — closed, sleepy eyes are surprisingly charming.
Nose. Roll a tiny coil and attach it, or pinch the clay outward from inside the pot to make the nose emerge from the wall. Pushing from the inside is a lovely sculptural trick that keeps the piece hollow.
Mouth. Cut a smile with a needle tool, or add a small coil of clay and press a smile into it. A lopsided smile reads as friendly, not flawed.
Details. Add eyebrows with thin coils, freckles with a skewer, or a little hat by pinching the rim into a peak. Let the face tell you what it wants.
The secret to a good face pot is not symmetry — it is character. Squint at your pot and ask yourself what mood it is in. Then lean into that mood. You will be amazed at how much personality a few pinches can hold.
Coil Pots with Attitude
Coil building is the classic hand-building technique, and it is perfect for sculptural pieces that are taller, curvier, or more sculptural than a pinch pot can manage.
Roll out long, even coils of clay about as thick as your finger. Work on a flat base — either a slab of clay or a pinch pot base — and begin stacking the coils in a spiral, pressing each one firmly onto the one below.
Blend the coils together with your fingers or a tool, smoothing the inside and leaving the outside textured if you like. The visible coil lines are a beautiful, honest record of how the pot was made, and many sculptural potters leave them exposed on purpose.
Now, the fun part: shape the pot as you go. Taper it in and out to make a curved silhouette.
Lean a few coils to one side. Add a bulge here and a pinch there.
Because coils are added one at a time, you have complete control over the final form — you are literally building the shape you want, one ring at a time.
For a truly funky piece, let the pot lean like it is stretching toward the light, or give it a handle that loops up and over like a little arm. Coil pots invite play.
Slab Building for Geometric Pieces
If you love clean shapes and crisp edges, slab building is your technique. It is also wonderful for making sculptural vases, boxes, and abstract forms that pinch and coil methods cannot quite achieve.
Roll out a slab of clay to an even thickness — about a quarter inch works well for most pieces. A rolling pin with guide sticks on either side keeps the thickness consistent, which helps the piece dry evenly.
Cut your shapes with a knife: rectangles for a box, circles for a drum, or freeform organic shapes for a sculptural vessel. Score the edges where pieces will join, apply a little water or slip, and press the seams together firmly. Smooth the seams inside and out.
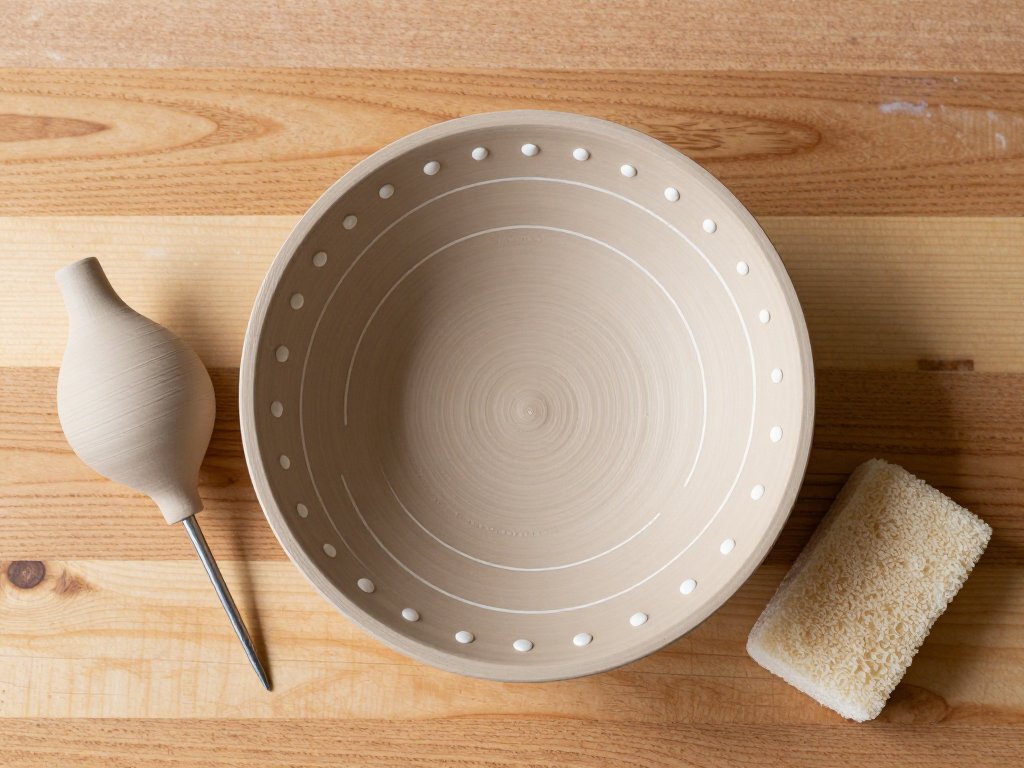
Slab pieces are ideal for surface decoration. Before the clay dries, you can press texture into the surface — lace, leaves, coins, textured fabric, even your own fingerprints.
You can also carve into the slab with tools, or cut windows and openings into the walls while the clay is still soft.
For a sculptural twist, try curving a slab into a gentle S-shape before it sets. Once it firms up, it holds that curve, giving you a wall piece or vase that feels almost like fabric in clay.
Adding Texture and Details
Texture is where sculptural pottery really comes alive. It is also the cheapest way to make a piece look deliberate and finished — no extra materials, just impressions.
Here are some of my favorite texture techniques:
- Found objects. Press leaves, seashells, coins, doilies, or anything with an interesting surface into the clay. The impression is delicate and beautiful.
- Fingerprints. Deliberately press your fingerprints into the surface. They are a lovely, honest signature.
- Carving. Use a skewer or loop tool to carve lines, spirals, or patterns into the surface while the clay is leather-hard.
- Stamping. Make your own stamps from polymer clay or wood, or use household objects like bottle caps and buttons to stamp repeating patterns.
- Scoring marks. The same fork marks that join pieces can become a deliberate design element — bands of scored texture around a pot's rim or base.
Try combining two textures: a smooth rim above a textured body, or carved lines that follow the curve of a coil pot. Contrast is what makes texture sing.
Drying and Finishing
Clay is patient, but it has rules. Drying and finishing done right means your piece survives; done wrong, it cracks or slumps. Let's do it right.
Dry your piece slowly and evenly. Cover it loosely with plastic or a cloth for the first day or two, then uncover it gradually. Fast drying causes cracks, especially on pieces with thick and thin sections. A week of slow drying is normal and healthy.
When the clay is leather-hard — firm but still slightly cool and damp — you can trim, carve, and refine details. This is also the time to attach any remaining parts, because the clay still has enough moisture to join well.
Once the piece is bone dry, it is ready to fire if you are using kiln clay, or to paint if you are using air-dry clay.
For air-dry clay, a coat of acrylic sealer before painting gives a lovely smooth base, and two coats of sealer after painting protect your finished piece.
If you are using a community studio kiln, ask about their firing schedule and glazing options. A clear glaze over your sculptural piece will make the texture shine.
Embracing the Wonky
Now that you know the techniques, let's talk about the mindset — because it is the real tool in sculptural pottery.
At some point, every maker holds up a piece and sees a flaw: a tilt, a fingerprint, a crack, a color that pooled oddly.
The reflex is to call it a mistake. But in sculptural pottery, that "flaw" is often the best part of the piece.
It is the evidence of a human hand, and it is what makes the pot yours and nobody else's.
Try this exercise: when a piece comes out of the kiln or dries, look at it for a full minute before judging it.
Notice the way the light hits the bumps. Notice where your thumb pressed a little deeper.
Then decide what the piece is, rather than what it failed to be. A leaning vase is a vase that is reaching for something.
A cracked pot can be repaired with gold or simply loved as it is.
This is the deep joy of sculptural pottery: it teaches you to be gentle with imperfection, in clay and in yourself. Every wonky pot is a small lesson in self-acceptance, and you get to keep the lesson on your shelf.
Displaying Your Funky Ceramics
Your sculptural pieces deserve to be seen. Here is how to give them a home that shows them off.
Group them. A cluster of face pots or wonky vases reads as intentional art. Arrange them at different heights on a shelf or windowsill.
Use them. The best sculptural pottery is used, not just displayed. Drink from your lopsided mug, hold pens in your face pot, and put dried flowers in your wonky vase. Function makes the charm complete.
Light them. Texture loves side light. A shelf near a window, or a small lamp shining across the pieces, will make every ridge and fingerprint glow.
Gift them. Handmade ceramics are the most personal gift there is. A face pot with your friend's favorite color, or a mug that leans like they do, will be treasured for years.
Remember, these pieces are not trying to be perfect. They are trying to be themselves — and that is exactly what makes them special.
Conclusion
Sculptural pottery is a homecoming of sorts. It returns us to the oldest, most intuitive way of working with clay: with our hands, without a wheel, without chasing perfection.
Whether you make a pinch pot with a sleepy face, a coil vase that leans with curiosity, or a slab box textured with leaves, you are making something that has never existed before. That is a small act of creation, and it matters.
So pick up some clay, let your pieces be imperfect, and make something a little funky. Your hands already know what to do — they just need permission to do it.
Happy making!