Introduction
Some of my happiest childhood memories live in my grandmother's kitchen, at a small oak table pushed against the wall.
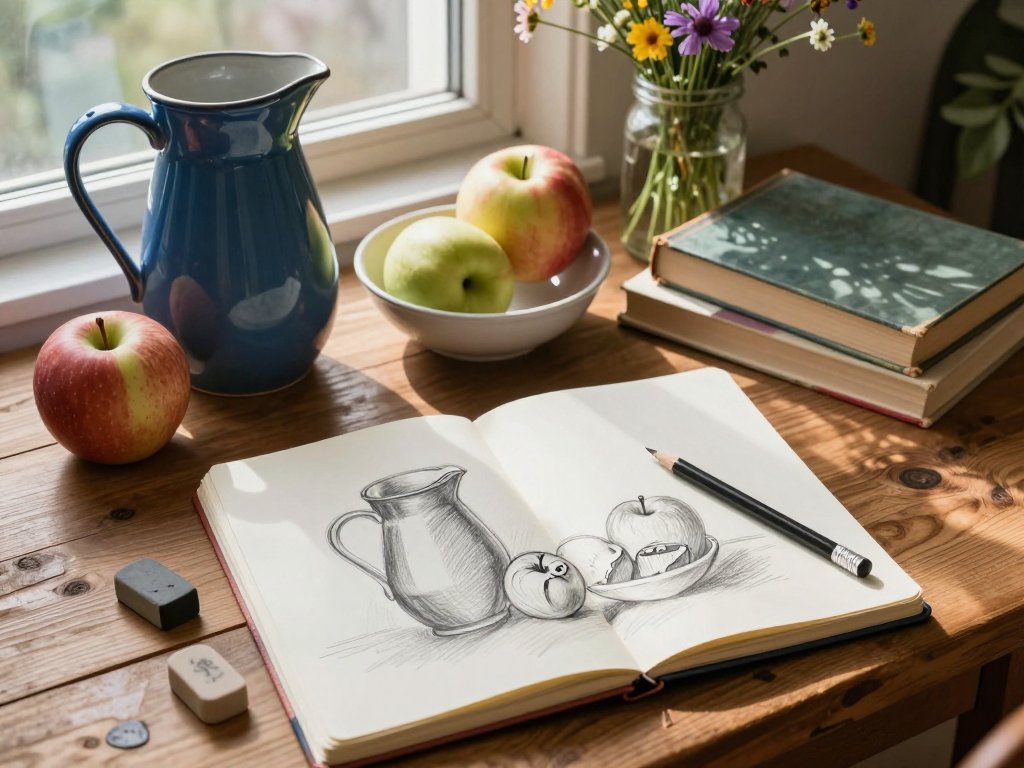
On that table sat a blue pitcher, a chipped sugar bowl, and a glass jar of wildflowers that my grandfather picked on his morning walk.
I must have been seven or eight when I first tried to draw them — the pitcher came out lopsided, the flowers looked like scribbles, and I loved every minute of it.
That is the wonderful secret of still life drawing. You do not need a studio, a model, or a dramatic landscape.
You need a few objects from your own home, a pencil, and a willingness to look closely.
The things sitting on your kitchen counter right now — a mug, an apple, a stack of books — are all you need to begin.
In this guide, I will walk you through setting up your first still life and sketching it from start to finish. We will choose objects, arrange them, talk about light, and draw together, one simple shape at a time. No experience needed, and no perfection required.
Why Still Life Is the Perfect Place to Begin
Still life has been a favorite subject of artists for centuries, and for good reason.
Unlike a landscape that changes with the weather or a pet that refuses to sit still, your still life waits patiently for you.
It stays exactly where you left it, letting you look, measure, erase, and try again as many times as you like.
For a beginner, that patience is pure gold. Drawing is a skill of the eye as much as the hand, and still life gives your eye time to learn. You can compare shapes, check angles, and study how light falls without anything moving on you.
There is also a quiet joy in drawing the ordinary. When you sketch the teapot your mother gave you or the bowl of fruit from the farmer's market, you are paying attention to your own life in a new way.
Every object has a story, and drawing it is a way of honoring that story.
Choosing Your Objects: Look for Stories
The best still life objects are the ones that mean something to you. Walk through your home and gather a few things that catch your eye — an heirloom vase, a favorite book, a wooden spoon your child painted, a candle in a pretty holder.
Objects with personal meaning make the drawing session feel like a conversation rather than a chore.
Beyond sentiment, look for variety in a few key areas. Mix different sizes, like a tall bottle beside a small apple.
Mix different shapes, like a round bowl with a rectangular book. Mix textures, like smooth glass, rough linen, and soft fruit.
This variety gives your composition interest and teaches you to draw many different kinds of surfaces.
Three to five objects is a lovely starting number. Too many becomes overwhelming; too few can feel sparse. And do not worry about finding "artistic" objects. A coffee mug, a pair of glasses, and a crumpled scarf are as beautiful as anything in a museum when the light is right.
Setting Up Your Still Life
Find a flat surface near a window — a table, a desk, or even the kitchen counter.
A windowsill works beautifully too. Place a plain cloth or a large book under your objects to give them a simple stage, and set your objects so they overlap a little.
Overlapping creates depth; objects floating far apart look disconnected.
Now the most important step: sit down and arrange things at your eye level. The tabletop itself is usually too low, which is why so many first attempts feel awkward.
Prop your setup on a stack of books or a box so the objects sit close to the height of your eyes when you are seated.
You should be able to see the tops of the objects slightly, not just their sides.
Give yourself room to work. Place your sketchbook on the table in front of you, or on a board on your lap, and make sure you can see both your subject and your paper without twisting.
Comfort matters — you will stay longer and draw better when your body is at ease.
Light: The Secret Ingredient
Light is what turns a pile of objects into a still life. The same apple looks completely different under bright noon sun than it does under a soft lamp, and learning to see light is half of learning to draw.
For your first attempts, choose a window that gets indirect daylight. Place your still life to one side of the window so the light comes from the side, not straight at you.
Side lighting casts gentle shadows that show the shapes of your objects — the curve of the bowl, the roundness of the orange, the folds of the cloth.
Those shadows are your best teachers.
You can also experiment with a single desk lamp for evening sessions. A lamp gives you dramatic, controllable light, and there is something cozy about drawing by lamplight while the rest of the house sleeps.
Whatever light you choose, keep it consistent during your session — if the sun moves and your shadows shift, that is normal.
Just notice it and keep going.
Supplies You Already Have
Here is the part that surprises most new artists: you probably own everything you need.
A regular pencil, an eraser, and any kind of paper will carry you through your first dozen still life drawings.
Fancy supplies are lovely, but they are not what makes a drawing good — looking is.
If you want to upgrade a little, a set of drawing pencils with different hardnesses (like 2H, HB, and 2B) lets you make light and dark marks easily.
A kneaded eraser is wonderful for lifting graphite softly instead of scrubbing. And any paper heavier than printer paper, even a simple sketchbook, will take pencil marks more kindly.
Set up a small drawing kit — pencils, eraser, sharpener, and sketchbook in a pouch — and keep it near your still life spot.
When everything is within arm's reach, you will sketch more often. Half the battle of any creative habit is removing the friction between you and your supplies.
Starting with Simple Shapes
Every object in your still life can be broken down into simple shapes. The pitcher is a cylinder, the apple is a circle with a bump, the book is a rectangle. When you learn to see these basic forms, drawing becomes far less intimidating.
Begin by lightly sketching the overall shapes and their positions. Do not worry about details yet — just place each object on the page with soft, loose lines.
Check the proportions: how tall is the bottle compared to the bowl? How wide is the apple compared to the book?
Hold your pencil at arm's length and use it as a measuring stick, closing one eye and comparing lengths.
This old artist's trick works beautifully.
Keep your first lines light, because you will adjust them. Draw the shapes, look at your setup, then draw again over the top, nudging lines into place. This layering is not wasted effort — it is how every artist, beginner or master, finds the true shape of things.
Adding Light and Shadow
Once your shapes sit comfortably on the page, it is time to bring them to life with light and shadow. Look at your setup and find three things: the bright areas, the dark areas, and the shadow cast on the table beneath and beside each object.
Start with the darkest darks. With the side of your pencil or a soft 2B, gently shade the deep shadows — the side of the bowl away from the window, the shadow under the apple.
Keep these first shadows light; you can always darken them later. Then work toward the mid-tones, the areas that are neither bright nor dark, letting your pencil strokes follow the curve of each object.
Leave the brightest areas white — that is how your drawing will read as having light.
The contrast between your white highlights and your dark shadows is what gives objects volume and roundness.
This is the moment a drawing starts to feel three-dimensional, and it is deeply satisfying to watch happen.
Details and Finishing Touches
With the main shapes and shading in place, you can move on to details. Add the pattern on the mug, the crease on the book spine, the stem and leaf of the apple.
Keep details for last, and do not overdo them — a few well-placed marks say more than a hundred fussy ones.
Step back from your drawing often, literally. Hold it at arm's length, or set it on the floor and look down at it.
From a distance, you will see what needs adjusting: a shadow that is too dark, a shape that is slightly off, an object that has drifted out of place.
Make small corrections and step back again.
When you feel the drawing is finished, sign it — your name, or just the date, in a corner.
Signing your work is a small act of kindness toward yourself. It says: I made this, and it matters.
Keep the drawing, date it, and in a month's time, draw the same still life again.
You will be amazed at how far you have come.
When It Does Not Look Right
There will be days when nothing goes as planned. The apple looks like a lump, the pitcher leans like a tower in a storm, and you want to rip the page out.
Before you do, take a breath — this is the most important moment in any artist's journey, and it happens to everyone.
First, check your basics. Are you looking at your subject more than your paper? Most drawing mistakes come from watching the pencil instead of the object.
Are your shapes light enough to correct? If the drawing is still in light lines, you can simply redraw over it.
If it is too dark to fix, flip the page and start again — every artist has a bin full of abandoned pages, and they are not failures, they are practice.
And remember the blue pitcher in my grandmother's kitchen. My first drawing of it was lopsided and glorious, and my grandmother framed it anyway, right next to her wedding photo.
She knew something I did not yet: a drawing does not have to be perfect to be precious.
Yours does not either.
Still Life Ideas to Try This Week
Once you have made your first still life, you will probably be hooked. Here are a few gentle ideas to keep you sketching all week long.
Try a breakfast still life: a mug of tea, a plate with toast, a napkin.
Or a kitchen shelf scene with jars and spices. Draw a single object large, filling the whole page with one apple or one vase.
Arrange a family of similar things — all your mugs, or all your books — and study how they differ.
Or go seasonal: a pumpkin in fall, pine branches in winter, fresh flowers in spring.
You can also change your materials to keep it fresh. Sketch the same setup in pen for bolder lines, or add a little watercolor wash over a pencil drawing for color.
However you choose to play, the rule stays the same: look closely, draw gently, and enjoy the quiet minutes with your objects.
One more suggestion: keep a dated list inside the back cover of your sketchbook noting each still life you set up. Future you will love looking back at the little scenes your days were made of — the winter oranges, the summer jam jars, the autumn leaves.
Conclusion
Still life drawing is a gentle art. It asks for nothing but a few objects, a bit of light, and your full attention. It rewards you with calm, with sharper eyes, and with a growing collection of pages that quietly record your days.
Set up your first still life tonight — a mug, a piece of fruit, something that means something to you.
Place it near a window, pull up a chair, and let your pencil begin. The objects are waiting, just as they waited for me all those years ago on my grandmother's kitchen table.
Happy sketching, and may your lopsided drawings always be framed with love.
