Introduction
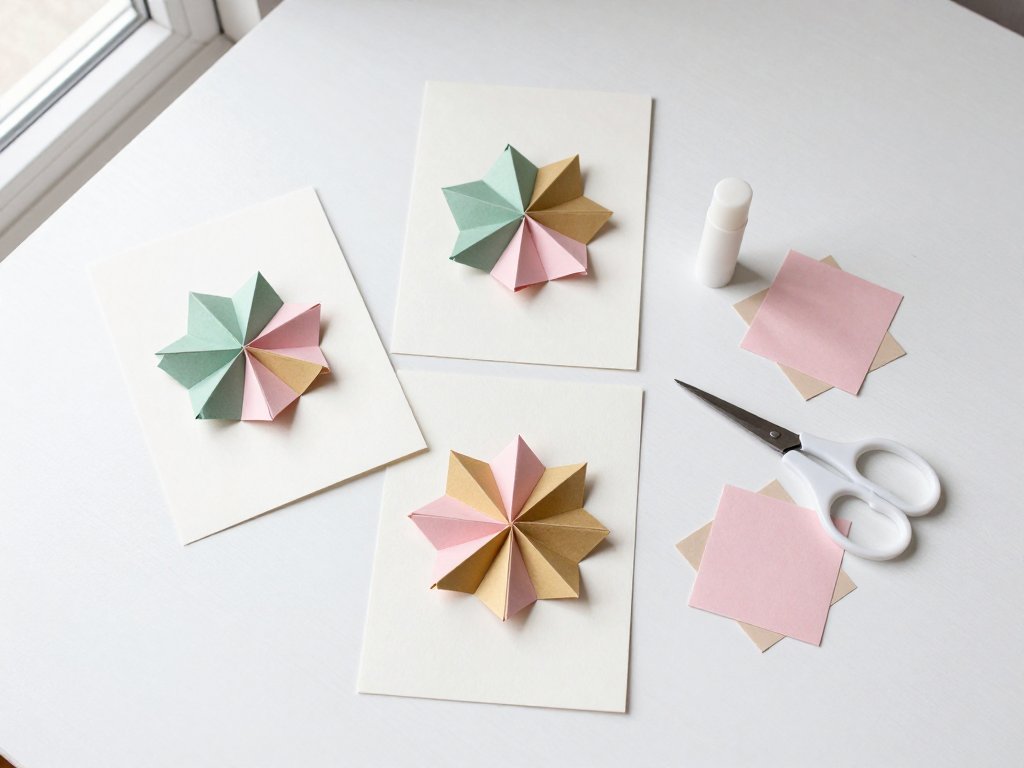
Tea bag folding is one of those crafts that looks harder than it is. Eight small squares of paper, one repeated fold, and a little patience add up to a medallion that looks like it came from a stationery shop.
The first one takes about twenty minutes. The second takes ten. By the fourth, your hands know the fold and you can work while the kettle boils.
This guide walks you through the basic fold, the assembly, and the card layout that makes a finished medallion look deliberate rather than homemade. Everything is listed with sizes, so there is no guesswork at the table.
Start with four cards. That is enough to learn the rhythm without turning a pleasant evening into a production line.
What Tea Bag Folding Is
Tea bag folding is a paper craft built on repetition. You cut identical small squares, fold each one the same way, and join the finished units edge to edge into a rosette or medallion.
Because every unit is identical, the shape grows evenly. Eight units make a full circle, four make a half rosette, and sixteen make a larger medallion that needs a bigger card.
The name comes from the paper the craft was first made with. Tea bags once arrived in thin printed paper envelopes, and crafters saved those envelopes because the paper folded crisply and held a crease. The envelopes are gone from most kitchens now, but the fold stayed.
Modern versions use pre-cut tea bag papers or any lightweight patterned paper. The technique is the same either way.
- A single repeated fold — one shape, learned once, used eight times.
- Radial symmetry — units fan out from a center point like petals.
- A flat finished piece — the medallion sits level, which makes it easy to glue onto cards.
Why It Suits Beginners
Most paper crafts ask you to learn something new at every step. Tea bag folding asks you to learn one fold and repeat it until the shape closes.
That repetition is the whole advantage. The tenth unit is as easy as the first, and by your third medallion you are folding without thinking about it.
Mistakes are also cheap. A spoiled unit costs one two-inch square of paper, not a whole afternoon.
- No measuring once the squares are cut.
- No special tools beyond a bone folder and glue.
- No drying time between steps.
- Easy to stop and start — folded units wait patiently in a dish.
It suits short working sessions too. You can fold eight squares in ten minutes, leave them overnight, and assemble the medallion the next day.
There is no drying time to plan around, no machine to warm up, and no expensive tool to buy before you can start. A pack of paper squares and a glue stick will get you through your first four cards.
Materials You Need
Here is exactly what to gather before you sit down. Everything fits on a small tray, which makes setting up and packing away quick.
- Paper squares — eight per medallion, cut to 2 inches (5cm). Pre-cut tea bag papers save time; lightweight patterned paper works just as well.
- Card blank — A6 (4⅛ × 5⅞ inches) or 5 × 7 inches, in cream or white.
- Glue stick or tacky glue — a glue stick for paper to paper, tacky glue for the center embellishment.
- Bone folder — for crisp creases. A fingernail works, but it wears out before the paper does.
- Small sharp scissors — for trimming square edges and snipping tiny points.
- Tweezers — for placing units precisely when your fingers feel too big for the job.
- Optional center — a flat pearl, a small button, or a die-cut circle.
- Scrap paper — to glue on, so your table stays clean.
Cut all eight squares at once with a paper trimmer if you have one. Consistent squares matter more than perfect ones, because units that differ in size show up as a lopsided rosette.
Choosing Paper That Folds Cleanly
Paper weight decides whether this craft feels easy or frustrating. Aim for around 80gsm — ordinary printer weight or slightly heavier.
Thin paper creases sharply and the points stay flat. Heavy cardstock resists the fold and cracks along the crease, leaving white fibers showing at the tip.
Test before committing. Fold a scrap, press the crease, and look at the point. If the paper splits or springs back, choose something lighter.
- Works well: tea bag papers, lightweight scrapbook paper, origami paper, thin patterned wrapping paper.
- Avoid: 200gsm cardstock, glossy coated paper, textured watercolor paper.
- Also check: paper printed on one side only will show white points on the finished rosette.
Coated or glossy paper is a quiet trap. Glue slides off it and the creases look shiny, which draws the eye straight to every imperfect fold.
The Basic Fold, Step by Step
This is the kite fold, the base for almost everything else in tea bag folding. Work on a flat surface with the patterned side of the square facing down.
- Set the square as a diamond. Place it patterned side down and turn it so one point faces you.
- Fold in half on the diagonal. Bring the bottom point up to the top point, press the crease with the bone folder, and leave it folded. You now have a triangle.
- Fold the two outer corners to the center. Take the left corner and fold it up so its edge meets the center line. Repeat with the right corner. The shape becomes a kite with a pointed top.
- Fold the long point back. Take the narrow point at the bottom, fold it up and behind the kite, and crease firmly. This makes the small tab that holds the unit to its neighbor.
- Check the unit. It should read as a narrow triangle with a small tab at the wide end, all creases sharp and the patterned side facing out.
A good unit lies flat on the table without rocking. If it cups upward, the creases are soft — run the bone folder over each one again before you set it aside.
The tab should be about the width of your fingernail. A tab that is too long shows through the front of the medallion, and one that is too short will not hold the join.
Fold all eight units before you pick up the glue. It takes four minutes, and a full set on the table makes the assembly step feel obvious rather than fiddly.
Assembling the Medallion
Assembly is where eight loose units become one piece. Keep the units face down and work on a sheet of scrap paper.
- Glue the first tab. Run a thin line of glue stick along the tab of unit one.
- Join unit two. Press the side edge of unit two onto the tab, aligning the bottom edges exactly.
- Keep going. Glue the tab of unit two to unit three and continue around. Each unit overlaps the one before it in the same direction.
- Close the circle. After the eighth unit, glue the last tab and bring the first unit around to meet it.
- Press flat. Slide the medallion under a heavy book for ten to fifteen minutes. This flattens the center, where the overlap is thickest.
Keep the units in a loose fan as you work, then close the fan at the end. Building flat and curling later is easier than wrestling a circle that keeps rolling away.
Check the front before the glue sets. All eight points should meet at the center without gaps, overlaps, or one unit sitting proud of the others.
If you use tacky glue rather than a glue stick, give the medallion twenty minutes before you handle it. Tacky glue holds better on textured paper but stays soft longer than a stick.
Variations to Try
Once the kite fold feels automatic, three more folds open up the craft. Each one uses the same square and the same joining method.
- Triangle fold. Fold the square in half on the diagonal, then in half again to make a smaller triangle. The units join into a sharp, star-like rosette that suits gold and cream papers.
- Square fold. Fold all four corners to the center, then fold the resulting square in half. The finished medallion has a boxy, geometric look and works well on masculine cards.
- Frame fold. Fold the square in half, fold the sides in to the center line, then fold the long edges back out. The unit reads as a layered frame around the center.
Mix two papers in one medallion — alternate light and dark units — and the rosette gains a pinwheel pattern without any extra folding.
Keep your first attempts in the basic fold. Variations are more enjoyable once your hands already know how a tab should feel between your fingers.
Unit size scales with the card. Two-inch squares suit an A6 card, while 1½-inch squares give a medallion small enough for a gift tag. Keep the paper weight the same when you scale down; tiny thick units are almost impossible to fold neatly.
Laying Out the Card
A finished medallion needs a little structure behind it. Two mat layers and a sentiment strip are usually enough.
- First mat: cut a square of cardstock a quarter inch larger on each side than the medallion — about 3½ inches for a 3-inch rosette.
- Second mat (optional): a contrasting square a quarter inch larger again, in a muted tone pulled from the paper.
- Sentiment strip: a rectangle about ¾ inch tall, stamped or handwritten, placed below the medallion.
- Foam dots: two or three under the medallion, which lifts it from the card and casts a soft shadow.
Center the medallion with a ruler rather than by eye. On an A6 card, a 3-inch medallion leaves roughly half an inch of margin on each side — enough breathing room without looking lost.
That proportion is why small works better than large here. A 4-inch medallion on A6 crowds the sentiment and adds weight that warps the card as the glue dries.
Limit the palette to three tones plus a neutral card. A medallion already carries a lot of pattern, and a fourth colour usually tips it from considered to busy.
Making a Set of Cards
Four cards take barely more time than one if you batch the steps. Cut thirty-two squares, then fold them all in a single sitting.
Production-line folding is faster because your hands stay in the same motion. Assemble the medallions in a second session, then glue them to cards in a third.
- Keep folded units in a shallow dish with all the tabs facing the same way.
- Sort papers into eight-unit piles before you start gluing, so no medallion runs short.
- Store finished cards flat in a box with wax paper between the layers.
- Write the paper combination on a slip in the box, so you can repeat a favourite later.
Batching also means fewer glue sticks left open while you hunt for scissors. Set everything out once, work through the pile, and put it all away.
A set looks best when the cards share a paper family but not an identical medallion. Vary the unit colour order from card to card, and keep the mat and sentiment strip consistent across all four.
Troubleshooting
Most problems in tea bag folding come from three things: soft creases, thick paper, and too much glue. Here is how each one shows up and what to do about it.
- Folds springing open. The crease was not burnished, or the glue stick has dried out. Re-crease with a bone folder and use a fresh glue stick.
- Cracking at the points. The paper is too heavy. Switch to 80gsm and fold gently rather than forcing the crease flat in one motion.
- Glue showing. Too much glue, usually on a dark paper. Use a thin line on the tab only, and wipe the edge with a clean fingertip.
- An uneven rosette. The units were cut to slightly different sizes. Re-cut with a trimmer and check each square against the first one.
- A warped card. Water-based glue plus a heavy center pulls the card into a curve. Use less glue and press the finished card under a book overnight.
None of these ruin the project. A slightly lopsided medallion still reads as handmade rather than broken, and the next one will be better.
Test a new paper and a new glue stick on two spare squares before you cut a full set. Five minutes of testing saves an evening of discovering that the creases crack or the tabs slide apart.
Mailing, Gifting, and Starting Your First Batch
A card with a flat medallion usually mails at a standard first-class rate. The limit for a standard letter is about ¼ inch thick, and a glued rosette stays well under that.
Foam dots change the math. If the card feels thicker than a few coins stacked together, ask for a non-machinable stamp or send it in a padded mailer.
- Single cards: a 5 × 7 envelope, a rigid card envelope, or a padded mailer for anything dimensional.
- Sets of four: a padded mailer with a piece of card either side, so the corners stay crisp.
- Gift pairing: a small tag with a four-unit half rosette, tied to a jar of jam or a bundle of tea.
If you enjoy precise paper work, case binding a hardback book at home uses the same patience with folds and glue, just on a larger scale.
Start with four cards, not forty. Fold the units one evening, assemble them the next, and send the first one to someone who will notice the points.
That is the whole craft: one fold, repeated eight times, pressed flat and given away.