Introduction
I once spent forty dollars on a single glazed ceramic planter. It looked beautiful in the shop window, all speckled and artisanal. Then it cracked the first winter, and I stood in the garage holding two halves of a planter that cost more than my favorite pair of boots.
That was the moment I stopped buying fancy planters and started making them instead. The secret?
Plain terracotta pots. The same clay pots you can grab for a couple of dollars at any garden center.
With a little paint and one clever trick, they can look every bit as good as the expensive stuff.
Today I am going to walk you through the whole makeover process. You will learn how to clean, paint, and age terracotta pots so they look like they came from a boutique garden shop.
And you will do it for a fraction of the price. This is a perfect weekend project that even a complete beginner can finish in an afternoon.
Why Terracotta Pots Are the Perfect Canvas
Terracotta is Italian for "baked earth," and it has been used for pots for thousands of years. There is a reason it keeps showing up in gardens everywhere. It is cheap, it is classic, and it takes paint beautifully.
Unlike plastic pots, terracotta has a warm, porous surface with real texture. That texture grabs onto paint and gives your finished piece depth. Plastic looks flat no matter how many coats you add. Terracotta looks rich and handmade with just one or two.
Here is the part I love most. Because terracotta is so affordable, you can experiment without fear. Mess up a color? Paint over it. Change your mind about a design? Sand it down and start fresh. The stakes are low, and that freedom makes the whole process more fun.
You can find these pots almost anywhere. Big-box garden centers sell them in stacks. Dollar stores often carry small ones. Thrift stores and garage sales are gold mines for odd sizes. And end-of-season clearance sales can drop the price to pennies.
What You Will Need
Before you start, gather your supplies. Most of these you probably already own. The whole list should cost you under twenty dollars if you are starting from nothing.
- Terracotta pots — any size or shape you like. New or used both work.
- Mild soap and a scrub brush — for cleaning off dirt and dust.
- White vinegar — the secret weapon for removing white mineral deposits.
- Acrylic craft paint — cheap, easy to find, and available in every color imaginable.
- Paintbrushes — a flat brush for big areas, a small one for details.
- Painter's tape — for crisp lines and geometric designs.
- Clear matte sealer — spray or brush-on, to protect your work.
- Sandpaper — medium grit, for the aging trick.
- Newspaper or drop cloth — to protect your work surface.
That is it. No special equipment, no expensive tools, no learning curve. If you have painted a wall or a picture frame, you already know how to do this.
Step 1: Clean and Dry Your Pots
Terracotta pots arrive covered in dust, and used pots carry mineral deposits from watering. Paint will not stick well to any of that, so the first step is getting the surface truly clean.
Start with warm water and a little mild soap. Scrub the whole pot, inside and out, with your brush. Pay special attention to the rim and any decorative ridges where dirt likes to hide.
If you see white, chalky buildup on a used pot, that is efflorescence. It comes from minerals in the water and clay.
Plain soap will not touch it. This is where the vinegar comes in. Mix one part white vinegar with three parts water, and wipe the pot down with the solution.
Let it sit for a few minutes, then rinse well.
Now comes the part people skip, and it matters. Let the pot dry completely. Not just surface dry, but bone dry. Terracotta is porous, and any trapped moisture will bubble under your paint later. Give it at least a few hours, or overnight if you can.
Pro tip: set the pot upside down on a towel so the rim dries fully. A damp rim is the most common cause of peeling paint at the top edge.
Step 2: Decide on Sealing (and Why It Matters)
Here is the question everyone asks: do I need to seal the pot before painting? The honest answer is, it depends on where the pot will live.
If your pot stays indoors, you can paint directly on the dry clay. The acrylic paint will grip the porous surface just fine. Many of my favorite pots were painted with no primer at all.
If the pot will live outside, spend the few extra minutes to seal it first. Outdoor moisture and frost can cause paint to peel. A coat of matte sealer or even a thin layer of gesso gives the paint something solid to bond to.
There is one more case worth mentioning. If you are painting a very light color like white or cream over raw terracotta, that orange-red clay will fight you.
Two or three coats will fix it, or you can prime first to save time.
I usually just add extra coats because I am impatient.
The good news? Acrylic paint is forgiving. If the first coat looks streaky, let it dry and add another. Nobody is grading your first coat.
Step 3: Paint Like You Mean It
Now for the fun part. Apply your first coat of acrylic paint with a flat brush, using smooth, even strokes. Follow the curve of the pot rather than painting straight up and down. That keeps the brush strokes looking natural.
Do not try to get full coverage with one coat. It will not happen, and that is normal.
Thin, even coats dry faster and look smoother than one thick gloopy layer. Let the first coat dry completely, then add a second.
For dark colors over light clay, two coats usually does it. For light colors over dark clay, you may need three.
If you want a perfectly smooth finish, thin your paint with just a drop of water. This turns the acrylic into something closer to a wash, and it self-levels as it dries. You will get a much more professional result with almost no extra effort.
Here is a Mason trick for saving money: buy the small craft-size bottles of paint instead of the big tubes. For a weekend pot project, you will use maybe half a small bottle. Why pay for paint you will not use?
Step 4: The Aging Trick That Changes Everything
This is the step that makes people think you paid a fortune for your planters. It is also embarrassingly simple. You are going to make a brand-new painted pot look like it has been loved for decades.
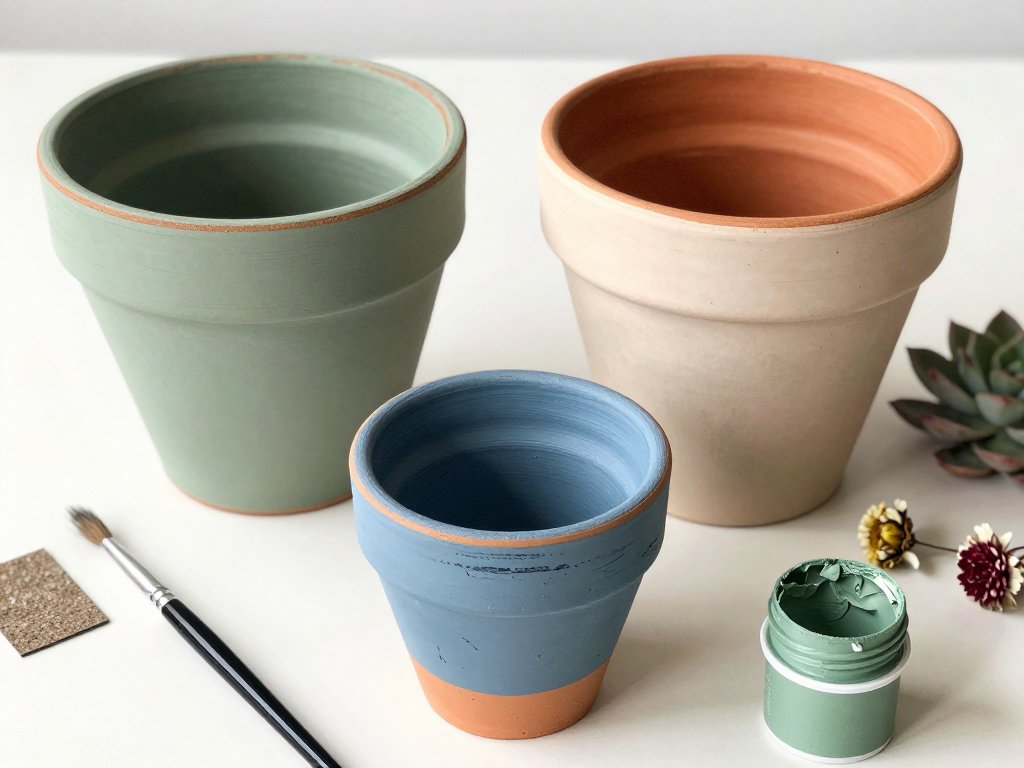
Here is the method. Once your paint is fully dry, take a piece of medium-grit sandpaper and gently rub the edges, the rim, and any raised details.
You are not trying to sand the paint off. You are just knocking the shine off the high points so the clay color peeks through.
Think about how a real aged pot wears. The rim gets bumped. The edges get scraped.
The bottom gets dusty. Those are exactly the spots you want to distress. A few light passes is all it takes.
You can always add more wear, but you cannot undo it, so start gentle.
For an even more convincing antique look, try a dry-brush technique. Dip a nearly dry brush into a slightly darker paint, wipe most of it off on a paper towel, then lightly drag it across the pot. This adds a subtle shadowy depth that makes the piece look hand-thrown.
The aging trick works because your brain reads wear as age. And age, in the world of planters, reads as quality. It is the same reason people pay extra for distressed furniture.
Design Ideas to Try This Weekend
Now that you know the basics, here are a few design directions that look fantastic and are beginner-friendly.
Classic two-tone. Paint the pot one color and the rim a contrasting color. White pot with a terracotta rim is a timeless look. Tape off the rim line for a crisp edge.
Ombre fade. Mix your main color with white in increasing amounts, and paint stripes from darkest at the bottom to lightest at the top. Blend the stripes while wet for a smooth gradient.
Geometric lines. Use painter's tape to create stripes, diamonds, or triangles. Paint the taped pot a solid color, let it dry, then remove the tape to reveal clean, sharp lines.
Stenciled motifs. Grab a stencil and a sponge brush. Dab the paint through the stencil for a crisp pattern. Stars, leaves, and simple florals all look wonderful on terracotta.
Chalky finish. Mix a little baking soda into your paint to create a chalk-paint texture. It dries matte and slightly grainy, perfect for a farmhouse look.
Do not overthink the design. A solid color with a distressed rim already looks ten times better than a bare pot. Anything beyond that is a bonus.
Plant Pairings That Show Off Your Work
Your painted pot deserves a plant that makes it shine. Here are a few pairings that always look good together.
Herbs like rosemary, thyme, and sage love terracotta. The porous clay lets their roots breathe, and the earthy tones of the herbs complement almost any paint color.
Succulents are the easiest choice. They need well-draining soil, which terracotta provides naturally. Group three small painted pots with different succulents for an instant windowsill display.
Trailing plants like ivy or pothos soften the look of a painted pot. The greenery spilling over the rim draws the eye to your handiwork.
One practical note: terracotta dries out faster than plastic because it breathes. Plants in terracotta need watering more often, especially in summer. That is not a downside, it is just something to know. If you tend to overwater, this might actually save your plants.
Protecting Your Work
You have put the effort in, so protect it. A clear sealer will keep your painted pot looking fresh for years instead of months.
For indoor pots, a single coat of matte acrylic sealer is plenty. Spray-on versions are fast and give an even finish. Just spray outside or in a well-ventilated area, and let it dry completely before planting.
For outdoor pots, use a sealer labeled for exterior use. Apply two coats, and reapply at the start of each growing season. Frost, rain, and sun will slowly wear down even the best finish, so a yearly touch-up keeps things looking sharp.
One warning: do not seal the inside of the pot. Terracotta's whole job is to let moisture escape through the walls. Sealing the inside traps water against the roots and can rot your plants. Seal only the outside, and leave the drainage hole clear.
Common Mistakes (and How to Fix Them)
Let me save you the trouble of learning these the hard way. I have made every single one of these mistakes, and they are all fixable.
Bubbles in the paint. This means moisture was trapped in the clay. Fix it by sanding the bubbled area smooth and repainting, after letting the pot dry out completely this time.
Streaky coverage. You probably used too little paint or tried to cover in one coat. Add another thin coat and let it dry between layers. Streaks disappear with patience.
Paint peeling at the rim. The rim probably stayed damp when you painted. Sand the peeling edge, let everything dry fully, and touch up.
Color looks flat. Add the aging trick. A little sanding and dry-brushing adds instant depth and character that flat color never has.
Mistakes in the design. Acrylic paint is water-based, so you can wipe mistakes off with a damp cloth while the paint is wet. Once dry, sand and repaint that section.
The beauty of this project is that almost nothing is truly ruined. Worst case, you repaint the pot. Best case, the "mistake" becomes a design feature you would have never planned.
Where to Find Pots for Pennies
Before we wrap up, let me share my favorite sourcing tips, because half the fun is finding the pots.
Check the clearance section of garden centers in late summer and fall. That is when they discount pots hard to clear shelf space. I have picked up perfectly good terracotta pots for a dollar or two each.
Thrift stores are unpredictable but rewarding. Bring a measuring tape if you need a specific size. And do not pass up pots with chips or cracks. A chipped pot is a perfect candidate for a distressed makeover, because the imperfection becomes part of the charm.
Dollar stores carry small terracotta pots that are perfect for succulents and herbs. The quality is fine for painting, and the price is unbeatable.
Garage sales and estate sales are where you find the interesting shapes. Old pots have character that new ones lack, and a good cleaning brings them right back to life.
Buy in multiples. The magic really happens when you paint a collection of pots in coordinating colors and group them together. Three small pots painted in the same palette look far more impressive than one big pot.
Final Thoughts
When I cracked that forty-dollar planter, I figured I was done with nice planters for good. Instead, it sent me down a path that has saved me hundreds of dollars and given me a shelf full of pots I actually love.
The terracotta makeover is the perfect weekend project. It is cheap, forgiving, and fast. You can go from bare clay pot to boutique-looking planter in a single afternoon, with supplies you probably already own.
So grab a pot, pick a color, and give it a try. Start with one small pot if you are nervous.
Paint it, age it, plant something in it, and set it where you will see it every day.
I bet you will be painting a whole collection by next weekend.
And if your first pot does not look perfect? Sand it a little more and call it vintage. Nobody has to know.