Introduction
I bought a beginner woodcut kit for twenty-two dollars online. Two gouges, six pale blocks, a plastic brayer, one tube of ink. The listing photo made it look like a weekend.
I carved the wrong face of the first block. On cheap blocks, the printing surface is the thin smooth veneer. I dug into the rough back instead, where the grain runs wild and the wood crumbles instead of slicing.
Then I carved straight across the grain, because nobody had told me grain had a direction. Whole flakes lifted out of the block. My mountain looked like a bite mark.
By the time I admitted the block was ruined, I had pulled eleven bad prints on good paper. Thirty dollars of paper, into the recycling bin, along with a tube of ink I had never learned to use properly.
Here is what I wish someone had said that first night: woodcut is subtractive. You are not drawing on the block. You are removing everything that should stay white, and the block does the rest.
Once that clicked, the tools stopped being mysterious and started being cheap. This is the whole process, the way I run it now at the kitchen table.
Relief Printing Is Subtraction, Not Drawing
Ink sits on the uncut surface of the block. Whatever you gouge away prints as white paper, because the ink never touches it.
That one sentence is the entire craft. Every mark you make with a gouge is a mark of absence. Carve the sky and you get a white sky. Leave the mountain raised and it prints solid.
Which means you plan backwards. Most beginners sketch the dark shapes and carve them out, then wonder why the print arrived inverted. Sketch the light shapes instead, and carve those.
There is no grey in a single-colour woodcut, only ink and paper. If you want a mid-tone, carve thin parallel lines and let the white gaps lighten the area from arm's length. Printers call that hatching.
And the image must be carved in mirror. Whatever faces left on the block prints facing right. Text is the obvious case, but a tree leaning right will lean left on paper, and that surprises people more than it should.
Choosing a Block That Won't Fight You
Shina plywood is the standard beginner woodcut block, and it earns the reputation. It is a thin plywood with a fine, even grain and a face that takes ink without drinking it. A small block, roughly four by six inches, runs about ten to fifteen dollars.
Basswood is the softer, cheaper cousin. It cuts like cold butter, which is forgiving on your hands and hopeless for fine detail. Good for a first shape, disappointing for a first finished piece.
Avoid end-grain hardwood. End-grain maple is what fine wood engraving uses, and a single block costs more than your whole setup. It is also dense enough that a beginner's gouge skates instead of biting.
Avoid MDF completely. The fibres crumble at the cut edge, and each pass sheds a furry lip that grabs ink and prints as a smudge. It dulls a gouge faster than real wood, too.
Whatever you buy, look at the block before you touch a tool. The printing face is the smooth side, usually the veneer. The back shows grain and often a stamped label. Carve the smooth one.
The Three Gouges You Actually Need
A U-gouge has a curved cutting edge and scoops a rounded channel. It clears large areas fast and leaves a soft, slightly dished wall. This is your workhorse for sky, background and the space between shapes.
A V-gouge has a pointed edge and cuts a sharp valley. It draws thin lines, defines borders, and reaches into corners the U-gouge cannot. It is the tool that makes a print look deliberate.
A flat chisel, sometimes sold as a straight gouge, has a square edge. It pares away flat fields and cleans the walls of a shape. Without it, big carved areas look chewed rather than cut.
Three tools. That is genuinely enough for a couple of years. A set of six sounds generous, but two of them will sit in the roll untouched while you learn what the other three do.
Buy handles you can hold for an hour. A thin dowel handle looks elegant and punishes the base of your thumb. Barrel-shaped handles cost a few dollars more and save your hand.
Honing, and Why a Dull Edge Bites Harder
A dull gouge does not slide politely through wood. It skips. It rides up out of the cut, jumps across the block, and your hand follows it into the path of the blade.
Most carving injuries I have seen came from a dull edge, not a sharp one. Sharp tools go where you point them. Dull tools go wherever the grain decides.
Honing is not grinding a new bevel. Lay the flat back of the blade on a fine slip stone for a few strokes, then the bevel, then wipe the burr off with a cloth.
Ninety seconds before you start, and again halfway through a session. Wood with grit in it dulls an edge faster than clean stock, and plywood glue is unkind to steel.
Test on a scrap corner, never on your thumb. If the tool bites and lifts a clean shaving under light pressure, it is ready. If it skates, keep going.
Drawing It in Reverse
Three ways to get a design onto the block, and they differ mostly in how much you trust your own head.
Graphite rub. Draw on thin paper, turn the paper face down on the block, and rub the back with a spoon. The graphite transfers as a mirror image, which is exactly the orientation you need.
Tracing paper flip. Tape tracing paper over your drawing, trace it, then flip the paper and rub the back. Slower, but reliable, and it lets you correct proportions before you commit to wood.
Draw directly. Fastest, and fine if your design is loose and you can hold the flip in your head while you work. Do not try this with text or a strong asymmetric shape.
Then run the mirror test before you cut. Hold the block up to a mirror, or turn your paper over against a window. If the reflection looks right, carve what is in front of you.
If the reflection looks wrong, the fix is not to carve it backwards. Rub the design off with a damp cloth, dry the block, and start the transfer again.
Inking: Thin and Even, Not Gloppy
A brayer is a small rubber roller, and it wants far less ink than feels natural. Squeeze a bead about the size of a grain of rice onto a glass tile, then roll it out until it lays as a thin, even film.
The sound tells you more than your eyes. Properly rolled ink makes a soft tacky hiss, like a shoe peeling off a wet floor. If it slaps dry or squeaks, there is too little. If it squelches, there is too much.
Roll onto the block in several directions, not one. Four or five light passes, until the raised surface is uniformly glossy and the carved channels are still clean and pale.
Water-based block printing ink dries in minutes and cleans up with soap and water. It is the sensible starter ink, and it is still what I hand to anyone printing at a kitchen table.
Oil-based ink gives a denser black, stays open on the block for hours, and takes a day or more to dry. Better for editions of twenty, worse for a house with small children nearby.
Registration and the Hand Pull
Registration simply means putting the paper in the same place every time. Get it wrong and every print in the edition drifts a few millimetres, which reads as sloppy rather than handmade.
The cheap solution is a bench hook: a board with a raised strip along one edge that the block butts against. Tape a paper stop at one corner, and you can repeat the position by feel.
Lay the paper down from one edge, not from the centre. Drop it slowly, let it settle, then press it flat with a clean hand. Never slide paper across wet ink.
Burnish with the back of a wooden spoon or a baren, in small circles, working from the centre outward. You are not pressing hard. You are transferring ink through friction, evenly, for about a minute.
Peel from a corner, slowly, holding the block down with your other hand. Fast peeling is where paper tears and where the wet ink smears.
That first pull is a test print, not a product. Expect pale patches. They are telling you where to add ink, or where the block surface needs another pass.
Your First Print: Mountain, Sun, Tree
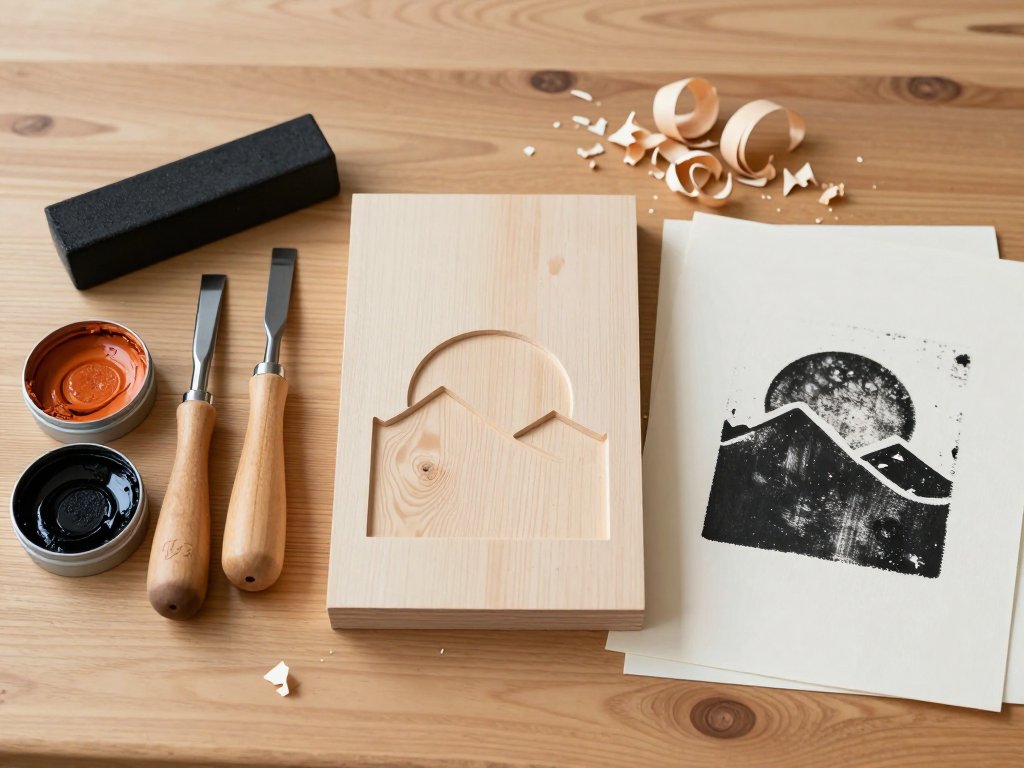
One small block, three shapes, two stages. This is the project I give people who have never held a gouge before, and it takes an afternoon including drying time.
You need one shina or basswood block about four by six inches, three gouges, black water-based ink, a brayer, a smooth tile for rolling, cream printmaking paper cut to six by eight, a wooden spoon, and newspaper.
Stage One: The Raised Shapes
- Draw a mountain triangle, a sun circle and a single tree on thin paper. Keep them large and simple. Small shapes are much harder to carve cleanly than they look on paper.
- Transfer the drawing with the graphite rub, so it lands on the block in reverse. Do not skip this because you are confident. Confidence is what wrecked my first block.
- Hold the block to a mirror and check the mountain leans the way you want. If it leans the wrong way, wipe it off now, while the block is still blank.
- Carve away everything around the three shapes with the U-gouge, working outward from each shape toward open field.
- Aim for a depth of about two millimetres. Deep enough that the brayer never touches the carved floor, shallow enough that the block stays strong.
- Clean the border of each shape with the V-gouge. A clean edge is the difference between a print and a grey smear.
- Ink the block evenly, lay the paper on the bench hook, and pull your first test print. Check the mirror first, then check for pale patches.
Stage Two: The Interior Lines
- Look at the test print honestly. Three solid shapes on white paper is a real print, and it is allowed to stay that way.
- Choose one area to open up, such as three thin lines across the mountain to suggest a ridge. Space them wider than feels right.
- Carve those lines with the V-gouge, at a consistent depth, and clear the shavings with a stiff brush before inking.
- Pull a second print and compare it to the first. The lines should read as a lighter tone from a step back, not as scratches.
- Stop carving before you think you are finished. The block cannot be un-carved, and beginners overwork the first one almost every time.
Let all the prints dry flat on newspaper. Stack them only when they are bone dry, or the ink offsets onto the back of the sheet above.
What It Costs Per Print
Now the arithmetic, because this is where woodcut quietly beats almost every other print method for a small seller.
Say the block costs fifteen dollars, the ink twenty, a hundred sheets of decent paper thirty, and a brayer fifteen if you do not own one. Call it eighty dollars of materials, bought once.
An edition of fifteen prints uses one block, perhaps a fifth of the ink tube, and fifteen sheets of paper. Materials land somewhere under two dollars a print, and the block is still there afterwards.
The second edition costs only ink and paper. By the third, your material cost per print is close to the paper itself, which is why hand-pulled prints stay cheap per unit once the carving is done.
Your real cost is the hours at the table, and those never repeat. That is why a hand-pulled print can sell for twelve dollars and make sense, while a painted canvas the same size cannot.
Where beginners lose the math is paper. Cheap paper tears, drinks ink and ruins a good pull. Buy fewer sheets of paper you trust rather than a ream you will fight all afternoon.
When It Goes Wrong
Every failure below has one likely cause and one fix. None of them require buying another tool.
Patchy or speckled ink
Usually under-inking, or a brayer that is not rolling evenly. Work the ink longer on the tile, then apply in two directions. If speckles persist, wipe dust out of the block grain with a dry cloth.
Registration slipped
The paper moved between laying and burnishing. Tape a paper stop to the bench hook and hold the top edge with your free hand for the first few passes.
Paper tore on the pull
Too much ink, too much pressure, or paper too thin for the job. Peel slower, from a corner. If the sheet is lightweight, dampen it very slightly and blot it before laying.
Grain tear-out
You carved against the grain, the tool was dull, or the wood was too soft. Turn the block and cut with the grain, in shallow passes, and let a sharp edge do the work.
Ink dried in the gouge lines
Water-based ink skins over fast. Re-ink and pull promptly, and wipe the carved channels with a damp cloth between pulls. Oil-based ink sidesteps this completely.
Over-inking
The print looks glossy, the fine lines fill in, and the paper buckles. Scrape the excess off the tile, roll thinner, and test on scrap paper before you commit a good sheet.
Safety and Shop Habits
Carve away from your body, always. Both hands behind the cutting edge, the block clamped or hooked, and the tool travelling into open air.
Never carve toward the hand holding the block. If you need to rotate the block, rotate it. Do not reach around the tool to save a second.
A bench hook does two jobs: it registers the paper and it stops the block sliding while you push a gouge through it. Clamp the board to the table if it still walks.
Store gouges edge-up in a roll or a slotted block, never loose in a drawer where they knock against each other. A chipped edge takes twenty minutes on a stone to repair.
Keep a stiff brush on the table for shavings, and sweep the block before every inking. One shaving trapped under the paper prints as a white crater.
Where to Go Next
Your first print is a baseline, not a portfolio piece. The next step that teaches the most is a two-block colour print: one block for the dark, one for a colour, registered to the same corner marks.
Reduction printing, where one block is carved and printed in successive colours, is the other route. Read about it before you try it, because it destroys the block as it goes.
If you want to take the same carving skills onto cloth, fabric block printing uses the same tools with a different ink and a different set of rules.
And if your first print came out patchy, keep it. Tape it above the table. In six months you will want to see exactly how far your hand has come.