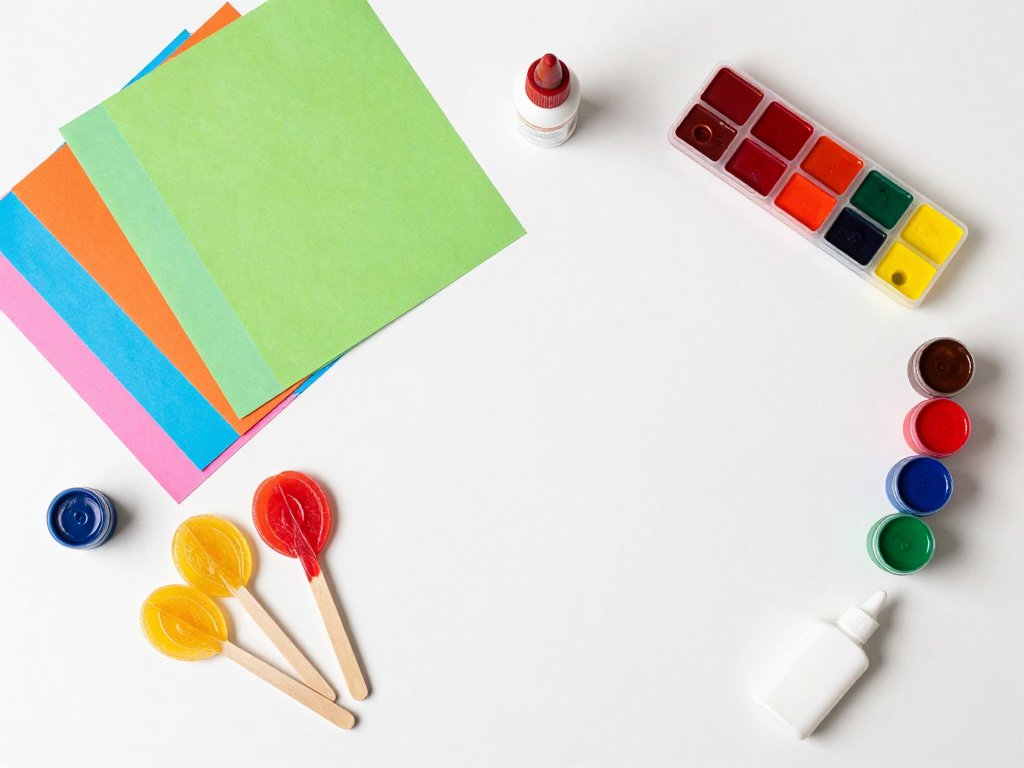
Summer vacation is here, mama! The sun is shining, the days are long, and the kids are bouncing off the walls looking for something — anything — to do. Before you hear "I'm bored" for the hundredth time (because let's be honest, it's coming), I've put together a list of 20 cheap and easy summer craft ideas that will keep your little ones busy, creative, and smiling without blowing your budget.
All of these projects use materials you probably already have around the house or can pick up for just a few dollars at the dollar store. I've included age recommendations and cost estimates so you can pick the perfect activity for your crew. Some are quick 15-minute distractions, others can fill an entire afternoon — and most of them double as outdoor fun so you can soak up that Vitamin D while the kids get messy (on purpose, for once!).
Grab your craft bin, clear off the kitchen table (or head out to the backyard), and let's make this the most creative summer yet!
1. Water Balloon Piñata
This one is an absolute crowd-pleaser and probably the most fun you can have with a dollar-store bag of balloons. Instead of a traditional candy-stuffed piñata that takes forever to make, you fill water balloons, hang them from a clothesline or tree branch, and let the kids whack away with a plastic bat or even just their hands. The splash factor is off the charts, and on a hot day, everybody wins.
Materials needed: A bag of water balloons (100-count is about $2–$3 at the dollar store), a plastic bat or wooden spoon (optional), string or twine, and a hose or faucet for filling. That's it — you probably already have the string and a spoon.
How to do it: Fill about 30–40 water balloons and tie them off. Tie a length of string to each balloon. Drape the strings over a tree branch or clothesline and weight them so they hang at kid-chest height. Let the kids take turns swinging at the balloons. Each POP sends a glorious splash everywhere, and the shrieks of joy are totally worth the wet laundry afterward. Pro tip: do this right before bath time and let the hose rinse them off as a bonus cool-down.
2. DIY Sidewalk Chalk Paint
Sidewalk chalk is a summer staple, but sidewalk chalk paint takes it to a whole new level. It goes on smooth and creamy, dries bright and vibrant, and the best part? You make it in about two minutes with cornstarch and food coloring. My kids spend hours painting the driveway, the patio, and even the fence (it washes off, I checked!).
Materials needed: 1 cup cornstarch, 1 cup water, food coloring (gel works best for bright colors), small containers or a muffin tin, and paintbrushes or sponges.
How to do it: Mix equal parts cornstarch and water in a bowl until smooth. Divide into containers (an old muffin tin is perfect). Add 5–10 drops of food coloring to each section and stir. Give each kid a paintbrush and let them go to town on the driveway or sidewalk. The paint dries to a matte finish and washes away with rain or a hose. Want extra pizzazz? Add a drop of dish soap for a creamier texture. For a fun twist, give them stencils made from cardboard or cookie cutters — they can create shapes, letters, and even a hopscotch board.
3. Nature Scavenger Hunt
Sometimes the best crafting material is right outside your front door. A nature scavenger hunt turns a simple walk into an adventure, and it doubles as a craft project when you use the found treasures for art later. This one works for any age, any season, and best of all — it's completely free.
Materials needed: A paper bag or small basket for each child, a printed or hand-drawn checklist, and optionally a magnifying glass and some tape.
How to do it: Create a simple checklist of items to find: something round, something smooth, something rough, a yellow flower, a feather, three different kinds of leaves, a stick shaped like a Y, a pine cone, a fuzzy seed head, and so on. Hand each child their bag and checklist, and head out to the backyard, a local park, or a nature trail. Older kids can race to find everything first; younger ones just enjoy the collecting. Once you're back inside, spread out the treasures and use them to create a nature collage on paper or cardboard. Glue leaves into animal shapes, arrange pebbles into a mosaic, or press flowers between wax paper. It's a two-in-one activity: the hunt and the craft!
4. Tie-Dye T-Shirts
Tie-dye is a rite of summer passage, and it's so much easier than you remember from summer camp. You don't need fancy supplies — a kit from the craft store runs about $10 and makes 8–12 shirts, or you can use food coloring in a pinch. This is the kind of project where the mess is part of the memory, and the kids wear their creations all summer long with pride.
Materials needed: White cotton T-shirts (one per child), a tie-dye kit or fabric dye in assorted colors, rubber bands, plastic squeeze bottles, plastic bags or wrap, rubber gloves, and a drop cloth or trash bags for the table.
How to do it: Wash and dampen the shirts — dye adheres better to damp fabric. Lay the shirt flat and pinch the center, then twist into a tight spiral. Secure with 3–4 rubber bands radiating from the center like pizza slices. Mix the dye according to the kit instructions (usually just add water and shake). Squeeze dye onto each section — go wild with color combinations! Place the shirt in a sealed plastic bag for 6–8 hours (or overnight) so the dye sets. Rinse under cold water until the water runs clear, then wash separately in warm water. The reveal when you take off those rubber bands is pure magic — every shirt is a one-of-a-kind masterpiece.
5. Popsicle Stick Crafts
Popsicle sticks (or craft sticks) are the unsung heroes of summer crafting. A giant bag costs maybe two bucks and can be turned into everything from picture frames to miniature houses, catapults, or even working puppets. They're also wonderfully forgiving — glue something crooked? Just peel and restart. No stress, all creativity.
Materials needed: A bag of craft sticks (jumbo size is nice for little hands), white school glue or a low-temp glue gun, acrylic paint or markers, and optional decorations like googly eyes, buttons, yarn, or sequins.
How to do it: The possibilities are endless, but here are three easy starters. Popsicle stick picture frame: glue four sticks into a square, glue two more across the back as a stand, let dry, then paint and decorate. Popsicle stick catapult: stack 8 sticks and rubber-band them together at both ends, slide one more stick through the middle, and launch pom-poms or mini marshmallows across the room. Popsicle stick puppets: glue sticks together to form a body and arms, attach yarn hair, draw a face, and tape on a craft-stick handle for a fun puppet show. Set up a "stage" over the back of a couch and let the performances begin!
6. Paper Plate Animals
Paper plates are practically a craft supply in their own right. They're cheap (a pack of 50 is about $3), they hold paint beautifully, and their round shape is the perfect base for animal faces. From lions and ladybugs to fish and frogs, there's a paper plate animal for every favorite creature.
Materials needed: Plain white paper plates, washable paint in assorted colors, paintbrushes or sponges, school glue or glue sticks, construction paper, scissors, and googly eyes (because everything is better with googly eyes).
How to do it: Pick an animal and let the creativity flow. For a lion: paint the plate yellow or orange, cut strips of construction paper in matching shades, glue them around the edge for a mane, and add a snout and eyes in the center. For a ladybug: paint the plate red, let dry, then dot with black paint or cut-out circles; add a black construction paper head and pipe-cleaner antennae. For a fish: cut a wedge out of the plate for the mouth, glue the wedge to the back as a tail, paint bright colors, and add a googly eye. These make adorable room decorations or puppets for imaginative play.
7. Homemade Bubbles
Why buy bubble solution at the store when you can whip up a batch that's even better in under three minutes? Homemade bubbles are bigger, stronger, and so much cheaper. Plus, the kids love "helping" mix the ingredients — just be prepared to lose count of how many batches you'll go through on a sunny afternoon.
Materials needed: 1/2 cup dish soap (Dawn works best), 1 1/2 cups water, 2 teaspoons sugar or corn syrup (this is the secret for bigger bubbles!), and a wand — you can use store-bought wands, pipe cleaners bent into circles, a flyswatter, or even a slotted spatula.
How to do it: Gently stir the water, dish soap, and sugar together in a bowl or shallow dish. Let it sit for about 10 minutes — this lets the sugar dissolve and the solution thicken. Dip your wand and blow slowly for giant, iridescent bubbles that seem to float forever. Want to take it up a notch? Make a giant bubble wand by tying two straws together with a piece of yarn to form a loop — you'll get bubbles the size of beach balls! Set up a "bubble station" in the backyard and let the kids chase, pop, and create to their hearts' content.
8. Rock Painting
Rock painting might be the most satisfying low-cost craft out there. It's incredibly simple, deeply calming (even for wiggly kids), and the results are cute enough to display in the garden or hide around the neighborhood for others to find. The rock-painting "kindness rocks" movement is huge — kids love the idea of making something that will brighten a stranger's day.
Materials needed: Smooth, flat rocks (collect them on a nature walk or buy a bag at the craft store for $3–$4), acrylic paint or paint pens (paint pens are much easier for little hands), clear outdoor sealer or Mod Podge (optional, for weatherproofing), and paintbrushes if using bottled paint.
How to do it: Wash and dry the rocks thoroughly. If using acrylic paint, apply a base coat (white or a light color makes subsequent colors pop) and let it dry completely. Then let the kids paint whatever inspires them — ladybugs, strawberries, galaxies, positive words, or funny faces. Paint pens are fantastic because they're less messy and allow for fine details. Once the paint is dry, brush on a layer of clear sealer to protect the design from rain. You can display the rocks in a flower pot, line a garden path, or take them to a park and hide them for other kids to find (join a "kindness rocks" Facebook group to see where the trend is active near you!).
9. Bird Feeder from Pine Cones
This classic craft is a wonderful way to connect with nature and teach kids about backyard wildlife. Pine cones are plentiful in most areas (or you can buy a bag at the craft store for a couple of dollars), and the process is so simple that even toddlers can help. Plus, watching birds visit the finished feeder is a reward that keeps giving all summer long.
Materials needed: Pine cones (one per child), smooth peanut butter or vegetable shortening (for nut-free options), birdseed (a small bag is about $3), string or yarn, a butter knife or popsicle stick for spreading, and a shallow dish or pie plate for the birdseed.
How to do it: Tie a length of string around the top of each pine cone, leaving enough to hang it from a tree branch. Spread peanut butter all over the pine cone, pushing it into the crevices with a knife or popsicle stick. Roll the coated pine cone in a dish of birdseed, pressing gently so the seeds stick. Hang the feeder from a tree branch where you can see it from a window, and wait for the birds to discover it. Keep a bird identification chart nearby so the kids can identify their visitors — chickadees, finches, and cardinals are common guests. Refill as needed throughout the summer!
10. Sand Art Bottles
Sand art bottles are mesmerizing to make and beautiful to display. Layering colored sand in a clear container creates a striking visual that looks much harder than it actually is. The best part? You can use leftover sand from a beach trip or dye your own with regular craft sand from the dollar store.
Materials needed: Craft sand in 3–5 colors (or white sand with food coloring), clear bottles or jars with narrow necks (small water bottles, spice jars, or test tubes work great), a funnel or rolled-up paper, and a small stick or skewer for making patterns.
How to do it: If you're dyeing your own sand, put 1/2 cup sand in a zip-top bag, add 4–5 drops of food coloring, seal and shake until the color distributes, then spread on a baking sheet to dry. Layer the colored sand in your bottle using a funnel — pour a layer of one color, tilt the bottle slightly, and pour the next color so it lands at an angle for a zigzag effect. Use a skewer to poke down into the layers and create swirls or wavy patterns. Fill the bottle almost to the top, but leave a little space. Cap it tightly and you have a gorgeous piece of "art" that the kids can be genuinely proud of. These make wonderful gifts for grandparents, too!
11. Suncatchers
Suncatchers capture the summer light in the most magical way. They're essentially stained glass for kids — simple enough for toddlers, lovely enough for wall art. And since they rely on sunlight to really shine, they're the perfect summer craft project.
Materials needed: There are two easy methods. Method 1 (contact paper): clear contact paper, tissue paper in bright colors, scissors, and a paper plate with the center cut out (as a frame). Method 2 (beads): clear plastic lids or a suncatcher kit, oven-safe beads (Pony beads or Perler beads), and string or ribbon for hanging.
How to do it (Contact Paper Method): Cut a large square of contact paper and peel off the backing. Stick it sticky-side-up on a table with tape. Let the kids tear or cut tissue paper into small pieces and arrange them on the contact paper. Once the design is complete, place the paper plate frame on top, then cover with another layer of contact paper (sticky-side-down). Trim the edges and punch a hole at the top for hanging. Hang in a sunny window and watch the colors glow. Bead Method: Arrange plastic beads in a metal cookie cutter or silicone mold on a parchment-lined baking sheet. Bake at 400°F for about 10–15 minutes until the beads melt together, then let cool completely. The melted beads form a translucent, stained-glass-like suncatcher. String a ribbon through and hang it up.
12. Fairy Garden
A fairy garden is a miniature world that kids can build, arrange, and rearrange all summer long. It sparks imaginative play like nothing else — suddenly the backyard is populated by tiny fairies, little woodland creatures, and pint-sized furniture made from acorn caps and twigs. The beauty is that it grows and changes as the kids add new elements.
Materials needed: A shallow container or flower pot, potting soil, small plants (succulents or moss work beautifully), pebbles or small stones, and tiny accessories like miniature furniture (found at dollar stores or made from twigs, bottle caps, acorns, and pine cones).
How to do it: Fill the container with potting soil and plant a few small succulents or a patch of moss to create the "landscape." Arrange pebbles to form a path leading to a tiny "door" (a bottle cap or a painted pebble works great). Add a small twig "bench," an acorn cap "bowl," and a pine cone "tree." Let the kids decide where everything goes — the fairy garden is their little world. They can add new elements every time they find something interesting outdoors. A small sign that says "Fairy Village" or "Welcome" personalizes it further. Keep it on a porch or windowsill where the fairies (and neighborhood birds) can visit.
13. Sponge Water Bombs
Water balloon fights are great, but picking up all those tiny rubber pieces afterward? Not so much. Enter the sponge water bomb — reusable, eco-friendly, and arguably even more fun. They hold way more water than a balloon, they're soft enough for younger kids, and they last all summer long.
Materials needed: Kitchen sponges (the rectangular kind, not the scrubby ones — a pack of 6 is about $2), scissors, and string or zip ties.
How to do it: Cut each sponge lengthwise into 4 strips. Stack the strips from two or three sponges (matching colors is fun but not necessary). Tie a piece of string tightly around the center, or use a small zip tie, and fluff the ends to form a ball shape. That's it! Toss the sponge bombs into a bucket of water, let them soak for about 10 seconds (they absorb an incredible amount of water), and they're ready for battle. They're soft enough to throw at siblings without tears, heavy enough to fly straight, and when the fight is over, just toss them in the sun to dry for next time. Make a whole batch — you'll need them.
14. Cardboard Box Fort
Ask any parent: the best toy is often an empty box. A cardboard box fort takes that concept and runs with it. Save up boxes from online deliveries for a couple of weeks (or ask at a local appliance store — they're usually thrilled to give away refrigerator boxes), and you'll have everything you need for hours of imaginative play.
Materials needed: Cardboard boxes of various sizes, packing tape or duct tape (duct tape is stronger), scissors or a box cutter (adults only for cutting), and optional decorations like markers, paint, streamers, or old sheets to drape over the top.
How to do it: Clear a space in the living room or backyard. Arrange the boxes to form a structure — a castle, a spaceship, a pirate ship, a playhouse. Tape the boxes together securely, especially at the joints. Cut out doors and windows (adult job!). Let the kids decorate the fort with markers, paint, or whatever craft supplies you have on hand. Drape an old sheet over the top for a roof. Stock the inside with pillows, blankets, snacks, and books. The fort will likely be the center of summer activity for days — my kids eat lunch in theirs, read in theirs, and have even napped in there. When they're done, break it down and recycle it with no guilt whatsoever.
15. DIY Kites
There's something magical about watching a kite you made yourself soar through the sky. DIY kites are surprisingly easy to build with common household materials, and they teach kids about wind, lift, and a little bit of physics along the way. Even if they don't fly perfectly, the process of making and testing them is a wonderful summer afternoon activity.
Materials needed: A plastic trash bag or a large sheet of tissue/butcher paper, two thin wooden dowels or straight sticks (about 18–24 inches long), string or kite string, tape (duct tape or packing tape works well), scissors, and markers or stickers for decorating.
How to do it: Create a cross shape with the two dowels — the longer one is the vertical spine, the shorter one is the horizontal crossbar (positioned about 1/3 of the way down from the top). Secure the cross with string and a dab of glue. Lay the frame on your plastic bag or paper and cut the sail material, leaving a 1–2 inch border around the frame. Fold the border over the frame and tape it down securely. Tie your kite string to the cross point where the dowels meet. Cut a long strip of plastic or ribbon for the tail and tape it to the bottom of the kite. Decorate with markers or stickers. Find an open field on a breezy day, hold the kite up, and run into the wind. Adjust the tail length if the kite wobbles or spins. The first successful flight will have everyone cheering!
16. Tin Can Stilts
Tin can stilts are a blast from the past that kids still absolutely love. They're simple to make, cost next to nothing (especially if you're already using canned goods), and they provide a fun gross-motor challenge. Walking on them takes practice, which means the kids will keep at it until they master it — a perfect perseverance-building activity.
Materials needed: Two empty tin cans (same size — 15-ounce vegetable cans work well), thick string or clothesline (about 4 feet per can), a nail and hammer (adults only), and optionally paint or construction paper to decorate the cans.
How to do it: Wash the cans thoroughly and remove any labels. Let the kids decorate the cans with paint or wrapped construction paper if desired. An adult uses the nail and hammer to punch two holes on opposite sides of each can, about 1/2 inch from the open top. Thread the string through both holes so the can sits in the middle of the length, and tie a knot on the inside of each hole to secure it. Adjust the string length so that when the child holds the ends and steps onto the cans, the string comes up to about waist height. To use, the child stands on the cans, pulls the strings taut, and walks by lifting each can in turn. Start on grass — it's softer for inevitable tumbles. Within an afternoon, most kids can walk across the yard on their "stilts."
17. Leaf Rubbing Art
Leaf rubbing is the kind of craft that never gets old. It's meditative, it teaches kids to notice the intricate veins and textures in nature, and the results are genuinely lovely. You can turn your leaf rubbings into greeting cards, wall art, or even wrapping paper.
Materials needed: Fresh leaves with prominent veins (collect them on a walk — look for large leaves like maple, oak, or hosta), thin white paper (copy paper or sketch paper works perfectly), and crayons with the paper removed (sidewalk crayons or broken crayons are ideal).
How to do it: Place a leaf vein-side-up on a flat, hard surface. Lay a piece of paper over the top. Hold the paper steady with one hand and rub the side of a crayon gently over the area where the leaf is. The leaf's veins and shape will magically appear on the paper! Use different colors for different leaves, or try overlapping multiple leaves on the same page for a layered forest effect. Experiment with different pressures — light rubbing gives a delicate outline, heavy rubbing produces a bold, saturated image. Trim the finished rubbings and mount them on colored construction paper for a beautiful nature gallery. You can also cut out the leaf shapes and glue them onto cards to send to grandparents or friends.
18. Sock Puppets
Sock puppets are the ultimate recycled craft. Everyone has a lonely sock that's lost its mate, and with a few basic supplies, that orphan sock becomes a character with its own personality. The puppet show afterward is worth the price of admission — kids come up with the most hilarious dialogues and plots.
Materials needed: Clean socks (any color or pattern), googly eyes, felt or fabric scraps for mouths and ears, yarn or ribbon for hair, pom-poms for noses, fabric glue or a hot glue gun (adult supervision for hot glue), and scissors.
How to do it: Slip a sock over your hand and make a "talking" motion — the fold where your fingers meet your thumb becomes the mouth. Use fabric glue to attach googly eyes above the mouth fold. Cut a crescent-shaped piece of red or pink felt for the inside of the mouth and glue it inside the fold. Add yarn hair by gluing strands to the top of the sock. Glue on pom-pom noses, felt ears, or any other features. Let each child name their puppet and create a personality — is it shy? Loud? Silly? A hungry monster that only eats broccoli? Set up a "stage" by draping a blanket over the back of a couch or a table, and let the puppet show begin. It's incredible how much language and social skill development happens through puppet play.
19. Moon Sand
Moon sand (also called cloud dough) is a sensory play material that feels like damp beach sand but holds its shape like clay. It's incredibly easy to make, costs pennies compared to store-bought kinetic sand, and provides hours of quiet, focused play. It's one of those crafts that doubles as an activity — once you make it, the kids play with it for days.
Materials needed: 8 cups all-purpose flour, 1 cup baby oil or vegetable oil (baby oil is most commonly recommended and gives a lovely scent), a large mixing bowl, and optional food coloring or glitter for customization. A shallow plastic bin or baking sheet makes a great play surface.
How to do it: Pour the flour into a large bowl. Slowly add the oil while mixing with your hands or a spoon. Keep mixing until the texture feels like damp sand — it should hold its shape when squeezed and crumble when pressed lightly. If you want colored moon sand, add 6–8 drops of food coloring to the oil before mixing. Spread the moon sand in a shallow bin and provide cups, spoons, cookie cutters, and small toys for building. The kids will mold castles, shape animals, and practice scooping and pouring for hours. Store in an airtight container or zip-top bag — it keeps for months! If it dries out, just add a tiny bit more oil and mix it in.
20. Ice Cube Painting
Ice cube painting is the craft that saves the hottest days. It combines art with a cool, sensory experience — the ice glides across the paper leaving bright trails of color, and the melting process creates beautiful watercolor effects. It's messy in the best possible way, and it's so simple to set up.
Materials needed: An ice cube tray, water, food coloring or liquid watercolors, short wooden sticks or toothpicks (as "handles"), and thick paper or watercolor paper (printer paper will get too soggy).
How to do it: Fill an ice cube tray with water. Add 3–4 drops of food coloring to each section and stir with a toothpick. Place a short wooden stick or a folded-over piece of tape with a toothpick inside each cube section (this becomes the handle once frozen). Freeze for 4–6 hours until solid. Pop out the colored ice cubes, give one to each child, and let them "paint" on thick paper. The ice melts as they work, leaving a trail of watercolor behind. The cubes are easiest to grip when wrapped in a paper towel or cloth (it also catches the drips). Kids can blend colors by layering different cubes on the same spot, creating beautiful marbled effects. For an outdoor variation, paint directly onto the driveway or sidewalk — the colors will be vivid and temporary, washing away with the next rain.
A Final Word on Summer Crafting
And there you have it, mama — 20 cheap and easy summer craft ideas that will save your sanity, spark your kids' creativity, and fill your summer days with laughter instead of boredom. The best part about this list? Almost every single idea uses materials you already have or can grab for pocket change at the dollar store. No fancy supplies, no complicated instructions, no pressure to make something "perfect."
Remember: the goal isn't a Pinterest-worthy finished product. The goal is connection, creativity, and the joy of making something together. Let the kids lead. Let them get messy. Let them make mistakes and try again. Some of the best craft memories come from projects that didn't turn out quite right — the blue-and-purple tie-dye shirt that looks like a storm cloud, the slightly lopsided bird feeder that still attracts chickadees, the moon sand castle that collapsed into a glorious crumbly mess.
Summer is short, but these memories will last a lifetime. So pick a craft (or two, or five), gather your supplies, and make this the summer your kids remember as the one where Mom said yes to glitter, paint, and a little bit of chaos. You've got this!
What's your family's favorite summer craft? Drop it in the comments below — I'm always looking for new ideas to try with my own little ones!

