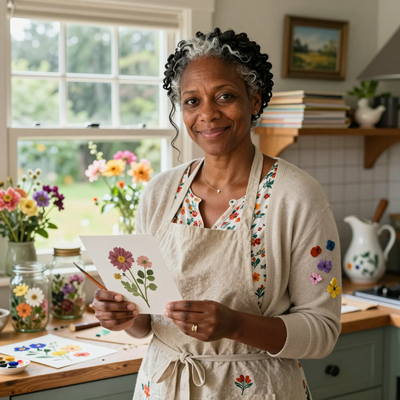
Introduction
If you have ever stood in the art supply aisle, looked at the rows of colorful acrylic paint tubes, and felt both excited and overwhelmed, you are in good company.
Acrylic painting is one of the most accessible and rewarding art forms for beginners. The paints are affordable, they dry quickly, and they clean up with just soap and water.
You do not need years of training or a studio full of equipment to start making paintings you are proud of.
All you need is a willingness to try, a few basic supplies, and a little guidance.
This article will walk you through the essential techniques every beginning acrylic painter should know, from choosing your materials to finishing your first painting.
There is no pressure to be perfect — just paint, explore, and enjoy the process.
What You Will Need
One of the best things about acrylic painting is how affordable it is to start. A beginner can buy everything needed for a first painting for about thirty dollars. Here is what to look for.
Acrylic paint. Start with a basic set of five to eight colors. Look for student-grade acrylics from brands like Liquitex Basics, Arteza, or Michaels brand Craft Smart.
These are affordable and good quality for learning. A starter set in tubes or jars with colors like titanium white, mars black, cadmium red, ultramarine blue, cadmium yellow medium, burnt sienna, and viridian green will let you mix virtually any color you need.
Brushes. A set of synthetic bristle brushes in a few basic shapes is all you need.
Look for a flat brush (half inch), a round brush (size 6 or 8), a filbert brush, and a small detail brush.
Synthetic brushes work beautifully with acrylic paint and are much cheaper than natural hair brushes.
Canvas or paper. For practice, canvas paper pads are an excellent budget-friendly option. They have the texture of canvas but come in a pad and cost much less than stretched canvases.
Stretched canvases are wonderful for finished pieces but save them for when you are ready to frame your work.
A pad of canvas paper costs about eight dollars for ten sheets.
A palette. A disposable paper palette pad or a simple white ceramic plate works perfectly. You need a surface for mixing colors, and it should be white so you can see the true colors of your paint.
A cup of water and a rag. Keep a jar of clean water for rinsing your brushes and an old rag or paper towel for drying them. Change the water frequently — muddy water makes muddy colors.
Understanding Your Paints
Acrylic paint is a water-soluble polymer that dries into a permanent, water-resistant film. This means you have a limited window to work with the paint while it is wet — usually ten to twenty minutes, depending on the thickness of your application and the humidity in your room.
As the paint dries, it darkens slightly, so the color you mix on your palette will be a shade or two lighter than what appears on your canvas.
This takes some getting used to. Many beginners mix a color, apply it, and are surprised when it dries darker.
The solution is to mix a test amount first and let it dry before committing to a large area.
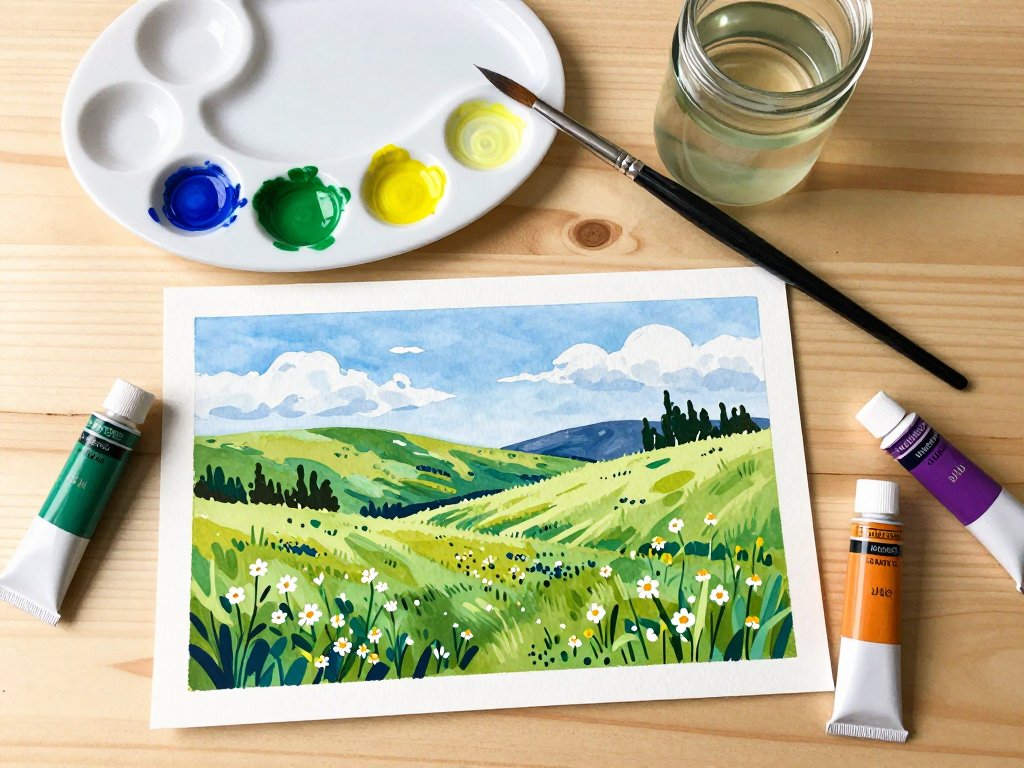
Essential Technique 1: Color Mixing
Color mixing is the single most valuable skill you can develop as a painter. With just the three primary colors — red, yellow, and blue — plus white and black, you can mix every other color.
Start by making a simple color wheel on a piece of canvas paper. Paint a circle divided into twelve segments.
At every fourth segment, place your primary colors: yellow at the top, red to the right, and blue at the bottom.
Between each pair of primaries, mix the colors that result. Between yellow and red, you get orange.
Between red and blue, you get violet. Between blue and yellow, you get green. Between each of those, you get the tertiary colors: yellow-orange, red-orange, red-violet, blue-violet, blue-green, and yellow-green.
Making a color wheel by hand is one of the best exercises you can do as a beginner.
It teaches you how colors relate to each other, how to create browns and grays by mixing complements, and how to control the value and intensity of your mixtures.
For everyday painting, remember a few simple rules. To lighten a color, add white. To darken a color, add a little of its complement (the color opposite on the color wheel) rather than black.
Adding black can make colors look muddy and flat. For example, to darken red, add a touch of green.
To darken blue, add a touch of orange. The result is a richer, more natural dark tone than black alone would produce.
Essential Technique 2: Brush Control and Paint Consistency
How you load your brush and how much water you add to your paint changes everything about your painting.
Acrylic paint can be used in three basic consistencies. Thick, straight from the tube, is called impasto.
It creates textured, bold marks that stand up from the canvas. Thinned with a little water, it becomes a creamy consistency perfect for broad areas and smooth blending.
Thinned with more water, it becomes a wash similar to watercolor, ideal for underpaintings, glazes, and soft backgrounds.
Practice changing the consistency of your paint and notice how your brush behaves differently with each one.
A flat brush loaded with thick paint makes a very different mark than the same brush loaded with a thin wash.
Getting the paint consistency right takes a bit of practice. If your brush drags and leaves streaks, the paint is too thick. Add a few drops of water at a time until it flows smoothly. If the paint drips off your brush, you have added too much water. Blot it on a rag and add a little more paint to thicken it back up. With time, you will develop an instinct for the right consistency by sight and feel alone.
Hold your brush near the ferrule (the metal band) for detailed work, and near the end of the handle for loose, expressive strokes. The further your hand is from the bristles, the more movement and freedom you have. Experiment with different grips and notice how they change your marks.
Essential Technique 3: Underpainting
An underpainting is a thin, monochromatic layer of paint that you apply to your canvas before you begin the actual painting.
It serves several purposes. It covers the white of the canvas so you are not painting on a bright white surface, which can make colors look different than intended.
It establishes the composition and values (light and dark areas) of your painting before you add color.
And it gives you a roadmap to follow as you paint. To create an underpainting, thin a dark color like burnt sienna or ultramarine blue with plenty of water and sketch out the basic shapes and values of your composition.
Do not worry about details at this stage — just block in the main areas of light and shadow.
Let it dry completely before you begin painting over it, which usually takes about fifteen minutes for a thin layer.
Essential Technique 4: Working from Background to Foreground
One of the most important habits you can develop is painting from the background forward.
Start with the sky or background elements, then middle-ground shapes, and finally foreground details. This is because acrylic paint is opaque enough to cover earlier layers.
By painting the background first, you can paint the foreground on top without leaving gaps or having to carefully paint around objects.
For a simple landscape, you would paint the sky first, then the distant hills, then the closer trees, and finally the flowers or details in the foreground.
Each layer covers the edges of the previous one, creating a clean, natural look.
Essential Technique 5: Blending and Soft Edges
Acrylic dries quickly, which makes blending a bit different than with oil paints. The key is to work fast and keep your paint moist.
To blend two colors, apply them side by side on your canvas, then use a clean, dry brush to gently stroke back and forth across the boundary where they meet.
Work quickly, before the paint starts to dry. If the paint becomes tacky, a light mist of water from a spray bottle can reactivate it for a few more seconds of blending.
Another technique for soft edges is dry brushing. Load a dry brush with a small amount of paint, then brush it lightly over the edge you want to soften.
There are also blending mediums available that extend the drying time of acrylic paint, giving you more time to work.
Many beginners find a bottle of acrylic glazing medium or retarder helpful for larger pieces.
Essential Technique 6: Layering and Glazing
One of the great strengths of acrylic paint is how well it layers. Because each layer dries quickly and is water-resistant once dry, you can build up complex, luminous effects by painting thin transparent layers called glazes over dried opaque layers.
To make a glaze, mix a small amount of paint with a larger amount of water or glazing medium.
The mixture should be thin and transparent, like colored water. Paint this over a dry layer of a different color.
The light passes through the transparent glaze, reflects off the layer beneath, and creates a rich, glowing effect.
A red glaze over a yellow underpainting creates a warm, vibrant orange. A blue glaze over a gray underpainting creates a cool, atmospheric effect.
Glazing takes practice, but it is one of the most satisfying techniques in acrylic painting.
A Simple First Painting: Sunset Landscape
Here is a beginner-friendly project that brings together all of these techniques. On a small canvas or canvas paper, paint a simple sunset landscape.
Start with a thin wash of yellow at the horizon line, blending upward into orange and then into a deep purple or blue at the top of the canvas.
Let this dry. Then paint a dark silhouette of hills or mountains at the horizon using a mix of ultramarine blue and a touch of burnt sienna.
Let this dry. Finally, paint a simple foreground shape — a tree silhouette, some grass, or a fence — using pure mars black.
The result is a gorgeous, atmospheric painting made from just four colors and three simple layers.
It is the kind of project that builds confidence and teaches the fundamental techniques of blending, underpainting, and working in layers.
Common Beginner Questions and Encouragement
My painting looks muddy. This usually means you are overmixing colors on your canvas or not cleaning your brush enough between colors.
Rinse your brush thoroughly and blot it on a rag between each color change. Also, try using fewer colors — a limited palette of five or six colors forces you to mix intentionally rather than grabbing every tube.
The paint dries too fast. Mist your palette with water from a spray bottle to keep the paint workable. You can also use a stay-wet palette, which has a damp sponge under a special paper that keeps acrylic paint moist for hours.
My brush strokes are visible. This is not necessarily a problem — visible brush strokes are part of the charm of acrylic painting. If you want a smoother finish, try using more water or a flow medium, or sand lightly between layers with fine sandpaper.
I am afraid to ruin my canvas. This is the most common fear for beginners.
Here is a secret: you can paint over anything. Acrylic is opaque enough to cover mistakes completely.
If you do not like what you have painted, let it dry, paint over it with white, and start again.
Every mistake is practice, and practice is how you improve.
Conclusion
Acrylic painting is a journey, not a destination. Your first painting may not look like the landscapes you see on social media, and that is perfectly fine.
Every painter you admire started exactly where you are now, with a palette full of colors they were learning to mix, brushes they were learning to control, and canvases they were learning to trust.
The most important thing is to keep painting. Set aside twenty minutes a few times a week.
Paint something small. Try a new technique each time. Notice what you enjoy and what challenges you.
Over time, your skills will grow naturally, and one day you will look at a painting you made and feel genuinely proud.
That moment is worth every bit of practice it takes to get there.