Introduction
My grandmother kept a painted tea tin on the shelf above her stove. It was dull green, dented at one corner, and across the lid she had painted a single pink rose.
I used to sit on the counter and stare at it while she made tea. The rose was not careful. Some petals were thicker than others, and one edge had smudged where her thumb caught it.
It was still the best rose I had ever seen.
When I finally tried one myself, at thirty-four, on a canvas board propped against a jam jar, it came out looking like a cabbage. A purple cabbage, if I am honest. Lumpy in the middle, frilly at the edges.
That first cabbage taught me something useful. Roses are not painted by drawing petals. They are painted by stacking soft shapes in a particular order.
Once I understood the order, the cabbage problem disappeared. What follows is that order, along with the brush habits that make it work.
Why Roses Intimidate Beginners (And Why They Forgive You)
A rose looks like a hundred petals. Nobody wants to paint a hundred of anything on a Tuesday evening.
But count the petals on a real open rose sometime. Most garden varieties show somewhere between twenty and forty, and you will only paint eight or ten of them clearly. The rest become suggestion.
Here is the part that surprised me. Roses hide mistakes better than almost any other flower.
Petals overlap in a spiral. Every edge has another edge tucked behind it, so a wobbly stroke gets covered by the next petal group.
Compare that to a leaf or a single daisy. One flat shape, one outline, and every waver in your hand is visible forever.
A rose is a stack of soft, forgiving shapes. That is a much kinder teacher.
It is also why beginners who can paint a decent rose often struggle with tulips. The rose was never asking for precision. It was asking for layering.
The Supplies, Kept Small
You do not need a full palette to start. Four colors will carry an entire rose, and three will get you surprisingly far.
Pick a warm red or pink for the main color. A deep purple or burgundy handles shadow, and it mixes into a richer dark than black ever will.
Titanium white is your light. Yellow ochre, just a little, keeps the pinks from turning candy-bright.
Skip black. Black dulls a rose faster than almost anything else, and burgundy does the shadow job with more life in it.
Here is the rest of the kit:
- A flat brush about half an inch wide, for blocking petals and laying down the base.
- A small round or filbert brush for edges, curls, and the tiny front petal.
- A canvas or canvas board, roughly 8x10 inches to begin.
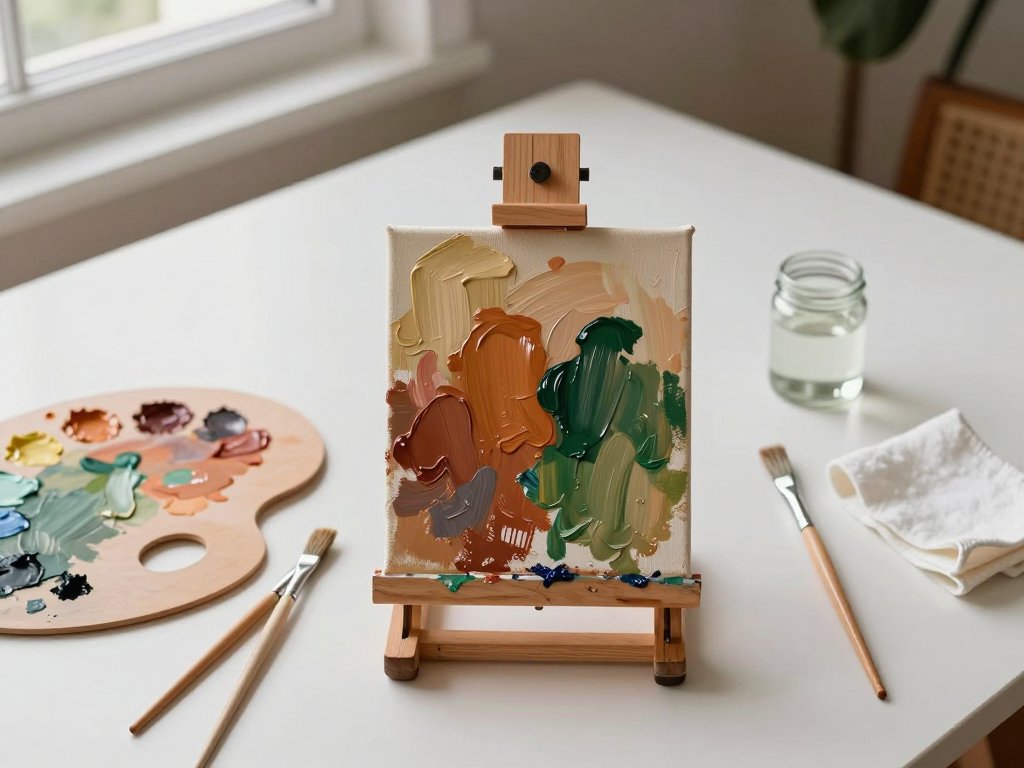
- A palette or a paper plate, plus a jar of water and a rag.
- A spray bottle, which you will use more than you expect.
A student-grade acrylic is fine to start. The pigment is a little less dense than artist grade, but the behavior is the same, and you will not feel wasteful while practicing.
Keep the brushes cheap and the canvas small for now. Expensive materials make beginners timid, and timid brushstrokes look exactly like timid brushstrokes.
Paint Consistency: Heavy Cream, Not Watery
This is the single habit that separates a soft rose from a muddy one. Your paint should leave the brush like heavy cream or thick yogurt.
Not dripping. Not stiff. When you drag the brush across the palette, the stroke should hold a soft ridge and then slowly settle.
Watery paint causes mud for a specific reason. Acrylic is pigment held in a binder, and water thins the binder along with the pigment.
Past a certain point the film cannot hold together. The pigment settles into whatever is underneath, the stroke goes translucent and grey, and the layer you just painted sinks into the layer below.
You can feel it happen. The brush starts dragging water instead of depositing color, and the canvas looks wet rather than painted.
Fix it by picking up more paint, not more water. A damp brush and a loaded belly will thin a stroke far more gently than a wet brush.
When you do need to loosen the mix, add a drop of water at a time and stir with the brush. Two drops is usually enough for a whole session.
Wet-on-Dry, and Keeping the Palette Alive
Acrylic dries fast, which is a gift for this method. You want to work wet-on-dry: each petal group goes onto paint that has already stopped being tacky.
Wet paint over wet paint blends into a single smear. Dry paint underneath lets a new stroke sit on top with a clean edge you can later soften on purpose.
So work one petal group, then wait. Two or three minutes with a hairdryer on cool, or five minutes with a cup of tea, is plenty.
Your palette is the thing that dries out, not the canvas. Mist the puddles with the spray bottle every few minutes and cover them with an upside-down plate between passes.
Never spray the canvas itself. Water beading on a half-dry surface will bloom and leave pale rings in your petals.
The Core Idea: Back to Front, Dark to Light
Every rose in this method is built in the same sequence, and the sequence matters more than the brushwork.
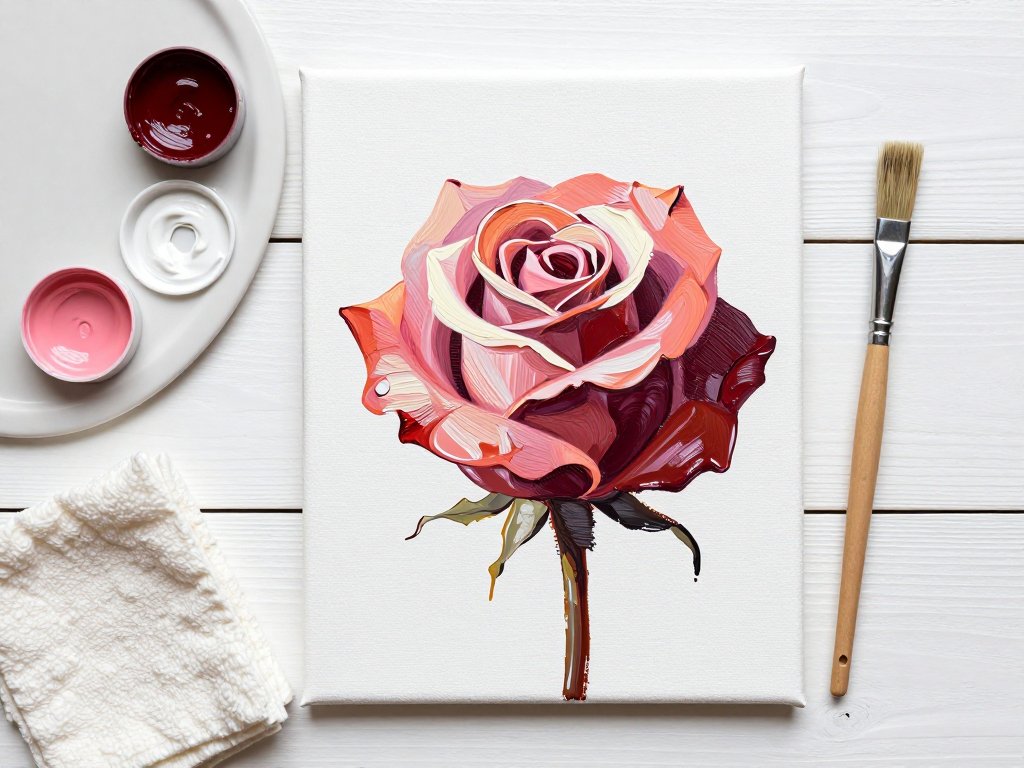
You start with a dark shadow mass. Then the outer petals in a mid-tone. Then the inner spiral, which is the part people think of as "the rose."
Then the edges soften. Then thin glazes go on for depth. Highlights come last, and the smallest front curl closes the whole thing.
Read that list again and notice what is missing: there is no step where you draw petals first. You are not filling in shapes. You are stacking light on top of shadow.
That is why the order cannot be shuffled. If you paint the pale outer petals before the dark base, you have nothing to paint the shadows into.
Think of it as building a small bowl of shadow, then covering that bowl with petal shapes until only the deepest parts of the dark are still showing.
Steps One and Two: The Dark Base and the Outer Petals
A Loose Dark Base
Load your flat brush with the burgundy or deep purple and paint a shallow bowl shape where the rose will sit.
Not a circle. A bowl, or a cup seen slightly from the side, wider at the top than the bottom.
Keep it loose and slightly irregular. Two or three quick strokes, edges left soft and unfinished.
This shape is the shadow inside the bloom, and it will be almost entirely covered. That is the point. You are building the dark the light will sit against.
Let it dry completely before the next step. A wet base will lift under the mid-tone and turn the whole rose mauve.
Blocking the Outer Petals
Now mix your warm red or pink with a touch of the burgundy. You want a mid-tone, a shade darker than the color you actually see in the flower.
Load the flat brush on one corner and pull curved strokes around the outside of the dark bowl. Follow the direction a petal would grow.
Outer petals cup outward. So the stroke starts at the outer edge and sweeps toward the center, curving as it goes.
Two strokes per petal is usually enough. One for the body, one short one for the turning edge.
Leave gaps. Let slivers of the dark base show through between petals, because those slivers are the crevices.
Do not outline anything. The moment you draw a petal outline and fill it, the painting starts to look like a coloring book.
Work your way around the whole bloom in this way, slightly overlapping each petal onto the one before it.
Step Three: The Inner Spiral in Three Shapes
The center of a rose is where beginners freeze, because it looks like a maze. It is only three shapes, repeated in a spiral.
Learn them once and the center stops being frightening.
The C Shape
A C is a curved stroke, open on one side, like the edge of a cup. It makes the petals that wrap around the center from behind.
Load the small round or filbert brush and pull the C in one motion, turning your wrist rather than your fingers.
The Comma
A comma is a C that tapers. Start with pressure, release as you curve, and lift the brush at the tail.
Commas make the petals that curl forward and inward. They are the shapes that give a rose its soft, folding quality.
The Scalloped Edge
Some rose petals have a slightly ruffled top edge. Paint the petal body first, then add two or three small bumps along the upper rim with the tip of the brush.
Keep these tiny. A scallop the size of a fingernail reads as a petal. A scallop the size of a thumb reads as a ruffle on a curtain.
The Order to Add Them
Now place them in sequence, working from the back of the spiral to the front.
- Add two or three C shapes at the back of the center, tucked behind the existing petals.
- Add C shapes down each side, letting them overlap the previous ones by about a third.
- Add two commas on the upper left and upper right, curving toward the middle.
- Add the front petals last, the ones that curl over and hide the center.
- Leave a small dark gap in the very middle. The spiral needs a shadow to curl into.
Load the brush with two colors for these petals when you feel ready. Dip one corner in the pink and the other in the burgundy, then stroke.
The stroke will lay down a petal that is lighter on one side and deeper on the other, without any blending on your part.
Steps Four and Five: Soft Edges, Then Thin Glazes
Soften While the Paint Is Wet
While a petal is still workable, take a clean brush, dip it in water, and dry it on the rag until it is only damp.
Drag that damp brush lightly along one edge of the petal. The edge will blur and settle into the petal beside it.
Do this to two or three edges, not all of them. A rose needs both soft and crisp edges, and a painting where everything is blurred looks out of focus.
If the paint has already skinned over, leave it. Scrubbing at half-dry acrylic lifts the film and leaves a pale scar.
You can also create a lost edge by dragging a dry brush across a boundary. It pulls a little color across and softens the transition without water.
Glaze Thinly, and Know When to Stop
A glaze is a transparent layer, mixed thin enough to see through. One drop of water into a pea of paint is roughly right.
Brush it over a dried petal group to deepen a crevice or to unify a color that has gone patchy.
Each glaze should be barely visible when it goes on. Three thin glazes build more depth than one heavy one, and they dry without streaking.
Glaze the shadow side of the bloom, not the whole thing. Light is what makes the rose turn, and glazing everywhere flattens it again.
Knowing when to stop is a skill worth practicing. Here is the test I use.
Step back about three feet. If the rose reads as a rose from there, put the brush down.
If a new stroke would only tidy something nobody will see at arm's length, skip it. Most ruined roses are overworked, not underworked.
Step Six: Highlights and the Front Curl
Highlights go on last, once everything beneath is dry. This is the step that makes the bloom look lit rather than painted.
Mix titanium white with a touch of your pink. Pure white is too cold and too bright, and it will look like snow on the petals.
Load the small brush with very little paint and drag it along the upper curve of a few petals, the side facing your light source.
A highlight belongs on the crest of a petal, not in the middle of it. One short stroke, following the curve.
Do three or four petals only. Scattering highlights across every petal makes the rose look wet and slightly plastic.
Then the front curl. This is a single small comma shape at the front center of the rose, curling over the spiral.
Paint it with a mix of the mid-tone and a little white, and give it a thin dark line underneath where it lifts away from the petal below.
That tiny comma and its shadow are what make a viewer's eye read "rose" instead of "pink shape." It is the last thirty seconds of the painting and the most important thirty seconds.
Common Beginner Mistakes
Almost every disappointing first rose comes from one of four habits. All four are easy to break once you can name them.
- Painting petals as outlined shapes. An outline plus a fill reads as a cartoon. Build petals as overlapping strokes instead, and let the edges find each other.
- Too much white, too early. White added in the middle of the process kills the shadow structure. Save it for glazing and highlights, at the end.
- Working the whole canvas at once. Two half-finished roses look worse than one finished bloom. Finish one, then start the next.
- Over-blending until petals vanish. Softening three edges is right. Softening all of them erases the shapes you just built.
There is a fifth, quieter mistake: painting from imagination instead of from a photograph. Roses are strange shapes, and memory flattens them into a spiral of circles.
Put a real photo beside your canvas. You do not have to copy it. You just need something to check the petal directions against.
Troubleshooting and Practice
When Petals Look Flat, Colors Turn Muddy, or Edges Look Hard
Three problems come up again and again. Each has a specific cause.
- Petals look flat. Usually there is no value difference between the inner and outer petals. Deepen the base and the crevices, then bring the outer petals lighter.
- Colors turn muddy. Too much water, or too many colors stirred together on the canvas. Mix on the palette, keep the paint creamy, and let layers dry between passes.
- Edges look hard and cut out. Nothing was softened while wet. Next time, keep a clean damp brush in hand and blur two or three edges per petal group.
If a rose has already dried hard-edged, you can soften it slightly with a damp brush and a light scrub, but do not expect much. Acrylic film does not reopen easily.
The better fix is prevention. Keep the damp brush loaded and beside you from the first petal.
Three Roses at Four Inches
Before you paint anything large, paint the same rose three times on a small scale.
Four inches across, on canvas board or heavy paper. Twenty minutes each, no more.
The first one will be lumpy. The second will be better because your hand remembers the C stroke. The third is where the shapes start to feel natural.
Then move up to eight inches and paint it twice. The bigger surface changes the brush pressure and the amount of paint you need, and two attempts is enough to adjust.
Keep all five. Date them on the back. In a month you will want to see the difference, and you will not believe the first one was yours.
This is also why small canvas boards matter. Five practice roses at four inches cost less than one large stretched canvas, and you learn five times as much.
Sitting a Rose Over a Painted Background
A rose can go on top of a background you have already painted, and it often looks better there than on bare white.
The surface needs to be fully dry, matte, and free of gloss medium or varnish. Glossy acrylic will not hold a new layer reliably.
If the background is very smooth, sand it lightly with fine paper and wipe the dust away with a dry rag.
Sketch the rose's position with thinned paint rather than pencil, so no graphite shows through the petals.
Then paint the dark base directly over the background color. Do not cut a hole in the background first. The rose will sit on it, and the background will read as depth behind the bloom.
Conclusion
My grandmother's tea tin is on my own shelf now, still dented, the rose still a little smudged at one edge.
I understand it better than I did as a child. She was not painting a perfect flower. She was stacking dark and light in an order she had practiced enough times to trust.
That is all this method asks of you. A dark bowl, mid-tone petals, a spiral of C shapes and commas, softened edges, thin glazes, and one small curl at the front.
Paint it badly the first time. Paint it again next week. The third one will surprise you.
And if the tight, layered approach feels fussy in your hand, there is another way to paint flowers that lets the water do most of the work. The looser approach in these loose watercolor florals might suit you better, and the two methods teach each other.
For now, put a small board on the table, mix a bowl of shadow, and see what your hand does. There is no hurry, and no wrong first rose.