Introduction
My grandmother kept a jam jar of garden flowers on her kitchen windowsill all summer long. Sweet peas, daisies, whatever the bees had approved that week. She would fuss over them every morning, and I would watch the light catch the petals and wish I could paint them.
But I was terrified. Flowers seemed like the hardest thing in the world to paint — all those petals, all that detail. Every time I tried, I ended up with stiff, sad-looking blooms that belonged on a greeting card from 1982.
Then a friend who paints taught me a secret that changed everything: stop trying to paint every petal, and let the water do the work.
That is what loose watercolor florals are all about. You are not painting a botanical illustration. You are capturing the feeling of a flower — its softness, its color, its shape — with a few trusting brushstrokes. It is forgiving, it is fast, and it is genuinely beautiful.
If you have ever wanted to paint flowers but felt you were not good enough, this guide is for you. Let me show you how.
Why Loose Florals Are the Gateway to Watercolor
Watercolor has a reputation for being difficult, and it is earned — if you try to control it like a coloring book. But loose florals flip the script. Instead of fighting the paint, you partner with it.
The loose style is a natural fit for beginners for three reasons:
It is forgiving. A bloom that is not perfectly round is not a mistake — it is a flower with personality. In loose watercolor, the "happy accidents" are the whole point. There is no such thing as a wrong petal.
It is fast. A loose floral can be painted in ten minutes. You do not need hours of careful layering. This means you can practice more, and more practice is the real secret to getting good.
It is expressive. Loose florals have a soft, dreamy quality that tight, precise painting rarely achieves. That little wobble in the stem, that bleed of color at the petal's edge — those are what make a painting feel alive.
Think of it as the difference between photographing a flower and remembering it. We are going to paint the memory.
What You Really Need
Here is the honest supply list. You probably own most of it already.
Watercolor paper. This is the one thing worth spending money on. Ordinary printer paper buckles and pills the moment it gets wet. A pad of 140lb cold-press watercolor paper costs about eight to twelve dollars and makes everything easier. Even a small 6x8 inch pad is plenty to start.
Paints. A basic set of watercolor pans or tubes in five colors will do: a warm red, a pink or magenta, a yellow, a blue, and a green. Most budget sets include these. If you already own a set, use what you have.
Brushes. One round brush in a medium size — a size 8 or 10 — is genuinely enough to start. If you have a second, smaller round brush for details, even better. Skip the fancy brush sets for now.
Water and paper towel. Two jars of water — one for clean rinsing, one for dirty — and a paper towel to dab your brush.
That is the whole list. No masking fluid, no fancy palettes, no drawing skills required. If you can make a circle and a line, you can paint loose florals.
The Mindset: Let the Paint Do the Work
Before you put brush to paper, there is one mindset shift that matters more than any technique: you are not in charge of every drop.
Watercolor paint is alive. It moves, it blooms, it bleeds into the wet paper in ways you cannot fully predict. Loose florals are about setting the paint loose and then getting out of its way.
So give yourself permission to let go of control. Your first few flowers will be messy. Paint them anyway. The goal is not a perfect bloom on your first try — it is a loose, lovely one by your tenth.
I also want to encourage you to paint on scrap paper first. Not to "waste" good paper, but because practice sheets are where the magic happens. When you know a sheet is just practice, your hand relaxes. And a relaxed hand makes the best marks.
The First Wash: Leaves and Stems
Let us start with the easiest part — the greenery. Leaves and stems are simple shapes, and they will give you a feel for how watercolor behaves before you tackle a bloom.
Mix a green on your palette, then load your brush with plenty of water. You want the paint to flow — a dry brush makes scratchy, stubborn marks.
For a stem, touch the brush to the paper and pull a gentle, slightly curving line downward. Do not push the brush; let it glide. The line does not need to be straight. In fact, a slight curve looks more alive.
For a leaf, press the brush down firmly at the base, then lift and drag it to a point. One stroke, base to tip. That single stroke, with the natural variation of pressure, makes a surprisingly convincing leaf.
Paint two or three leaves and stems on your practice sheet. Notice how the water dries lighter than it looks when wet. That is a lesson worth learning now, before it surprises you in the middle of a flower.
Painting Simple Blooms: The Blob and Dot Method
Here is the technique that unlocked loose florals for me, and I call it the blob and dot method because that is exactly what it is.
Load your brush with color — pink, say, or a soft coral. Touch it to the paper where you want the center of the flower to be, and let it bloom into a soft, irregular circle. That is your blob.
While it is still wet, touch a slightly darker version of the same color into the blob in two or three places. The dark color will bleed into the wet paint, creating soft shadows and petal suggestions all by itself. Those touches are your dots.
Then, with a clean, damp brush, pull gently outward from the blob at a few points to suggest petals. Do not overdo it — three or four pulls is plenty. The wet paint will soften them into natural-looking edges.
The whole flower takes about thirty seconds. And here is the wonderful part: no two will ever look the same. That is the charm of the loose style — every bloom is a one-of-a-kind.
Three Flowers to Start With
Different flowers ask for slightly different shapes. Here are three easy ones to practice, starting with the simplest.
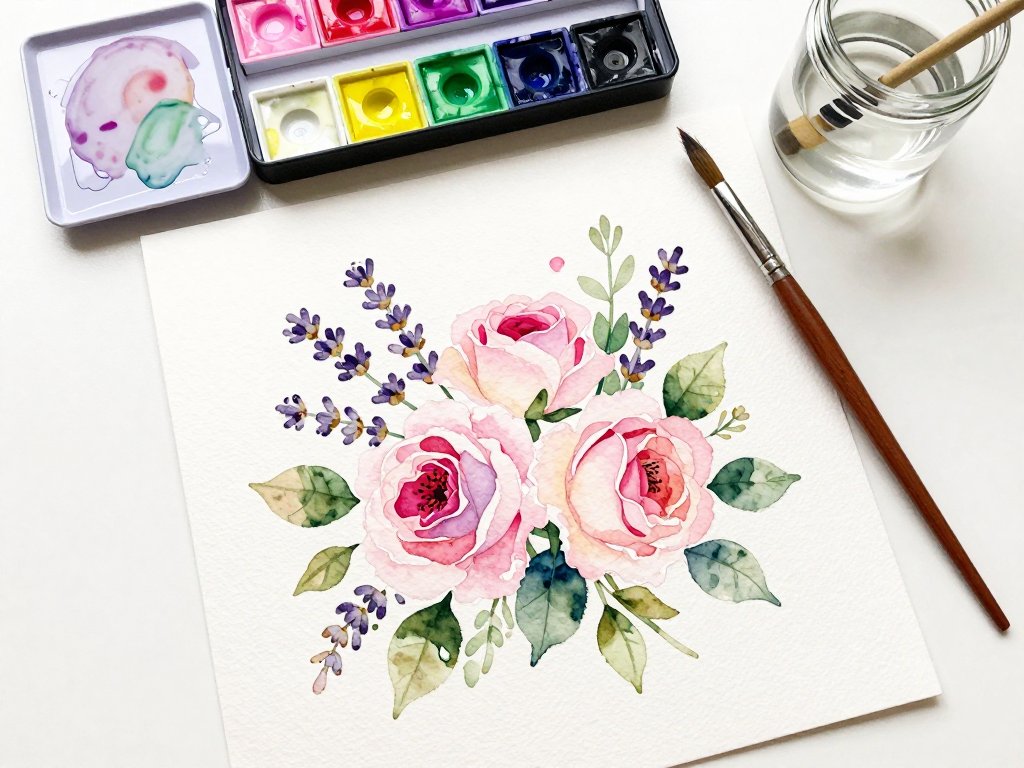
1. The rose, as a series of circles. Start with a small blob of color, let it dry, then add a slightly larger, looser circle around it in a lighter shade.
A third, softest circle around that finishes it. The overlapping rings read as a rose from across the room, with none of the fiddly spiral detail.
2. The tulip, as a cup. Paint a small, rounded "U" shape with the brush, then fill it in.
While wet, drop a tiny touch of darker color at the base of the cup for depth.
Add a short stem and a simple leaf. A tulip is one of the most forgiving flowers to paint — a wobbly cup just looks like a tulip catching the breeze.
3. The lavender sprig, as a series of dabs. Paint a thin stem, then make small, quick dabs of purple up both sides of it, working from the bottom up.
Keep the dabs loose and uneven — lavender is never perfectly symmetrical. This is the fastest flower in watercolor, and it makes beautiful borders on cards.
Paint each of these three times on a practice sheet. By the third try, your hand will have found the rhythm, and you will start to feel what "loose" means.
The Magic of Negative Space
Here is a secret that makes loose florals look professional: you do not have to fill the whole page, and you should not.
Negative space is the empty paper around and between your flowers, and it is not wasted space — it is part of the painting. The white paper acts like light, making your colors glow.
This is especially important with flowers. A single stem with two blooms, floating on a clean white page, looks intentional and elegant. The same flowers crammed into every corner of the paper look busy and muddled.
So resist the urge to add more. Paint your bloom, your stem, your leaf, and then stop. Let the paper breathe. If the composition feels unbalanced, add one small sprig in the corner — not ten.
Fixing "Mistakes" (and Why You Shouldn't)
Loose watercolor has a wonderful relationship with mistakes: most of them are not mistakes at all, and the ones that are can usually be saved.
That blob that got too big? It is a peony now. Peonies are supposed to be big and blowsy.
That stem that wandered sideways? It is a stem catching the breeze. That color that looks too dark while wet?
It will dry lighter — wait ten minutes before you judge it.
If a bloom genuinely does not work, you have two honest options. You can cut around it and turn the good bits into a card or a gift tag — the best florals are often rescued fragments.
Or you can paint a second one right next to it. In the loose style, a pair of flowers where the first is a little awkward and the second is lovely reads as a deliberate composition.
What you should never do is scrub at the paper with a dry brush trying to erase a wet mistake. That is how you get holes in your paper. Trust the paint, and trust yourself — the looseness will forgive you.
From Practice Sheet to Finished Piece
Once you have a practice sheet you like, it is time to make something with it. Loose florals are wonderfully useful, and here are the best ways to use yours.
Cards. A small loose floral on the front of a folded card is one of the most personal gifts you can give.
Cut a practice flower into a neat rectangle, glue it to a card blank, and add a handwritten note.
Birthday, thank-you, thinking-of-you — one style of flower covers them all.
Gift tags. Paint a tiny lavender sprig on a scrap of paper, punch a hole, and thread it with ribbon. Homemade gift tags make even a bar of soap feel thoughtful.
Framed miniatures. A single bloom on a small sheet, matted and framed, looks like a gallery piece. The white mat does the same job as negative space — it makes the flower glow.
Journal art. A loose floral in the corner of a journal page turns a plain entry into a keepsake. No skill required, just a bloom and a date.
Conclusion
My grandmother never learned to paint her garden flowers, but she taught me something better: she taught me to look at them. To notice the way light moves through a petal, and the way a stem curves toward the sun.
Loose watercolor florals are my way of saying thank you to her, and to every flower she kept in that jam jar. Every time I paint a loose, imperfect rose, I think of her kitchen windowsill.
You do not need to be good at drawing. You do not need expensive supplies. You need a brush, some paper, a little water, and permission to let the paint do the work.
So this weekend, set up your jar of water, mix a soft pink, and paint a blob with a dot in it. Let it dry. Look at it. Then paint another one, and another, until the page is full of your own little garden.
Because flowers, like memories, are not meant to be perfect. They are meant to be loved.