Introduction
I bought my first airbrush at a flea market for eleven dollars. Single-action, blue plastic body, one nozzle. The seller said it worked fine, and it did. I was the problem.
I thinned some craft acrylic, filled the little bottle, and sprayed a wobbly brown blob across a sheet of good cardstock. Then another. Then four more, each one worse than the last.
I kept adding water, then paint, then water again, convinced the mixture was wrong. By the time I stopped, I had ruined a whole sheet and learned nothing.
The paint was never the issue. My finger was. I was holding the trigger down like a light switch and waving the brush around, so the paint landed wherever momentum took it.
A single-action brush only switches air on and off. Paint volume is set by a knob at the back, which is exactly why I kept fiddling with the mixture instead of my hand.
Airbrushing is a control problem dressed up as a paint problem. Once I understood that, even that cheap brush started behaving.
This is the article I wish someone had handed me that afternoon. No brand worship, no shopping list. Just the trigger, the pressure, and the distance, explained slowly enough to practice.
What the Gear Actually Does
An airbrush is a paint delivery system, not a magic pen. Air breaks liquid paint into tiny droplets, and the needle controls how much paint rides along with it.
Everything else, the body, the brand, the finish, is packaging. Useful packaging, but packaging. The air and the paint metering are what make the mark.
The compressor, regulator, and moisture trap
A compressor does two jobs: it makes air, and it holds that air at a steady pressure. The regulator is the gauge and dial that let you choose the pressure.
The moisture trap is the unglamorous part that saves your work. Compressed air carries humidity, and a trap catches the water before it reaches the nozzle.
A tank matters more than a fancy brush body. A tank or tank-assisted compressor holds a reserve, so the airflow stays even instead of pulsing with each motor stroke.
Pulsing air produces uneven coverage, and uneven coverage is what people mistake for a bad brush. Buy steady air before you buy a better handle.
Gravity-feed versus siphon-feed
Gravity-feed brushes put the cup on top. Paint drops into the nozzle by weight, which means less pressure is needed and cleaning is quicker.
Siphon-feed brushes pull paint up from a bottle below. They hold more paint for long sessions, but they need more pressure and they waste more in the bottle.
For a beginner at a kitchen table, gravity-feed wins. Small cups, easy swaps between colors, and less paint sitting around drying into waste.
Needle and nozzle sizes
The needle and nozzle set the width of your spray and the fineness of the detail. This is the one spec worth understanding before you spend.
- 0.2 mm. Fine detail, thin lines, small models. Clogs easily with craft acrylics and demands careful thinning.
- 0.3 mm. The all-rounder. Wide enough for coverage, tight enough for detail, forgiving with ordinary paint.
- 0.5 mm. Broad coverage, backgrounds, large panels. Harder to make fine marks, much harder to clog.
If you buy one brush, buy a 0.3 mm. It will do ninety percent of what a beginner wants and complain less than the alternatives.
Air Pressure in Practice
Pressure is the second control, and it is the one people set once and forget. That is a mistake, because pressure changes the character of the spray.
For fine work, dots, thin lines, small gradients, run roughly 15 to 25 PSI. The lower air volume lets you creep up on the surface without blasting paint sideways.
For broad coverage, backgrounds, large panels, base coats, run roughly 25 to 35 PSI. More air moves more paint and lets you cover area in fewer passes.
When pressure is too low, the paint does not atomize cleanly. You get spitting, spatter, and droplets that land as spots instead of a mist.
Low pressure also makes you spray closer and slower to compensate, which is exactly how runs start. The fix is more air, not more paint.
When pressure is too high, the air hits the surface and bounces back. Paint deflects off the panel and dries in the air around your line.
That bounce-back shows up as an overspray halo, a gritty dusty ring around your work. High pressure also dries paint mid-flight, so it lands as powder.
Start at 20 PSI, test on scrap, and adjust by five PSI at a time. Write the number on the card so the next session starts where this one ended.
Paint Reduction: The Skim-Milk Test
Unthinned acrylic will not atomize. It arrives at the nozzle too thick to break into droplets, so it hoses out in blobs or clogs the tip entirely.
Forget precise ratios for a moment and use your eyes. Thinned airbrush paint should look like skim milk: thin, opaque, and slightly watery when you tilt the cup.
A workable starting point is one part paint to one part reducer or water, then adjust by drops. Some craft acrylics need closer to two parts reducer to one part paint.
Stir, do not shake. Shaking whips air into the mixture and creates bubbles that spit and sputter through the first minute of spraying.
Test on scrap card before every session. A quick spray tells you more than any ratio chart, because your paint, humidity, and nozzle are not the same as the chart's.
Over-thinning causes its own problems. Too much water breaks the binder, so color goes weak and transparent, and the paint runs on contact.
Weak color tempts you to spray wetter and slower, which produces runs. Then you add more layers to fix the runs, and the surface gets muddy and flat.
Thin enough to flow, not so thin that it forgets how to sit on the surface. That is the whole rule. Skim milk, not water with a tint.
The Double-Action Trigger, Slowly
A double-action trigger does two separate things, and most beginners do them at the same time. Press down for air. Pull back for paint. That order matters.
Press straight down and you get air only. Nothing comes out but wind, which is useful for drying an area or clearing the tip between passes.
Now, with air already flowing, pull the trigger back gradually. Paint enters the airstream and the spray begins. The further back, the more paint.
Release the paint first, then the air. That sequence keeps the nozzle clear and stops a blob from landing when you lift off.
Here is the drill almost everyone skips. Ten minutes on scrap card, before you touch a real project. Not ten minutes of doodling, but ten minutes of these four exercises.
- Dots. Air on, a brief pull, air off. Aim for even, round dots in a row, then make each one smaller without moving the brush.
- Daggers. Touch down, pull back slightly as you move, release. You are practicing a soft start and a tapered end in one motion.
- Thin lines. Low pressure, low paint, steady hand. Keep the line width constant from one end to the other.
- The controlled stop. Spray a line and stop it cleanly at a marked point. No fade, no overshoot, no blob at the end.
That last one is the skill behind every clean edge you will ever spray. The stop is harder than the start, and it is what separates a stripe from a smear.
Do the drill with each color change for the first week. It costs ten minutes and a scrap of card. It saves a finished piece and a full afternoon.
Distance, Angle, and Overlap
Six inches is the working distance to memorize. Roughly the span from your thumb to your pinky with your hand spread, between nozzle and surface.
Closer than that, paint lands wet and heavy and orange peel starts. Farther than that, paint dries in the air and lands as grit.
Keep the brush parallel to the surface, not angled like a pencil. An angled nozzle sprays an ellipse instead of a circle, and coverage goes uneven.
Move the wrist and forearm, not the elbow. Elbow movement swings in an arc, which changes the distance and puts more paint at the center of each pass.
Start the spray before the edge of the piece and stop after it. Trigger on and off outside the work, so the panel never sees a start or stop point.
Overlap each pass by about fifty percent. Half the previous band, half new. That is what turns separate stripes into one continuous, even field of color.
Keep the speed constant. Slowing down in the middle of a pass deposits more paint there, and the uneven band shows up as a stripe once it dries.
If you must pause, pause with the trigger off and the brush still moving. A stopped brush with paint flowing creates a visible dark spot.
Three Gradients Worth Drilling
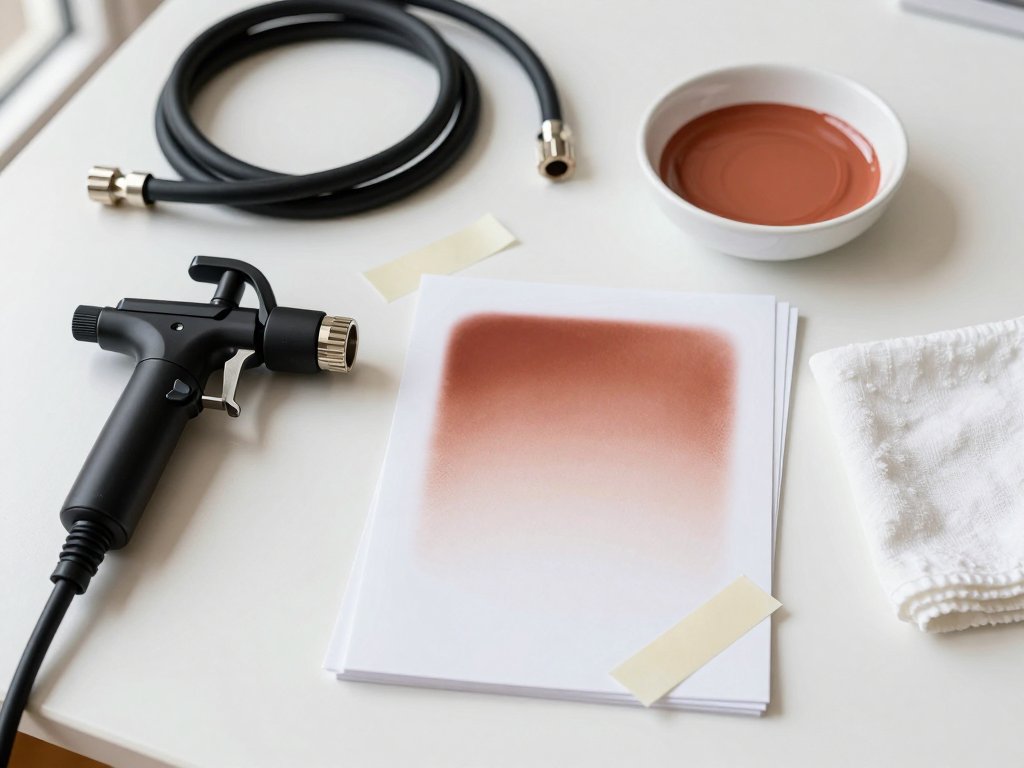
Gradients are where airbrushing earns its keep, and they are just controlled overlaps. Three versions cover most of what a beginner needs.
The fade to nothing
Load your color, set pressure around 20 PSI, and start the pass off the edge of the card. Spray onto the scrap beside the piece, then sweep across.
Each pass travels a little less far onto the surface. Paint builds at one end and thins to nothing at the other, with no hard boundary anywhere.
Keep the brush moving at a constant speed and let the passes do the work. Do not try to fade with your finger by easing off the trigger.
The two-color blend
Spray your first color across the left half, fading it out past the middle. Then spray the second color from the right, fading into that same zone.
The overlap band is where the blend happens. Two soft edges meeting produce a smooth transition. One hard edge meeting soft paint produces a seam.
A light sealing coat between colors helps if you are working on a surface that lifts. Let it dry, then blend into it rather than scrubbing wet into wet.
The radial fade
Start at the center and work outward in small circles, then wider ones. Keep the distance constant and rotate the piece rather than your arm.
Each ring of passes overlaps the last by half, exactly like straight passes. The result is a soft round glow that fades evenly in every direction.
This is the gradient that makes portrait backgrounds and product shots look expensive. It is also the one that exposes an unsteady wrist fastest.
If you want the opposite texture, dry broken grain rather than a smooth field, that is a different tool entirely. Hand brushes get there through Dry Brush Scumbling, and the two methods solve different problems.
Masking and Clean Edges
Masking is how you get a crisp shape next to a soft gradient. The tape does the work, and your hand only has to spray evenly over it.
Burnish the tape before you spray. Run a fingernail or the back of a spoon along every edge, pressing the tape down into the texture of the surface.
Paper and canvas have tooth. Unburnished tape sits on the peaks, and air finds the valleys underneath, which is exactly how bleed starts.
Frisket film is the flexible option for curves. It is a thin, low-tack sheet you cut on the surface, and it bends around shapes that tape cannot follow.
Cut frisket with a light touch. A blade that scores the surface underneath will show up later under thin paint, and no amount of spraying hides it.
A light sealing coat of clear stops bleed better than tape alone. Spray a thin coat of clear or matte medium along the taped edge and let it dry.
That clear coat seals the tape's edge. Paint that tries to creep underneath meets cured clear instead of raw surface, and the edge stays sharp.
Pull tape slowly and at a shallow angle, back over itself rather than up. Fast pulls lift paint with the tape, especially on a soft or chalky ground.
Failures and Fixes
Almost every airbrush problem has a mechanical cause. None of them mean you are untalented, and most cost a minute to fix once you know where to look.
Spitting
Cause: paint drying inside the nozzle, a partly seated needle, or pressure too low to atomize. Fix: flush the nozzle, reseat the needle, and add five PSI.
Tip dry
Cause: fast-drying acrylic collecting on the needle tip. Fix: wipe the tip with a soft cloth dampened with reducer, and keep the brush moving between passes.
Tip dry is normal, not a failure. A drop of retarder in the cup slows it down, and a quick wipe every few minutes keeps it from becoming a spit.
Water droplets
Cause: a compressor without a moisture trap, or a trap that is full. Fix: drain the trap, fit one if you have none, and keep the tank pressure steady.
Water lands as a ring with a darker edge, and it will not blend out once the paint around it dries. Catch it while wet with a corner of cloth, then re-spray the area lightly.
Orange peel
Cause: paint laid too wet and too close, so it skins over before it levels. Fix: back off to six inches, lower the paint flow, and build in thin passes.
Overspray halo
Cause: pressure too high, distance too far, or the brush lingering at the edge. Fix: drop the pressure, move closer, and keep the trigger moving past the edge.
Cleaning as a Money Habit
A dirty airbrush is an expensive airbrush. Not because cleaning supplies cost much, but because neglect turns a working tool into a replacement purchase.
Flush between colors, every time. A few seconds of cleaner through the nozzle saves a clogged tip and a ruined cup of the next color.
Pull the needle to clean it properly. Wipe it from the back toward the tip, never the reverse, so you do not drag dried paint into the nozzle.
Never soak the whole body. Solvent left in the air valve swells the seals, ruins the trigger's feel, and is not a mistake you can repair at home.
Clean the nozzle with a soft brush or a soak in the right thinner. Do not poke it with a needle or a pin, because a scratched nozzle sprays crooked forever.
Here is the math that matters for a batch run. A thirty-dollar brush kept clean will outlast three neglected ones, and each replacement is a full day of lost production.
If you sell on Etsy or at craft fairs, your cost per piece includes tool life. A brush that lasts three years instead of one cuts that cost to a third, with no change to your technique.
Three Practice Projects That Teach Something
Practice needs a purpose or it turns into doodling. These three projects each teach one skill, and each one produces something you can use or give away.
The gradient postcard
Cut a piece of card stock to postcard size and mask a one-inch border. Spray a single color from one edge, fading to nothing before the far edge.
Pull the tape, and you have a clean frame around a soft field. Do ten of these in a session and you will have practiced the fade more than a month of random spraying.
The set of sprayed gift tags
Buy a pack of plain kraft tags and spray them in batches. One color fading across the tag, or two colors meeting in the middle, is enough.
This is the batch run that teaches consistency. By tag fifteen, your distance and speed are the same every time, and the whole set looks like one product.
The one-color silhouette
Draw a simple shape on frisket film, cut it out, and stick it to a canvas board. Spray the board evenly, then lift the film to reveal the shape in negative.
This teaches coverage and edge control at the same time. An even field around a clean shape is harder than it looks, and it is the foundation of every stencil project.
What to Buy First, and What to Skip
You do not need much, and the order you buy in matters more than the total. Buy steady air first, a competent brush second, and everything else later.
Start with a compressor that has a regulator, a moisture trap, and a tank. Expect to spend somewhere around eighty to a hundred and twenty dollars for a reliable one.
Add a double-action gravity-feed brush with a 0.3 mm needle. Thirty to sixty dollars buys a perfectly capable brush, and the brand on the body changes nothing about the spray.
Skip the all-in-one kit with the tiny tankless compressor. The pulsing air will fight you on every pass, and you will blame the brush and buy another one.
Skip the 0.2 mm detail brush at the start. It clogs with ordinary craft paint, and a clogged brush teaches frustration rather than technique.
Skip the branded upgrade until you can feel what it fixes. A hundred-dollar brush does not correct an unsteady trigger, and it will not make a gradient smoother.
Here is the cost per piece in plain numbers. A hundred and fifty dollars of setup, spread across two hundred gift tags, is under a dollar a tag in tool cost.
Compare that to hand-painted tags at six or seven dollars each in materials and time. The airbrush pays for itself in one craft-fair season, if you keep it clean.
Conclusion
That eleven-dollar flea market brush is still in a drawer, and it still works. The difference between the blob on that ruined sheet and a clean gradient was never the tool.
It was the order of operations. Air first, paint second, stop before the edge. Same brush, same paint, completely different result.
You will still ruin a sheet now and then. Everyone does, usually on the day they get confident and skip the ten-minute drill.
But you can stop chasing perfect. A gradient does not need to be flawless to look intentional, and a soft edge that fades to nothing forgives a lot.
Set the pressure, thin to skim milk, hold six inches, overlap by half, and move your forearm. That is the whole craft, practiced until it feels boring.
Boring is the goal. Boring is repeatable, and repeatable is what sells at a craft fair and what makes a Tuesday afternoon at the table feel calm instead of frustrating.
Start with one postcard tonight. Ten minutes of dots first, then one fade. You already have everything you need except the practice.