Introduction
I lost three hours of underpainting to one careless stroke. Not to a bad color, not to a bad idea. To a brush that was far too wet.
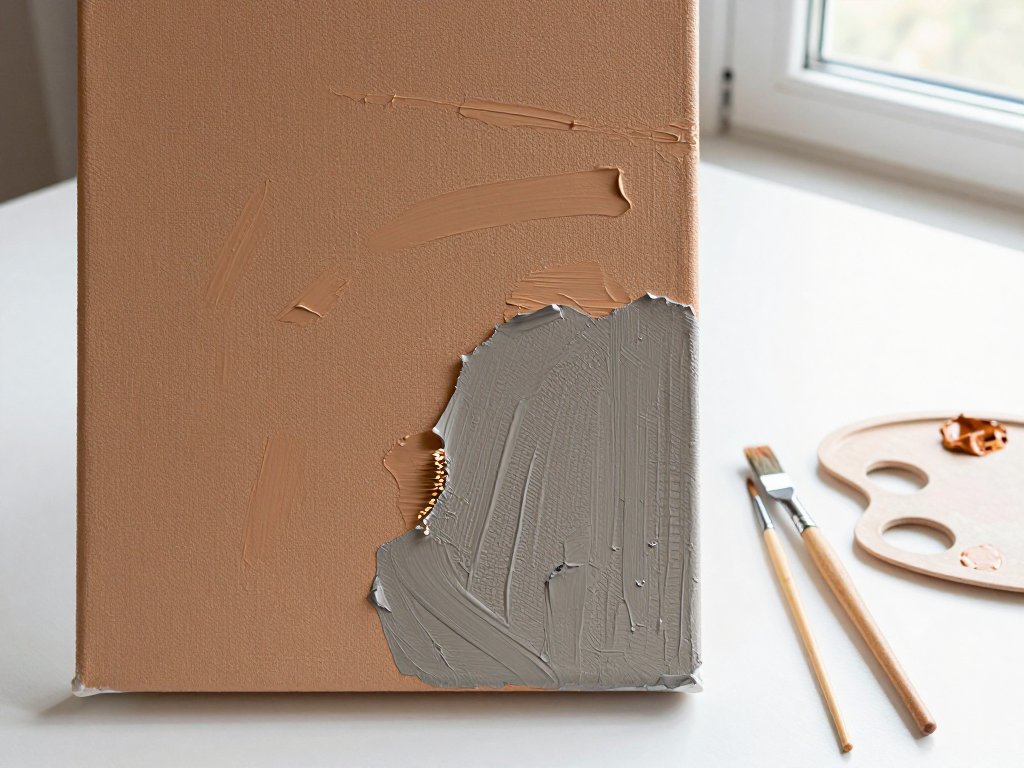
I had spent the morning blocking in a weathered barn wall. Ochre, raw umber, a little warm grey. It was finally starting to look like something.
Then I picked up my hog bristle flat, loaded it the way I load a watercolor brush — dipped, wet, generous — and dragged it across the canvas expecting texture.
What I got was a grey mud puddle. The pigment slid, the canvas tooth clogged, and three hours of careful layering disappeared under a smear I could not lift cleanly.
Here is what I wish someone had told me that morning. Scumbling is not painting. It is almost the opposite. You are trying to leave paint behind, not put it down.
The fix cost me nothing. A rag, thirty seconds of wiping, and a different way of loading the brush. That is the whole article.
What Scumbling Actually Is
Scumbling is a thin, almost tacky layer of paint dragged over dry paint beneath it. The pigment catches only on the raised high points of the surface.
The low spots stay bare, or stay whatever color was already there. That broken, skipping coverage is the texture. It is supposed to look incomplete.
Strictly speaking, a scumble is an opaque light veil dragged over a darker ground. Think of mist over a dark field, or chalk dust on slate.
Dry brush is the broader term, and it means what it says: no medium added at all. No water, no oil, no glazing liquid. Just pigment and bristle.
That distinction matters, because the two terms get used interchangeably online. Both rely on the same physics, though. A dry surface and a dry brush.
When both are dry and the paint is tacky, friction does the work. The bristles grab the tops of the weave and skip the valleys. That is the mechanism.
Understand that one sentence and you can stop following recipes. You start reading your own canvas instead, which is where the real money gets saved.
One more thing worth knowing. Scumbling adds light, not dark. If you want depth, you glaze or you paint it in. Scumbling goes on top, and it always moves the surface lighter.
That is why it suits weathered things so well. Stone, wood, brick and plaster are all surfaces where time has rubbed the top layer off and left something paler behind.
Loading the Brush: How Little Paint You Actually Need
The loading is where almost everyone goes wrong, including me. A dry brush does not mean an empty brush. It means a loaded brush that has been emptied back down.
Start by picking up paint with the flat of the bristles. Work it into the brush with small circular motions on the palette, not just on the tips.
You want pigment distributed through the bristle mass. If only the tips are coated, the stroke starts strong and dies within an inch.
Then take it off again. Wipe the brush on a rag or a paper towel with a firm, dragging motion. Repeat until the brush stops leaving a wet mark.
The target is tacky, not wet. Touch the bristles to the back of your hand. It should feel like a nearly dry brush, not a damp one.
Test on a scrap of the same surface before you commit. One stroke tells you everything. If it smears, wipe again. If it skips hard, add a touch.
Here is the money part. A tube of good paint costs a few dollars and holds dozens of scumbles. Wet painting burns through it. This stretches it.
The tacky-not-wet rule is the entire skill. Everything else in this article is a variation on it.
How little paint is that, honestly? For a canvas the size of a paperback book, one small dab of color the size of a lentil is plenty. Two dabs is usually too much.
If you can still see a glossy sheen on the bristles, keep wiping. Matte is the signal you are looking for. Gloss means there is still liquid in there.
Brushes That Do the Work
You need less gear than the internet implies. Two brushes will do most of what this technique can do.
- Stiff hog bristle flat. The workhorse. Stiffness is the point — soft bristles bend and deposit, stiff bristles drag and skip.
- Worn round. An old round that no longer comes to a point makes a broken, scrubby mark that is hard to fake otherwise.
- Cheap chip brush. The hardware aisle kind. A few dollars for a pack, and the coarse bristle is an advantage, not a flaw.
- Skip list. Soft synthetic rounds, watercolor mops, anything sold as a blender. They hold too much liquid and cannot skip.
Look for a flat with some spring and a visibly splayed, uneven tip. A brush that has already lost a few hairs is often better than a new one.
Skip the very cheapest craft brushes with glued-in bristles that shed. Loose hairs in a scumble layer are a nuisance to pick out once dry.
Two brushes, a few dollars, and they will outlast a dozen soft synthetics. That is the whole shopping list.
Read the Surface First
Dry brush dies on a slick surface. If there is no tooth, there is nothing for pigment to catch on, and you get a thin greasy film instead of texture.
Canvas has tooth by design. The weave gives you peaks and valleys, and the peaks are what the brush grabs. Coarser canvas gives coarser texture.
Gesso texture is the other half of it. Brushing gesso on with a stiff brush leaves a physical surface that reads as stone before you paint anything.
A smooth panel or a sanded board is the opposite situation. Paint sits on top and slides. Scumbling there just looks like thin, uneven paint.
You can add tooth to a slick panel. One coat of gesso applied with a coarse brush and left unsanded gives you something to work against.
Run your fingertips across the surface before you load a brush. If it feels like glass, fix it or change your plan. That check takes five seconds.
Also check for gloss, not just texture. A sealed or varnished surface can feel rough and still repel paint. If water beads on it, scumbling will bead too.
Primed canvas from a craft store is usually fine straight out of the pack. The cheap ones can be slick, so test a corner with a dry stroke first.
Step by Step: Your First Scumble
Here is the sequence I use now. It takes about ten minutes on a small canvas, and most of that is drying time.
- Start with a fully dry underpainting. Not touch-dry — dry to the point where a fingertip leaves no mark and no tack.
- Pick one color, and pick it lighter or darker than the ground. A tone close to the ground reads as a smudge, not a texture.
- Load the brush, then wipe it nearly clean on a rag until it is tacky. Test one stroke on scrap before you touch the canvas.
- Drag the brush across the surface with light pressure. Let the bristles skip. Do not press down to force coverage.
- Work in one direction, then cross it at an angle. Two directions build a woven texture. Three directions start to look muddy.
- Stop while the stroke still breaks. The moment the paint starts looking solid and even, you have gone too far.
Let it dry completely before you judge it. A scumble looks weak when wet and correct when dry. That is normal, and it fools people constantly.
If it dried too subtle, do not fix it by loading more paint. Fix it with a second light pass in a paler tone. Same pressure, different color, crossed direction.
Do the first one on a scrap board rather than a finished painting. Ten minutes of practice on rubbish paper beats an hour of reading about it.
Layering Two and Three Colors
One color gives you texture. Two colors give you material. Three give you age. The order matters more than the colors do.
For weathered stone, start with a mid grey ground. Scumble a warm ochre over it, let it dry, then a cooler grey on top at a different angle.
The ochre sits in the middle layer like dirt in the grain. The cool grey reads as lichen or mineral bloom. That is the whole illusion.
For bark, work the other way. Dark ground, then a mid-brown scumble, then a pale grey or ochre catching only the highest ridges.
Each layer must be dry. Scumbling into a wet layer pulls it up and mixes on the canvas, which is exactly how you get mud instead of depth.
Change direction between layers. Same-direction layers read as stripes. Crossed layers read as a surface.
Two layers is enough for most beginner projects. Add the third only if the second dried flatter than you wanted it to.
Keep a note of your layer order on the back of the canvas. Three months later you will not remember which grey came first, and you will want to repeat it.
If you want the other route to raised texture, the site's companion guide to palette knife painting for beginners covers the loaded, lifted side of surface building. It pairs well with this one.
Scumbling Over a Colored Ground
Acrylic dries fast, which is both the advantage and the trap. You can layer three colors in an afternoon, but you have minutes to work a scumble.
Oil gives you working time. A scumble over a dry oil ground can be adjusted with a rag for an hour or more, which is far more forgiving.
With acrylic, keep a spray bottle nearby but never spray the canvas. Mist the air, or mist your rag. Water on the surface kills the tooth.
With oil, wipe excess off the brush onto a rag, not back onto the palette. Oil stays workable and will creep back into the bristles.
Drying time between layers differs too. Acrylic scumbles are ready in minutes. Oil needs a day, sometimes two, before the next layer goes on.
A colored ground changes the result more than any paint choice. A warm ground under a cool scumble gives depth a white canvas cannot. Try it once.
If you are impatient — and I am — acrylic plus a hairdryer on cool is a legitimate workflow. Just confirm the layer is truly dry, not just cool.
One caution with oil. A scumble over a glossy, fully cured oil ground can slide instead of catch. A very thin wipe of the surface with a dry cloth helps it grip.
Five Textures You Can Build
These five are the ones I use most. Each one is two or three scumbles over a dry ground, and each has a palette that works without much fiddling.
Weathered stone. Mid grey ground, warm ochre scumble, then cool grey. Finish with a near-white pass on the highest edges to catch light. Palette: raw umber, yellow ochre, titanium white, and a cool grey mixed from black and white.
Driftwood. Silver-grey ground, pale grey scumble, then a thin warm buff pass. Keep every stroke parallel to the grain, or it reads as stone instead of wood. Palette: titanium white, raw umber, a touch of yellow ochre, and Payne's grey.
Rust. Burnt sienna ground, then orange scumble in patches, then dark umber on top. Rust is patchy, so leave plenty of ground showing through. Palette: burnt sienna, burnt orange, raw umber, and a hint of yellow ochre for the bright edges.
Old brick. Terracotta ground, dusty red scumble, then pale mortar scumble at the joints. Keep the mortar strokes short and vertical, and let them break. Palette: Venetian red, yellow ochre, titanium white, and raw umber for the shadows.
Aging plaster. Warm off-white ground, thin grey scumble, then a near-white pass on top. Plaster is about softness, so use the lightest pressure of the five. Palette: titanium white, yellow ochre, raw umber, and a little black.
Notice that none of these need a special product. Five textures, one brush, and whatever is already on your shelf.
Test each palette on a scrap card before you commit to a canvas. A color that looks right in the tube can go chalky or invisible once it is scumbled thin.
Mistakes That Cost Me a Canvas
Overloading is the first and most expensive one. A wet brush lays down a solid film, and a solid film is not a scumble. It is just paint.
Scumbling into wet paint is the second. The brush lifts the layer beneath and mixes it, and you get a flat even tone with no break in it.
Brushing too long is subtler and worse. Every extra pass pulls the layer up and redistributes it. Two passes, then stop and walk away.
Using straight tube paint with no body is the fourth. Some pigments are so transparent they vanish; others are so stiff they crawl. Test first.
The pattern across all four is identical. Every mistake is an excess of paint, pressure, or time. Scumbling rewards restraint and punishes enthusiasm.
I have lost two canvases to this. At a few dollars each plus the paint, that is not a disaster. But the hours are the real cost.
There is a fifth mistake that is harder to name. Working tired. Scumbling is a light-touch skill, and tired hands press. If the stroke starts looking solid, stop for the night.
Fixing a Smear
If the smear is fresh, lift it. A barely damp cloth, pressed and lifted, not rubbed. Rubbing drives pigment down into the tooth where you cannot reach it.
Once it is fully dry, sand it back. Fine grit, light pressure, and stop the moment the texture returns. You are not trying to remove the layer.
Then re-scumble lighter than before. The surface is slightly smoother now, so a heavy hand will smear again in exactly the same place.
If the tooth is gone entirely, one thin coat of gesso restores it. Let that dry fully, then start again with a drier brush.
Conclusion
The whole technique comes down to subtraction. Less paint, less pressure, less time on the surface. That is the opposite of what most beginners expect.
It is also cheaper. A properly loaded brush covers more area, a rag costs nothing, and a scumbled canvas needs fewer layers than a wet one.
Start on scrap. Spend ten minutes learning what tacky feels like on your own brushes, and the rest of this stops being theory.
Then ruin one canvas on purpose. It is the fastest way to find the edge, and it costs a few dollars instead of a painting you cared about.
Ten minutes of practice, one rag, two brushes. That is the whole investment, and it will change how every weathered surface you paint from here behaves.