Introduction
I remember standing in a garden center one September, admiring a row of stone-finish planters priced at forty dollars apiece. They were beautiful, heavy-looking, quietly expensive. I wanted them. I also wanted to stay married to my budget, so I walked out empty-handed and spent the afternoon grumbling.
A week later, a friend handed me a terracotta pot from the dollar store and said, "Mix baking soda into your paint.
You will not believe what happens." She was right. Two hours later I had a planter that looked like it cost forty dollars, made from a two-dollar pot and about a tablespoon of baking soda.
That is the magic I want to share with you today. Baking soda paint is one of the oldest, simplest tricks in the upcycling world, and it transforms ordinary acrylic paint into a thick, matte, chalky finish that mimics terracotta and stone with astonishing ease.
No special products, no expensive chalk paint, no artistic talent required.
Why Baking Soda Paint Works
Understanding a little of the why makes the how much easier to trust. Baking soda is a fine powder, and when you stir it into acrylic paint, it does two things at once.
First, it thickens the paint into a paste that holds the shape of your brush strokes. Those visible strokes are exactly what real stone and unglazed terracotta look like up close, so the texture reads as authentic rather than messy.
Second, baking soda dries to a porous, chalky matte surface that catches light the way natural clay and stone do. Glossy craft paint screams "plastic"; the baking soda finish whispers "handmade pottery."
It is also wonderfully forgiving. If a coat looks streaky, you simply add another. If a stroke goes astray, you sand it smooth. There is no way to ruin a piece, only ways to layer it into something better.
What You Need
The supply list is short, and most of it is probably already in your house.
Acrylic craft paint. The cheap bottles from a craft store work perfectly. For terracotta, pick a clay or rust tone; for stone, choose warm gray, greige, or soft taupe. Flat or matte paint gives the most convincing finish, but satin works if that is what you have.
Baking soda. The same box in your pantry. Plain baking soda, not baking powder, and not soda ash from the hardware store. The fine, food-grade powder is exactly the texture you want.
A jar or disposable cup. For mixing. Use something you do not mind throwing away, because the dried paint is hard to scrub out.
A spoon or craft stick. For stirring. You want a smooth paste, so stir thoroughly and scrape the sides.
Brushes. A flat synthetic brush for large areas and a smaller one for details. Cheap brushes are fine; you will replace them eventually because the gritty paint wears bristles.
Your piece. A terracotta pot, a glass jar, a thrifted vase, a plastic planter, a picture frame, anything with a surface that can be painted. Clean it first, and lightly sand glossy or plastic surfaces so the paint has something to grip.
Matte varnish. Optional but recommended for anything that will live outdoors or get handled often.
The Basic Recipe: Mixing Your Paint
Here is the simple ratio that has served me for years: two parts acrylic paint to one part baking soda. For a small pot, that means two tablespoons of paint and one tablespoon of baking soda, mixed until smooth.
Stir gently at first, because the powder flies. Then stir more firmly, scraping the bottom and sides of your jar, until the mixture has the consistency of thick yogurt. It should hold a soft peak when you lift the spoon, but it should still spread smoothly under a brush.
If the paste seems too thick, add a teaspoon of water. If it seems too thin, add a little more baking soda. The exact balance is forgiving, and you will find your preferred texture within one project.
One important note: mix only as much as you will use in about an hour. The paste does not go bad, but it does dry out as it sits, and re-thinning with water changes the texture slightly. Fresh batches are cheap, so mix small and often.
Prepping Your Piece
Good prep is the difference between a finish that lasts and one that peels in a month. It takes ten minutes and saves you a world of disappointment.
Wash your piece with warm soapy water to remove dust and oils, then let it dry completely. This matters more than any other step, because paint refuses to stick to grease.
If your piece is glossy, glass, or plastic, scuff it lightly with fine sandpaper. You are not trying to remove material, just to give the paint tooth. Wipe away the dust with a damp cloth afterward.
Terracotta pots are thirsty. If yours is unglazed, give it a quick coat of plain acrylic paint or a spray primer first, so the baking soda paste does not soak into the clay and disappear.
You can skip this for a second coat, but the first project is smoother with a base.
Finally, tape off any areas you want to protect, such as the inside rim of a pot or a label spot you want to keep clear.
Painting Technique: Building the Finish
This is the fun part. Load your brush generously and paint in long, even strokes, letting the texture show.
Apply the first coat without worrying about perfection. Coverage will be streaky, and that is fine; the streaks are the texture. Let it dry completely, which usually takes thirty to sixty minutes depending on humidity.
Apply a second coat, this time working the paste into the surface with a bit more pressure. If you want a smoother finish, lightly sand between coats with fine sandpaper. If you want more visible stone texture, leave the strokes as they are.
Most projects need two coats, and some need three. Judge by eye: when the original surface no longer shows through and the finish looks even, you are done. Then let the piece cure for at least twenty-four hours before you seal it or put anything inside.
As you paint, resist the urge to fuss. Stone and clay are not perfectly smooth, and your finish should not be either. The small irregularities are what make it believable.
Finishing Touches: Seal, Wax, Distress
A little finishing work turns a nice paint job into a convincing one.
Seal. For indoor pieces, a matte varnish or a thin coat of furniture wax protects the finish without adding shine. For outdoor pots, use an exterior matte sealer and be prepared to refresh it every season, because weather is hard on any paint.
Distress. Lightly sand the edges and raised areas after the paint cures. This reveals hints of the original surface underneath, exactly the way genuine terracotta and stone wear at the rims. A tiny bit of sanding goes a long way; do it gradually.
Whitewash. For a two-tone terracotta look, thin a little white or cream paint with water and brush it over the dried finish, then wipe most of it off with a cloth. The white settles into the texture and instantly adds age and depth.
Wax. A thin layer of clear furniture wax, buffed with a soft cloth, gives the finish a gentle, natural sheen and makes the piece pleasant to touch. It is optional but lovely.
Project One: Faux Terracotta Pots
Let us put the technique to work on the classic project: turning ordinary pots into warm terracotta beauties.
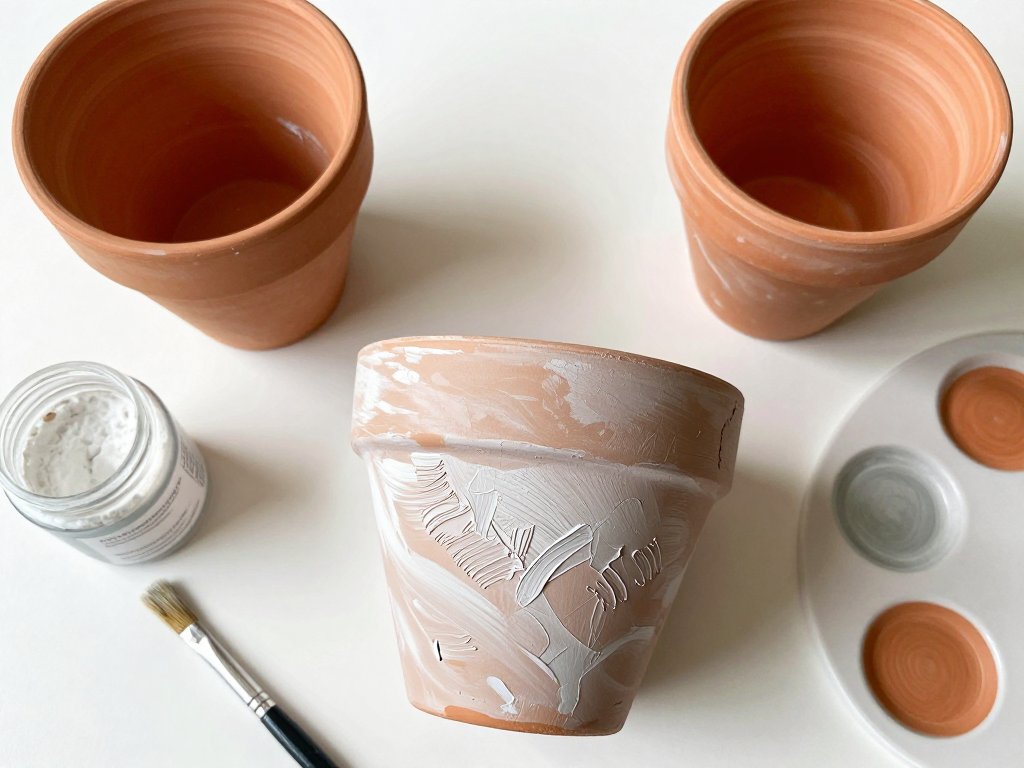
Mix your paste using a clay or rust-toned acrylic paint. Two coats will give you the familiar terracotta color, and the visible brush strokes will echo the texture of real unglazed clay.
Once the paint cures, sand the rim and base lightly to reveal a whisper of the original surface. Then whitewash the whole pot with a very thinned cream paint, wiping it back until only the recesses hold color.
The result is a pot that looks like it has lived on a sunny Tuscan windowsill for years. Group three in different sizes, add a few succulents, and you have a vignette that would cost a small fortune at a boutique garden shop.
You can also vary the base color: a dusty blush terracotta, a deep burnt sienna, or a pale sand tone all read as natural clay. The technique is identical; only the paint color changes.
Project Two: Faux Stone Finish
Stone is just as easy, and it might be even more convincing, because real stone is rarely a single flat color.
Start with a warm gray or greige base paste and apply two coats as before. Then, while the final coat is still damp, dab the surface with a crumpled plastic bag or a sea sponge loaded with a slightly lighter gray. This creates the mottled, mineral look of real stone.
Add a third color if you like: a whisper of taupe or a dusty blue-gray, dabbed in a few places only. Less is more here. Step back after each dab and check that you are building depth, not clutter.
Finish with matte varnish, and you have planters, vases, or candle holders that look like they were carved from a quarry wall. They are particularly handsome in pairs, one tall and one squat, on either side of a door.
What Else You Can Transform
Once you have the technique in your hands, you will start seeing baking soda paint opportunities everywhere.
Glass jars. A baking soda finish turns an old pasta jar into a chalky vase or a rustic kitchen canister. Leave the label area clear or paint over it entirely.
Thrift store vases. That dated amber vase from the charity shop becomes a modern matte statement piece in stone gray or terracotta. This is the cheapest room refresh you will ever do.
Plastic planters. Scuff, paint, and seal, and cheap plastic pots look like fired clay. Use them outdoors only with a good exterior sealer.
Picture frames. A flat frame painted in a chalky baking soda finish gives a gallery wall a cohesive, natural look.
Candle holders and trays. Small accessories in matching finishes tie a shelf together. Paint a whole set in one afternoon and rearrange your decor while it dries.
Bookends and boxes. Anything with a flat surface and a solid shape takes the finish beautifully. A painted box makes a handsome catchall for remotes or mail.
Troubleshooting: When Things Go Slightly Wrong
Even with a forgiving technique, questions come up. Here are the fixes for the common ones.
Bubbles in the finish. You stirred too vigorously and whipped air into the paste. Mix more slowly next time, and for now, sand the bubbles flat and add another thin coat.
Cracking as it dries. The paste was too thick or the coat too heavy. Thin your mix with a teaspoon of water and apply lighter coats. If a piece already cracked, sand it smooth and repaint; the crack will disappear under the next layer.
Paint peeling or flaking. The surface was greasy or glossy. Sand the piece, wipe it with rubbing alcohol, and start over with a fresh coat. Peeling usually appears in the first week, so catch it early.
Finish too smooth. You sanded away all the texture. Add one more coat and leave the brush strokes alone this time.
Color looks flat. Real stone and clay have variation. Add a whitewash or a second dabbing color, and the depth will return.
A Last Word
That garden center planter still sits in my memory, but it no longer sits in my wallet. In its place are a row of baking soda pots on my porch, and every single one of them was made for less than the price of a coffee.
What I love most about this craft is that it rewards patience with authenticity. Two coats, a little sanding, a whisper of whitewash, and an ordinary object becomes something that looks like it has history.
It is the same feeling I had as a child, watching my grandmother turn junk-shop finds into treasures with nothing but paint and stubbornness.
So raid your pantry, pick a pot, and mix up a batch. In an hour, you will hold something that looks expensive, feels handmade, and cost almost nothing. And the next time you see a forty-dollar planter, you will smile, because you know how to make it yourself.


