Introduction
There is something deeply satisfying about holding a basket you have woven yourself. The feel of the reed, the rhythm of over and under, the way a flat pile of materials slowly rises into something useful — it is quiet magic, and it has been quietly happening for thousands of years.
If you have ever admired a woven basket at a market and thought, "I could never make that," I am here to tell you otherwise.
Basket weaving is one of the most forgiving crafts in the world. It does not require expensive machines, precise measurements, or years of training.
It requires a few handfuls of reed, a bowl of water, and the willingness to sit with your hands for a while.
In this guide, we will start with the two simplest forms: a small round basket and a flat tray.
Both use the same basic over-under weave, and both can be finished in an afternoon.
By the end, you will understand not just how to weave, but why this ancient craft has never gone out of style.
A Craft as Old as Civilization
Before there were pots, there were baskets. Archaeologists have found fragments of woven containers dating back more than ten thousand years, long before pottery or weaving looms appeared. Baskets carried grain, gathered food, stored clothing, and even held water when lined with clay or pitch.
What makes this history so remarkable is that basketry changed very little over the millennia.
The techniques used in those ancient fragments — plaiting, twining, coiling — are the same techniques you will use today.
When you pick up a piece of reed and begin weaving, you are joining a line of makers that stretches back to the earliest human settlements.
Every culture developed its own style. Native American weavers coiled pine needles and sweetgrass into tight, watertight containers.
European basket makers wove willow into the sturdy market baskets that farmers carried for generations.
In Southeast Asia, rattan weavers created everything from rice steamers to furniture. Each tradition added its own patterns and rhythms, but the core idea remained the same: flexible material, interlaced with patience, becomes structure.
That heritage is part of the appeal. When you weave a basket, you are not just making an object — you are practicing a skill that humans have valued since the beginning of settled life.
The Four Classic Techniques
Before we gather supplies, it helps to know the four main families of basketry. You will meet two of them in this article, and the other two are worth knowing for later.
- Plaiting. The simplest weave: strips cross over and under each other at right angles, like a woven mat. Think of a picnic basket's flat lid or a simple market bag. This is the technique we will use for our tray and basket.
- Twining. Two or more flexible strands are twisted around rigid upright stakes, binding them together as you go. Twining creates strong, durable baskets and is lovely with soft materials like raffia or yarn.
- Coiling. A core of bundled material — pine needles, rope, or grass — is spiraled around itself and stitched into place with a thread. Coiled baskets are the ones with a beautiful spiral pattern radiating from the center.
- Wicker weaving. The classic woven-wood look, usually made with willow or rattan over a sturdy frame. Wicker furniture uses this family of techniques at a larger scale.
Do not worry about mastering all four at once. Plaiting alone will keep your hands busy and happy for a long time.
What You Need to Begin
Here is the best part: basket weaving supplies are inexpensive and easy to find. A complete beginner kit costs about the same as one fancy candle, and it will last for many projects.
- Flat reed. Look for 1/4-inch flat reed for the base and weaving. This is the workhorse material for beginners. A one-pound coil costs around ten to fifteen dollars and makes several small baskets.
- Round reed. 1/8-inch or 1/4-inch round reed is used for the rim and for handles. It is flexible, smooth, and gives a finished edge.
- A spray bottle and a bowl. Reed must be soaked before weaving so it bends without cracking. A large bowl of warm water and a spray bottle for keeping your work moist are essential.
- Small clothespins or binder clips. These hold stakes upright while you weave. Regular wooden clothespins work perfectly.
- Scissors and a knife. Sharp scissors for trimming reed and a small craft knife for tapering ends. A nail file or fine sandpaper is handy for smoothing cut ends.
- A ruler. For measuring stakes and checking your base dimensions.
That is genuinely all you need. No loom, no special table, no power tools. A kitchen table and an afternoon will do.
Preparing Your Reed
Dry reed is brittle and will crack the moment you try to bend it. The secret to happy weaving is soaking.
Submerge your flat reed in warm water for fifteen to thirty minutes until it becomes supple and slightly slippery.
Round reed for the rim needs a little longer — thirty to forty-five minutes.
As you work, keep a spray bottle nearby. Reed dries out quickly, especially in warm rooms. A light mist every ten minutes keeps everything cooperative. If a strand starts to crackle or resist, it is telling you it needs more water. Soak it again and it will forgive you.
One note for beginners: wet reed looks darker than dry reed. As your basket dries, it will lighten to its finished color.
This is normal, and it is also why two baskets made from the same coil can look slightly different — the drying time and humidity affect the final tone.
Think of it as part of the handmade charm.
Starting Your First Tray
Let us begin with a tray, because a flat base is the easiest place to learn the rhythm of over and under. We will make a small rectangular tray about six by nine inches.
First, cut eight stakes of flat reed, each about fourteen inches long. These will form the skeleton of your base.
Lay four of them side by side, with a small gap between each — roughly the width of one reed.
Now weave the other four stakes through them, over one, under one, over one, under one.
Gently push them together until the base is snug and square.
This woven square is called the slath, and it is the foundation of your entire tray. Take a moment to admire it. Every basket, no matter how complex, begins with this simple crossing. If you can make the slath, you can make the basket.
Check that your slath is square by measuring the corners. If it has drifted into a diamond shape, gently push the opposite corners until it rights itself. A little patience here saves frustration later.
Weaving the Sides
Now the tray begins to become a tray. Bend each of the eight stakes upward at a right angle. This is called "raising the stakes," and it is where the base becomes the walls.
Cut a long strip of flat reed for your first weaver — a weaver is simply the horizontal strand that travels around the basket.
Tuck the end of the weaver behind one stake, then weave it around the basket: over one stake, under the next, over, under.
Pull it snug but not tight — you want the weaver to sit against the base without bending the stakes inward.
Continue weaving round after round. When you run out of weaver, tuck the end behind a stake and start a new strip, overlapping the join so it looks seamless. Keep the rows level by pressing them down gently with your thumb after each circuit.
For a tray, three or four rows are plenty. The walls should be low and gentle, just enough to hold fruit, mail, or craft supplies without becoming a deep basket. Stop when you like the height, and trim any stake that is poking up too far.
Finishing the Rim
The rim is what separates a craft project from a finished basket. A clean rim hides all your cut ends and gives the tray strength. It is also easier than it looks.
Soak a length of round reed for the rim — it should be long enough to wrap the entire opening plus a few extra inches.
Working around the tray, bend each stake down over the rim reed and tuck it behind the next stake, inside the weaving.
This is called a "border," and the simplest version is the single-twist border used by beginners everywhere.
Work your way around the tray, one stake at a time, pulling each one snug.
When you return to the start, trim the final ends and tuck them neatly into the weave.
Let the tray dry completely overnight. As it dries, the reed will harden and hold its shape, turning your flexible weaving into a rigid, useful object.
Do not rush the drying. A basket moved too soon can wobble or lose its shape. Leave it on the table overnight, and in the morning you will have something that could pass for a market find.
A Simple Round Basket
Once the tray feels comfortable, the natural next step is a small round basket. The technique is identical; only the base changes.
Instead of a flat slath, you will use a circular base. Take eight long stakes of flat reed and lay them in a star pattern, crossing at the center.
Weave a continuous spiral of weaver around the center, over two stakes and under two, gradually pushing the star apart until the base is the size you want — about four inches across for a first basket.
Now raise the stakes, just as you did for the tray, and weave the walls upward.
Because the stakes are spaced evenly around a circle, the over-under rhythm continues around and around without any corners to negotiate.
Many weavers find the round basket even easier than the tray, because there is no square corner to manage.
Weave until the walls are about three inches tall, then finish with the same border. Add a simple handle by soaking a long piece of round reed, bending it into an arch over the opening, and tucking both ends deep into the weave on opposite sides. Let it dry completely.
This little basket is perfect for keys, buttons, hair ties, or a few flowers from the garden. It also makes a gift that people genuinely treasure — handmade things carry a warmth that store-bought ones never quite match.
Trays and Flat Projects
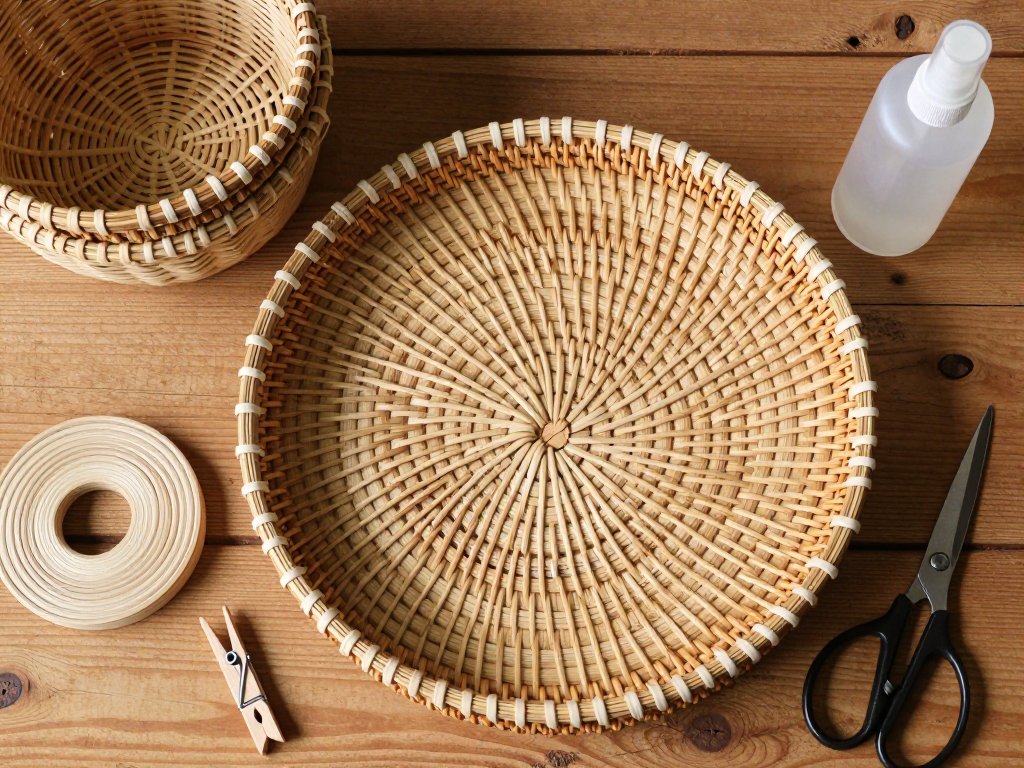
Trays deserve their own moment, because they are the easiest possible entry into weaving and endlessly useful. A tray needs no deep walls, no handles, and no complicated shaping. It is pure slath, a few rows of sides, and a rim.
Beyond the fruit tray we made, try a few variations:
- Desk organizer tray — weave it long and narrow to hold pens, scissors, and mail on a home office desk.
- Jewelry tray — a small square tray lined with a scrap of velvet makes a lovely ring and earring holder.
- Serving tray — weave a larger tray and add two short handles of round reed on the ends for carrying drinks outside.
- Bread basket liner tray — a flat woven tray under a cloth napkin keeps the table pretty and the crumbs contained.
Because trays dry flat and hard, they are also the best project for teaching children or grandchildren. The over-under rhythm is easy to grasp, and a completed tray is a confidence boost for any age.
Troubleshooting and Common Mistakes
Every weaver makes these mistakes at first. Here is how to fix them without unpicking your whole project.
"My base keeps going diamond-shaped." This happens when the slath is pulled too tightly in one direction. Push the corners gently back into square and weave a few loose rows before tightening. The walls will hold the shape once they are a few rows tall.
"My reed keeps cracking." It is too dry. Soak it longer, and mist your work every few minutes. If a crack appears, do not panic — wrap the damaged spot with a thin strip of reed and it will be invisible once dry.
"My walls lean to one side." You are pulling the weaver tighter on one side than the other. Slow down and keep even tension. It helps to weave with the basket in your lap, turning it toward you as you go, rather than reaching around it.
"The rim looks messy." The border gets neater with practice. If yours is uneven, soak the rim, gently pull the tucks apart, and redo one stake at a time. Wet reed is patient; take advantage of it.
"My basket wobbles." Usually this means the base dried unevenly. Set the finished basket on a flat surface, press it gently into shape while it is still damp, and let it dry with a weight inside.
Remember that a slightly imperfect basket is still a beautiful basket. The handmade look — the gentle unevenness, the visible joins — is exactly what people love about woven things.
Conclusion: Your Next Basket
You have done something that connects you to ten thousand years of human making. That first tray or basket, with its slightly uneven weave and its hand-finished rim, is a real achievement — and it is only the beginning.
When you are ready for the next step, try twining with raffia or yarn for a soft, colorful basket.
Explore coiling with pine needles gathered on a walk. Or simply make another tray in a different size, experimenting with dyed reed for a pop of color.
Every project teaches your hands a little more, and every basket carries the memory of the afternoon you made it.
Set your finished piece somewhere you will see it daily. It will remind you that slow, patient making still has a place in a busy life — and that you are capable of far more than you give yourself credit for.