Introduction
Before there were wheels, there were spindles. Before there was writing, there were spindle whorls — small pierced discs of clay, bone and stone, left behind in the earth in such numbers that archaeologists still use them to recognise settlements where people kept sheep or grew flax.
You are not learning a quaint hobby. You are learning the tool that clothed most of humanity, and it has changed remarkably little.
This guide will take you from a bare wooden spindle to a skein you can knit with. It will be uneven at first. It will also be yours.
A Tool Older Than Writing
The hand spindle is one of the oldest tools we have evidence of. Spindle whorls turn up in Neolithic sites across the Near East and Europe, and their shapes vary as much as the hands that used them.
A whorl is simply a weight. It is the counterweight that keeps a slim wooden shaft turning steadily while the spinner draws out fibre above it.
In ancient Egypt, tomb paintings show spinners at work with hand spindles, and Egyptian linen — fine enough to be nearly transparent — was spun this way. No wheel was involved.
In the Andes, spindles were carved from hardwood and bone. Some Paracas and Nazca textiles, roughly two thousand years old, were spun on them, and Andean spinners developed plying techniques we still borrow today.
In Europe, the distaff and drop spindle were ordinary household tools. The distaff held the unspun fibre; the spindle hung and turned. Our phrase "the distaff side," for the female line of a family, comes from this arrangement.
The spinning wheel, by contrast, is a surprisingly late arrival. It reached Europe only in the thirteenth century, and even then it was a slow, hand-turned thing. India and China had earlier versions, but for most of recorded history the spindle was the tool.
When you sit down with your first spindle, you join a very long queue of people who did this by firelight, with far less instruction than you have now.
How a Drop Spindle Actually Works
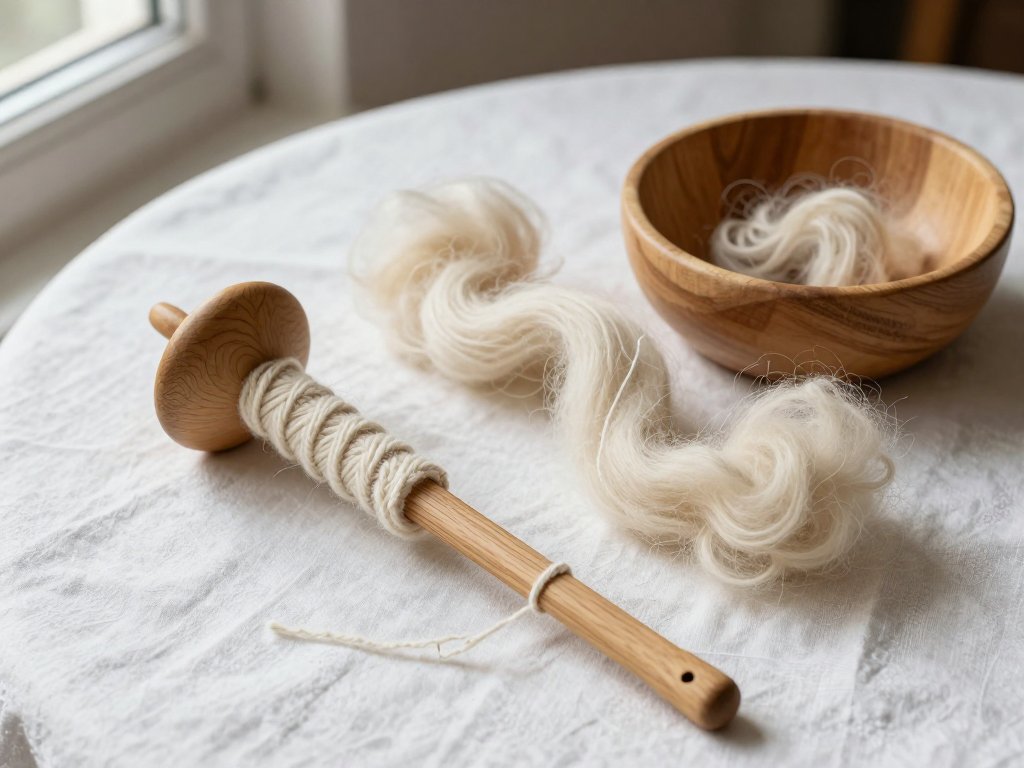
A drop spindle has three parts: a shaft, a whorl, and a hook or notch at the top. That is the whole machine. There is nothing to oil and nothing to adjust.
The whorl — a disc of wood, clay or stone — sits somewhere on the shaft. Its weight does two jobs. It provides inertia, so the spin continues after your fingers stop pushing, and it provides tension, so twist travels up the yarn instead of curling back on itself.
Twist enters at the bottom, where the yarn is attached, and travels upward into the drafted fibre above it. Your hands control where that twist stops. Everything about spindle spinning comes down to that one negotiation.
The spindle is called a drop spindle because it hangs from the yarn in progress. If you stop holding it and the yarn is too thin or the twist too little, it falls. That is not a fault in the tool. Falling is what it does.
The Fall, and What to Do About It
Beginners spend their first hour chasing a spindle across the floor. The cure is a technique called park and draft, and it is not a beginner's crutch — experienced spinners use it constantly.
Instead of drafting while the spindle spins, you park it. Tuck it between your knees, rest it against your thigh, or set it in a bowl. Now both hands are free and nothing is falling.
Draft out a comfortable length of fibre — four to eight inches is plenty. Then pinch the yarn below your drafted section and give the shaft a firm roll. Let the twist run up into the new fibre. Then wind on and park again.
You will be slower this way, but you will be making yarn instead of chasing wood across the kitchen floor.
The Kinds of Spindle
Most beginners do not need a collection. One well-made spindle and a bag of fibre will carry you for months. But it helps to know what you are looking at.
Top Whorl and Bottom Whorl
On a top whorl spindle, the whorl sits near the top of the shaft, with a hook above it. These are the most common beginner spindles, and they are light and quick to set spinning.
On a bottom whorl spindle, the whorl sits low and the yarn is secured with a half hitch around the shaft above it. They tend to spin longer and steadier, which suits thicker yarn and unhurried work.
Where the Weight Sits
A rim-weighted whorl carries its mass at the outer edge. It spins longer between pushes, which is forgiving when your hands are still learning to draft.
A centre-weighted whorl keeps its mass near the shaft. It spins faster and slows sooner, which suits fine yarn where you want twist to arrive quickly and stop precisely.
Weight itself matters more than any other specification. Roughly speaking, a spindle under about thirty grams suits lace and fine yarn; thirty to sixty grams suits ordinary knitting yarn; above that, you are heading toward bulky singles.
Supported Spindles
Not every spindle hangs. A supported spindle rests in a small bowl, a saucer or on the floor, and you set it spinning with a flick of the fingers while it stays put.
These are traditional for cotton — the little brass tahkli is the best-known example — and for very fine work. Many Central Asian and Native American traditions use supported spindles too.
They are lovely, but they are a second spindle. Start suspended, and add a supported one later if fine yarn calls to you.
Choosing Your Fibre
Fibre preparation matters more than most beginners expect. Two bags of wool can look identical and behave completely differently in your hands.
Roving, Batts and Rolags
Roving is combed, so the fibres lie parallel along its length. It drafts smoothly in a worsted manner — dense, smooth, strong. Most beginner kits contain roving, and it is the easiest place to start.
Batts come off a drum carder, with fibres crossed in every direction. They are airier and produce softer, loftier yarn, but they can feel lumpy and unpredictable in inexperienced hands.
Rolags are small rolls made from carded fibre, like little sausages of fluff. They are the traditional preparation for long draw.
Staple Length Changes Everything
Staple length is simply how long the individual fibres are. Short fibres need more twist to hold together and slip apart if you draft too fast. Long fibres draft easily and forgive a wandering hand.
Merino, the softest and most famous wool, has a short staple — often two to four inches — and it is slippery and neppy. It is a poor first fibre, however lovely it feels in a sweater.
Corriedale is the dependable beginner choice: medium staple, slightly grippy, forgiving. Bluefaced Leicester and Romney are longer and draft beautifully. Shetland is soft, springy and traditional.
Predrafting
Before you spin, loosen the fibre. Take your roving and split it lengthwise into strips about the thickness of your finger. Then gently pull each strip apart along its length, opening the fibres without separating them.
This is called predrafting, and it removes most of the struggle of the first hour. You are not cheating. You are preparing, which is what spinners have always done.
Why Greasy Fleece Comes Later
A raw fleece, straight from the sheep, still carries lanolin, dust and vegetable matter. It must be skirted, scoured, dried, picked and carded before it can be spun.
That is a wonderful project, and it teaches you where yarn actually comes from. It is not, however, a first project. Begin with prepared fibre, and save the fleece for the year you have a garden hose and some patience to spare.
Setting Up Your Spindle
You need a leader: a length of smooth scrap yarn, about twenty inches, tied to the shaft just below the whorl.
Tie it with a loop that will not slip, wrap it a few times around the shaft, then bring it up over the hook or into the notch. The loose end is where your fibre will attach.
Overlap the end of a thin strip of roving with the leader by two or three inches. Pinch firmly below the join and set the spindle turning.
Let twist travel up through the overlap. It will look lumpy, and it will hold. That first inch is not a sample of your future work; it is a knot doing its job.
Once the join is secure, park the spindle and predraft a small section. Then begin. The first length of yarn is always the least even, because your hands are still learning a conversation.
Drafting: Teaching Your Hands to Let Go
Drafting is the heart of spinning. It means sliding fibres past one another until a thick mass becomes a thin, even stream — and then letting twist catch it before it drifts apart.
Your hands have two different jobs, and they must not do the same thing at the same time. One hand holds the fibre supply and controls how much is released. The other shapes the yarn and decides where the twist stops.
The Short Forward Draw, Step by Step
- Park the spindle so nothing is pulling. Hold the fibre supply in your back hand, with a few inches of loose fibre between your hands.
- Pinch the fibre with your front hand, close to the twist already in the yarn. This pinch is a dam; twist cannot pass it.
- Slide your front hand back toward your back hand, letting the fibres slide and thin between your fingers.
- Stop sliding when the section is the thickness you want. Release the front pinch and let twist run up into it.
- Slide the front hand forward to the new yarn, pinch again, and repeat.
That is the whole movement. It is small, repetitive and almost boring once it clicks, which is exactly what you want. Boring means your hands have learned it.
The inchworm name comes from the rhythm: the front hand advances, pinches, retreats, releases, a few inches at a time, while the back hand feeds fibre at an almost imperceptible rate.
Letting Go
The hardest part is not the movement. It is releasing the pinch and trusting that twist will arrive before the fibre falls apart.
Most beginners hold on too long, which produces dense, over-twisted rope. The fibre needs a moment of being almost-yarn, and your hands must allow that moment to happen.
If you are nervous, count. Release the pinch, say "one," and then pinch again. The twist will be there. It always is.
Long Draw, as a Stretch Goal
Long draw is the other great drafting method, and it belongs to woollen spinning. Instead of pinching, you let twist travel into a carded roll and pull your hands apart smoothly, letting the twist draw the fibres out.
It is faster, softer and harder to control, and it needs rolags or a very airy batt. Save it for your third or fourth skein.
Spinning the Singles
There is no treadle here, which surprises people who have watched wheel spinning. The spindle's own weight supplies the drag that lets twist enter; gravity does the work of a wheel's flyer.
So your only controls are how fast you draft and how long you let the spindle spin. Draft faster than you add twist and the yarn drifts apart. Add twist faster than you draft and it kinks.
Checking Twist by Feel
Let a short length of your new yarn hang loose. If it kinks back on itself like a coiled telephone cord, you have plenty of twist. If it hangs perfectly straight and calm, it is under-twisted and needs more.
If it drifts apart when you tug gently, it needs more. Pinch above the thin spot, add a few turns, and carry on.
Beginners almost always over-spin rather than under-spin, because over-spun yarn feels secure. Try to spin a little more softly than your instinct suggests.
Keeping Thickness Even
Draft the same length with the same slide each time, and the yarn will even out on its own.
Winding On
When you have an arm's length of yarn, stop and wind it on. Unhook the yarn, hold the spindle steady, and wind in a criss-cross pattern so the cop — the growing ball of yarn on the shaft — stays even.
Finish with a half hitch: loop the yarn around the shaft, pass the working end under the loop and pull snug. This holds your work while you prepare the next section of fibre.
Joining a New Length
When your roving runs out, do not tie a knot. Fray the end of the old piece and the beginning of the new one, overlap them by about three inches, and draft them together as you add twist.
A good join disappears into the yarn; a poor one leaves a lump you will find later while knitting.
S and Z: The Direction of Twist
Hold a length of yarn vertically and look at the diagonal of its fibres. If the diagonal runs from bottom-left to top-right, like the middle stroke of the letter Z, the yarn has a Z twist.
If it runs the other way, bottom-right to top-left, it has an S twist. Those two letters are the entire vocabulary, and they matter more than they sound.
Most spinners spin their singles with a Z twist and ply with an S twist — the opposite direction. Doing so counteracts the energy stored in the singles and produces a balanced yarn.
Whatever direction you choose, keep it. If one length is Z and the next is S, the yarn will fight itself and plying will not save it.
Plying
Plying means twisting two or more singles together in the opposite direction. Almost every yarn you have ever knitted with is plied, and for good reason.
First, balance. A single yarn is under tension and wants to untwist; plying in the opposite direction settles that energy. Second, strength, because two strands share the load. Third, evenness, since two uneven singles average each other out.
Plying from One Cop
If you have spun one cop and want a two-ply yarn, you can use Andean plying. Wind the singles from the spindle around your hand in a figure eight, between thumb and little finger, until you have a loose bracelet of yarn.
Slip it off carefully. The end from the inside and the end from the outside now lie together, and you can ply from both at once. It is an elegant trick, and it has been used in the Andes for centuries.
Plying from Two Sources
The simpler method is two spindles, or two balls wound from two cops. Hold the two ends together, attach them to a leader, and spin in the opposite direction to your singles.
Keep a little tension on both strands so they feed evenly. If one runs out first, you will get a section of three-ply — not a disaster, but worth avoiding.
How Much Plying Twist
Use the ply-back test. Fold a short length of your plied yarn back on itself and let it hang. If it hangs straight and calm, the twist is right. If it kinks, you have too much; if it looks loose and stringy, add more.
Plied yarn should feel round and firm, not wiry. When in doubt, add a little more twist than feels natural — under-plied yarn pills and splits in knitting.
Finishing: Washing and Setting the Twist
Freshly plied yarn is still lively. Washing settles the twist, cleans the fibre and evens out the thickness, and it is the step beginners most often skip.
Making a Skein
Wind the yarn off the spindle onto a niddy noddy, or around the back of a chair if you do not have one. A chair back is roughly a yard and a half around, which makes counting easy later.
Tie the skein in four places with short lengths of contrasting cotton, using a figure eight so the ties do not strangle the yarn. Then slide it off carefully.
Washing
Fill a basin with cool water and a little gentle soap. Lay the skein in and let it sink. Do not agitate, stir or wring — wool plus heat plus movement equals felt.
Leave it for twenty minutes. Then lift it out, press the water out against the side of the basin, and rinse in water of the same temperature. A sudden change of temperature can shock the fibre.
Roll the skein in a towel and press to remove excess water. Never wring it.
Snapping and Drying
Hold the skein by both ends and snap it firmly between your hands, once or twice. This distributes the twist evenly along its length and is deeply satisfying.
Hang it to dry over a rod or door handle, with a small weight — a mug, a jar, a clothes peg — hung from the bottom loop. The weight straightens the yarn as it dries without stretching it.
Your first skein will probably yield somewhere between twenty and sixty yards. That is normal. It is enough for a small project and enough to teach you what your hands can do.
Measuring Your Yarn
Before you knit, measure. Wraps per inch — WPI — is the oldest and simplest guide to yarn weight, and it needs only a ruler.
Wrap the yarn around the ruler for one inch, with the wraps touching but not squashed. Count them. Roughly: eighteen or more is lace, fourteen to eighteen is fingering, eleven to twelve is double knitting, nine to ten is worsted, and seven or fewer is bulky.
For yardage, count the wraps around your niddy noddy or chair back and multiply by its circumference. Forty wraps around a yard-and-a-half chair back is sixty yards.
Write both numbers on a tag and tie it to the skein.
Troubleshooting
The Yarn Coils Back on Itself
That is over-twist. Let the spindle spin less, or draft faster. The yarn will still be usable, but ply it with a little extra twist in the opposite direction to balance it.
The Yarn Drifts Apart
That is under-twist, or drafting faster than twist can travel. Park the spindle, pinch above the thin place, and add a few turns before continuing.
Thick and Thin
Almost always a drafting problem, not a twist problem. Slow down, draft shorter sections, and keep your front hand moving the same distance each time.
The Spindle Keeps Dropping
Either the yarn is too thin for the spindle's weight, or you are trying to draft while it spins. Park and draft for a while. A heavier spindle will also help.
The Fibre Feels Felted
You may be holding it too tightly, or your hands are damp. Relax your grip, keep your hands dry, and predraft more thoroughly next time.
Joins That Slip
Overlap more, fray both ends, and add twist at the join before you carry on. A join needs roughly three inches of overlap to be trustworthy.
A First Skein Worth Keeping
Here is the truth that most spinning books do not say plainly: the lumpy first skein is the real milestone. Not the even one. The lumpy one proves you can make yarn at all.
Keep it. Tie a tag on it with the date and the breed, and put it in a drawer. In a year you will look at it with real affection, and you will be able to see, quite literally, how far your hands have come.
When you are ready to use it, choose something small that forgives unevenness. A pair of fingerless mitts takes under fifty yards, and thick-and-thin wool looks intentional in them. So does a small pouch, or a cosy for a teapot.
Then spin another skein. That is the whole secret, and it is a very old one.