Introduction
Here's a project that feels like a secret handshake between the old craft room and the modern world.
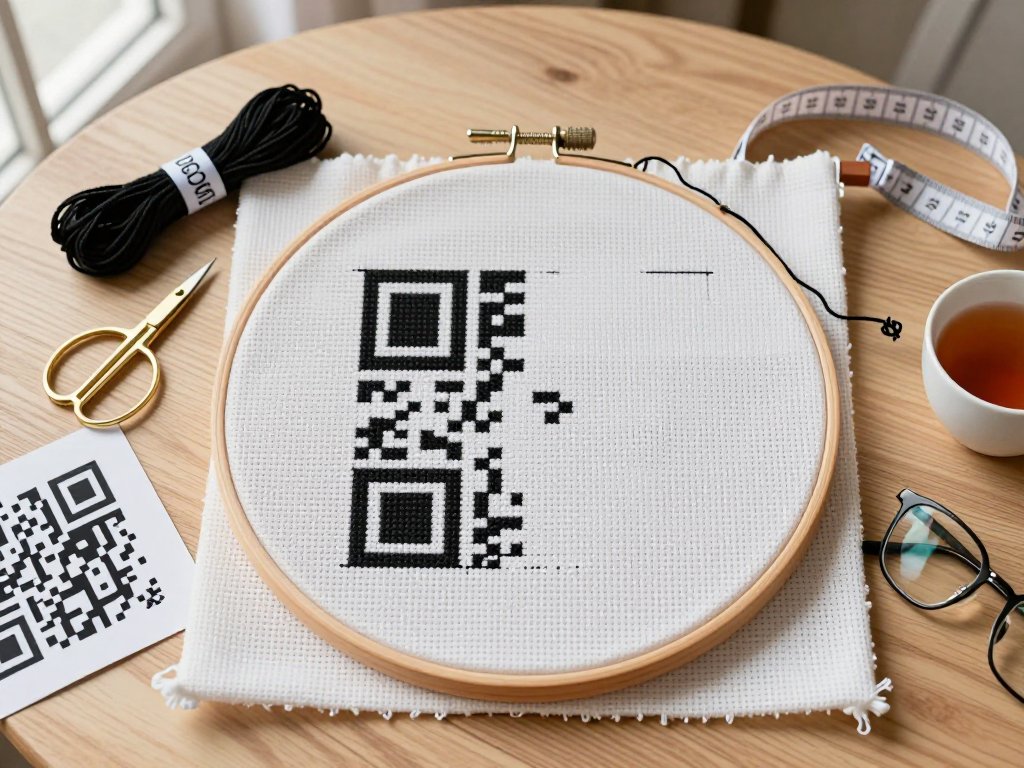
QR codes are literally pixel art. Every black module is one square. One square maps perfectly to one cross stitch.
That's it. The whole technique is just counting squares and making X marks.
You've probably scanned a QR code a hundred times this week. Menus, tickets, payment screens.
Now imagine stitching one by hand. In thread. On fabric that will outlive the phone that scans it.
It's fun. It's modern. And it makes the most giftable project you'll stitch this year.
Best of all, it's beginner friendly. If you can make a single cross stitch, you can make a QR code.
Here's exactly what you need, exactly how to do it, and exactly how to make sure it scans.
Why Stitch a QR Code
Let's be honest. Most cross-stitch patterns look like they belong in a 1980s sampler.
Flowers, kittens, motivational quotes in cursive. Lovely, but not exactly modern.
A QR code is different. It's clean, graphic, and unmistakably twenty-first century.
It also does something no flower pattern can do. It works.
Point a phone at your finished piece and it opens a website, a playlist, or a love note.
That moment never gets old. People's faces light up when the stitch actually scans.
Here are the best reasons to stitch one:
- Scannable art: your work becomes interactive, not just decorative.
- Gifts: a stitched QR code linking to a heartfelt message is unforgettable.
- Bookmarks: small, flat, and perfect for a reader in your life.
- Business cards: a hand-stitched card gets kept, not recycled.
- Wedding favors: link to your wedding website or a thank-you video.
- Housewarming gifts: link to the Wi-Fi password. Genius.
Every one of these projects uses the same basic skills.
You'll learn them all in this guide.
Choosing the Right QR Code
Not all QR codes are created equal. Some make great patterns. Some make nightmares.
Start with a free QR code generator. There are dozens online.
Keep the content simple. A short URL is ideal. A single word or short phrase is even better.
Long content makes a dense, busy QR code. Dense codes are harder to stitch and harder to scan.
Here's the trick most people miss: choose LOW error correction.
Most generators default to high error correction, which adds extra modules to the pattern.
Low error correction means fewer squares. Fewer squares means less stitching and a cleaner look.
You don't need heavy error correction for a gift piece. Your fabric won't get damaged like a printed menu.
Before you print anything, test the code. Scan it with your phone.
Make sure it goes exactly where you want it to go. This saves a lot of unpicking later.
A few more choices to make now:
- Use a dark color for the modules. Black is best for scanning.
- Keep the background plain. White or cream fabric works perfectly.
- Avoid adding logos or pictures inside the code. They complicate the pattern.
- Save the QR image file. You'll need it for the pattern step.
Ten minutes of planning here saves two hours of stitching.
Converting the QR Code to a Pattern
Now you need to turn your QR code into a cross-stitch pattern.
The good news? The conversion is basically already done.
A QR code is a grid. Cross-stitch is a grid. The math is the same.
Each black module in the QR code becomes one square of Aida cloth. Each square of Aida is one cross stitch.
That's the whole conversion. Black squares are stitches. White squares stay empty.
You have three ways to build your pattern:
- Print the QR code at the size you want to stitch.
- Overlay a transparent grid on the printout, or draw one with a ruler.
- Use free cross-stitch pattern software to convert the image automatically.
Printing and gridding works fine for small codes.
Software is faster for bigger ones. Most free tools let you upload an image and set the grid size.
If you use software, set the output to black and white. One color only.
Choose a stitch count that matches your fabric. On 14-count Aida, a 21 by 21 module code stitches to exactly 1.5 inches square.
That's the beauty of 14-count Aida. Every 14 stitches measure one inch.
Want to know your finished size? Divide the module count by 14. That's your size in inches.
Mark your pattern clearly. Number the rows if it helps.
A printed pattern you can tick off as you stitch is worth its weight in gold.
Materials and Supplies
Here's exactly what you need. Nothing more, nothing less.
- 14-count Aida cloth in white or cream: about 8 by 8 inches for a small project.
- DMC embroidery floss in black, or one dark color of your choice: two to three skeins.
- Tapestry needle, size 24: blunt tip, large eye, perfect for Aida.
- Embroidery hoop, 6 or 8 inches: keeps your fabric taut while you work.
- Small sharp scissors: for snipping thread close to the fabric.
- An optional frame: for displaying the finished piece.
Let's talk about the fabric first, because it matters.
14-count Aida is the standard for beginners. Fourteen squares per inch.
It's stiff enough to hold its shape, and the holes are easy to see.
White or cream both work. Just keep it light so the dark stitches stand out.
For floss, black is the most reliable choice for scanning.
One dark color also works. Deep navy, charcoal, or forest green all scan well.
How much floss? Two to three skeins of DMC 310 (black) covers most small projects.
A 21 by 21 stitch area uses roughly one and a half skeins. Buy a little extra to be safe.
The size 24 tapestry needle is non-negotiable. It glides through Aida holes without splitting threads.
Its blunt tip means you won't stab yourself, either. Beginners love that.
A 6-inch hoop suits small codes. Use an 8-inch hoop for anything bigger.
One more tip: skip the thimble. You won't need it.
Gather these supplies and you're ready to stitch.
Step-by-Step Stitching Instructions
Set up your hoop first. Center the fabric, pull it taut, and tighten the screw.
The fabric should feel like a drum. Not stretched to distortion, just firm.
Find the center of your fabric and the center of your pattern.
Fold the fabric in half, then in half again. The corner point is the center.
Mark it with a small pin or a loose thread.
Start stitching at the center of the pattern and work outward.
This keeps your design centered and gives you room to count in every direction.
Thread your needle with two strands of floss. That's the sweet spot for 14-count Aida.
One strand looks thin and wispy. Three strands get bulky. Two is just right.
Here's the basic full cross stitch:
- Bring the needle up from the back at the bottom-left corner of a square.
- Take it down at the top-right corner. That's your first diagonal.
- Come up at the bottom-right corner.
- Take it down at the top-left corner. You've made an X.
One X equals one QR module. Keep every stitch going the same direction.
If your bottom stroke always runs bottom-left to top-right, keep it that way.
Consistent stitches catch the light evenly. They also scan better.
Work row by row, exactly like reading a book. Left to right, top to bottom.
Count carefully before every stitch. Count twice if you're tired.
One miscounted row in a QR code shifts everything below it.
Keep your tension even. Pull each stitch snug, but not tight.
If the fabric puckers, you're pulling too hard. Loosen up.
Every ten stitches, glance at your pattern and confirm your position.
Stop every twenty minutes to stretch your hands and check your counting.
A small project takes four to six hours. Spread it over a few evenings.
Enjoy the rhythm. There's something meditative about making X after X.
Making It Scannable
This is the section that separates a decoration from a working QR code.
Scanners look for contrast. Dark modules on a light background.
Use dark floss. DMC 310 black is the gold standard.
Keep the background fabric light. White or cream Aida.
Make your stitches even and flat. Bumpy stitches confuse scanners.
Don't pull the floss too tight. Tight stitches sink into the fabric and lose contrast.
Aim for stitches that sit on the surface, not buried in it.
Here's the rule everyone forgets: the quiet zone.
Every QR code needs a border of empty space around it. Scanners need it to find the edges.
Leave at least four empty squares of Aida on every side. More is better.
That means your pattern is really the QR code plus a four-square frame.
When you cut your fabric, add another inch or two beyond the quiet zone.
That extra fabric makes framing easier and keeps the edges clean.
Lighting matters too. A well-lit piece scans faster than one in shadow.
And hold the phone steady. Let the camera focus before you expect a result.
Test the scan before you frame the piece. It's easier to fix a stitch now than after framing.
One last tip: bigger is better. A 2-inch QR code scans more reliably than a 1-inch one.
When in doubt, stitch it bigger.
Project Ideas
Once you've made one QR code, you'll want to make more. Here's where to put them.
Framed wall art is the classic choice. Stitch a link to your favorite playlist or a photo gallery.
Mount it in a simple frame and hang it where guests can scan it.
A bookmark is quick and thoughtful. Stitch a link to a free ebook or a reading list.
It's flat, durable, and fits in any book.
Gift tags make every present feel handmade. Link to a message, a song, or a recipe.
Card fronts work beautifully too. A birthday card that links to a video greeting? Unforgettable.
Business owners, listen up. A hand-stitched business card gets noticed.
Link it to your portfolio or your contact page. People keep it on their desk.
Wedding favors are the sweetest idea of all. Stitch a small code linking to your thank-you video.
Guests scan it during the reception. Cue the happy tears.
Housewarming gifts: stitch the Wi-Fi password as a QR code. It's useful and hilarious.
New parents would love one linking to a baby photo album.
Pet owners, link to your pet's Instagram. Yes, really.
The pattern is always the same. Only the message changes.
That's the beauty of this project. One skill, endless variations.
Troubleshooting
Something not working? Let's fix it. Here are the three most common problems.
Problem one: your QR code won't scan.
First, check the contrast. Are the stitches dark enough against the fabric?
Second, check the lighting. Try scanning near a window or under a bright lamp.
Third, check the quiet zone. Is there a clear border of at least four empty squares?
Fourth, check the size. If the stitched code is under 2 inches, make the next one bigger.
Fifth, check your stitches. Are they flat and even, or bumpy and twisted?
If the code still won't scan, photograph it and zoom in. Look for missed or shifted modules.
Problem two: you miscounted a row.
It happens to everyone. Don't panic.
Unpick the wrong stitches with the tip of your needle. Work slowly.
Slide the needle under the offending stitches and lift them out one by one.
Pull gently. You don't want to distort the Aida holes.
Once the row is clean, restitch it, counting twice this time.
Problem three: you're running out of floss.
Check your remaining skein before you start the last rows.
If you're low, finish the quiet zone first. Empty squares need no floss at all.
Stitch the densest area of modules next, while you still have thread.
Buying more DMC 310 is easy. It's the most common color in the world.
Matching dye lots is rarely an issue with black.
And if all else fails, remember: a QR code that won't scan is still a striking piece of pixel art.
Frame it anyway. It tells a story.
Finishing Your Piece
Your last stitch is in. Congratulations. Now let's make it beautiful.
First, wash the piece gently. Hand wash in cool water with mild soap.
This removes the oils from your hands and any hoop marks.
Rinse until the water runs clear. Never wring or twist the fabric.
Roll it in a clean towel and press out the excess water.
Let it dry flat, out of direct sunlight.
Once dry, press it face down on a folded towel.
Use a warm iron with no steam. The towel protects your stitches from flattening.
Press, don't drag. Dragging can distort the fabric.
Now choose your display method.
A hoop makes a charming frame on its own. Trim the excess fabric, fold the edges under, and secure them.
Or mount it in a picture frame. Stretch the fabric over acid-free cardboard and tape it in place.
Cut a mat to leave the quiet zone visible. It looks intentional and professional.
Add a small label on the back. Date, recipient, and the link the code hides.
That label becomes part of the story.
Your finished piece is now ready to gift, hang, or keep.
Conclusion
You did it. You turned pixels into thread and thread into something people can scan.
That's a genuinely modern craft skill, and very few people have it.
Think about what you just learned. Counting. Grids. Tension. Contrast.
Those same skills open the door to so many other projects.
Pixel art sprites from your favorite video game make wonderful patterns.
So do simple portraits, tiny landscapes, and bold geometric designs.
Any image that works as a grid can become cross-stitch. That's a huge creative universe.
Start with a QR code. Then follow the thread wherever it leads.
Scan the code you stitched. Watch it work. Smile.
Then pick your next message and start again.
Happy stitching, and may your thread never tangle.