Introduction
There is a moment, late in the afternoon, when a piece of Mountmellick work stops being flat cloth. The light comes in low across the room, and every padded leaf lifts a small shadow of its own.
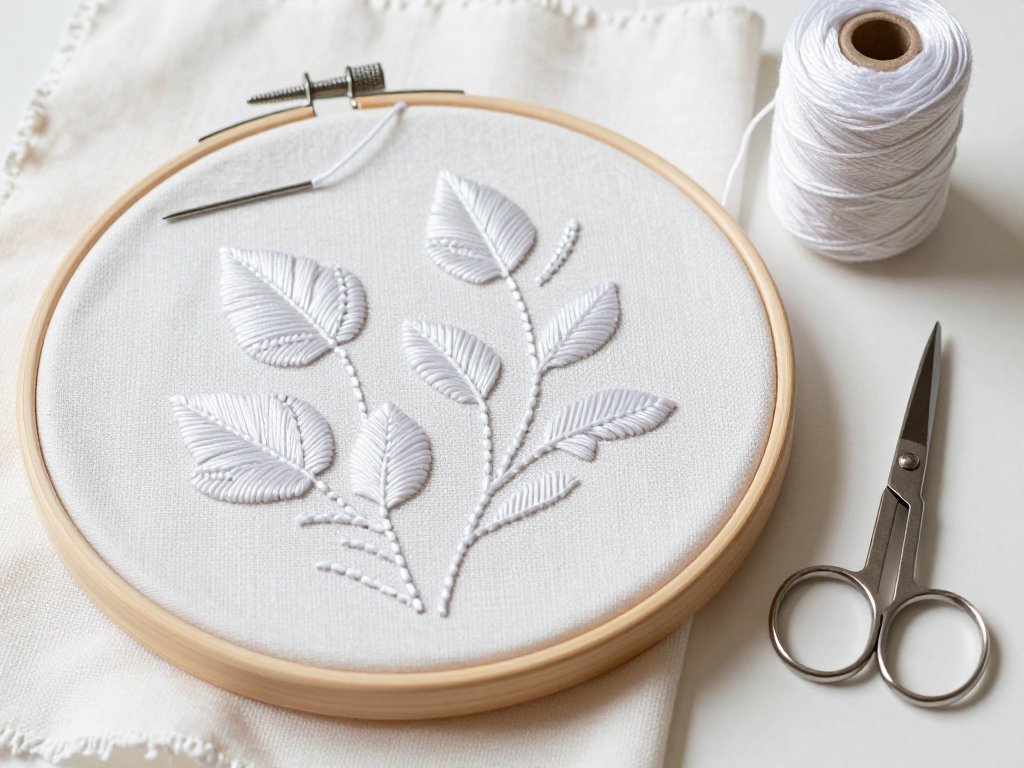
That shadow is the whole point. Mountmellick embroidery is white thread on white cloth, and it has no colour to lean on. What it has instead is height, and the way height behaves when light grazes across it.
If you have done a little hand sewing, you already own most of what this work asks for. You know how to thread a needle and how to keep a stitch even. What is new here is a way of building a shape rather than filling one.
This is not a quick craft, and it was never meant to be. It is the kind of sewing you pick up for twenty minutes while the house is quiet, then set down without guilt. The cloth waits patiently, and so does the light.
A Short History from Mountmellick
Mountmellick work began around 1825 in the town of Mountmellick, in County Laois, in the Irish midlands. It was introduced by Johanna Carter, a woman who taught the technique to local girls and young women.
The town already had a strong Quaker community, and that community mattered. Members of the Society of Friends had long supported schooling and small industry there, and they helped shape the new embroidery into paid work for young women who needed an income.
That detail is worth sitting with. This was not a drawing-room accomplishment passed down for pleasure. It was employment, designed so a woman could earn at home, in a place where other work was scarce and emigration was always near.
The work spread to neighbouring towns and to Dublin, but it kept the name of the place it came from. It declined late in the nineteenth century, as cheap machine lace and hard times pulled the market away, and then it was patiently revived in the twentieth.
The designs travelled in a practical way, through schools, convents and pattern sheets rather than through any single printed book. A woman who learned the work in one town could teach it in the next, and the motifs drifted and simplified as they went.
So when you sit down with a needle and a length of heavy cotton, you are joining a fairly long queue of women who did the same thing for reasons that were partly practical and partly, always, a wish to make something beautiful.
White on White, Drawn by Hand
Mountmellick belongs to a family of whitework traditions, and it is useful to know where it sits. The design is drawn freely onto the cloth, by hand or by tracing, and then stitched. Nothing is counted.
That is the cleanest way to see the difference from Hardanger embroidery, which is counted work on an evenweave ground, where the pattern lives in the grid of threads and grows from counting rather than from a drawn line.
Mountmellick asks for a different eye. You follow a drawn line the way you would follow a pencil sketch, and the cloth stays whole underneath. The lift comes from padding, not from openwork.
The motifs are taken from hedgerows and gardens rather than from geometry. Blackberry, dog rose, fern, oak leaf, wheat, ivy and hollyhock all appear, drawn with a naturalist's care and a certain gentle stylisation.
The Cloth and the Thread
Two materials carry this technique, and neither is a substitute for the other. Get them right and the stitching almost teaches itself.
The cloth is a heavy, smooth, firm cotton, traditionally a stout cotton satin sometimes described as mattress cloth. It has a close weave, a faint sheen on the face, and enough body to hold a raised shape without collapsing.
It is not linen. Linen slubs and its springy hand fight the padding, and the satin sits unevenly over them. It is not an evenweave either, because there is nothing here to count.
Weight matters more than colour. A cloth that drapes like a shirt will let the padding sink; you want something closer to the feel of a good apron or a heavy tablecloth, firm enough to resist your thumb.
The thread is the signature of the style. Traditionally it is a thick, soft, matte cotton cord, knitted or braided rather than twisted like floss, so it lies dense and flat and covers ground quickly.
Modern perle cotton No. 5 is the closest everyday stand-in for stitching, and a smooth cotton yarn works well for the hidden padding. Both are inexpensive; a working skein costs about the price of a coffee.
The Padding Principle
Here is the idea that makes everything else make sense. A padded shape is not stuffed. It is built in two passes, and the second pass is what you see.
First you make a bed. Work rows of back stitch across the shape until it is filled, but stop a thread or two short of the outline. Or lay thick thread along the shape and couch it down with tiny stitches at right angles.
Then you work satin stitch across that bed, at right angles to the padding, passing over it. Your needle enters just outside the drawn line and exits just outside on the other side, so the padding sits underneath like a small rise in the ground.
Because the padding stops short of the edge, the outline stays crisp while the middle swells. That is the difference between a padded leaf and a lump.
Tension decides whether this works. Stretch the cloth in a large hoop or frame until it is firm as a drum and rings faintly when you tap it. Slack cloth and padded satin will pucker, and no amount of pressing afterwards will repair it.
The Stitch Repertoire
Mountmellick uses a small, sturdy set of stitches, and each one has a job. You do not need all of them for a first piece, but it helps to know the shape of the vocabulary.
- Padded satin stitch: the raised leaf and petal work, built over a bed of back stitch or couched thread.
- Stem stitch: stems, vine lines and the fine veins that run down a finished leaf.
- Buttonhole stitch: the padded scalloped border that finishes a hem, and the hallmark of the style.
- Feather stitch: light, branching sprays that suggest fine foliage between heavier motifs.
- Thorn stitch: small pointed strokes that give a blackberry cane its prickles.
- Cable chain: a firm line for tendrils and the curling ends of stems.
- French knots and bullion knots: berries, seed pods and the centres of flowers.
- Long-and-short stitch: soft shading inside a petal, where two tones of white meet.
Work order matters as much as stitch choice. Outline and pad first, satin over the padding last, and save every knot and detail for the end, when nothing else can crush them.
Materials for Your First Piece
You can begin with very little. The cloth and the thread are the only things that must be right; everything else can come from an ordinary sewing box.
- A fat quarter or half metre of heavy cotton satin, or the heaviest smooth cotton you can find, in white or soft cream.
- One skein of perle cotton No. 5 in white, and a smooth cotton yarn for padding.
- A large hoop, ten to twelve inches, or a small frame. Room to work matters more than you expect.
- Tapestry and crewel needles in a middling size, with a long eye for the thick thread.
- A hard pencil, or a water-soluble fabric marker, for the drawn line.
- Small sharp embroidery scissors, and a soft towel for pressing.
Skip the temptation to buy a kit with twenty colours. This work is white, and the pleasure is in the relief, not the palette.
Your First Motif: A Padded Leaf Spray
A spray of three leaves with a stem and two berries teaches nearly everything: drawing, tension, padding, satin, and finishing details. Draw it lightly and keep it small, about four inches across.
- Wash and press your cloth, then draw the spray in a hard pencil or water-soluble marker. Keep the line faint; white cloth shows every mark.
- Mount the cloth in the hoop and pull it drum-tight. Tap it with a fingertip. If it gives, tighten the screw and ease the edges again.
- Outline each leaf and the stem in stem stitch with a single strand of perle cotton, working small, even stitches along the drawn line.
- Pad the first leaf with rows of back stitch across its short axis, keeping inside the outline by a thread or two at every edge.
- Add a second layer of padding on the two larger leaves only, working across the first layer. Small leaves need one layer, large ones two.
- Satin stitch over the padding, working across it rather than along it, entering and exiting just outside the outline.
- Keep the satin stitches parallel and snug. Lay the thread down rather than pulling it, so the padding is not compressed into a ridge.
- Work the stem in stem stitch, one row for a fine stem or two side by side for a sturdier one.
- Make the berries last: bullion knots with eight to ten wraps, or French knots worked twice around the needle for a rounder bead.
- Add a single stem stitch vein down the centre of each finished leaf, then step back and look at the spray from arm's length.
If a leaf looks slightly uneven, leave it. Padded work has a handmade rhythm, and the eye forgives a wobbly edge far more readily than it forgives a flat one.
A Weekend-Sized Project
The classic small project is a guest towel or a short table runner with a scalloped padded border along the hem. It is generous enough to feel like a real piece and modest enough to finish in two quiet evenings.
Draw a row of shallow arcs along the hem, each about an inch and a half wide, spaced evenly. Couch a thick padding thread along the arc, then work buttonhole stitch over it, keeping the stitches upright and evenly spaced.
The loops should sit on the outside edge of the scallop, with the flat bars facing inward. A small padded dot or a single French knot centred in each scallop lifts the border without crowding it.
Above the border, work one simple spray: a leaf, a stem, a berry. Resist filling the space. Mountmellick designs breathe, and the plain cloth is part of the composition.
If you want something even smaller, a lavender sachet with one padded leaf on the front takes an afternoon and makes a quiet, useful gift.
Common Beginner Mistakes and Calm Fixes
Most first attempts go wrong in the same four or five places, and each has a gentle remedy. None of them ruin the piece.
- Padding too wide: the satin spreads and the leaf looks mushy. Unpick only the satin, trim the padding back, and work across it again.
- Stitches too long: long satin snags and sags. Keep them under about half an inch, and split a long leaf into two padded sections.
- Cloth too slack: the shape puckers at the edges. Re-stretch the hoop and start the leaf again; pressing will not fix a pucker.
- Thread pulled tight: the cloth gathers around the motif. Let the thread lie flat and trust the padding for height.
- Details worked too early: knots get flattened by later stitching. Save berries, centres and veins for the last pass.
- Floss used instead of cord: the satin looks ropy and thin. Switch to perle cotton No. 5 for a denser, flatter surface.
If you have already made one of these, you are in good company. The tradition was taught by correction, one leaf at a time.
Care and Pressing
Padded work needs a lighter hand at the iron than flat embroidery. The padding is the point, and a hot iron pressed down flat will erase it.
Press face down on a thick towel, using steam and the weight of the iron rather than pressure. Let the pile of the towel take the relief, and lift the iron rather than sliding it.
Wash by hand in cool water with a little mild soap, and do not wring. Rinse, roll the piece in a towel to draw out the water, and dry it flat, away from direct sun.
Store finished work rolled rather than folded, so the raised stitches are not creased against each other. A cardboard tube wrapped in acid-free tissue is enough.
A Quiet Close
What stays with you about this work is not the finished panel. It is the sound of the needle going through heavy cotton, and the way a shape rises under your thumb after the last satin stitch closes over the padding.
White thread on white cloth asks you to look closely, and looking closely is its own kind of rest. There is nothing to match, no colour to choose, only line, height and light.
That is a good thing to have on a table in a busy house. Something slow, unfinished, and entirely yours.
Conclusion
Mountmellick embroidery is a generous teacher. It asks for two good materials, a firm hoop, and the patience to pad before you cover.
Start with one leaf spray on a scrap of heavy cotton. Get the tension right, feel the satin pass over the padding, and let the first piece be practice rather than a performance.
When the leaf stands up and catches the afternoon light, you will understand the tradition better than any page can explain it. Then draw the next one, a little larger.