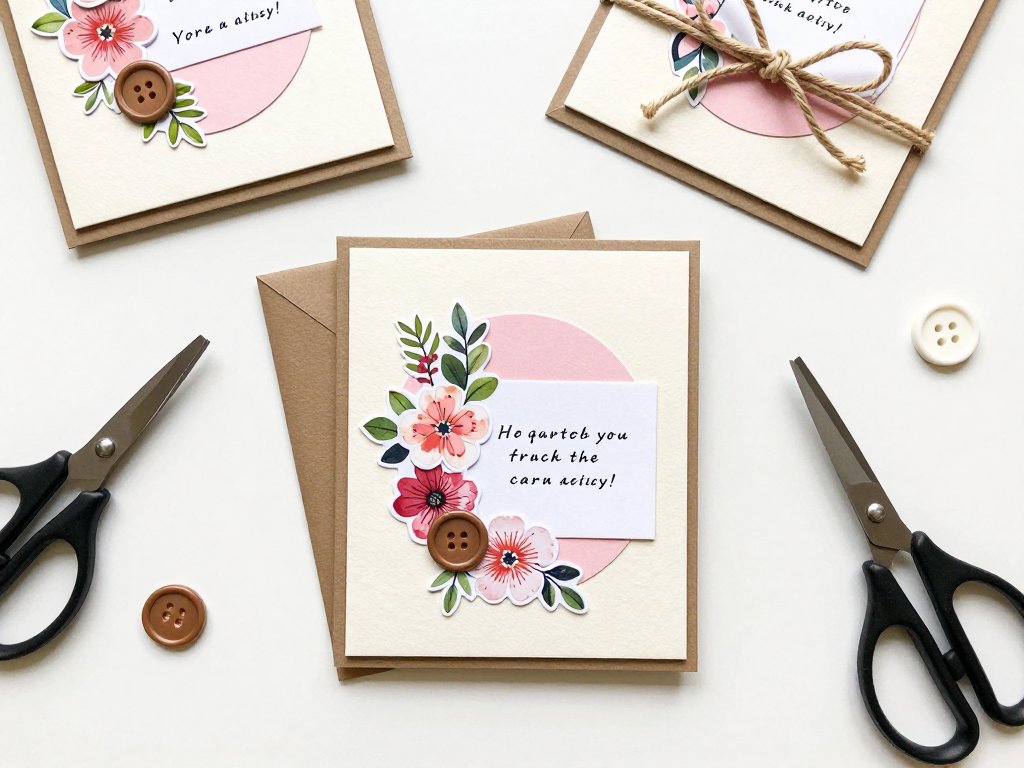
Introduction
There is something deeply personal about receiving a handmade card. The time someone took to cut, fold, and assemble it.
The thought behind the color choice. The slight imperfection in a hand-drawn line that proves a real person made it.
In a world of instant digital messages, a handmade card says, "You matter enough for me to slow down and make something just for you."
The wonderful thing about card making is that it requires very little to start. A few sheets of cardstock, some basic tools, and an afternoon of quiet focus are all you need to create cards that people will keep for years.
I have received handmade birthday cards that still sit on my desk, years after the occasion passed, because they are too lovely to throw away.
This guide covers two essential card categories — birthday cards and thank you cards — with projects that range from beginner-friendly to slightly more advanced.
Each project uses simple techniques that you can mix, match, and adapt to create cards for any occasion.
By the end, you will have the skills to make cards for every birthday, holiday, and thank-you note on your calendar.
Essential Card Making Supplies
You do not need a dedicated craft room or expensive equipment to make beautiful cards. Here is the practical starter list.
Cardstock. This is the foundation of every card. Choose heavyweight cardstock (at least 80 lb / 200 gsm) for your card bases.
White, cream, and kraft brown are versatile neutral bases. Colored cardstock in coordinating shades is used for layering and accents.
A pack of assorted colors gives you plenty of options for about ten dollars.
Paper trimmer or scissors. A small paper trimmer with a rotary blade makes straight cuts effortless and is worth the investment if you plan to make cards regularly. A twelve-inch trimmer costs about fifteen dollars. Sharp scissors are fine for smaller projects and curved cuts.
Bone folder. This simple hand tool creates crisp, professional folds. You run the smooth edge along your folded paper to create a sharp crease. It costs about five dollars and makes a noticeable difference in the quality of your finished cards.
Adhesive. A glue stick works for lightweight paper, but a double-sided tape runner is far better for card making. It applies a thin, even strip of tape that will not wrinkle your paper. Liquid glue with a fine tip is useful for attaching small embellishments.
Embellishments. Buttons, craft pearls, sequins, ribbon, and twine add texture and interest to your cards. You do not need much — a small assortment of neutral and metallic embellishments will cover most projects.
Rubber stamps and ink pads. A few sentiment stamps (Happy Birthday, Thank You, With Love) give you professional-looking text without requiring neat handwriting. Black and brown pigment ink are the most versatile choices.
Optional but helpful. Corner rounder punch, scoring board, decorative-edge scissors, nesting circle or oval dies, and a heat embossing tool. Start with the basics and add tools as you discover which techniques you enjoy most.
Card Anatomy: Understanding the Basics
Before diving into specific projects, it helps to understand the standard structure of a handmade card. Most cards follow a simple layered layout that creates depth and visual interest.
The card base. This is your folded card. The standard size is 5x7 inches when closed, made from a 7x10 inch piece of cardstock folded in half.
A 4.25x5.5 inch card (A2 size) is another common option, made from a 5.5x8.5 inch sheet folded in half.
Either size will fit in a standard envelope.
The mat layer. A slightly smaller piece of colored or patterned paper glued to the front of the card base. The mat layer creates a border of card base color around its edges, typically a quarter inch wide. This simple frame instantly elevates the card's appearance.
The focal panel. A smaller rectangle of paper, often light-colored or white, glued to the center of the mat layer. This is where your main design — the sentiment, floral arrangement, or illustration — lives.
The embellishments. Buttons, ribbon, die-cut shapes, pearls, or stamped images that complete the design. These are the details that make the card feel finished and intentional.
This layered approach — base, mat, focal panel, embellishments — is the foundation of virtually every card design. Once you understand it, you can adapt it endlessly.
Project 1: Layered Floral Birthday Card
This card uses simple paper layering and a stamped sentiment to create a sophisticated birthday card that looks like it came from a boutique stationery shop.
Materials needed: White cardstock for the base (5x7 inches folded), blush pink cardstock for the mat layer (4.75x6.75 inches), cream cardstock for the focal panel (4.25x6.25 inches), floral pattern paper or decorative scrapbook paper, Happy Birthday stamp, black ink pad, adhesive, craft pearls.
Step 1: Prepare the card base. Fold your 7x10 inch piece of white cardstock in half. Use a bone folder to sharpen the crease. Place the folded card on your work surface with the fold on the left.
Step 2: Apply the mat layer. Center the blush pink rectangle (4.75x6.75 inches) on the front of your card base and glue it in place. Use even pressure to ensure it lies flat with no air bubbles.
Step 3: Prepare the focal panel. Take your cream rectangle (4.25x6.25 inches). Stamp the Happy Birthday sentiment in the lower right corner, about half an inch from the bottom and right edges. Allow the ink to dry completely, about two minutes.
Step 4: Add floral accents. Cut small floral elements from your decorative paper. This can be individual flower blooms, leaves, or a cluster of small blossoms.
Arrange them in the upper left corner of the focal panel, creating an L-shaped composition that frames the stamped sentiment.
Layer the flowers, overlapping them slightly, and use foam adhesive dots under some of them to create dimension.
Glue the flat flowers directly, and attach the dimensional ones with foam dots.
Step 5: Assemble the card. Glue the focal panel to the center of the mat layer, aligning it evenly. Add two or three small craft pearls to the center of the largest flower blooms for a polished, elegant touch.
Step 6: Finish the inside. Open the card and line the inside with a slightly smaller piece of white or cream cardstock to cover the glue seams. Leave the inside blank for a personal handwritten message.
This design works for any occasion by changing the sentiment stamp and decorative paper. Swap Happy Birthday for Thank You and use soft blue floral paper for a thank you card. Use gold foil accents and burgundy flowers for an anniversary card.
Project 2: Clean and Simple Thank You Card
For occasions when you need a stack of thank you cards — after a bridal shower, birthday party, or holiday gift exchange — this clean, minimalist design is efficient to produce in batches.
Materials needed: Kraft brown cardstock for the base (5x7 inches folded, 10 sheets), cream cardstock (4.5x6.5 inches for the focal panel), twine or thin jute rope, Thank You stamp, brown pigment ink, corner rounder punch, adhesive.
Step 1: Batch prep the bases. Fold all ten card bases at once. Use a scoring board to make consistent folds, then sharpen each crease with a bone folder. Round the corners of each card front using the corner rounder punch for a soft, approachable look.
Step 2: Prepare the focal panels. Cut ten cream cardstock rectangles at 4.5x6.5 inches each. Round the corners to match the card base. Stack them so the ink will not smudge the next card.
Step 3: Stamp the sentiment. Stamp Thank You in the center of each cream panel using brown pigment ink. Hold the stamp firmly in place for three seconds, then lift straight up. Allow each panel to dry for a minute before stacking.
Step 4: Add twine detail. Cut a six-inch piece of twine for each card. Wrap the twine around the center of the cream panel, from left to right, and tie a simple knot or small bow on the right side.
Trim the ends at an angle so they do not fray.
Step 5: Assemble. Glue each cream panel to a kraft card base, centering it carefully. Press from the center outward to remove any air bubbles. Stack the finished cards with sheets of wax paper between them to prevent the twine from catching.
This design is intentionally simple. The natural kraft paper and brown ink create a warm, organic feel, while the twine adds a tactile element that makes the card feel special without any complex techniques. You can make a set of ten in about an hour.
Project 3: Interactive Pop-Up Birthday Card
For someone truly special, a pop-up card creates a memorable moment when the recipient opens the envelope. This project uses a simple V-fold mechanism that is easier to make than it looks.
Materials needed: Two pieces of white cardstock (one for the outer card at 5x7 inches folded, one for the inner mechanism), colored cardstock for decorations, Happy Birthday sentiment, adhesive, craft knife or scissors, ruler.
Step 1: Create the outer card. Fold your 7x10 inch piece of cardstock in half for the outer card. Set it aside.
Step 2: Make the pop-up mechanism. Take the second piece of cardstock (7x10 inches). Fold it in half.
Cut two parallel slits from the fold line inward, each one inch long and spaced one inch apart.
Make the cuts perpendicular to the fold. Open the paper and push the cut strip through to the opposite side, creating a box that pops forward when the card opens.
Step 3: Decorate the pop-up. Cut small decorative elements — balloons, a cupcake, or a birthday cake shape from colored cardstock.
Glue these to the front of the pop-up box so they face the recipient when the card is opened.
Add a smaller Thank You or Happy Birthday sentiment on the pop-up itself.
Step 4: Attach the mechanism to the outer card. Apply glue to the back of the pop-up mechanism's side panels (the parts that sit flat against the outer card).
Carefully align them with the center fold of the outer card and press firmly. Allow the glue to dry for fifteen minutes with the card partially open.
Step 5: Decorate the card front. Once the mechanism is secure, close the card and decorate the front cover with a simple sentiment and a small embellishment that hints at the surprise inside. A single Happy Birthday stamp and a small balloon cutout are enough.
Step 6: Test the mechanism. Open and close the card several times to ensure the pop-up moves freely and the card closes flat. If the mechanism catches, check that the glue is fully dry and the folds are crisp.
This card takes about an hour to make but creates a moment of genuine delight. It is worth the extra effort for milestone birthdays or for someone who has supported you in a meaningful way.
Techniques for Professional-Looking Cards
A few simple techniques will elevate your cards from obviously handmade to indistinguishable from boutique stationery.
Use a scoring board for perfect folds. A scored fold is crisp and straight. A hand-folded crease is often crooked. Scoring boards cost about fifteen dollars and include a bone folder. If you make more than a few cards, this tool pays for itself in the first session.
Mat your focal panel. Before attaching your main design panel to the card base, mount it on a slightly larger piece of coordinating cardstock. This creates a framed look that adds instant polish. The border should be even on all sides — typically an eighth to a quarter inch.
Add foam dimension. Pop dots or foam adhesive squares lift certain elements off the card surface, creating shadows and depth. Use them selectively on the most important elements — the main flower, the sentiment, or a die-cut shape — to draw the eye.
Keep your work surface clean. This matters more than you might think. Ink smudges, glue fingerprints, and paper dust all show up on light-colored cards. Wash your hands before handling cardstock, keep a damp cloth nearby for sticky fingers, and brush away paper dust with a soft paintbrush.
Stamp with consistency. When stamping, place the stamp on a flat surface, press the paper onto it rather than the other way around, and apply even pressure for three to five seconds. Lift the paper straight up rather than peeling it from one corner.
Let adhesive dry before adding embellishments. If you attach buttons or pearls while the underlying glue is still wet, they may slide out of position. Give each layer five to ten minutes to set before adding the next.
Card Design Ideas for Every Occasion
Once you have mastered the basic techniques, the possible designs are endless. Here are ideas for common occasions throughout the year.
Birthday cards. Use bright, celebratory colors. Add balloons from cardstock, confetti dots punched from metallic paper, or a simple birthday cake silhouette. A small envelope glued to the front of the card can hold a gift card or tea tag.
Thank you cards. Soft, warm colors work best. Floral patterns, leaf motifs, and simple calligraphy sentiments create an elegant, grateful tone. The clean and simple design from Project 2 is endlessly adaptable.
Get well soon cards. Cheerful but not loud. Soft blues, greens, and yellows with uplifting sentiments. A small bunch of hand-drawn or stamped flowers in muted tones communicates care without overwhelming.
Sympathy cards. Restrained and tasteful. Neutral tones, single flower stems, and simple script sentiments. Less is more for these cards — a single embossed flower on cream cardstock with a With Sympathy stamp is both beautiful and appropriate.
Thinking of you cards. Casual and warm. Bright colors, whimsical patterns, and short sentiments. These are wonderful for practicing new techniques since the expectations are lower and the recipient will appreciate the gesture regardless.
Holiday cards. Seasonal colors and motifs. Gold and silver accents on deep green or burgundy bases for Christmas. Pastel colors with floral accents for Easter. Warm oranges and browns with leaf motifs for Thanksgiving. The same card structure works for all of them with different paper and embellishments.
Packaging and Presenting Your Cards
How you present your handmade cards matters almost as much as the card itself. A carefully packaged card shows that you value both the craft and the recipient.
Store finished cards in clear cellophane sleeves to protect them from dust and smudging. These sleeves cost pennies each and keep your cards pristine until they reach their recipient. For gift-giving, slide the card into its sleeve, then into a coordinating envelope.
Make your own envelopes using an envelope template and decorative paper. A4 or 12x12 inch scrapbook paper works well for standard-sized cards. Sealing the envelope with a small wax stamp or a custom sticker adds a final personal touch that recipients notice.
If you are giving a set of cards as a gift, bundle them with twine or ribbon and include a matching notepad or a pack of coordinating envelopes. A handmade card paired with a quality pen makes a thoughtful, practical present for anyone who values correspondence.
For cards you plan to sell, photograph them in natural light on a clean background before packaging. Clear photos of your work help potential buyers see the detail and quality you put into each piece.
Conclusion
Handmade cards carry something that store-bought cards cannot replicate: the evidence of your time and attention. Every straight fold, every centered sentiment, and every carefully placed embellishment says, "I thought about you while I made this."
Start with the layered floral birthday card for your next celebration. Gather your cardstock, your trimmer, and your favorite stamp, and give yourself an hour to create something from scratch.
The first card may not be perfect, but the person who receives it will not notice a slightly crooked mat layer or a less-than-straight sentiment.
They will see a card made just for them.
And once you make one, you will likely find yourself reaching for your supplies the next time a birthday appears on the calendar. Card making has a way of becoming a habit — a creative pause in a busy week that produces something lasting and meaningful.
