Introduction
Halloween prep always looks calm in photos. In real life it is a table covered in costume pieces, a stack of plastic pumpkins, and somebody asking where the scissors went. Making your own treat bags gives that chaos a quiet anchor.
A folded paper pouch costs pennies, uses supplies you likely already own, and takes only minutes once you know the folds. The best part is that the kids can fill them while you finish the costumes.
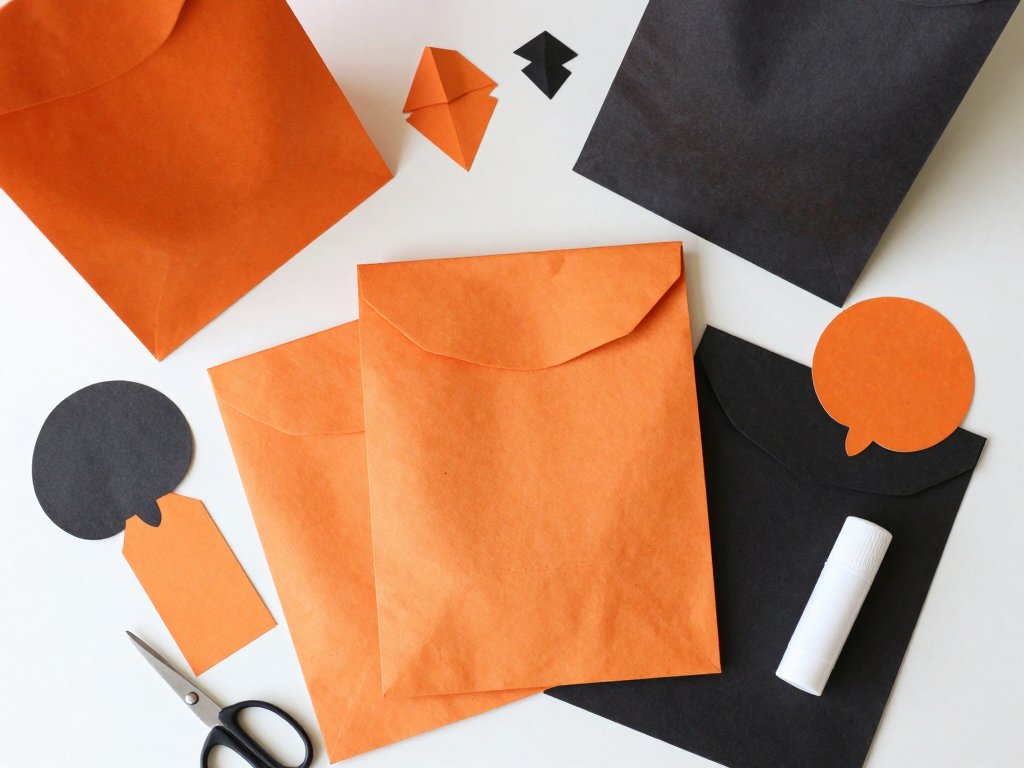
This project turns plain kraft lunch bags into stand-up pouches, finished with hand-cut tags and small paper toppers. Nothing here needs special tools or perfectly precise measurements.
By the end you will have a plastic-free treat bag that looks intentional and handmade, plus a batch method for making twenty without losing your entire evening.
Let's begin with exactly what you need on the table.
What You Need
Gather everything before you fold the first bag. A clear table and one small tray of supplies make the whole project move faster. Here is the exact list I keep stocked.
- Kraft paper lunch bags. The flat-bottom kind, roughly 5 by 10 inches. Plain brown kraft is the classic choice.
- Orange and black card stock. One sheet of each makes many tags and toppers. Matte card stock folds and punches more cleanly than glossy.
- Washi tape. A few Halloween-pattern rolls, plus a plain black roll for edges and quick repairs.
- Glue stick. Acid-free if you have it, for paper layers that need to stay flat.
- Double-sided tape. The strong, invisible hold for the top fold, described in the next section.
- Baker's twine. Black, orange, or natural cotton string for tag threads and small handles.
- Hole punch. A standard single-hole punch is enough for every tag.
- Scalloped and shape punches. One scalloped edge punch plus a few small shape punches for decorations.
- Small scissors. Sharp craft scissors sized so kids can manage them with a little help.
Two optional helpers make folds crisp and even: a pencil for faint guidelines and a bone folder or the back of a spoon to press creases.
The Folding Technique
The trick to a stand-up pouch is that a kraft lunch bag already has a gusseted base. Open it, flex the bottom, and it stands on its own. You are only shaping the top.
Step one: open and stand the bag
Slide your hand inside and gently push the bottom flat. The folded base opens into a small rectangular gusset that gives the pouch its stand-up foot. Press the corners square.
If a bag came folded flat and creased, run your fingers along the base folds again. A well-opened base means the pouch will not tip over once you add candy.
Step two: measure the top fold
Decide how deep you want the top band. One and a half inches is comfortable for a small hand; two inches gives more room for a tag hole. Measure down from the top edge.
Mark that distance lightly with a pencil at both edges, fold the top down to meet the marks, and press the crease. Lining up the two pencil dots keeps the band level.
Step three: secure the fold
Run a strip of double-sided tape inside the folded band and press it down. The tape holds the flap flat and thin, which keeps the pouch looking tidy when you fill it later.
Double-sided tape or glue?
This is the detail that changes your finished look. Glue stick adds moisture, and moisture makes paper wrinkle. A thin line of glue is fine for flat layering, but it ripples along a fold.
Double-sided tape adds no water, so the paper stays smooth and the flap sits flat. Use tape for the top fold and glue stick only for thin, decorative layers pressed between flat sheets.
If you already glued a fold and it wrinkled, do not panic. Set the bag under a heavy book for ten minutes; the paper relaxes and the ripple mostly disappears.
Hand-Cut Tags
Tags are where the personality lives, and they are genuinely easy to cut. A rectangle, a bat, a ghost, and a pumpkin cover almost every Halloween mood. Start with the simplest shape and grow.
Cutting the shapes
Cut a rectangle roughly 2 by 3 inches for a plain tag. Fold it in half lengthwise so both sides match, then trim the corners round if you like a softer look.
For a bat, fold a small rectangle in half and cut a wing curve on the folded edge. Unfold it and you have a symmetrical bat in two cuts. Snip a small notch for the head.
For a ghost, draw a rounded dome on folded card and cut a wavy hem along the bottom. For a pumpkin, cut a circle and add a tiny stalk rectangle in green or brown.
Layering two colours
Layering makes a plain tag look considered. Cut the main shape in black, then cut a slightly smaller version of the same shape in orange, or the reverse.
Glue the smaller shape onto the larger one with a single swipe of glue stick. Line up the top edges first, then smooth the layer down from the center outward to avoid bubbles.
Punching and threading
Punch one hole near the top of the tag, about a quarter inch below the edge. If you are layering, punch through both layers at once so the holes line up perfectly.
Thread a length of baker's twine through the hole, fold it over, and knot it into a small loop. Six to eight inches of twine is plenty to drape over the pouch band.
Reinforce the hole if the card stock is thin: press a small square of washi tape over the spot first, then punch through the tape and the card together. That little step stops the tag ripping.
Paper Toppers
Toppers are the small crowning details that sit on top of the pouch band. They add height and texture, and they use up the scraps from your tag cutting, which feels satisfying.
Folded paper toppers
Cut a strip about 1 inch wide and 4 inches long in two colours. Fold both ends inward to meet in the middle, then pinch the center to make a simple bow shape.
Secure the pinched center with a small wrap of washi tape, and glue the whole topper to the front of the top band. It reads as a bow from any angle.
Paper-clip bats
For a quick flutter, cut a small bat from black card and tape a paper clip to the back. Clip it onto the bag edge and let the wings peek above the fold.
Scalloped edge punches
A scalloped edge punch turns a plain paper band into something with presence. Punch a strip of orange card along one long edge, then tape it just under the top fold.
The scallop catches the light and hides any slightly uneven fold line underneath. It is a forgiving decoration that covers small mistakes.
A small paper bow
Fold three short loops of paper strip, overlap them, and pinch the center. Tape the finished bow to the tag instead of the bag for a lighter, dangling look.
Three Easy Variations
Once the basic pouch works, these three variations add variety without new supplies. Make one of each and pick your favourite for the batch.
Mummy-wrap bag
Cut a kraft bag shorter, then wrap it with thin strips of white or cream paper, criss-crossing and leaving a gap for the eyes.
Glue two small black circles in the gap for eyes. Because the strips overlap at odd angles, messy edges look intentional, which is perfect if kids are helping.
Jack-o'-lantern window cut-out
Cut a small triangle nose and two triangle eyes from an orange card panel, then glue the panel to the pouch front. The black bag shows through the cut-outs as a face.
This is also a lovely place to recycle a scrap of bleeding tissue paper art, tucked behind the cut-outs for a soft glow of colour.
Spider-web thread wrap
Wind baker's twine around the whole pouch a few times, changing direction each pass, then knot it at the back to make a loose web.
Glue one tiny paper spider in a corner of the web. Keep the wrap loose so the bag front stays readable and the twine does not dent the paper.
What to Put Inside
Treat bags do not have to mean candy. More families now hand out small non-candy fillers, and a paper pouch makes those little gifts feel like real treasure.
- Sticker sheets. One themed sheet per bag lasts far longer than a sweet.
- Mini pencils. Seasonal pencils with eraser tops fit neatly and get used at school.
- Glow sticks. A couple of sticks make the walk home safer and feel like a small event.
- Temporary tattoos. Lightweight, flat, and endlessly popular with kids of every age.
- Small erasers, bouncy balls, or finger puppets. Any tiny toy that fits without bulging the pouch.
Many parents prefer non-candy fillers because treats are already everywhere on Halloween night. A bag of toys and stickers balances out a bucket that is otherwise full of sugar.
They also travel better. A pencil or a glow stick will not melt in a coat pocket or get crushed at the bottom of a candy bag, so the gift is still intact the next morning.
If you do include sweets, place the flat items in first and the treats on top. That keeps the pouch standing and stops it looking empty from the front.
Assembly-Line Tips
Making twenty bags one at a time will eat an evening. Working in small, repeated batches is far faster, and it lets kids join in without crowding your hands.
Do one task across every bag before moving to the next. Your fingers learn each motion, and you stop switching tools between steps.
- Open and stand every bag. Do all twenty bases at once and set them in rows on the table.
- Fold and tape all the top bands. Measure once, then repeat the same fold down the line.
- Cut all tags in one sitting. Cut rectangles first, then add shapes from the same bowls of scraps.
- Punch and thread every tag. Line them up, punch the row, then knot twine across the batch.
- Make the toppers. Fold strips, then glue one topper onto each tag or band.
- Fill last. Add fillers only when every bag is complete, so nothing gets dented mid-production.
Set up a small bowl for each material and keep the twine pre-cut into even lengths. Pre-cutting is the single biggest time-saver in the whole process.
Give younger helpers the safe jobs: sorting tags, peeling washi tape, and dropping fillers into finished pouches. Save the scissors and punches for older hands.
A batch of twenty takes roughly an hour with one adult and a helper, spread over two relaxed sittings. You do not have to finish it all in one go.
Troubleshooting
Small problems appear in every batch, and none of them ruin the project. Here are the common ones and the quickest fixes.
Glue wrinkles
This almost always means too much moisture. Switch to double-sided tape for fold lines, use a thinner glue swipe for flat layers, and press the paper under a book to dry flat.
Torn fold lines
Tears happen when card stock is scored against the grain or folded too fast. Fold gently along the line first, then press the crease with a bone folder rather than forcing it flat.
If a top band tears, cover it entirely with washi tape or a scalloped strip. The repair becomes part of the design, and no one will notice.
Curling card stock
Card stock curls when it absorbs moisture or sits in humid air. Let sheets come to room temperature, and store punched tags under a heavy book overnight to flatten them.
Curling tags can also be taped flat onto the pouch for a few hours. The weight of the tape holds the card while it settles.
Tags that rip at the hole
A torn hole usually means the hole is too close to the tag edge. Punched too near the rim, the paper has nothing left to hold the twine.
Move the hole down a quarter inch and reinforce it with a small square of washi tape before punching. Tape-spotting the hole nearly always solves the problem.
If a tag already ripped, thread the twine through a fresh hole a little lower, or glue the torn tag onto a larger backing cut from scrap.
Final Thoughts
Handmade treat bags rarely come out identical, and that is exactly the charm. Slightly wonky bats and imperfect folds read as warmth, not mistakes.
Give yourself permission to make the first one ugly. The second is faster, the fifth is neat, and by the tenth you have your own rhythm without thinking about it.
Involve the kids wherever you can. Let them pick the shapes, thread the twine, and decide what goes inside. The making is the memory, more than the finished bag.
So which will you try first, the mummy-wrap or the jack-o'-lantern window? Set out one bowl of scraps tonight and see how far the family gets together.