Introduction
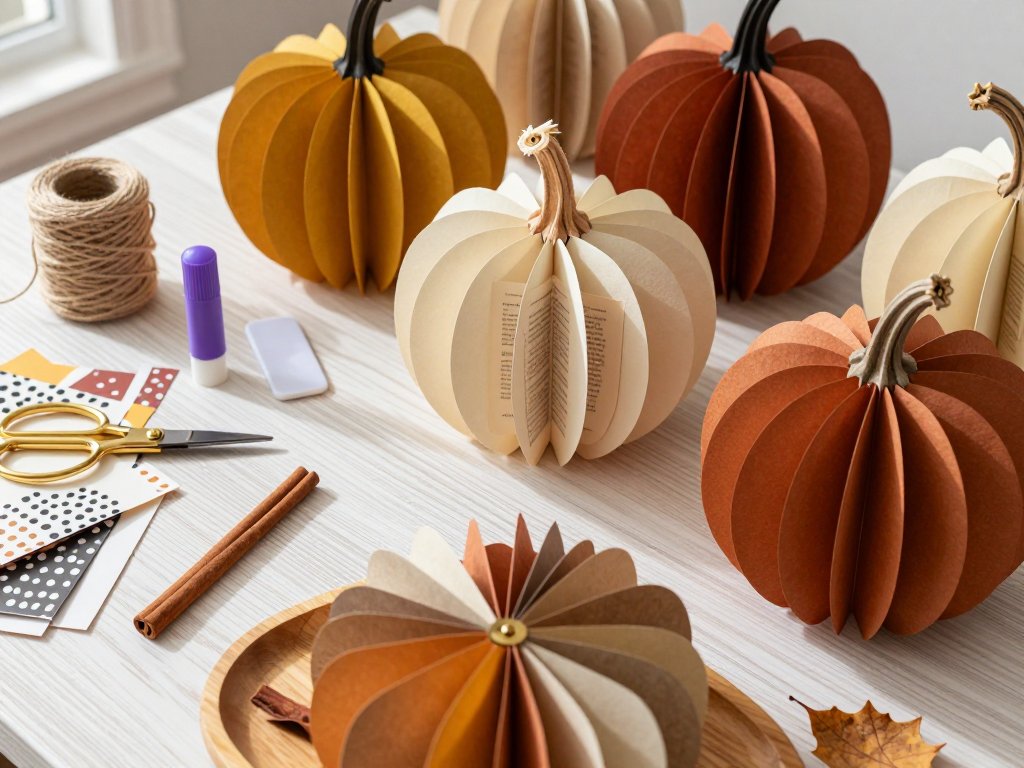
Paper pumpkins are the cheapest, fastest fall decor you can make. No trips to the craft store, no fancy tools, no waiting on shipping.
Chances are you already own everything you need. Cardstock from a half-used pack. Scrapbook paper left over from a birthday banner. A glue stick that still has life in it.
These projects skip the mess of carving and the cost of faux pumpkins. You cut, you fold, you glue, and twenty minutes later you have something plump and pretty sitting on your mantel.
Best of all, paper pumpkins are forgiving. A wobbly pleat or a crooked stem reads as handmade charm, not a mistake. That's exactly the kind of project you want when time is short.
I'll walk you through five different methods, from the classic accordion fold to a five-minute garland. Start with the easiest and work your way up, or cherry-pick the one that fits your afternoon.
Each project uses the same handful of supplies, so you can make one pumpkin and immediately try the next without restocking.
There is no right season to start, either. Make a few in September and you'll have them ready well before the leaves turn.
If you enjoy paper crafts with a more detailed finish, our guide on Paper Marbling: Marble Book Edges and Stationery is a lovely next step once your fall decor is done.
The Basic Supplies
You probably have most of this already. Anything missing is inexpensive and easy to substitute.
- Cardstock or construction paper — the backbone of every pumpkin. Medium weight holds a fold without cracking.
- Scrapbook paper — printed sheets give you instant pattern. Look for small prints so the folds stay visible.
- Old book pages or newspaper — free texture with a vintage feel. Thrift-store paperbacks work perfectly.
- Scissors or a paper trimmer — a trimmer keeps strips uniform, which matters more than you'd think.
- Glue stick and hot glue — the stick for paper-to-paper, hot glue for the stem and any heavy joins.
- Twine, raffia, or jute — for stems, handles, and hanging. A small skein lasts all season.
- A ruler and pencil — for measuring strips. Accuracy here makes the finished shape round.
- A bone folder (optional) — a clean crease makes every pleat crisp. A thumbnail works too.
Two extra items worth having on hand: a small hole punch and a few brass brads. They cost almost nothing and unlock the strip method in Project 2.
Everything here is archival-safe enough for decor that lives indoors. Store leftovers in a zip bag and next fall you're ready in minutes.
You don't need a dedicated craft room, either. A kitchen table, a cutting mat, and half an hour are enough to finish a small set.
Project 1: Accordion-Fold Paper Pumpkins
This is the classic, and it's the easiest. Once you've made one, you can make six without thinking.
- Cut 8 to 12 strips of cardstock, each about 1 inch wide and 8 to 11 inches long. Shorter strips make a smaller, rounder pumpkin.
- Fold each strip in half to find the center, then unfold. This center crease is your guide for the next step.
- Accordion-fold each strip with pleats about 1/2 inch wide. Press every fold flat with a bone folder or your fingernail.
- Glue the folded strips to each other, stacking the halves so they form one long fan. Match pleat to pleat as you go.
- Bring the two ends together and glue them into a closed circle. Hold for a few seconds until the glue grabs.
- Fan out the pleats with your fingers, spreading the circle into a plump sphere.
- Hot-glue a short curl of twine or raffia to the top for a stem. Add a paper leaf if you like.
Work on a flat surface and keep the pleats aligned as you glue. Misaligned pleats are the number one cause of a lumpy pumpkin.
For a two-tone look, alternate a solid cardstock strip with a patterned scrapbook strip. The contrast shows off the fold beautifully.
Tip: if the pumpkin looks flat, you need more strips. If it bulges unevenly, smooth the pleats with your hands and let it relax.
A single pumpkin takes about fifteen minutes. Make three in an evening while a show plays in the background.
If your strips are different lengths, the finished pumpkin will lean. Trim all the strips together against a ruler before you fold.
Project 2: Paper Strip Pumpkins from Cardstock
This version uses flat strips threaded on a center spine instead of folds. It reads as a clean, modern pumpkin.
- Cut 12 to 16 strips of cardstock, all the same length and about 1/2 inch wide. Uniform strips are the whole trick here.
- Punch a small hole about 1/4 inch from both ends of every strip. Line them up so the holes sit evenly.
- Stack the strips and thread a brad or a length of twine through both sets of holes.
- Spread the strips outward into a sphere, spacing them like the ribs of a globe.
- Secure the top with a knot or bend the brad's legs open against the paper.
- Slide a short twine stem through the top hole and tie it off. Trim the bottom if the strips poke out unevenly.
- Fluff the shape by gently pulling alternate strips until the sphere looks round and full.
Longer strips make a tall, slender pumpkin; shorter strips make a squat, wide one. Changing length is the easiest way to vary your set.
If the strips won't stay fanned, your holes are too tight. Nudge the punch one size up and rethread.
These make wonderful place-card holders at a fall table. Tuck a name tag under the twine stem and you're set.
Because the strips stay flat, this is also the easiest pumpkin to mail. Slip one into a padded envelope for a friend who loves fall.
Project 3: Book-Page and Newspaper Pumpkins
Old book pages give you a soft, aged look that printed paper can't match. The cost is basically zero.
Use the same fold-and-fan method as Project 1, but cut your strips from book pages or newspaper instead of cardstock.
Paper from novels is thin, so plan on 12 to 16 strips per pumpkin. Thicker newspaper may need only 10.
For a warm antique tone, tea-stain the pages first. Steep a few tea bags in hot water, brush the liquid over each page, and let them dry flat.
Once dry, the pages curl slightly, which actually helps the folds. Press them under a book for an hour if they're too wavy.
Vary your source pages for subtle texture. A mix of book print, sheet music, and newsprint reads richer than a single type.
Layer book pages with cream kraft paper to break up the print. A twine stem and a small cinnamon stick pair beautifully with this vintage look.
Keep a few finished pumpkins under a glass cloche and they'll look like a curated antique find, not a craft-night experiment.
Thin pages tear easily, so glue them gently and avoid pulling the strips. Support the shape with two hands as you fan it open.
Project 4: Toilet-Paper-Roll and Cardboard Pumpkins
Save those empty tubes and cardboard scraps. This is the upcycled version, and it's wonderfully sturdy.
Start with four to six cardboard tubes, or cut a cereal box into strips about 1 inch wide. Each strip becomes one rib of your pumpkin.
Paint the tubes in rust, mustard, or deep orange and let them dry completely before assembling.
Or skip paint and wrap each tube tightly with twine, jute, or narrow paper strips. Secure the ends with a dab of hot glue.
Bundle the tubes side by side into a barrel shape and hot-glue them together. Add a cardboard circle top and bottom if you want a tidy finish.
A short stick or a rolled cardstock tube makes the stem. For a patterned pumpkin, cover cardboard strips with scrapbook paper instead.
These hold up to handling, so they're the best pick for a porch or a kids' craft station.
Let kids paint their own tubes while you assemble the adults' set. It keeps little hands busy and everyone ends up with a pumpkin.
A row of these smallest pumpkins along a windowsill looks charming and costs you nothing but a few saved tubes.
Project 5: Flat Paper Pumpkin Garland
Short on time? This is your five-minute win, and it fills a whole doorway with fall color.
- Cut simple pumpkin shapes from cardstock in three sizes: small, medium, and large.
- Layer a smaller pumpkin over a larger one with a glue stick or a foam square for a raised look.
- Add a paper stem and a curl of twine to the top of each cutout.
- Punch a small hole in each stem and thread the shapes onto a long length of twine.
- Space them a few inches apart in alternating heights and hang the garland on a mantel or across a doorway.
Mix plain cardstock with patterned scrapbook paper for contrast. A garland of nine pumpkins takes about fifteen minutes from start to finish.
To make cutting faster, fold a sheet in half and cut two shapes at once. Symmetry saves you time and keeps the sizes consistent.
For wall art, mount the same layered shapes on a framed kraft-paper background and call it done.
This is also the best project to make with kids. Older children can trace and cut, while younger ones can stamp or color the shapes.
Hang one garland per doorway and your whole hallway reads as fall. It's the fastest way to decorate a big space on a small budget.
Styling Ideas
Group three to five pumpkins of different sizes on a wooden tray. Varying heights makes the cluster look intentional.
Build a fall tablescape by mixing paper pumpkins with real candles in cream and amber. Keep the flames away from loose paper edges.
Fill a clear mason jar with tiny paper pumpkins for a shelf or entryway. A little twine tied around the neck finishes it.
Swap the paper stems for real dried pumpkin stems if you have them. The contrast between crisp paper and rough stem sells the illusion.
Finally, mix paper pumpkins with real ones. Tuck a paper version beside a grocery-store pumpkin and no one will spot the difference.
Line a bookshelf with one pumpkin per shelf for a subtle, spread-out fall look. Repeat the same size for a calm, uniform feel.
For a dining centerpiece, nestle pumpkins among a few acorns and a sprig of dried eucalyptus. It reads seasonal without feeling cluttered.
Use one scale per space. Tiny pumpkins get lost on a wide mantel, and large ones crowd a narrow shelf.
Making Them Last and Troubleshooting
Paper decor can last for years if you store it well. Keep finished pumpkins in a lidded bin away from damp basements and direct sun.
To avoid glue bleed-through, use a light hand with the glue stick. Let each layer dry before you add the next.
A lopsided pumpkin usually just needs one more strip or a firmer hand on the pleats. Reshape it gently while the glue is still soft.
If the pleats spring open, re-press each fold with a bone folder and hold the shape for a moment. Crisp folds stay put.
Choose colors that read as autumn: rust, mustard, cream, deep orange, and warm brown. A single muted green accent keeps things from looking too flat.
Dust with a soft brush rather than a damp cloth. Water will warp the paper and loosen your glue lines.
For a light protective finish, mist finished pumpkins with a matte sealer. Test on a scrap first so your pattern doesn't bleed.
If a stem falls off, a fresh dot of hot glue fixes it in seconds. Keep the glue gun handy during setup and you'll never fuss.
Small creases smooth out with a warm iron on low, pressed between two sheets of scrap paper. Never iron directly on the pattern.
Conclusion
You now have five ways to turn paper into fall decor, and none of them need a trip to the store.
Pick one project and make a set this afternoon. Start with the accordion fold, because it's the fastest path to a finished pumpkin.
Once you have a little cluster on the mantel, try the next paper project. Each one gets easier, and each one adds to the warm, handmade feel of your fall home.
Set out the paper, put on something cozy, and make the first one. The rest will follow.
When your set is finished, snap a photo and arrange the pumpkins somewhere you'll actually see them. Decor you made yourself is the kind that makes a house feel like fall.