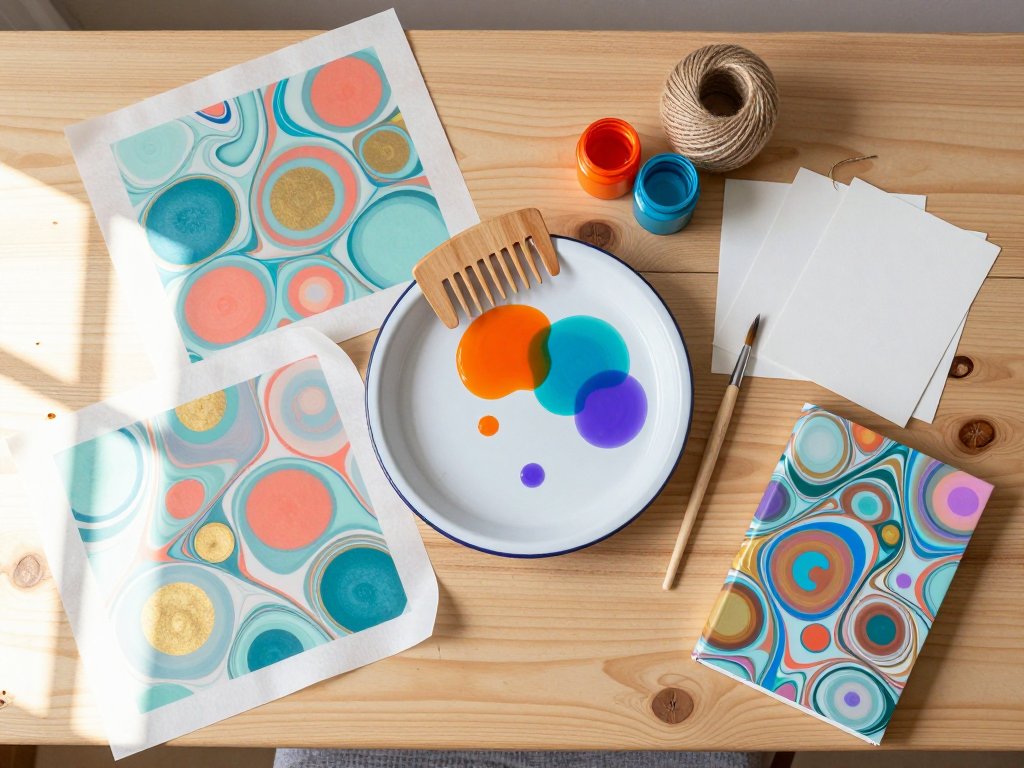
Introduction
There is a moment in paper marbling that still stops me, even after years of practice.
You drop a color onto quiet water, watch it bloom into a soft circle, and draw a comb through it.
Then you lay a sheet of paper on the surface and lift it a few seconds later.
What comes up is a pattern no one has ever made before or will ever make again.
I am Eleanor Hayes, and decorated paper has been my quiet companion for more than thirty years.
I have taught this craft at kitchen tables and studio benches, to children and to grandmothers.
This guide is for you: the busy mom who craves an hour of calm and a finished thing to hold.
You need a tray, a few colors, some paper, and the willingness to be surprised by your own hands.
A Craft Carried Across the World
Before we mix anything, let me tell you where this art began, because the story makes every print richer.
The earliest marbling we know comes from Japan, where artisans made suminagashi, or floating ink, as early as the twelfth century.
They floated ink on still water and drew up patterns that drifted like smoke.
Meanwhile, in Turkey and Persia, the art of ebru was unfolding with earth pigments and brushes of horsehair.
Ebru masters coaxed stones, waves, and flowers from droplets of color, and we still use their pattern names today.
European travelers carried marbling west, and by the seventeenth century it flourished in Germany, France, and England.
There, marbled paper found its great calling: the decoration of books.
Binders used it for endpapers and for the painted edges of the pages themselves.
Those lively edges did real work, shielding the paper from dust and grime during a book's long life on the shelf.
They also announced the binder's skill, for a clean, even marble was terribly difficult to achieve.
Each workshop guarded its recipes and its signature patterns the way a baker guards a family cake.
The Quiet Science of Floating Paint
Marbling looks like magic, but it rests on a simple truth about liquids.
Paint and water prefer not to mix, much as oil and water keep their distance.
Your bath is not plain water, though. It is a thickened water called the size.
The size is made from seaweed or plant gum, and it pours like thin syrup or a silky jelly.
Because the size is thicker than plain water, a droplet of paint settles on its surface and stays there.
Surface tension holds each drop in a tidy island, while the thick size keeps neighbors from rushing together.
This is why a comb can push the colors around and the pattern still holds.
When you lay paper on the size, the fibers drink the paint that touches them.
Lift the sheet, and the whole design comes away with it, printed onto the page in a single breath.
What You Will Need
Here is the list, with the frugal substitutions I have used for decades.
The Size
You need a thickener to make your bath. Carrageenan is the traditional choice, and it is ground from Irish moss seaweed.
Methyl cellulose is a friendly alternative that mixes quickly. Either will serve you well.
Paints
Ready-made marbling paints are lovely, but you can begin with fluid acrylics or artists' inks thinned with water.
Thin each color until it pours like milk, and test it on your size first.
Ox Gall
Ox gall is a wetting agent that helps paint spread into thin, even films on the size.
A single drop changes everything, so we add it sparingly and test as we go.
The Tray
Your tray should be shallow and slightly larger than your paper.
A cat-litter tray, an old baking pan, or a plastic photo tray all work.
A tray about the size of a sheet of card is the perfect place to start.
Combs and Rakes
Combs drag the floating colors into patterns. You may buy a marbling rake or make your own.
A strip of corrugated cardboard with toothpicks pressed into the ridges makes a fine first comb.
Paper
Choose paper that is smooth and absorbent. Cotton paper and artists' papers are ideal.
Even good printer paper will take a print, though the colors will look softer on it.
Keep a roll of newsprint nearby for skimming the tray and blotting wet prints.
A Place to Dry
Wet prints need somewhere flat to rest: a drying rack, a clothesline with clips, or a table covered in clean newsprint.
Most of the tools, from the tray to the comb, can be borrowed from your kitchen or craft drawer.
Start small, and let the craft grow at the pace your life allows.
Before the First Drop: Mixing and Testing
Mix the size according to the package directions, using lukewarm water.
Whisk or blend it well, pour it into your tray, and then do the hardest thing: walk away.
The size needs several hours, or better still, overnight, to rest.
During that time the bubbles rise and pop, and the bath turns glassy and still.
A rested size is the quiet secret behind every clean print.
Before your first drop of paint, skim the surface, dragging a strip of newsprint from one end of the tray to the other to catch dust, bubbles, and film.
Now prepare your paints. Spoon a little of each color into its own small jar.
Add water until the paint pours like thin cream, then stir in a single drop of ox gall.
Test each color by letting one drop fall onto the size.
A healthy drop spreads into a circle about the size of a coin.
If it sits in a tight dot, add a whisper more ox gall and test again.
If it bursts into a ragged film, you have added too much; rinse the jar and start over.
Write the winning recipe on each jar with a marker, because you will want it again next week.
Your First Pattern, Step by Step
This is the heart of the craft. Read the whole sequence once, then begin.
- Mix the size and pour it into your tray the day before you print, so it can rest until every bubble has risen and settled.
- Skim the surface with a strip of newsprint, drawing it from one end of the tray to the other.
- Dip a clean brush into your first color and tap it gently over the tray, so fine droplets spatter across the size.
- Repeat with a second and third color, letting the droplets fall where they will and spread into soft circles.
- For a stone, or Italian, pattern, stop here and let the colors still into rounded shapes that recall polished pebbles.
- Hold your paper by two opposite corners, with the side you want printed facing down toward the size.
- Lower one corner to the surface and let the sheet roll gently across the water, corner to corner, so no air is trapped beneath it.
- Count slowly to ten, then lift the paper by two corners in one steady, unhurried motion.
- Rinse the print under a gentle stream of cool water to wash away the loose size, and lay it flat on newsprint to dry.
- Skim the tray again before every new print, and take a moment to admire your first stone pattern.
A Second Print: The Combed Nonpareil
When the stone pattern feels easy, try the design that made the old bookbinders famous.
Drop your colors across the size in loose bands, working from one end of the tray toward the other.
Take your comb and draw it once, slowly, from one end of the tray to the other.
Then draw the comb across again, at a right angle to the first pass.
The two passes break the bands into a fine, even mesh of lines and feathery marks.
This is the nonpareil, the pattern most of us picture in old library books.
Print it exactly as you printed the stone pattern, then rinse and dry it flat.
Learning the Pattern Names
Marbling has its own language, and the names are half the charm. Here are four you will meet often.
Stone, or Italian. Drops of color are left to spread on their own until they form rounded, pebble-like shapes. It is the gentlest pattern and the best place for a beginner to begin.
Nonpareil. The comb is drawn across the tray twice, in two directions, breaking the colors into a fine and orderly mesh. The old binders favored it for endpapers.
French curl, or peacock. The comb is pulled through the size along a slow, wavy path, so the lines sweep into arcs like an opened fan. The finished pattern truly calls a peacock's tail to mind.
Getgel. This pattern comes from the Turkish ebru tradition. A stylus draws one continuous wavy line across the tray, and the colors braid after it in a ribbon of soft curves.
Do not try to master all four at once. Every pattern begins with the same quiet drops.
Project One: A Marbled Stationery Set
Let us put your new skill to work on something you will actually use: a small set of stationery.
Plan four or five prints in colors that make you happy, and let them dry fully before cutting.
Then gather plain cards, envelopes, a small notebook, and a few blank gift tags to transform.
Cards and Gift Tags
For cards, cut your dried sheets to size and fold them in half, or glue a marbled panel to the front of a plain folded card.
For gift tags, cut small rectangles, punch a hole in one corner, and thread a ribbon through.
For envelopes, trace an envelope you already own onto a thin marbled sheet, then cut, fold, and glue it together.
Cover a Notebook
A plain composition notebook becomes a treasure when you wrap it in a marbled sheet.
Cut the paper an inch larger than the cover on every side, fold the edges over, and glue them down inside.
Make It Yours
When the stationery is dry, consider pairing it with stamped designs in the corner of each card.
A tiny monogram or a sprig of leaves looks lovely resting on marble.
If that idea appeals to you, our guide to custom rubber stamp carving shows how to cut stamps that match your own hand.
Tuck the finished pieces into a gift box, and you have presents for teachers, neighbors, and grandmothers ready before the holidays.
Project Two: Marbled Book Edges
This is the project that makes people gasp, and it is far simpler than it looks.
Choose a small paperback or notebook whose pages are smooth and uncoated.
The Clamp Trick
Close the book firmly and hold it shut with a simple jig of two stiff boards and a pair of clamps.
Set one board on each side of the closed book, and clamp them snugly, like a sandwich.
The boards keep the pages from shifting and stop paint from seeping between them.
Choose a book small enough to hold in one hand while the other tends the tray.
Marbling the Edge
Optional but helpful: brush a thin coat of alum onto the page edges and let it dry before you marble.
Alum helps the colors bite into the paper fibers and hold fast.
Prepare a fresh pattern on your size, just as you did for sheets of paper.
Hold the clamped book with its page edges facing down, and lower it gently until the edge kisses the floating paint.
Count a few seconds, lift the book away, and rinse the edge under a gentle stream of cool water.
Stand the book upright with the pages still clamped, and let the edge dry completely.
If your book is wider than the tray, marble it in sections, adding fresh paint between each dip.
Leave the clamps on overnight, and unclamp only when the edge is fully dry.
Then open the book slowly and admire the one edge no one else in the world owns.
When the Water Misbehaves: Troubleshooting
Every marbler, even a seasoned one, has a day when nothing floats as it should. Here is what the common troubles are telling you.
- Paint sinks to the bottom. Your size is too thin or your paint is too watery. Mix a fresh, stronger size and let it rest fully before trying again.
- Colors bleed into one another. There is too much ox gall in the paint, or you have dropped too much color. Use smaller drops and less gall.
- The colors look muddy. You are overworking the size. Comb once or twice and stop, for endless fussing blends every hue into brown.
- Tiny bubbles ring your prints. The size has not rested long enough. Give it more hours, and skim carefully before each print.
- Paint will not transfer to the paper. Your paper is too smooth or too heavily coated. Cotton paper or artists' paper will drink the color far more willingly.
When in doubt, skim the surface and begin again. The size forgives, and a fresh start is always one strip of newsprint away.
Marbling Around a Busy Life
A few small habits keep marbling calm rather than chaotic, especially when small helpers are near.
- Cover the table with newspaper or a vinyl cloth, and wear an apron or an old shirt.
- Start with one tray and card-sized paper, which prints quickly and cleans up faster than big sheets.
- Set up near the sink so the rinse step is never a dash across the house.
- Let children join with supervision. Give each child a little tray and brush, and let them drop colors while you lay the paper on the size.
- Keep paints and ox gall on a high shelf between sessions, for marbling belongs to hands that understand no tasting.
- Try papers from your recycle bin, since scraps often take a lovely print and experiments are free.
- Gift what you make, for marbled cards and tags carry the warmth of your afternoon in every swirl.
- The size keeps for days in the refrigerator, so you can print a little each evening without remixing.
A Gentle Close
When I began marbling, my first prints were crooked, blotchy, and absolutely wonderful.
Yours will be too, and that is entirely the point. The size does not judge, and the paper keeps whatever you give it.
You are joining a line of makers that reaches back to twelfth-century Japan and winds through the great binderies of Europe.
All you need tonight is a small tray, a few colors, and a stack of plain cards.
Lower that first sheet onto the water, lift it slowly, and see what the centuries have been trying to show you.
Your kitchen table is enough. Your first tray of marbled cards is waiting.
