Introduction
There is a moment in every snail mail hobbyist's life when a plain envelope stops feeling like enough. You have the washi tape, the vintage postage, the beautiful handwriting. But the envelope still looks, well, a little generic.
That is exactly the moment you need a rubber stamp. Not a store-bought one, although those are lovely, but one you carved yourself.
A little leaf, a coffee cup, your initials, a tiny house. One small carved image, pressed in colored ink, and suddenly your envelope looks like it came from a person with a point of view.
The best part? Carving your own stamps is genuinely easy. The supplies are inexpensive, the skills build quickly, and a single carved stamp can stamp hundreds of envelopes, cards, and gift tags. It is one of the most satisfying projects per minute of effort that I know.
This guide walks you through everything: the exact tools to buy, how to transfer a design, how to make clean cuts, and how to fix the mistakes we all make. By the end, you will have a stamp you made yourself and a brand new craft in your back pocket.
Why Carve Your Own Stamps?
Before we dig into the how, let me sell you on the why. Because once you start, you may never look at a store-bought stamp the same way again.
It is budget-friendly. A single carving block costs about the same as one cute store-bought stamp, but it gives you a blank canvas you can carve into dozens of designs over time. You can even carve both sides.
It is fully customizable. Want a stamp of your dog, your houseplant, or your favorite coffee order? You can have it. Store stamps are made for everyone; your stamps are made for you.
It is wonderfully portable. The whole kit fits in a pencil case. Carve at the kitchen table, on a lunch break, or while the kids are at soccer practice.
And it pairs perfectly with the snail mail revival. Handmade letters are having a genuine moment, and a hand-carved stamp is the finishing touch that makes your mail unmistakably yours.
Exactly What You Need
Here is the complete supply list. I have kept it to the essentials, with honest notes on what matters and what you can skip.
- Carving blocks. Soft rubber carving blocks, often sold under names like Speedball Speedy-Carve or Soft-Kut, are the beginner's best friend. They carve like firm butter. Look for a pack of a few small blocks to start.
- A carving tool set. A set with interchangeable blades is ideal. You will use two shapes most: a small V-gouge for fine lines and a U-gouge for clearing larger areas. A basic five-piece set costs very little and lasts for years.
- A pencil and tracing paper. For drawing and transferring your design. A regular HB pencil is fine.
- A stamp pad. A water-based ink pad in a color you love. Black, brown, or a deep teal all look beautifully classic on paper.
- Scrap paper. For test stamps. You will want this, trust me.
- A cutting mat or bench block. To protect your table and give the block something firm to rest on.
Optional but nice: a small soft brush for sweeping away rubber crumbs, and baby wipes for cleaning your stamps between colors.
Choosing a First Design
Your first stamp should be simple. This is not the moment for a detailed portrait of your cat. This is the moment for a leaf, a star, a moon, a heart, or your initial.
Think about shapes with clear outlines and big open spaces. A design that works well is one you can recognize even as a solid silhouette, because that is roughly what a stamp prints. Bold and simple reads beautifully; fussy and tiny turns into a muddy blob.
If you want to carve text, keep it to one or two short words. Remember that the stamp prints in reverse, so if you are carving letters, you need to carve them backwards, like reading them in a mirror.
Numbers are a great place to start: a single letter or number has only one or two lines to manage.
Here is a trick I use every time: before carving anything, stamp-test your idea mentally. If you squint at your drawing and it still makes sense, it will make a good stamp.
Step One: Transfer Your Design
You have two ways to get your design onto the block: drawing it directly, or transferring it from paper. Both work, and you will develop a favorite.
Drawing directly is the simplest. Lightly sketch your design on the carving block with a pencil. The block's surface is smooth, so your pencil lines show up well. Do not press hard; the lines only need to guide your blade.
For a traced design, draw it on tracing paper first, then flip the paper over so the drawing faces down, and rub the back with your pencil or a spoon.
The graphite transfers onto the block in reverse, which is exactly what you want for text.
For pictures, reversing does not matter at all.
Whichever method you choose, give yourself a clean, visible line to follow. A few extra minutes of clear marking saves you a lot of guesswork at the carving stage.
Step Two: Carve Away the Background
Here is the single most important concept in stamp carving: you carve away what you do not want to print. The raised parts are what touch the ink. So your design stays, and everything around it gets carved away.
Hold your carving tool like a pencil, with your other hand holding the block firmly on your cutting mat. Push the blade away from your body, always. This keeps your fingers safely out of the path of the blade, which is the number one rule of this craft.
Start with shallow cuts. You can always carve deeper, but you cannot put rubber back. Run your V-gouge along the outline of your design first, creating a little moat around it. Then switch to the U-gouge to scoop out the larger background areas.
Rotate the block, not your hand, to follow curves. Turning the block keeps your cutting angle comfortable and your lines smooth. Carve a little, brush away the crumbs, and check your progress often.
Step Three: Test and Refine
When you think you are done carving, ink the stamp and press it onto scrap paper. This is the moment of truth, and it is always a little exciting.
Press the stamp onto the ink pad evenly, then press it onto your paper with firm, even pressure. Do not rock it side to side; a flat, steady press gives the cleanest print.
Look at your test print. Are there extra specks of ink where rubber should have been carved away? Carve those spots a little deeper. Are some lines printing thin or broken? They may need a touch more depth beside them, or the ink may just need a more even press.
Expect to go back and forth a few times. Carve, test, refine, test again. This loop is the whole craft, and it is genuinely satisfying to watch your print get cleaner with each round.
Fixing Common Carving Mistakes
Everyone carves something they wish they had not. Here is the reassuring truth: almost every mistake is fixable, and the rest are design features.
You carved through a line. If a thin line broke, carve around it a little, and let the break become a deliberate gap. Or simplify the design slightly by removing the broken line entirely. Nobody knows what you intended.
The background is not clearing. Carve deeper, but in small passes. Trying to remove a big chunk in one go is how slips happen. Shallow, repeated passes are safer and give you more control.
The print is patchy. Usually an ink or pressure issue, not a carving one. Ink the stamp more evenly, press more firmly, and test on smoother paper. Sometimes the paper is the problem, not the stamp.
You carved the text backwards. We have all done it. Flip the block over and carve the mirror image on the other side, or just lean into it and use the stamp on the back of envelopes as a little secret.
The beauty of carving blocks is that they are cheap, so when a mistake truly cannot be saved, you shave the whole surface flat and start again. That is not failure. That is practice.
Caring for Your Stamps
A well-made stamp will serve you for years with minimal care. Here is the short maintenance list.
- Clean after each use. Gently blot the inked surface with a baby wipe or a damp cloth until no color comes off. Let it dry completely before storing.
- Store flat. Keep stamps lying face up or face down on a flat surface, never stacked with other stamps pressing into their carved faces.
- Keep them out of heat. A hot windowsill can soften and warp the rubber. A drawer or box at room temperature is perfect.
- Re-ink, don't over-ink. A light tap on the ink pad is plenty. Too much ink fills the carved grooves and ruins the print.
That is genuinely all the maintenance they need. No oils, no special cleaners, no fuss.
Projects for Your First Stamps
Once you have one successful stamp, you will want to use it everywhere. Here are the projects that give you the most joy per stamp.
- Return address stamps. Carve your initials or a tiny house, and stamp it on every envelope you send. Instant signature.
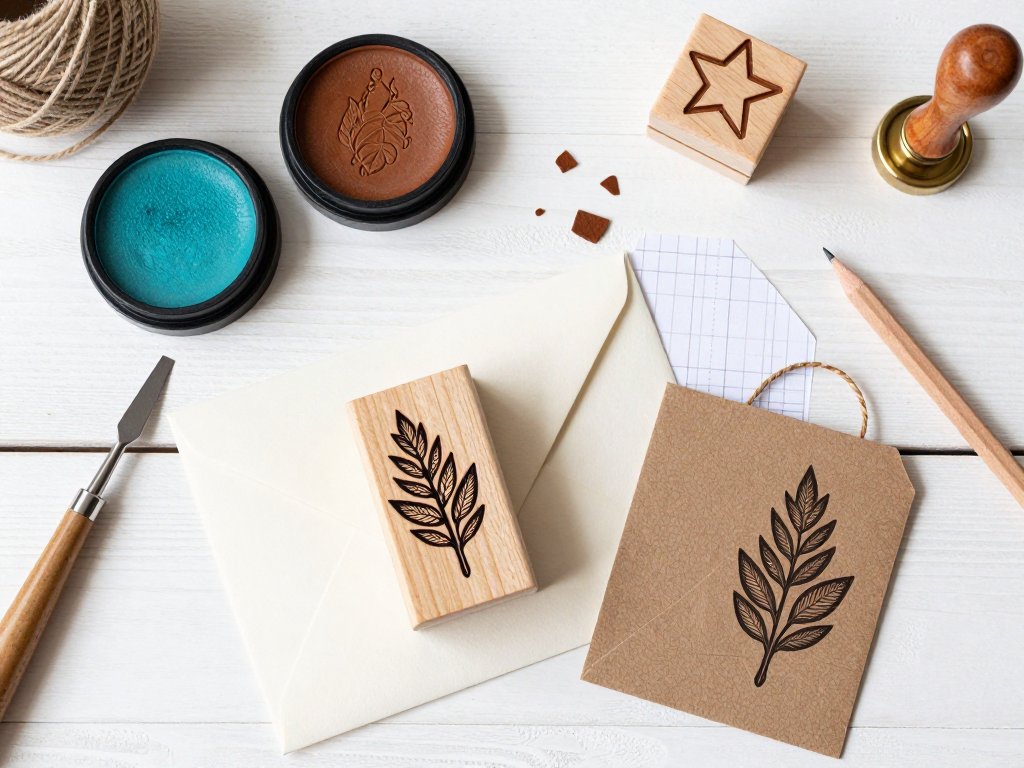
- Gift tags. Stamp plain kraft tags with a leaf or star, and your gifts look thoughtfully wrapped in seconds.
- Envelope art. Stamp a small motif in the corner of an envelope, or stamp a border pattern along the flap.
- Wrapping paper. Stamp plain kraft paper with a repeating pattern and you have custom wrapping paper for a birthday or holiday.
- Cards and notes. A single stamp can become the hero of a handmade card: stamp it, frame it with a few lines of ink, and add a greeting.
- Bookplates. Carve a tiny "This book belongs to" design with your initial, and stamp it inside the covers of books you lend out.
If you are new to the world of handwritten letters, our guide to the snail mail revival is full of ideas for what to do with all those beautifully stamped envelopes.
Leveling Up: Multi-Color and Layered Stamps
Once the basics feel comfortable, the craft opens up into some genuinely delightful territory.
Try carving a two-layer stamp set: one layer for the outline, one for a solid shape that sits inside it. Ink each layer in a different color and stamp them one after the other. It takes a little alignment practice, and the results look remarkably professional.
Try stamping with pigment inks, which are thicker and leave a slightly raised, embossed finish on paper. They dry more slowly, which gives you time to add embossing powder for a glossy, dimensional effect.
And try combining stamps into patterns. A single leaf stamp, stamped at different angles and colors, becomes a whole botanical border. Repetition is a design superpower, and you now own the tool for it.
Seasonal stamps are another favorite of mine. Carve a tiny pumpkin in October, a snowflake in December, and a little flower in April. Your stash of designs grows through the year, and every holiday envelope gets a fresh, hand-carved touch that costs only the time it takes to carve.
Final Thoughts
Carving your first stamp takes about an hour, start to finish. It costs less than a takeout lunch. And the thing it gives you, the ability to put your own mark on paper whenever you want, keeps giving for years.
Start with something simple. Carve slowly, test often, and do not be precious about mistakes. The second stamp will be better than the first, and the tenth will be something you are genuinely proud to press onto an envelope.
The snail mail revival is all about slowing down and making correspondence feel personal. A hand-carved stamp is one of the most personal touches there is, because it cannot exist anywhere else.
It is yours, made by your hand, pressed into paper by your hand, and sent out into the world.
So pick a design, grab a block, and give yourself one quiet hour. Your future envelopes will thank you.