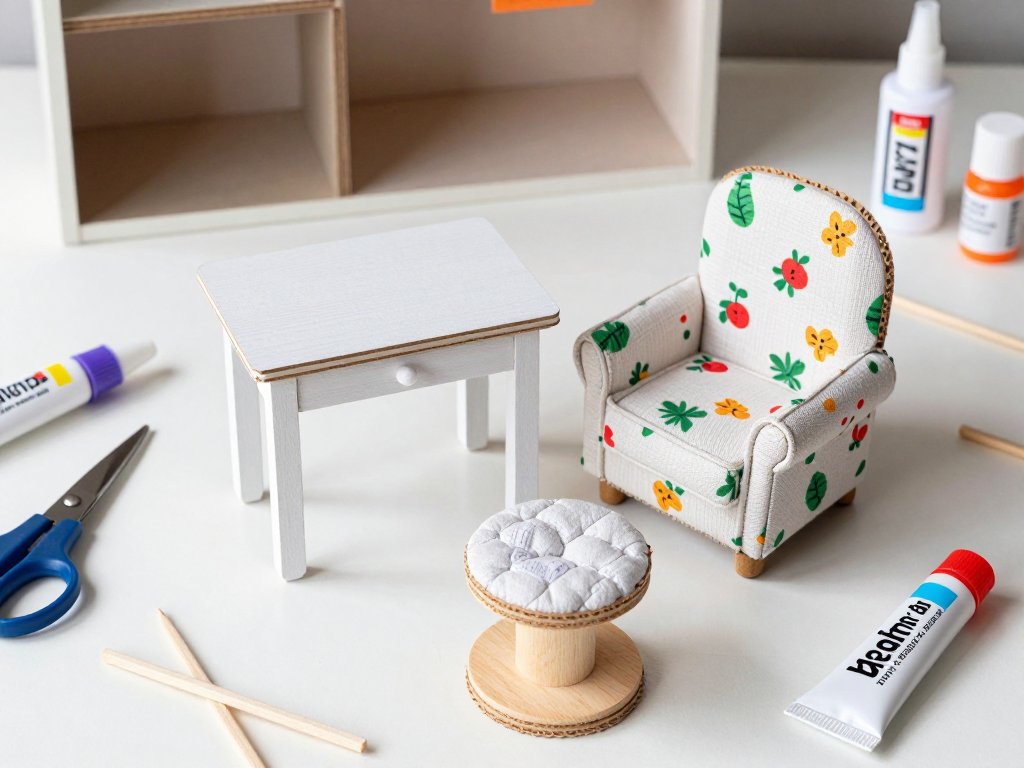
Introduction
Dollhouses are magical, but furnishing them can feel anything but. Walk into any toy store and you will see tiny beds, tables, and sofas priced like real furniture. A single room set can cost more than the dollhouse itself.
Here is the secret the miniature community has known for years. You can make charming dollhouse furniture from supplies you already own. Craft sticks, cardboard boxes, fabric scraps, and bottle lids become heirlooms in miniature.
This guide walks you through everything you need to start. You will learn the materials, the basic skills, and four simple projects you can finish this weekend. No fancy tools required, and no experience needed.
Why Make Dollhouse Furniture Yourself
Making your own miniature furniture saves money, and lots of it. A single wooden dollhouse bed can cost fifteen to thirty dollars in a store. You can build one from balsa wood and fabric scraps for less than two dollars.
Homemade pieces also look more charming. The slightly imperfect, handmade quality fits the cozy world children imagine. Your kids will love that you made the furniture yourself, and you will love watching them play with something you built.
There is a practical bonus too. Dollhouse furniture takes hard play. Store-bought pieces snap and chip, while glue-and-cardboard builds are easy to repair. When a leg breaks, you simply glue it back on.
Best of all, this is a calm, screen-free project you can do at the kitchen table. Little helpers can sort supplies, sand sticks, and choose fabric. It is crafting that the whole family can share.
What You Need to Get Started
You do not need a craft room or expensive supplies. Everything on this list is affordable, and most of it is probably already in your house.
Materials to collect:
- Popsicle or craft sticks, plain and uncolored
- Thin cardboard from cereal boxes and shipping boxes
- Balsa wood sheets and strips, about 1/16 inch thick
- Fabric scraps, felt, and a little quilt batting
- Wooden beads, spools, and corks for legs and details
- White school glue, tacky glue, and a hot glue gun
- Craft acrylic paint in small bottles
- Toothpicks, skewers, and paper straws for rails
Tools that help:
- A sharp craft knife and a cutting mat
- Small scissors that cut cleanly through fabric
- A ruler with clear markings, ideally metal
- Tweezers for placing tiny pieces
- Sandpaper or a nail file for smoothing edges
- Clothespins and binder clips to hold glue joints
Buy craft sticks and balsa at any craft store or online. A few dollars of balsa wood goes a very long way at this scale.
A small tackle box or shoebox keeps everything tidy. Sort supplies into bags by type, and you will spend less time hunting and more time building. Your total startup cost for this basic kit is usually under fifteen dollars, and most of it lasts for years.
Choose Your Scale First
Before you build anything, decide on the scale of your dollhouse. Scale is the size relationship between the miniature and real life. Getting it right matters more than any other detail.
The most common dollhouse scale is 1:12, where one inch equals one foot. A six-foot-tall person becomes six inches tall, and a standard interior door is about seven inches high. Most dollhouse furniture kits and accessories are made for this scale.
Smaller play dollhouses often use 1:24 scale, where one inch equals two feet. Furniture for this scale is half the size of 1:12 pieces. Measure the doorways of your dollhouse first, then check that your furniture will fit through them.
Here is a simple way to keep scale straight. Measure a real piece of furniture in your home, then divide by twelve for 1:12 scale.
A real chair that is three feet tall becomes three inches tall in miniature. Write your key measurements down and keep them handy while you craft.
When in doubt, build slightly smaller rather than larger. A piece that is a little small looks intentional. A piece that cannot fit through the door is a frustration for every play session after.
Stand your doll next to a doorway before building a whole room of furniture. Most play dolls between ten and twelve inches tall suit a 1:12 house best, while smaller dolls around six inches look right in a 1:24 home.
Matching the doll to the house is the fastest way to make everything feel believable.
Project 1: Popsicle Stick Farmhouse Table
This is the perfect first project. It uses one material, takes about twenty minutes, and teaches the basic skill of building a stable frame.
You will need: eight craft sticks, two small clothespins, tacky glue, and scissors.
Lay six craft sticks side by side to form the tabletop. Keep the edges as even as you can, then glue two sticks across the back, one near each end. These crossbars hold the top together. Let the glue dry for a few minutes.
For the legs, cut two craft sticks in half. You now have four short pieces. Glue one leg at each corner of the underside, pressing each against a crossbar for strength. Use clothespins to hold everything while it dries.
Once the glue is set, paint the table or leave the wood natural. A coat of white or soft blue paint gives it a sweet farmhouse look. Add a tiny vase made from a bead and a silk flower stem to style it.
This same method makes benches, stools, and coffee tables. Just change the number of sticks and the height of the legs.
Project 2: Upholstered Cardboard Armchair
Cardboard is free, forgiving, and perfect for practicing the upholstery skills you will use again and again. This little armchair looks complicated but comes together in layers.
You will need: thin cardboard, quilt batting, fabric scraps, tacky glue, and scissors.
Cut the chair shape from cardboard: a seat, a back, and two armrests. A simple outline looks like a capital letter U lying on its side. Test the pieces against a doll to check the size before you glue anything.
Glue the seat to the back at a right angle, then attach the armrests. Cut small triangular supports, called gussets, and glue them behind each joint. Gussets make cardboard furniture surprisingly sturdy.
Now for the upholstery. Cut batting slightly larger than each piece and glue it on. Then cut fabric larger still, wrap it over the edges like a present, and glue it down on the back and underside. Gather the fabric neatly at the corners.
Finish with a tiny fabric throw pillow stuffed with a scrap of batting. Choose a cheerful print to make the chair the star of the room.
This layering technique transfers to sofas, benches, and headboards. Once you understand wrapping and gluing fabric, upholstery in miniature becomes easy.
Project 3: Spool Stool with a Padded Top
Empty thread spools are one of the best free supplies in miniature crafting. A wooden spool already looks like a little stool, so you are halfway done before you start.
You will need: one empty wooden spool, felt or fabric, quilt batting, tacky glue, and scissors.
Sand the spool lightly if the edges are rough. Paint the outside in a color that suits your dollhouse room, or leave the wood bare for a natural look.
Cut a circle of batting slightly larger than the top of the spool and glue it in place. Then cut a fabric circle about twice the diameter of the spool top. Wrap it over the batting and glue the edges down around the rim, pleating as you go.
The result is a padded stool that looks store-bought. Make a set of four in different fabrics for a dollhouse breakfast nook. A larger spool becomes a side table when you add a painted wooden circle on top.
Plastic spools work too. Paint them with craft acrylics meant for plastic, or cover them completely in fabric so the surface does not matter.
Project 4: Balsa Wood Bed with a Quilted Blanket
Every dollhouse needs a cozy place to sleep. This bed combines simple woodworking with fabric work, and it makes a wonderful gift piece.
You will need: balsa wood sheets, four wooden beads for feet, fabric, batting, tacky glue, and a craft knife.
Cut two side rails, a headboard, a footboard, and a base from balsa. A standard 1:12 bed is about six inches long and three and a half inches wide. Adjust to fit your dollhouse room.
Glue the frame together on a flat surface. Check that the corners are square before the glue dries. Wooden beads glued under the corners become turned feet that give the bed a finished look.
Cut a piece of felt or thin foam for the mattress, then cover a second piece of cardboard with fabric for the blanket. A quilted look is easy to fake: sew or draw a simple grid of stitches across the blanket fabric.
Add a tiny pillow stuffed with batting. Fold the blanket down at the top corner to show the pillow, just like a styled bed in a catalog.
Once you master the bed frame, try a crib, a bunk bed, or a daybed with the same box-and-rails method. Each one uses the exact same skills.
Everyday Materials Worth Saving
Start a miniature supply box today, and you will never run out of free materials. Almost anything small and sturdy can become furniture or decor.
- Cardboard tubes become lampshades, planters, and table bases
- Bottle caps turn into stools, tables, and wall art
- Jar lids become trays, mirrors, and serving platters
- Corks make vases, stools, and tiny planters
- Buttons become plates, clocks, and drawer pulls
- Scrap ribbon and lace trim anything instantly
- Twigs and bark create rustic log furniture
- Paper straws cut cleanly into table legs and curtain rods
Keep your box organized by material in small jars or bags. When a project calls for a table leg, you will know exactly where to look.
Finishing Touches That Make It Look Store-Bought
The difference between homemade and professional miniature furniture is almost always in the finishing. A few small habits will transform your pieces.
Sand every cut edge before assembly. Rough, fuzzy edges scream homemade, while smooth edges read as polished. A nail file works beautifully on tiny pieces.
Paint in thin, even coats. Two thin coats of craft paint look far better than one thick coat that hides the details. Let each coat dry completely.
Add hardware in miniature. A tiny bead makes a drawer pull, a bent paperclip becomes a lamp shade frame, and jewelry wire forms picture frames and curtain rods.
Scale your details. A doorknob should be the size of a small pea, and a book should be smaller than your thumbnail. When details are correctly scaled, the whole room feels real.
Common Beginner Mistakes and How to Avoid Them
Every miniature maker starts with a few wobbles. Here are the mistakes I see most often, and the easy fixes that save a project.
Using too much glue. Puddles of glue take forever to dry and leave shiny lumps. Use a toothpick to apply a thin line of tacky glue, and wipe away any squeeze-out while it is still wet.
Skipping the scale check. A chair that looks right on the table can tower over the dollhouse door. Measure doorways first, and test each piece against your doll before you finish it.
Rushing the drying time. Glue needs time to cure, especially on joints that hold weight. Use clothespins and clips, and let projects dry completely before you move them.
Cutting cardboard with scissors. Scissors crush the edges of cardboard and balsa. A sharp craft knife on a cutting mat gives clean, square cuts that glue together properly.
Forgetting to paint edges. Cardboard edges show their brown layers and spoil the illusion. Paint or color the cut edges before assembly, or cover them with matching paper.
Your Next Miniature Project
By now you have the skills to furnish an entire dollhouse room. Tables, chairs, stools, and beds are the foundation, and you can build every piece with the methods above.
Try one new technique each weekend. Add a paper lampshade, frame a tiny picture, or braid a rug from yarn. Before long you will have a whole house of handmade furniture.
The best part is that this craft grows with your confidence. That first farmhouse table will always be special, but your tenth piece will amaze even you.
So gather your craft sticks and your favorite fabric scraps. Pour yourself a cup of tea, put on some music, and build something tiny with your own hands. Your dollhouse family is waiting for their new furniture.

