Introduction
Some patchwork is made at a machine, fast, under a bright light, with the hum of the needle running ahead of your thoughts.
English paper piecing is the opposite of that. It is quiet, portable, and almost entirely stitched by hand.
English paper piecing — EPP to those who work it — folds fabric over paper shapes, bastes it in place, and whip-stitches the pieces together edge to edge.
The paper comes out at the end. What remains is patchwork so crisp and even that it looks, at first glance, as though it were cut by a machine rather than folded by hand.
The classic shape is a hexagon, and the classic first motif is a flower. This guide takes you from loose scrap fabric to a finished hexagon flower.
What English Paper Piecing Is, and Why It Is Sewn by Hand
English paper piecing is a method of patchwork in which each fabric piece is wrapped around a paper template before it is joined to its neighbours.
The paper gives the fabric a firm, exact edge. Fabric alone is floppy, and floppy edges are hard to line up.
With paper inside, every shape holds its geometry. Two folded edges meet cleanly, like pages of a closed book.
That is the whole idea, and it explains the hand work. EPP is sewn by hand not because a machine cannot reach a seam, but because the paper would be in the way.
A sewing machine feeds fabric flat through a presser foot. Here, the paper is a hidden layer inside each shape, and the join is a folded edge rather than a raw one.
The stitch that holds it is small, deliberate, and controlled by fingertip. A hand stitch can feel the corner forming; a needle bar cannot.
What it asks in return is patience, and a willingness to slow down — which, for many makers, turns out to be the best part.
The Supplies You Need
EPP has one of the shortest equipment lists in all of patchwork. A beginner can start for a few dollars, especially if there is a bag of fabric scraps already in the house.
Papers and Templates
You need one paper shape for every fabric piece — the paper is the skeleton of the work.
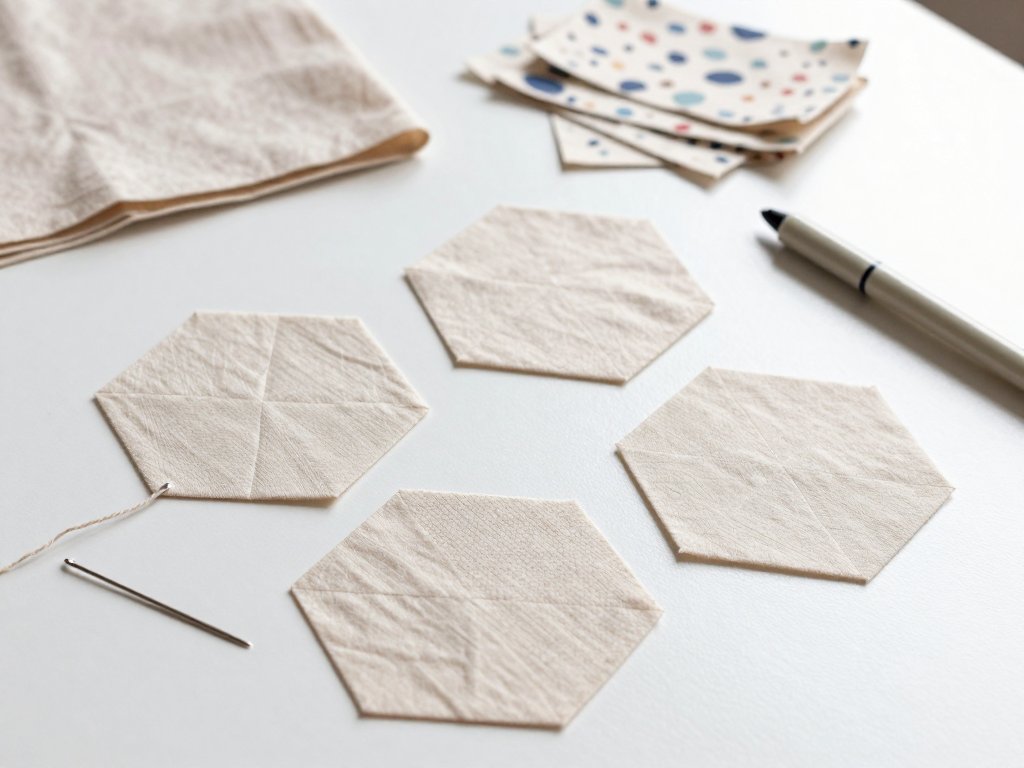
Pre-cut hexagon papers are sold in packs, in sizes measured by the length of one side, commonly from half an inch up to an inch and a half.
A one-inch hexagon is the beginner's friend: large enough to hold and to fussy cut, small enough to finish.
Freezer paper is another option. It can be pressed temporarily to the fabric, which helps if you prefer to baste by machine.
For hand work, plain cardstock or purpose-made papers hold a better edge and stand up to repeated use.
Needles and Thread
Use a fine, short needle. A size 10 or 11 milliner's needle, or a between, is the classic choice.
Thread matters. Use a 60-weight cotton or a hand-quilting thread in a colour that matches the fabric you are joining.
The Small Tools
- Fabric glue pen if you plan to glue-baste, refillable and fine-tipped
- Small, sharp scissors for trimming thread and clipping corners
- A needle threader, worth its weight for a fine needle with a small eye
- A thimble or a rubber finger pad for pushing a fine needle through folded fabric
- A small portable project box to hold threads, papers, scissors, and the current work
That box is not a luxury. EPP is a carry-along craft, and a tidy box means you can stitch for ten minutes wherever you happen to sit.
Choosing Fabric: Prints, Scraps, and Colour
English paper piecing is a scrap craft by temperament. The hexagons are small, so small leftovers go a long way.
Small Prints Beat Large Ones
A large floral chopped into a one-inch hexagon loses its shape. You see a fragment of a petal and little else.
Small, dense prints — dots, tiny florals, shirtings, textures — read as a beautiful speckle of colour at this scale.
Fussy Cutting
Fussy cutting means placing your paper template so that a specific motif lands in the middle of the shape.
Put a single rose, a bee, or a leaf exactly at the centre of a hexagon, and that piece becomes a feature in the design.
Colour Families
Start with a colour family rather than a full palette. Six or eight fabrics that share a mood are easier to work with than twenty unrelated ones.
Add one or two accent pieces — a brighter or a darker fabric — to give the eye somewhere to travel.
For a hexagon flower, think of the petals as the family and the centre as the accent.
If you enjoy the same eye for line and colour on a smaller scale, our guide to monogram embroidery works with the same restraint.
Basting: Thread or Glue
Basting is the step where fabric meets paper. You fold the seam allowance over the template and secure it.
There are two methods. Both give the same crisp edge, and both are correct. They simply suit different hands.
Thread Basting
Thread basting uses a needle and a long, loose stitch to hold the folded fabric around the paper.
You thread a needle, fold each side in turn, and take a stitch through the fabric and paper at each corner, working around the shape.
- Pros: precise, no glue residue, and the shape holds firmly. It is the traditional method and the most reliable for fussy work.
- Cons: slower. Every piece takes a minute or two to baste, and you thread a needle each time.
Glue Basting
Glue basting uses a fine fabric glue pen. You fold one side of the fabric over the paper and dot glue along the seam allowance.
Press the fold down, let the glue set for a few seconds, and move to the next edge, working clockwise around the shape.
- Pros: fast, tidy, and easier on the hands. A shape takes seconds rather than minutes.
- Cons: the glue must be right — a washable, acid-free fabric glue that dries without stiffening. Some makers find the paper sticks when it comes out.
Many stitchers use both. Glue for simple shapes and thread for fussy-cut pieces, where a shift of a millimetre would ruin the centring.
Whichever you choose, keep the folds tight to the paper. Loose basting makes wobbly edges later, and no amount of good stitching will fix them.
The Whip Stitch Join
The whip stitch is the join of English paper piecing. It is simple, and it is entirely about spacing.
Hold two basted pieces right sides together, folded edges aligned. They should nestle, edge against edge, like two tiles.
Bring your needle up through the very edge of the fabric, catching the fold, and back down through the edge of the second piece, directly opposite.
Then travel back up through the first piece, a hair further along. You are wrapping the two edges together, stitch by stitch.
Stitch Spacing: Ten to Twelve per Inch
Spacing is where beginners go wrong, usually by stitching too far apart.
Aim for ten to twelve stitches per inch along the seam. That works out at roughly one stitch every two to three sixteenths of an inch.
Stitches this close keep the join even and stop the fabric from pushing through. Wider stitches leave gaps that open up when the paper comes out.
If you can see daylight between your piece and the next, your stitches are too far apart. Slow down and place them closer.
Closing the Corners Without Gaps
The corners are the test of a good seam. Take special care at each end of the join.
End your line of stitching with a tiny back stitch, or two small stitches stacked in the very same spot, to lock it.
Sew right into the corner rather than stopping short of it. The last stitch should meet the folded edge of the adjacent piece.
When three pieces meet at a point, place a stitch at the shared corner so all three edges connect there. That single stitch prevents a pinprick of a hole.
Small gaps often close on their own when the piece is pressed and the paper is removed. Do not unpick over a hair's width.
If a gap is larger than a thread or two, it will not close. Unpick that seam two or three stitches, and rework it more tightly.
Where Three Hexagons Meet
Hexagons are wonderful because they tile perfectly, and awkward because three of them meet at every point.
Those meetings are the Y-junctions, and they are the one place where EPP asks you to think ahead.
If you stitch three separate seams right up to the same corner, you create a small twisted knot of threads inside the point.
The trick is to stop one stitch short of the corner on two of the seams, and complete the third seam into the corner from the other side.
Here is the order that keeps junctions flat:
- Join the first hexagon to the second along a full seam, stopping one stitch short of each corner.
- Join the third hexagon to the second along a full seam, again stopping one stitch short of each corner.
- Now, working from the third piece toward the point, take the final stitches that close the Y.
- Place your last stitch right at the meeting point, and fasten off there.
Always approach a junction from the piece that completes the triangle, not from the two that began it. That is what keeps the point flat rather than lumpy.
The papers help here. They stop the fabrics collapsing as you work the corner, and they hold the three edges apart neatly while you stitch.
Do not remove paper from any piece that still has an exposed edge. The junctions are supported by the paper until all their neighbours are attached.
Removing the Papers, and Keeping Them
Removing the paper is the moment the project finally reads as patchwork. It is also the moment to be gentle.
Take the papers out only from pieces that are completely surrounded by neighbours. Any piece with a bare outer edge still needs its support.
Slip a blunt needle or the tip of your scissors under a fold, lift the paper slightly, and ease it free.
If you thread-basted, pull the basting thread free first. It usually comes off in one piece, which makes the paper easy to lift.
Save and Reuse
Papers are reusable, often many times over. Store them flat, in a tin or an envelope, sorted by size.
Flatten any creased ones under a heavy book, or press them lightly with a cool iron between two sheets of paper.
Reuse is part of the pleasure. A well-kept set of papers can carry you through several quilts before it needs replacing.
Pressing, Stretching, and Finishing Edges
Pressing is what turns a slightly crumpled pile of hexagons into a flat panel, and it deserves care.
Press the work face down on a soft towel or a thick ironing mat, never directly on the front.
Set the iron to a warm, dry setting with a little steam. Lighten the pressure, and let the weight of the iron do the work.
If you press the right side directly, you flatten the stitched seam allowance and lose the crispness of the edge.
When the piece is flat, give it a gentle stretch. EPP fabric has some give, and a slightly wavy panel can often be eased back to shape.
For a pincushion or a mug rug, you will eventually want a backing. Cut it slightly larger than the finished top and turn the raw edges under.
Once the piece is quilted or backed, the last step is to stitch the outer edges, folding each raw edge to the back and catching it with small, tidy stitches.
Do that neatly and the whole piece looks, from the front, as though it were always one surface.
Your First Project: A Hexagon Flower
The classic beginner project is a hexagon flower: one central hexagon surrounded by six petals, all cut from the same hexagon shape.
Worked at a one-inch hexagon, the flower measures about three and a half inches across, corner to corner.
That is the perfect size for a pincushion top or a mug rug. Both are useful, both are quick, and neither needs a backing more complicated than a square of cotton.
What You Need
- Seven one-inch hexagon papers
- Seven fabric hexagons, cut with a generous quarter-inch seam allowance
- A size 10 or 11 milliner's needle, or a between
- 60-weight cotton or hand-quilting thread in a matching colour
- A glue pen or a spool of basting thread
- Small scissors, a threader, and a small project box
The Steps
- Cut seven fabric hexagons from your chosen scraps, adding a generous quarter inch all the way around each paper shape.
- Centre a paper hexagon on the wrong side of each fabric hexagon.
- Baste the first hexagon: fold one edge over the paper, then work clockwise, folding and securing each edge until the shape is firm.
- Baste the remaining six hexagons the same way.
- Lay the seven papers out on a flat surface and arrange them into a flower — one centre, six around it — before you sew anything.
- Join the centre hexagon to one petal along a full seam using the whip stitch, stopping one stitch short of each corner.
- Join the next petal to the centre, then join each petal to the petal beside it, working around the flower.
- At each Y-junction, complete the final stitches into the shared corner from the piece that closes the triangle.
- Press the flower face down on a soft towel.
- Remove the seven papers — the centre first, then the petals — now that every piece is surrounded.
- Press again, easing the piece flat with your palm from the centre outward.
- Turn the raw outer edge under to the back and catch it with small stitches, then attach a backing for a pincushion or mug rug.
Allow about an hour to baste and sew the flower, and another hour for pressing, paper removal, and finishing.
When Things Go Wrong
Almost every EPP problem has a simple cause, and almost all of them are fixable.
Puckered or Rippled Blocks
Puckering almost always comes from basting that is too loose, or stitches that have been pulled too tight.
Check that each fold hugs the paper. If the fabric can shift over the template, the block will never lie flat.
When you sew, keep your tension gentle. Stitches should hold the edges together, not pucker the cloth.
Thread That Shows
Visible thread is nearly always a colour problem, not a stitching problem.
Match your thread to the darker of the two fabrics you are joining, and switch spools often rather than working a whole flower in one colour.
Keep your stitches in the fold, too. If the needle pierces the fabric away from the edge, a dot of thread appears on the front.
Paper That Will Not Come Out
A paper that refuses to budge usually has a stitch running through it.
Look at your join and check whether a stitch crossed the paper rather than the fabric edge. Snip that one stitch, then ease the paper free.
If the paper has simply glued itself in, a small drop of water on the fold will loosen the fabric glue.
Wobbly or Wavy Outer Edges
Wavy edges on an unfinished piece often settle with a good press and a gentle stretch from the centre outward.
If the wave persists, the seam allowances are probably uneven, or the templates are not all the same size.
Check a few papers against each other. Mixed sizes of template will always produce a wobbly edge, no matter how careful the stitching.
Seams That Pull Apart
A seam that gapes has too few stitches, or a thread that was not locked off.
Always finish a seam with a tiny back stitch at the corner, and always rework a gap rather than hoping the backing will hide it.
If the whole piece feels soft and loose, you are probably basting more loosely than the pattern wants. A firmer fold makes a firmer seam.
Why EPP Suits Busy Hands
English paper piecing is, quietly, one of the most practical crafts a busy person can take up.
It needs no machine, no dedicated table, and no long stretch of uninterrupted time.
A few basted hexagons, a needle, and a thread live in a small box. You can stitch in the school pickup line, or on the sofa while everyone else watches something else.
Because every join is small, stopping and starting is easy. There is no seam half-fed through a machine and no tension to re-set when you sit down again.
That rhythm is the point. Many makers describe EPP as the calmest sewing they do — a craft that keeps the hands busy and lets the mind rest.
And it feeds on scraps. The tiny offcuts that would go in the bin become petals, and a bag of leftovers becomes something lasting.
Start with seven papers and a handful of small prints. Make one flower. You will have learned the fold, the join, the junction, and the press.
Everything else in English paper piecing is simply more flowers, laid side by side.