Introduction
My grandmother kept a stack of old mail-order catalogs beside her kitchen chair. On quiet afternoons she would open one and copy the people inside it — the lady in the garden dress, the boy with the dog, the family on the porch.
She never finished them. She just caught them, fast, in pencil, before the page turned.
I did not understand what she was doing until years later, in my first life drawing class. The model changed pose every thirty seconds, and my careful outlines collapsed before I had drawn a shoulder.
Then I remembered those half-finished catalog people, and something clicked into place.
My grandmother was practicing gesture drawing. It is the oldest and simplest way to learn the human figure, and it is the one skill that makes everything else easier.
If you have ever wanted to draw people and felt sure you could not, this guide is for you. You will learn what gesture drawing is, how to find the line of action, and which proportion landmarks keep a figure from looking wrong.
You will also find a fifteen-minute practice routine that fits in the space between school pickup and dinner. No expensive supplies. No pressure to be good yet.
What Gesture Drawing Really Is
Gesture drawing is the practice of capturing a figure's movement, weight, and attitude in a very short time. Usually thirty to sixty seconds. Sometimes less.
It is not a drawing of an outline. That is the part that surprises most beginners.
When you trace the edges of a body, you end up with a flat shape that looks like a paper doll. When you chase the movement instead, you end up with something that breathes.
A gesture sketch records what the body is doing. Is the figure leaning into a step? Are the hips tilted? Is the weight on the left foot or the right?
Answer those questions with a few sweeping strokes and the drawing reads as alive, even when it is messy.
Nobody frames a gesture drawing. That is rather the point. It is a warm-up and a thinking tool, not a finished piece.
Once you accept that, the fear loosens. A thirty-second sketch cannot fail, because it was never meant to be a picture.
Why Gesture Comes Before Finished Figure Drawing
Imagine building a house by installing the doorknobs first. That is what drawing details before structure feels like.
Gesture comes first because it establishes the big picture. It tells you where the body is headed, how the weight is distributed, and how the parts relate to one another.
Once the gesture is right, everything else has somewhere to sit. Clothing, hair, muscle, and shadow all hang on that structure.
Once the gesture is wrong, no amount of careful shading will rescue the drawing. You will spend an hour polishing a figure that still looks off, and you will not know why.
There is a quiet confidence benefit, too. A thirty-second sketch is so short that you cannot get precious about it. You will make twenty of them before you have time to feel self-conscious.
That fast, forgiving repetition is how your eye learns the figure. It teaches you to see the whole body at once instead of one careful edge at a time.
Finding the Line of Action
If you take one idea away from this article, take this one. Every pose has a line of action — a single sweeping line that runs through the whole figure.
It usually begins at the head, curves through the spine, and continues down into the weight-bearing leg. It carries the energy of the pose.
Think of it as the melody of the movement. Get the melody right and small mistakes stop mattering much.
Here is how to find it. Look at the figure and squint until the details blur. Ask yourself where the body would fold if it were a soft rope.
Then draw that one line, big and confident, across your paper before anything else.
Try this with a photo first. Choose an image of someone walking, reaching, or sitting forward, and draw only the line of action. Then draw it again. Then again, six times in a row.
You can also practice with your own reflection in a mirror. Stand with your weight on one hip and trace the imaginary line from your head, through your ribcage, down to your standing foot.
Children make wonderful models, too — especially when they are absorbed in something and holding still without meaning to.
If sweeping curved lines still feel awkward, a continuous line drawing practice is a lovely companion exercise. It trains your hand to move freely and your eye to stay on the subject.
Proportion Landmarks That Keep a Figure Believable
Gesture gives your figure life. Proportion gives it a believable body. The good news is that you only need a handful of landmarks.
Artists measure the figure in head units. That simply means you take the height of the head and stack it down the body to check everything else.
The Head Unit
A typical adult is about seven and a half to eight heads tall. Fashion illustration stretches this to nine, which is why runway sketches look so impossibly long.
A child of five or six is closer to six heads tall, and a toddler sits around four. That single ratio explains why children look so different from adults in a drawing.
Shoulders, Elbows, and Wrists
Shoulder width is roughly two heads across for an adult. That gives you a quick way to check a figure that looks too narrow or too broad.
The elbow rests at about waist level. Draw it higher and the arm looks broken. Draw it lower and the arm looks stretched.
The wrist falls near the hip, around the level of the crotch. Let your own arm hang and feel where your wrist lands. That is your reference for every figure you draw.
Legs and Knees
The knee sits roughly halfway between the hip and the floor. Not at the top of the leg, which is the common beginner guess.
From the knee down, the lower leg is about the same length as the upper leg. Keeping that balance makes standing figures look stable.
None of these landmarks are laws. Real bodies vary, and beautiful ones do. Use them as a fast check, never as a cage.
Your Gesture Drawing Toolkit
You need less than you think. Gesture drawing was designed for cheap, fast practice, so keep the setup simple.
- A soft pencil. A 2B or 4B gives you dark, loose lines without pressing hard. Hard pencils encourage timid marks.
- Charcoal, if you like bold marks. A stick of soft charcoal or a charcoal pencil is wonderfully expressive. It also forces you to commit to every line.
- Cheap paper. Newsprint pads or plain copy paper are perfect. Save the good sketchbook for finished work.
- A timer. Your phone works fine, but a small kitchen timer is nicer. It keeps your eyes off a screen.
- No eraser, at least at first. Erasing during a thirty-second pose eats the whole minute and teaches you nothing. Leave the mistakes.
That is the entire kit. The cost is often under ten dollars, and working on cheap paper is genuinely part of the method rather than a compromise.
A Fifteen-Minute Beginner Practice Routine
Here is a routine you can finish in one sitting. Fifteen minutes, start to finish. It is the same warm-up professional artists use before longer sessions.
- Warm up with five one-minute poses. One minute each. Use them to find the line of action and the big shapes. Do not erase.
- Speed up with five thirty-second poses. Thirty seconds each. You will not have time to think, which is exactly right. Mark only the essential sweeps.
- Finish with one two-minute study. Choose your favorite pose from the set and take the full two minutes. Add a little weight, a little shape, maybe the suggestion of clothing.
That is fifteen minutes total. Do it two or three times a week and you will notice real change within a month.
Where do the poses come from? A photo reference works beautifully. So does a family member willing to hold a pose badly for sixty seconds.
Television is another quiet option. Sketch people mid-motion during a scene, then let them go. Nobody is watching your paper.
If your schedule is truly squeezed, do the five thirty-second poses only. Two and a half minutes still counts.
Turning Shapes Into Figures
Once your gesture line feels alive, give it a little structure so it does not collapse into a scribble.
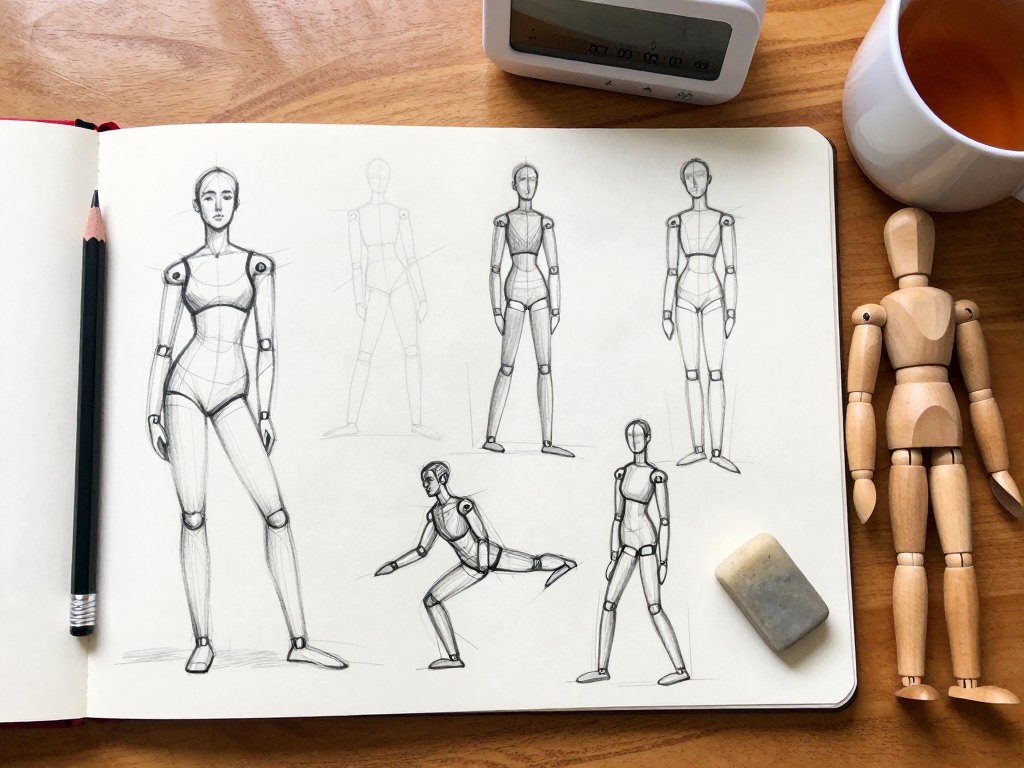
Think of the body as simple three-dimensional forms. The torso becomes a box or a cylinder. The limbs become tapered cylinders that narrow toward the wrists and ankles.
Draw these forms lightly over your line of action. A ribcage box tilted one way, a hip box tilted the other. That small tilt is where most of a pose's personality lives.
Arms and legs are not sticks. They taper, and they bend. A tapered cylinder that narrows at the wrist reads as an arm immediately.
You are not building a mannequin to keep. You are giving your gesture somewhere to live.
Notice how this connects back to proportion. The boxes and cylinders let you check your head units right on the page, without ever reaching for a ruler.
Common Beginner Mistakes
Almost everyone makes the same handful of mistakes at the start. Knowing them in advance saves a great deal of quiet frustration.
- Drawing outlines first. Tracing the silhouette creates flat, paper-doll figures. Search for movement instead.
- Chasing detail too early. Fingers, eyelashes, and shoelaces belong much later. Structure first, always.
- Stiff stick figures. Straight limbs and a rigid spine look like a scarecrow. Curve the lines and tilt the hips.
- Over-erasing. Erasing kills your momentum and hides your progress. Let the wrong lines stay on the page.
- Drawing only from a seated, static model. A patient sitter is comfortable, but it teaches you nothing about weight and movement.
Notice that four of those five mistakes come from the same root. They all come from trying to make the drawing good before it is finished.
Gesture drawing asks you to be quick and unpolished on purpose. Warm, alive, and slightly wrong beats careful and dead every time.
Troubleshooting a Stiff or Wrong-Looking Pose
Some sketches simply will not come together. Here is what to do when they do not.
When the pose looks stiff
Stop, and start again with the line of action. Do not try to repair a stiff drawing by adding more lines to it.
Ask yourself what the figure is doing. Then swing one big curve through the whole body, head to supporting foot, and rebuild from there.
Nine times out of ten, a stiff pose simply never had a line of action in the first place.
When the proportions look wrong
Check the head units. Measure the head you have drawn, then stack it down the figure with your eye or your pencil.
Is the body only five heads tall? Then the legs are probably too short. Are the shoulders four heads wide? Then narrow them.
One proportion correction often fixes the entire feeling of a drawing.
When your wrist feels tight
Loosen your grip and move from the shoulder instead of the fingers. Imagine holding a feather rather than a pen.
Spend a minute filling a large sheet with big, loose sweeping marks. Then return to the figure with your arm already relaxed.
Standing up helps, too, and so does taping your paper to the wall. Distance from the page quiets a tight wrist remarkably fast.
Keeping a Sketchbook That Shows Your Progress
This is the quiet secret that keeps artists going. Keep a small sketchbook and date every page you use.
A pocket-sized book that lives in your bag is ideal. It invites a three-minute sketch at the playground, in a waiting room, or at the kitchen table.
The dates do more than keep things tidy. In three months you will flip back and find figures that once felt impossible sitting beside your newest ones.
Progress in drawing is slow and almost invisible day to day, which is exactly why the dated page matters. It is your own proof.
If you miss a week, nothing is lost. Date the next page and begin again.
Some people keep a small ritual around it — the same warm drink, the same window, the same fifteen minutes. Mine is the kitchen table after the lunch dishes are cleared. Yours can be whatever fits your day.
Conclusion
Figure drawing sounds intimidating. It truly is not.
Capture movement in thirty to sixty seconds. Find one line of action. Check the head units when something looks off. Draw the torso as a box and the limbs as tapered cylinders.
Do the fifteen-minute routine a few times a week and the figure stops being a mystery. It becomes a set of shapes and sweeps your hand learns to trust.
Your first pages will be wobbly. Mine still are, and I have been drawing people for decades.
So find a soft pencil, a cheap pad, and a timer. Set it for thirty seconds. Draw the person in front of you, badly and boldly, and let the next one be a little braver. That is the whole practice, and it is enough.
