Introduction
In my grandmother's box of drawings there is a small sheet, no bigger than a postcard, with a pear on it. The line is grey and thin, almost the shadow of a drawing, and the paper around it has gone the colour of weak tea.
I asked her about it when I was nine. She said her father had made it with a piece of silver wire, and that you could not rub it out, which I decided was the saddest thing I had ever heard about art.
I forgot the pear for thirty years. Then one wet October afternoon, killing time at a library sale, I found a thin book on metalpoint drawing for two dollars and brought it home in my coat pocket.
Silverpoint, the book said, is drawing with metal instead of pigment. No erasing, no smudging, no dark dramatic line. Just a grey whisper that deepens over months until it looks like something remembered rather than made.
I want to hand you that whisper. This guide covers what silverpoint is, why it behaves so differently from a pencil, what to buy, how to prepare the ground that makes the whole thing work, and a first study you can finish in an evening.
It is not a fast medium. It is, however, one of the few that rewards you for slowing down, and that is exactly why I keep coming back to it.
What Silverpoint Actually Is
A silverpoint drawing is made by dragging a piece of silver wire across a slightly abrasive, prepared surface. The metal is softer than the grit beneath it, so it leaves a thin trail of silver particles caught in the tooth of the ground.
Those particles are what you are seeing. Not ink, not graphite, not paint. Metal, sitting on the surface of the paper like frost on a window.
At first the line is faint. It can look almost invisible from a step away, especially in a dim room, and beginners often panic and press harder. That faintness is temporary.
Over weeks and months the silver tarnishes. It oxidises into a warm brown-black, deepening every line you drew and pulling the whole drawing together into something quieter and richer than it looked on day one.
So the mark you make is not the mark you get. This is the opposite of how most drawing materials behave, and it is the single most important thing to understand before you start.
Silverpoint also cannot be erased. Not lifted, not rubbed out, not softened with a kneaded eraser. What you draw stays. That sounds unforgiving, and on your first attempt it is. Then it becomes the reason the drawings look the way they do.
Why It Feels So Different From Graphite
If you have spent any time with graphite drawing, you know the pleasure of a dark, buttery line you can push around with your thumb. Silverpoint gives you none of that, and asks for something else entirely.
Graphite is pigment bound with clay and wax. It sits on top of the paper, smudges at a touch, and darkens immediately with pressure. You can hunt for a line, erase it four times, and find it again on the fifth try.
Silver has none of that forgiveness. It offers a narrow range of values, from pale grey to a soft brownish dark, and it takes dozens of overlapping strokes to get there.
This changes how you draw. With graphite you often sketch the shape loosely, then refine. With silverpoint you look longer, decide more, and set the line down once.
Your hand learns a different rhythm too. Instead of rubbing and blending, you layer. Tone arrives through accumulation, hatch over hatch over hatch, the way a printmaker builds density or a knitter builds fabric.
Many people find the first ten minutes frustrating and the next hour oddly calming. That is the medium doing its work on you.
A Short History, Told Lightly
Metalpoint is old. Long before anyone drew for pleasure, medieval scribes used metal points for the practical business of the page.
Scriptors and Illuminated Pages
In a scriptorium, a monk might rule faint lines with a lead or silver point before laying down text, or sketch the design for an illuminated initial before the gold went on.
The metalpoint line was ideal for this. It was fine, it did not bleed into vellum, and it disappeared politely under paint and gold leaf, leaving no coloured residue to spoil the page.
The painters' handbook of Cennino Cennini, written around 1400, describes drawing with a silver point on a ground of bone ash. The recipe is six hundred years old and still works.
Renaissance Studios and After
By the fifteenth century, metalpoint was standard studio practice. Leonardo used it for studies, and Dürer left behind some of the most beautiful silverpoint drawings anyone has made, including careful studies of hands, pillows, and animals.
Van Eyck and his contemporaries used metalpoint underdrawing beneath oil paintings, mapping out faces and folds in a line no one was ever meant to see.
The technique faded once graphite arrived from England in the sixteenth century. Graphite was darker, softer, and did not require a prepared ground, and by the nineteenth century the silver stylus was a curiosity.
Its revival came in the twentieth century, when artists looking for precision and a slower tempo picked it back up. Contemporary silverpoint has a small, devoted following and a growing shelf of books.
The Materials You Actually Need
The supply list is short, which is part of the appeal. Nothing here is expensive except the prepared paper, and you can make your own ground for very little.
- A silver wire stylus. Buy a prepared silverpoint stylus, or set a short length of fine silver wire into a pin vise or a plain wooden holder. The wire should protrude about half an inch, no more, so it does not wobble.
- Prepared silverpoint paper or ground-making supplies. Commercial silverpoint paper saves a day of drying time. If you want to make your own, you need acrylic gesso and marble dust or bone ash, both covered below.
- Fine sandpaper or an emery board. You will use this constantly. Silver work-hardens and dulls at the tip, and a dull point skates instead of drawing.
- A soft brush. A wide, soft housepainting brush for applying ground, and a smaller soft brush for sweeping silver dust and sanding grit off the surface without touching it with your fingers.
- A kneaded eraser. Only for gently lifting loose silver dust and fingerprints. Never for erasing a line, because it cannot, and pressing it into the surface will only flatten the tooth.
- An optional fixative. A light workable fixative or matte spray can protect a finished drawing, though many artists prefer to leave the surface bare and rely on framing.
- A scrap of the same paper. Keep every offcut. You need a test surface that behaves exactly like the real one, and this is the cheapest insurance in the medium.
One practical note: silver wire is sold by gauge. Fine wire draws a delicate line but bends easily. Slightly heavier wire holds up longer between sharpenings. Buy a small amount of each and see which suits your hand.
The Ground Is the Whole Secret
Here is where most first attempts fail. Ordinary drawing paper is too smooth. Silver dragged across it leaves almost nothing, or a faint metallic sheen that looks like a smear rather than a line.
The silver needs something to bite. A ground is a thin layer of gritty material applied to the paper, abrasive enough to scrape microscopic amounts of metal off the wire with every stroke.
Think of it as very fine sandpaper that happens to be white, or ivory, or warm grey. The grit catches the silver, and the silver stays where you put it.
A DIY Ground Recipe
Mix roughly one part marble dust or bone ash with three parts acrylic gesso, then thin with a little water until it flows like thin cream. Stir thoroughly, because lumps become visible scratches later.
Apply three or four thin coats with a wide, soft brush, working in one direction and then the other at right angles. Let each coat dry completely before the next, which usually takes twenty to forty minutes.
When the final coat is dry, sand it lightly with fine sandpaper until the surface feels smooth but still has a faint tooth, like the back of a good watercolour board.
Brush off every trace of dust with your soft brush, then let the sheet cure overnight. Drawing on a ground that is still slightly damp is a reliable way to clog your point and ruin the surface.
Commercial silverpoint grounds work well and remove the guesswork. If you are unsure whether your homemade ground is right, buy one prepared sheet and compare the feel under the stylus.
Why a Toned Ground Flatters Silver
Silverpoint is naturally a light-value medium, so a white ground can make even a good drawing look unfinished. A toned ground gives the silver something to sit against.
Warm grey, ochre, and pale blue are traditional choices. Add a drop or two of acrylic colour to your gesso before the final coat, or buy toned paper ready-made.
A toned ground also opens up the top of the value range. On a mid-tone surface you can add touches of white chalk or opaque white gouache for highlights, something impossible on white paper.
Keep the tone light, though. Anything darker than a medium grey will swallow the silver line completely, and you will spend the evening pressing hard enough to score the surface.
Your First Study, Step by Step
Choose one simple object and give yourself one unhurried evening. The goal is not a finished masterpiece. The goal is to feel how the metal behaves.
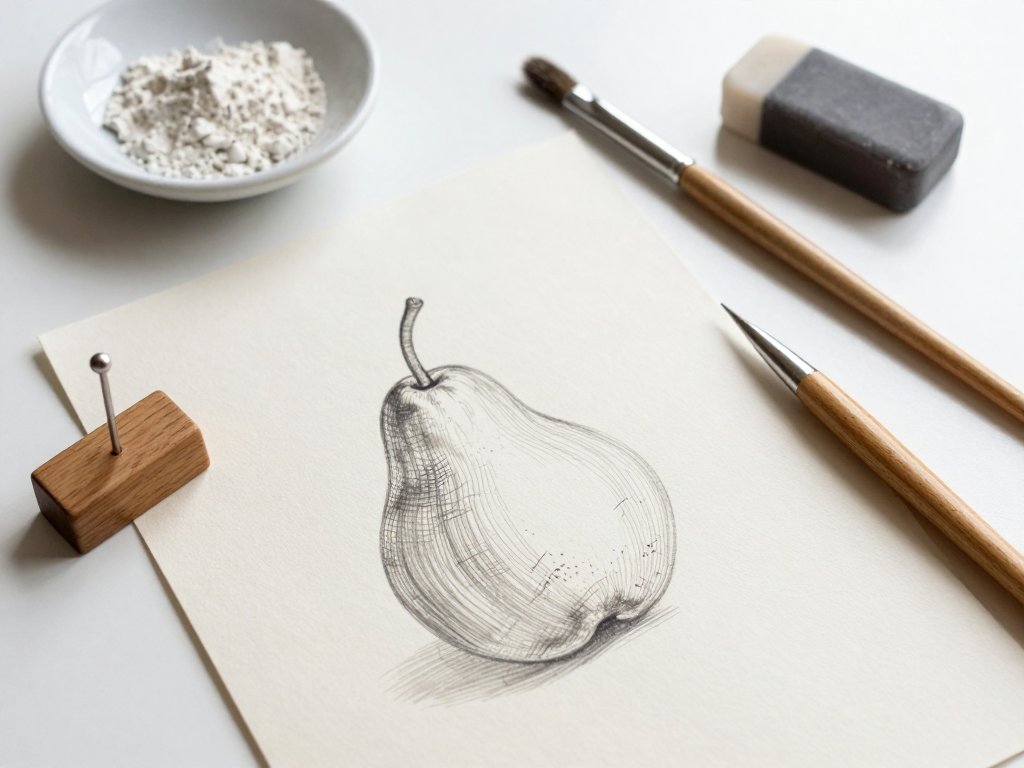
- Choose a simple form. An egg, a pear, a shell, or a single leaf. One object, one light source, no pattern and no lettering. Complex subjects come later, once your hand knows the pressure.
- Prepare and fully dry the ground. If you are making your own, do this a day ahead. The surface must be completely dry and cool before the first stroke.
- Sharpen and test the point on scrap. Rub the wire on fine sandpaper at a shallow angle until it has a clean, slightly rounded tip. Then draw a few lines on your offcut to see how dark it goes.
- Begin with the lightest contour marks. Hold the stylus like a pencil you are not sure about. Barely touch the paper. These first lines are a map, not a wall.
- Build the first layer of parallel hatching. Start on the shadow side of the form and lay down evenly spaced strokes, all in one direction. Keep them light and let the gaps show.
- Cross-hatch at a slight angle for the mid tones. A second layer crossing the first at perhaps thirty degrees deepens the shadow without any extra pressure. Two directions are almost always enough.
- Increase pressure only slightly for the darkest accents. The core shadow and the contact point with the table get one more pass. Slightly, not heavily. You are adding layers, not grinding.
- Keep your hand off the surface. Rest your drawing hand on a slip of clean paper, or work from the wrist with your forearm supported. Skin oils repel silver and leave permanent pale patches.
- Stop earlier than feels right. A silverpoint drawing that looks slightly unfinished in the evening is usually correct by the following week, once the tarnish begins to gather.
- Let it sit for a few days. Put it somewhere dry and out of direct sun, face up, and leave it alone. The line will darken on its own, and you will see what the medium is actually for.
If the whole drawing looks too light on the first night, resist the urge to go back in and darken everything. Give it a week. Most beginners overwork their first study, and the tarnish never gets a chance to do its quiet work.
Hatching, in Detail
Because you cannot rub or blend, tone in silverpoint is entirely a matter of lines. Learning four kinds of hatch will carry you through most subjects.
Parallel Strokes
Parallel hatching is the foundation. Draw a series of evenly spaced strokes in one direction, all the same length, all the same pressure, with a small and consistent gap between them.
Density is your volume control. Wide spacing gives you a pale grey. Close spacing, still with light pressure, gives you a middle tone. The strokes themselves never get darker, only more numerous.
Keep your strokes short where the form curves away, and longer across flat passages. Long strokes over a curved surface flatten it, which is the opposite of what you want.
Cross-Hatching
Cross-hatching is a second set of parallel strokes laid over the first at an angle. Thirty to forty-five degrees is plenty. Steeper angles create a woven texture that can fight the form.
Each additional direction multiplies the density without increasing pressure. That is the whole trick of the medium: darkness comes from overlap, never from force.
For a pear, you might use three directions in the deepest shadow near the stem and only one along the lit flank. The transition between them should be gradual, achieved by adding strokes rather than removing any.
Curved Hatching That Follows the Form
On rounded objects, let the hatch curve with the surface. Strokes should wrap around the egg or the shell the way the light does, bending as the form turns away from you.
This is called hatching that follows the form, and it does most of the work of describing three dimensions. Straight hatching across a sphere reads as a flat disc with lines on it.
Practise on a single egg before you attempt anything else. Ten minutes of curved hatching will teach you more about pressure than an hour of reading.
Why Tight Beats Scribbled
Tight, even, disciplined strokes read as tone. Your eye averages them into a smooth grey field, and the individual lines disappear into the value.
Scribbled, energetic strokes read as texture. They have varying pressure, varying direction, and visible loops, so the eye sees the marks themselves rather than the tone they were meant to make.
Both are useful, but they are not interchangeable. If you want smooth shading on a shell, keep the strokes tight. If you want the roughness of bark or a wool blanket, loosen them deliberately.
Most beginners scribble without meaning to. Slowing the hand down and drawing each stroke as a separate decision fixes it faster than any technique.
The Pressure You Must Not Use
Here is the warning worth taping to your easel. Heavy pressure scores the ground. It cuts a groove into the gesso, compresses the grit, and that groove will never accept silver again.
A scored line is brighter and shinier than the rest of the drawing, it catches the light, and it cannot be undone. On a finished sheet it looks like a scar, because it is one.
If you find yourself pressing to get a darker mark, stop. Add another layer of hatching instead. It is slower, it is correct, and it is the only way the medium gives you depth.
When Something Goes Wrong
Almost every problem in silverpoint has a physical cause, and almost all of them can be diagnosed from the marks themselves. Here are the four you are most likely to meet.
The Line Barely Shows
Either the ground is too smooth or the point is too polished. A glossy, rounded tip skates across the grit without scraping any metal free.
Roughen the tip lightly on fine sandpaper and test on your offcut. If that fixes it, the point was the problem. If not, add another thin coat of ground and let it dry fully.
The Point Scratches
A scratch means the wire is too sharp, or you are pressing too hard, or there is grit under your hand. Check all three in that order.
Round the tip slightly rather than sharpening it to a needle. Silver does not need a fine point to make a fine line; it needs a rough edge and light pressure.
The Drawing Looks Patchy
Patchiness usually comes from an uneven ground or from greasy fingerprints. Ground applied too thickly in places will take more silver there and less everywhere else.
Fingerprints are worse, because skin oil physically repels the metal. Rest your hand on a clean slip of paper, and sweep the surface with a soft brush before you begin any session.
The Whole Thing Looks Too Pale
This is normal, and it is not a mistake. Silverpoint is a light-value medium. Even a dense, heavily hatched drawing sits in the middle of the value range, not the dark end.
Two things will help. Let it tarnish for a few weeks, which deepens everything. And next time, work on a toned ground so the pale silver has something to contrast against.
Finishing, Framing, and Storing
Silverpoint is a fragile surface. The metal sits on top of the ground rather than soaking in, so anything that touches it can lift or burnish the line.
A fixative is optional. A light workable fixative or matte spray will reduce smudging, but it can also dull the faint metallic sheen that makes silverpoint distinctive. Test on a scrap first, always.
If you frame, frame behind glass with a mat. The mat keeps the glass off the drawing, because glass touching a silverpoint surface will rub the image away in transit.
Use a proper spacer or a deep frame if you are not using a mat. Museum glass or UV-filtering glass slows the fading of both the silver and any toned ground.
Store loose studies flat, interleaved with glassine or acid-free tissue, in a dry drawer. Avoid plastic sleeves, which trap moisture and can encourage uneven tarnish.
Date and sign the back rather than the front. A graphite signature on the face of a silverpoint drawing looks like a mistake, and it will out-darken the drawing within a year.
What the Silver Taught Me
My grandmother's pear is browner now than it was when I first saw it, and browner than it was the year I brought that two-dollar book home. It has kept changing without anyone touching it.
I have drawn the same pear three times since. The first attempt is scored and shiny in one corner where I pressed too hard, and I have kept it anyway, because it taught me what the medium will not tolerate.
The second is timid and pale. The third, done on a warm grey ground over two evenings, is the first drawing of mine I have ever framed for myself rather than for someone else.
What silverpoint teaches is not really a technique. It teaches you to look before you commit, because there is no undo, and to accept that a thing can improve without your intervention.
That is a strange and useful lesson for anyone who spends their days wiping counters and answering the same question four times. Not everything needs another pass of your hand.
So find a pear, or an egg, or a leaf from the garden. Prepare a small sheet, sharpen a short piece of wire, and give yourself one quiet evening at the kitchen table.
Draw lightly. Stop early. Let the silver do the rest of the work while you get on with your life, and come back in a week to see what patience looks like on paper.