Introduction
Every drawing you have ever admired started the same way: a pencil, a piece of paper, and a person willing to make a few marks.
That is the whole secret of graphite drawing. It is also the most forgiving art form I know.
Paint dries. Clay fires. Ink stains. But graphite sits quietly on the paper, waiting while you decide, and it erases when you change your mind.
I came back to drawing after years away, when my youngest was napping and I needed something that did not need setup or cleanup. A pencil and a scrap of paper were enough.
This guide walks you through everything a beginner actually needs: the right pencils, the five shading techniques, and two simple projects that will teach your hand to see.
No talent required. Only a few quiet minutes and the willingness to draw a lot of imperfect lines before some good ones appear.
What You Really Need
Here is the good news: graphite drawing has the shortest supply list in all of art.
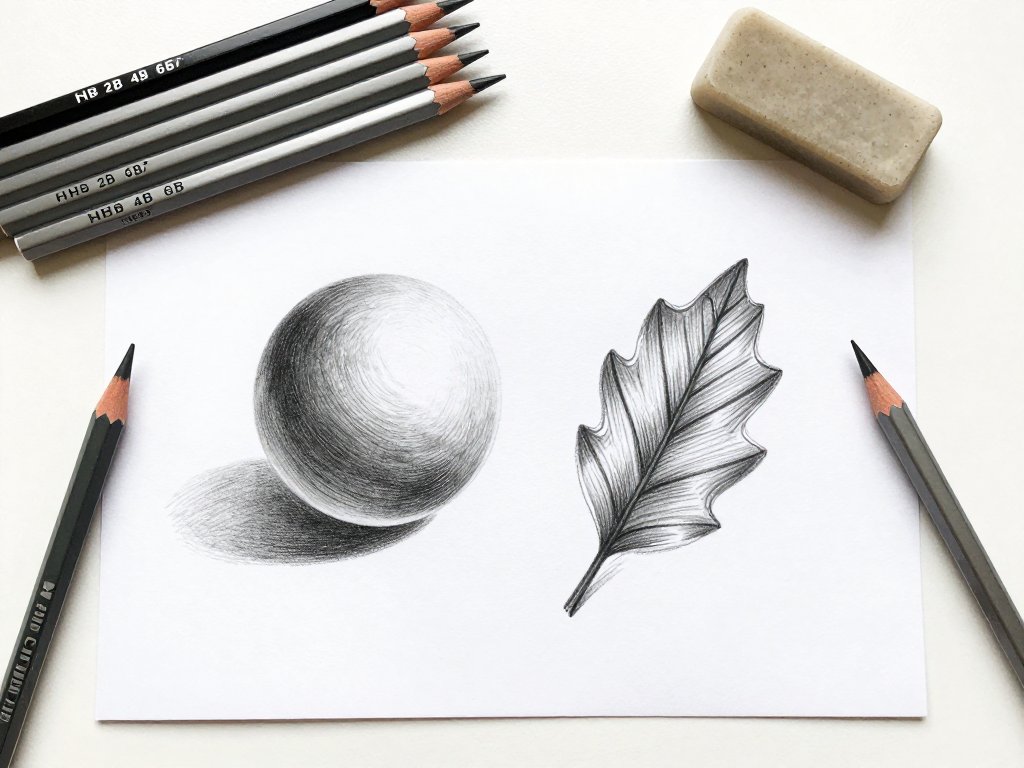
A set of drawing pencils. Look for a beginner set with a range of grades, usually HB, 2B, 4B, and 6B. That range is enough for years of practice.
Smooth paper. A pad of drawing paper or even printer paper works at first. As you improve, you will notice that slightly textured paper holds graphite better.
A soft eraser. The white plastic kind, not the pink rubber on your pencil. It lifts graphite without damaging the paper.
A sharpener. A simple handheld sharpener is fine. A blunt pencil cannot make fine lines, so keep one pencil sharp at all times.
Optional but lovely: a blending stump and a scrap of soft cloth for smoothing shading.
That is the list. You probably own most of it already. If you are missing pencils, a single 2B pencil can carry you through this entire guide.
One more note about paper: do not save your good paper for "real drawings." Use it. A pencil is forgiving, and every sheet is a chance to practice, not a test to pass.
Understanding Pencil Grades
Pencils are labeled with letters and numbers, and the system is simpler than it looks.
The letter H stands for hard. Hard pencils make light, fine lines. The letter B stands for black or soft. Soft pencils make dark, rich marks.
So an H pencil gives you pale gray, and a B pencil gives you deep charcoal. The number tells you how far it goes: 2H is harder than HB, and 6B is much softer than 2B.
For beginners, the middle of the range is your home base. HB is your everyday pencil, 2B your shading friend, and 6B your darkest darks.
You do not need to collect every grade. Most drawings can be made beautifully with just HB, 2B, and 6B.
Try this: on a scrap of paper, draw a line with each pencil in your set. See how the same hand makes such different marks. That knowledge is your foundation.
Holding Your Pencil
How you hold the pencil changes everything about the marks you make.
The writing grip is what you already know. Hold the pencil as if writing a letter. It gives you control for details like eyes, buttons, and the edges of leaves.
The underhand grip is the artist's secret. Hold the pencil further back, cradled in your palm with the point angled toward the paper. Use the side of the lead, not the tip.
The underhand grip lets you shade large areas with soft, wide strokes. It also relaxes your whole arm, which is where confident drawing comes from.
Switch between the two grips as you draw. Underhand for big shapes and shading, writing grip for the small details on top.
Shake out your hand whenever it gets tight. A cramped hand makes cramped drawings.
The Five Shading Techniques
Every shaded drawing you have ever seen is built from five simple techniques. Learn these, and you can render almost anything.
Hatching. Parallel lines drawn close together. The closer the lines, the darker the value. This is the most basic and the most versatile.
Cross-hatching. Hatching in two directions, layered over each other. The overlapping grid creates richer, deeper shading.
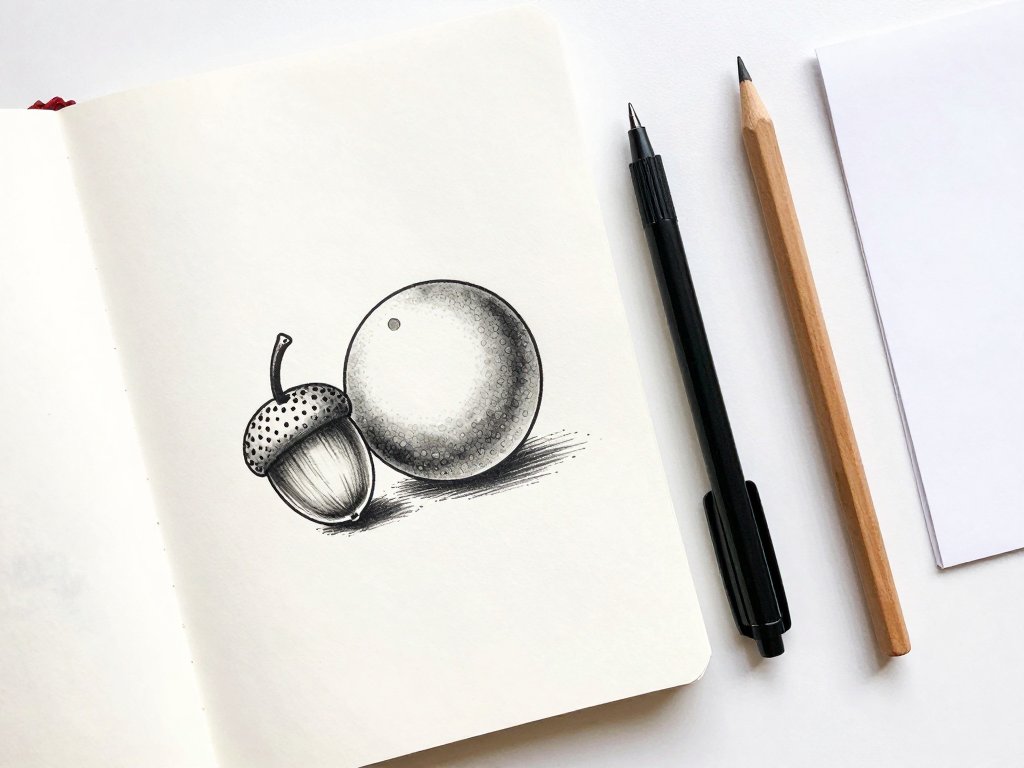
Stippling. Small dots placed close together. Dense dots make dark areas; scattered dots make light ones. It is slow and meditative, perfect for quiet afternoons.
Scumbling. Little circular scribbles, like coloring in a hurry. Layered circles build up soft, textured shading that is wonderful for clouds and fur.
Blending. Smudging the graphite with your finger, a cloth, or a blending stump. This produces the smooth, dreamy gradient that looks so professional.
Practice each technique in a small square on scrap paper. Fill the square with light marks, then add layers until it is nearly black. Feel how each method behaves.
You will naturally favor one or two. That is fine. A signature style is just a favorite technique, repeated with love.
Practice: The Value Scale
Before drawing objects, draw a value scale. It is the single most useful exercise in all of drawing.
Draw a long rectangle and divide it into five squares. Number them one through five.
Square one stays white. Square five is your darkest dark, shaded with your softest pencil pressed firmly. Now fill in the squares between them with gradually darker shading.
Two and four are the tricky ones. They teach you to control pressure and build tone slowly instead of all at once.
When you can make five even steps from white to black, you understand value. And value, more than anything else, is what makes drawings look three-dimensional.
Keep this first value scale. You will make many more, and each one will be a little smoother than the last.
Drawing a Simple Sphere
The sphere is the classic first project because it teaches light and shadow in one shape.
Step 1. Draw a circle with light HB lines. It does not need to be perfect. A slightly wonky circle still makes a lovely sphere.
Step 2. Decide where your light comes from. Put a tiny dot on the circle where the light hits, and a small shadow shape on the opposite side.
Step 3. Using the underhand grip and 2B, shade the side away from the light. Press harder near the shadow, lighter near the highlight.
Step 4. Blend gently with your finger or a stump to smooth the gradient. This is where the flat circle becomes a round ball.
Step 5. Add a cast shadow on the table below the sphere, darkest right under it and fading outward.
Step 6. Lift out the highlight with your eraser, and sharpen the shadow edge where it meets the light.
Step back and admire it. You have drawn light itself. Everything else you ever draw will use this same logic.
Drawing a Leaf
Leaves are the perfect second project. They have a clear outline, gentle curves, and a central vein that guides your shading.
Step 1. Sketch the leaf's outline in HB, a simple almond shape with a pointed tip and a short stem.
Step 2. Draw the center vein from stem to tip, and a few side veins angling outward. Keep them light.
Step 3. Shade one half of the leaf darker than the other, following the curve of the surface. This fold is what makes the leaf look alive.
Step 4. Darken the area around the veins slightly, so the veins appear to sit above the surface.
Step 5. Erase a thin bright line along the top edge where the light catches.
Leaves are wonderfully forgiving. Every leaf in nature is a different shape, so any wobble just looks like a real leaf with personality.
Draw three leaves in one sitting, each facing a different direction. By the third, your hand will know what to do.
Light and Shadow: The Language of Drawing
Here is a thought that changes how beginners see drawing: a drawing is not really about objects. It is about light.
When you draw a sphere, you are not drawing a ball. You are drawing the way light falls across a round surface, and your brain reads that as a ball.
Every drawing has the same building blocks. The highlight is where light hits directly. The midtone is the body of the form. The core shadow is where the form turns away from light. The cast shadow is what the object throws onto its neighbor.
Look for these four things in everything around you. The milk jug by the sink has all of them. Your child's toy on the floor has all of them.
Once you can spot the four lights, you can draw anything. The subject is just an excuse to arrange light on paper.
Try this at home: shine a desk lamp on a plain white mug in a dark room. Watch how the shadow side disappears into the dark and the light side glows. That single image teaches more about drawing than any book.
Common Beginner Mistakes, and How to Fix Them
These are the hiccups every new drawer meets. Knowing them ahead of time saves you a lot of frustration.
Drawing too dark too fast. Once graphite is down, it is hard to lift. Build tone gradually with light layers, and only press harder when you are sure.
Smudging your work. Rest your hand on a spare piece of paper under your drawing hand. It keeps oils and graphite from smearing your work.
Wobbly outlines. Draw with your whole arm, not just your fingers. Relaxed shoulders make smoother lines than tense wrists.
Staring at the paper. Look at your subject more than your drawing. Your hand needs new information, and the subject is where it lives.
Comparing yourself. The only drawing you should compare yours to is the one you made last week. Progress, not perfection, is the goal.
Simple Subjects to Start With
When you finish the sphere and the leaf, keep the momentum going with subjects that are kind to beginners.
Fruit. An apple or a pear is a sphere with a personality. Same shading, more character.
A mug. Cylinders are just circles stretched out. Shade the side opposite the handle and you have a cup in no time.
A crumpled paper bag. Its folds give you built-in shading guides. Draw what you see, fold by fold.
A shell. The spiral lines practically draw themselves, and the curved ridges are lovely practice for controlled shading.
A spoon. The oval bowl and handle show you how light bends on metal, which is a beautiful challenge without being hard.
Set up a little still life on your kitchen counter with three of these. A piece of fruit, a mug, and a spoon make a lovely first composition.
Making Drawing a Habit
Skill comes from frequency, not from long heroic sessions.
Ten minutes a day beats three hours once a month. Keep a pencil and a small pad where you sit in the evening, and draw whatever is in front of you.
Your coffee mug. The plant on the windowsill. Your sleeping dog, if they will hold still long enough.
Do not judge the results for the first few weeks. Just make marks. The judgment phase comes later, and by then your hand will have caught up with your eye.
If you want gentle structure, choose one subject a week. Week one: spheres. Week two: leaves. Week three: fruit. By the end of a month, you will have a small portfolio and a much braver pencil.
Keep your early drawings where you can see them. Tape them to the fridge or pin them to a board. When your hand improves, you will feel it in your chest, and the old drawings will remind you how far you have come.
Conclusion
Graphite drawing asks very little of you: a pencil, some paper, and the willingness to make mistakes on purpose.
The techniques in this guide are the same ones artists have used for centuries. Hatching, cross-hatching, blending, and patient value scales. They have not changed because they work.
Your first sphere will be lumpy. Your first leaf will be lopsided. Keep them anyway. They are the honest beginning of something real.
Draw a little today, a little tomorrow, and a little the day after. The pencil will remember what you teach it, even on the days you do not.
Pick up your pencil now and make five small marks. That is all it takes to begin. The rest is just practice, and practice, happily, is the best part.