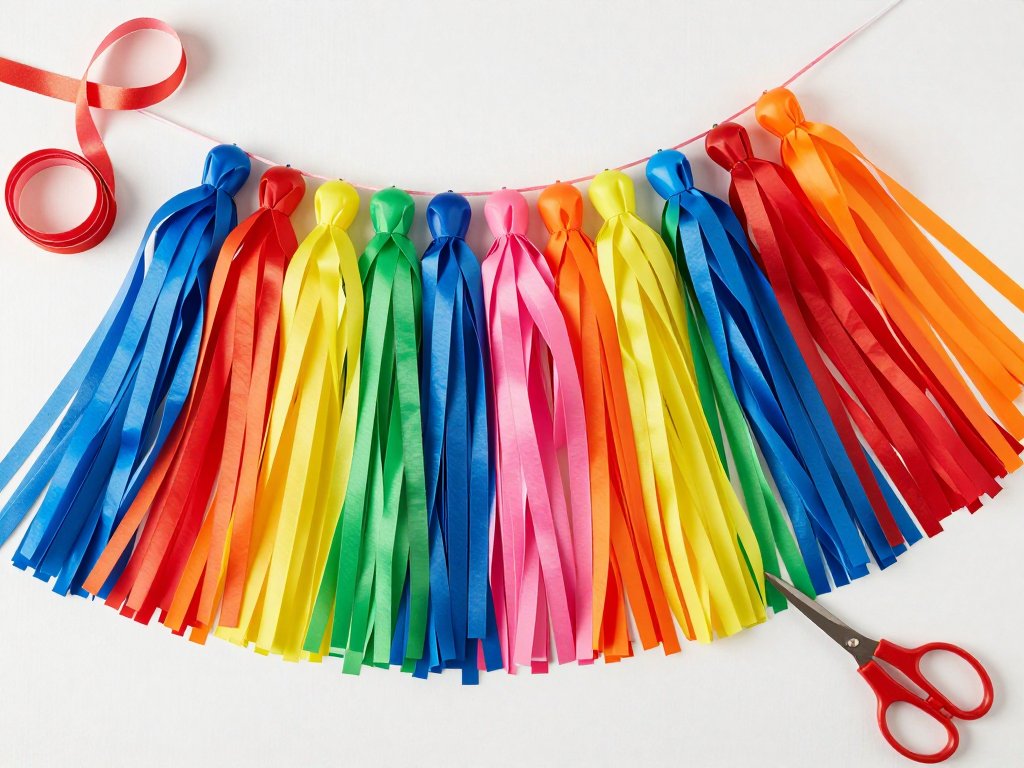
Introduction: Why Fringe Balloon Tassels Are the Party Decor Power Move You Need
Let's be honest — balloons alone are great, but balloons with fringe tassels? That's how you go from "nice party" to "did you hire a professional decorator?" Fringe balloon tassels are the secret weapon of event stylists, birthday party planners, and anyone who wants their celebration photos to absolutely dominate Instagram stories. The best part? They're deceptively simple to make, cost pennies compared to store-bought decor, and you can customize them to match literally any color palette or theme you can dream up.
I'm Sophie Bennett, and I've spent way too many late nights cutting fringe strips for birthday parties, baby showers, and last-minute holiday gatherings. I've learned what works, what frays your patience, and what makes the finished product look store-bought. This guide is everything I wish someone had handed me before I started.
Whether you're decorating for a first birthday party, a graduation open house, a wedding reception, or just because Saturday deserves some pizzazz, fringe balloon tassels deliver maximum impact for minimal effort. Let's get into it.
What Exactly Are Fringe Balloon Tassels?
Fringe balloon tassels are decorative accents made from fringed tissue paper or crepe paper that hang from the bottom or sides of balloons. They add movement, texture, color, and that playful, whimsical energy that separates a basic balloon arrangement from a showstopper. They can be as short as six inches for a subtle accent or as long as three feet for dramatic, floor-grazing effect. When clustered together on a balloon garland, they create a cascading waterfall of color that transforms any room.
The beauty of fringe tassels is that they work with every type of balloon — latex, foil mylar, bubble balloons, cloud balloons — you name it, a tassel makes it better. You can attach them to individual balloon weights, string them along a garland, or use them as standalone decorations hung from the ceiling. Once you learn the basic technique, you'll find yourself adding tassels to everything.
Materials: What You'll Need to Make Fringe Balloon Tassels
Here's the full materials rundown. Most of these are available at any craft store or in your own crafting stash.
Tissue Paper
This is the star of the show. Standard 20-by-30-inch tissue paper sheets are ideal because they give you enough length for substantial tassels without wasting material. You'll need two to three sheets per tassel, depending on how full you want it. Tissue paper comes in an astonishing range of colors. A 50-sheet assorted pack costs about eight dollars and can make fifteen to twenty tassels.
Crepe Paper (Alternative)
Crepe paper is thicker and has a slight stretch, giving tassels a different texture and more body. Crepe paper tassels hold their shape better than tissue paper tassels and are more durable, making them a great choice for outdoor decorating where breeze and humidity are factors. The trade-off is that crepe paper doesn't drape as softly — the fringe stands out more stiffly. For a romantic, flowing look, go with tissue paper. For a structured, graphic look, choose crepe paper.
Tissue Paper vs. Crepe Paper — Which Should You Choose?
Tissue paper is thinner, more delicate, and creates softer fringe that moves beautifully with minimal airflow. Perfect for indoor celebrations, photo backdrops, and events where you want that floaty, ethereal look. Crepe paper is thicker, stretchier, and more resistant to tearing. It holds up better outdoors, produces fringe with more structure, and is easier to handle in large batches. My rule of thumb: tissue paper for weddings and baby showers; crepe paper for birthday parties, outdoor events, and any scenario where toddlers might grab the decorations.
Curling Ribbon
Curling ribbon is what you'll use to cinch the top of your tassel and create the hanging loop. It comes in every color imaginable, costs about a dollar per spool, and one spool is enough for dozens of tassels. Buy curling ribbon in the same color family as your tissue paper for a cohesive look, or go with a contrasting metallic for extra pop.
Embroidery Floss
Embroidery floss is fantastic for tying the center knot of your tassel. It's stronger than curling ribbon, comes in hundreds of colors, and doesn't slip. Use a 12-inch piece doubled over to tie the tight knot that holds the tassel together. You can also use baker's twine, thin craft wire, or even dental floss in a pinch.
Scissors
Sharp scissors are non-negotiable. Dull scissors crush and fray tissue paper edges, making your fringe look ragged. Use dedicated 8-inch craft shears reserved exclusively for paper. If you're making more than ten tassels in one sitting, invest in a rotary cutter and cutting mat — the speed and uniformity are worth it.
Tape
Double-sided tape is my go-to for attaching tassels to balloons. It's invisible, holds well on latex, and doesn't leave residue. For foil balloons, use removable double-sided dots or low-tack washi tape — foil is more delicate than latex, and you don't want to risk tearing the balloon surface when removing the tassel. Glue dots are another excellent option for both latex and foil balloons.
Dowel, String, or Fishing Line for Hanging
For balloon garlands, thread the tassels directly onto the garland string. For standalone hanging tassels, clear fishing line creates the illusion that your tassels are floating in midair. Command hooks or removable adhesive hooks work perfectly for ceiling installations without damaging paint or tiles.
Step-by-Step: How to Make Fringe Balloon Tassels
Follow these steps carefully, and you'll have professional-quality tassels in under five minutes each.
Step 1: Prepare Your Tissue Paper
Stack two to three sheets of tissue paper neatly on top of each other. Fold them in half lengthwise so they measure 20 by 15 inches. The folded edge becomes the top of your tassel; the open edges become the fringe. Smooth out any wrinkles — creases in the upper portion will show in the finished product.
Step 2: Cut the Fringe
Starting from the open edge, cut strips toward the folded edge. Leave about one to two inches uncut at the folded edge — this uncut band becomes the solid "cap" of your tassel. For standard tassels (8 to 12 inches long), cut fringe strips about ¼ inch to ⅜ inch wide. This gives you dense, lush fringe without making individual strips too wispy. For extra-full tassels, cut ⅛-inch strips — more time-consuming but produces a magnificent, fluffy tassel. For quick-and-dirty tassels when you need thirty for a class party, cut ½-inch strips. They'll look chunkier, but from a distance no one will notice, and you'll save hours of cutting time.
Step 3: Unfold and Shape
Carefully unfold your tissue paper so you have a full rectangle with fringe cuts running along both short ends. The uncut section in the middle is your tassel cap. Flip the paper over so the cuts face away from you, and gently gather the paper from each short end toward the center. This creates the classic teardrop shape — wide and full at the bottom, gathered at the top.
Step 4: Tie the Tassel
Pinch the gathered center firmly. Take your embroidery floss and wrap it tightly around the pinched center two or three times. Tie a firm knot — not so tight that you tear the paper, but tight enough that the tassel won't slide apart. Double knot for security. Trim the floss tails to about a quarter inch.
Step 5: Fluff and Shape the Tassel
Hold the tassel by the tied center and gently shake it. The fringe strips will separate and fall into place. Take each individual strip and pull it gently downward, working your way around the tassel. This transforms a crumpled wad into a beautiful, symmetrical tassel. If any strips are stuck together, separate them carefully — tissue paper clings due to static electricity, especially in dry environments. Once all strips are separated, trim the bottom edges so they form a straight, clean line. You can also trim at an angle or in a V-shape for a different look.
Step 6: Add the Hanging Loop
Cut a 12-inch piece of curling ribbon. Thread it through the tied center of your tassel from back to front, and tie the ends together in a simple knot or bow. This loop is what you'll use to attach the tassel to the balloon. If you're attaching directly to the balloon surface rather than hanging, skip the loop and tie a short 3-inch ribbon tail that you can tape against the balloon.
How to Attach Tassels to Balloons
This is where many DIY tutorials get vague. Let me be specific.
Attaching to Latex Balloons
Latex balloons are forgiving and grippy. For a single latex balloon on a stick, place a small piece of double-sided tape on the side or bottom of the balloon, then press the tassel's ribbon tail or top cap against the tape. Hold for ten seconds. For latex balloons in a garland, use the tassel's hanging loop to tie it directly onto the garland string between balloons, then add a glue dot to keep it from sliding. This method is more secure because the garland carries the weight rather than the balloon.
Attaching to Foil Balloons
Foil balloons are less forgiving. They're made from thin mylar that can puncture or wrinkle. Never use hot glue on foil balloons — the heat can melt the mylar. Instead, use low-tack double-sided dots or glue dots. Press the tassel's ribbon against the dot and hold for at least fifteen seconds. If possible, position the tassel at a seam or color boundary where the tape is less visible. For large foil numbers or letters, attach tassels at the inner corners or bottom curves for a cascading effect that follows the shape of the foil.
Attaching to Balloon Garlands
Balloon garlands are the ultimate showcase for fringe tassels. The best positions are: at the lowest-hanging points where the garland sags between arches, at the ends of the garland to create a trailing effect, and clustered around the focal point. To integrate tassels, tie each tassel's hanging loop directly onto the balloon decorating strip. If you're using fishing line instead, simply knot the tassel loop onto your string at 12- to 18-inch intervals. For a maximalist garland, cluster two or three tassels together at each attachment point.
Color Combinations That Work Every Time
Birthday Parties: Hot pink and bright orange (birthday energy), teal and gold (sophisticated but fun), rainbow mix of six to eight colors (classic party vibe).
Baby Showers: Blush pink and cream (traditional girly), sage green and dusty blue (gender-neutral), lavender and soft yellow (whimsical). Use tissue paper for these events — the softer drape matches the gentle aesthetic.
Weddings: White and greenery-green (fresh and clean), champagne and ivory (timeless romance), deep burgundy and dusty rose (autumn wedding). Make tassels smaller and more delicate for weddings — use single sheets rather than three.
Holidays: Red and gold (Christmas), orange and black (Halloween), pink, yellow, and mint green (Easter).
Graduation: School colors mixed with metallic gold or silver. Tassels at graduation parties echo the actual tassels on graduation caps.
Sizes and Variations
Micro Tassels (3 to 5 inches): Use a single sheet folded to a quarter of its width. Perfect for cupcake toppers, gift toppers, and napkin rings.
Midi Tassels (6 to 10 inches): The standard size from two sheets. Perfect for most balloon arrangements and garlands.
Mega Tassels (12 to 36 inches): Use four to six sheets with wider fringe strips (½ inch) for structure. Spectacular as statement pieces at garland ends or ceiling installations.
Ombre Tassels: Stack sheets in graduating shades of the same color. When fluffed, the colors blend from light to dark (or vice versa). Looks incredibly high-end.
Two-Tone Tassels: Use two contrasting colors. The colors intertwine as you fluff, creating a marbled effect.
Spiral Tassels: Before cutting, lightly wet the folded paper and twist gently. Let it dry, then cut the fringe. The strips curl into spirals — perfect for children's parties.
Pro Tips From Someone Who's Made Hundreds of Tassels
Stack strategically. When stacking sheets for cutting, alternate the direction of the paper grain to prevent shifting and ensure clean cuts.
Cut multiple tassels at once. Stack four to six folded sets and cut fringe through the entire stack. This assembly-line approach cuts production time by 75 percent.
Use a paper trimmer. For trimming the bottom of tassels, a guillotine-style paper trimmer is faster and more accurate than scissors.
Store carefully. Finished tassels are fragile. Store in a clean plastic bin and don't stack anything on top. If making tassels more than a day before your event, hang them from a clothesline so they don't get crushed.
Watch the humidity. Tissue paper absorbs moisture. In high humidity, tassels droop and lose their fluff. Use crepe paper for outdoor or humid events. You can also spray finished tassels with a light coat of aerosol starch to help them hold their shape.
Antistatic for the win. If fringe strips cling together, lightly mist the tassel with water or run a dryer sheet over the surface. The static dissipates immediately.
Mind the helium. A standard tissue paper tassel weighs 3 to 5 grams. For helium balloons, stick with micro and midi tassels. Save mega tassels for air-filled arrangements.
Coordinate with your backdrop. If your backdrop is busy, use solid-color tassels drawn from the backdrop. If it's neutral, you can go wild with color combinations.
Balloon Garland Integration
Build your garland using at least three balloon sizes (5-inch, 11-inch, and 16-inch) for visual depth. Place tassels at every low point where the garland dips — typically every 2 to 3 feet. At each low point, attach one to three tassels. For single tassels, use a contrasting color midi tassel. For clusters, use one midi and two micro tassels in complementary colors.
For the ends of the garland, go big. Use mega tassels (12 to 18 inches) at both ends, and consider adding a cascade of three or four tassels graduating in size. This creates a trailing effect that draws the eye along the entire garland. If your garland includes foil letters or numbers, attach mini tassels to the bottom of each letter for continuity.
Beyond Balloons: Other Uses for Fringe Tassels
Table centerpieces: Tie a tassel around the neck of a vase, candle holder, or jar for added height and texture.
Gift toppers: Attach a mini tassel to your gift ribbon instead of a traditional bow. It's unexpected and reusable.
Wall decor: Tie multiple tassels to a wooden dowel at varying lengths for a stunning, low-cost wall hanging.
Photo booth props: Attach tassels to the ends of photo booth sticks. They catch motion beautifully in photos.
Party hats: Glue a mini tassel to the top of a party hat or birthday crown for an instant upgrade.
Conclusion: Your Turn to Create
Fringe balloon tassels are one of those rare DIY projects that look expensive, take minimal time, and use materials that cost almost nothing. Whether you're decorating for a milestone birthday, a wedding, a baby shower, or just a Tuesday that deserves better decor, these tassels deliver disproportionate delight for the effort invested.
The technique I've shared here is the result of trial, error, and many late nights with a glue gun. But once you know the fundamentals, you can make them your own. Mix colors in ways that feel like you. Try unusual variations. Experiment with materials — tissue paper, crepe paper, even lightweight fabric scraps. There are no mistakes, only design discoveries.
I'd love to see what you create. Share your tassel creations, tag ArtTools in your party photos, and don't forget to fluff those tassels before the guests arrive. Happy crafting, and here's to parties that truly pop.

