Introduction
Few motifs in the fiber arts are as instantly recognizable as the granny square. For over a century, this humble cluster of stitches has traveled from Victorian parlors to bohemian cottages, from your grandmother's afghan to the pages of glossy design magazines.
And here is the wonderful secret: the granny square is one of the easiest crochet projects you can learn.
It is made of one simple repeating pattern, works up quickly, and uses small amounts of yarn, which makes it perfect for stash-busting.
Best of all, those individual squares can become almost anything for your home.
In this guide, we will trace the granny square's story, learn the classic pattern step by step, and explore six modern home decor projects. Whether you have been crocheting for years or have never held a hook, there is a place for you here.
A Stitch with a Story: The History of the Granny Square
The granny square has a surprisingly long pedigree. Crochet itself emerged in the nineteenth century, and by the 1880s, patterns resembling the granny square were appearing in needlework publications on both sides of the Atlantic.
Early examples were worked in fine cotton thread, often in cream and subtle pastels, and used to make bedspreads and chair tidies.
The motif's golden age arrived in the 1970s, when bold colors and earthy tones turned granny square afghans and vests into icons of the decade. You have probably seen photographs of that era's colorful, cozy crochet, and you may even remember one draped over a family sofa.
Today, designers have reclaimed the granny square with a fresh eye. Modern versions use neutral palettes, oversized hooks, and unexpected color combinations, transforming a vintage motif into something contemporary and chic. That is the beauty of this stitch: it carries its history with it, yet it always feels new.
Choosing Your Yarn and Hook
Before we pick up the hook, let us talk supplies. The granny square is forgiving with yarn choices, but a few simple decisions will make your first squares easier and more enjoyable.
Yarn weight. For beginners, a medium weight yarn, called worsted weight in the United States and aran in the United Kingdom, is ideal.
It is thick enough to see your stitches clearly, works up quickly, and comes in every color imaginable.
DK weight yarn, a little thinner, also works beautifully for finer projects.
Fiber. Acrylic yarn is affordable, machine-washable, and widely available, making it a practical choice for blankets and cushions.
Cotton yarn gives a crisper stitch with lovely drape, perfect for table runners and bags.
Wool is warm and springy but costs more and needs gentler care. For your first squares, a soft acrylic in a light color will show your stitches best.
Hook size. Match your hook to your yarn. A 5mm hook, known in the United States as size H-8, pairs beautifully with worsted weight yarn.
If you crochet tightly, go up half a millimeter; if your stitches are loose, go down.
The goal is a fabric that is firm but not stiff.
One more tip. Check your yarn label for the recommended hook size and washing instructions. Saving a label from each ball means no guesswork later when your finished project needs a gentle clean.
The Classic Granny Square, Step by Step
Now for the heart of the matter. The classic granny square is worked in the round, built from clusters of double crochet separated by chain spaces. The pattern repeats each round, growing larger and larger until your square is the size you want.
A quick note on terms before we begin: this pattern uses American crochet terms. If you follow British patterns, remember that a British treble is the same stitch as an American double crochet. Many patterns will say which terms they use, so check before you start.
Round 1: Make a slip knot and chain four. Join with a slip stitch to form a ring.
Alternatively, use a magic ring, which lets you pull the center tight and eliminates the hole.
Chain three, which counts as your first double crochet. Work two double crochet into the ring, chain two, then work three double crochet, chain two, three more times.
You should have four groups of three stitches with chain-two corners. Join with a slip stitch to the top of the starting chain.
Round 2: Slip stitch into the chain-two corner space. Chain three, then work two double crochet into the same corner space, chain one.
In the next corner space, work three double crochet, chain two, three double crochet, chain one.
Repeat this corner treatment around the square, and join with a slip stitch.
Round 3 and beyond: Each new round is the same as Round 2. In each corner space, work three double crochet, chain two, three double crochet.
Along each side, work a group of three double crochet into each chain-one space, separated by chain one.
As the square grows, the rhythm becomes almost meditative.
Work as many rounds as you like, changing colors whenever the mood strikes. Weave in your ends as you go, and your first granny square is complete. Congratulations, you have just joined a century-old tradition.
Modern Granny Square Variations
The classic square is only the beginning. Once you have mastered the basic rhythm, three modern variations will open up a whole new world of design possibilities.
The solid granny square. Skip the chain-one spaces along the sides and work double crochet directly into each stitch, keeping only the chain-two corners. The result is a dense, solid square with a clean, contemporary look, perfect for minimalist decor.
The sunburst square. Start with a colorful center worked in single crochet and treble crochet petals, then finish the outer rounds in the classic granny style. Sunburst squares have a cheerful, floral quality that makes stunning pillows and throws.
The continuous granny square. Instead of working one square at a time, you can crochet squares in a continuous spiral that grows diagonally, never joining rounds. This technique creates a single large piece with no seams, wonderful for blankets and shawls.
Each variation uses the same basic skills, so learning them is simply a matter of practice. Try one of each, and see which speaks to your style.
Project 1: The Cozy Throw Blanket
The classic granny square project is the throw blanket, and for good reason. It is essentially a collection of squares joined together, which makes it portable, modular, and wonderfully satisfying.
What you need: about 1200 grams of worsted weight yarn in your chosen colors, a 5mm hook, and a yarn needle. This makes a lap blanket of roughly 45 by 55 inches.
Step 1: Crochet 48 squares, each with six rounds. For a modern look, use a neutral base color with two or three accent colors.
Step 2: Arrange your squares in a grid of six by eight. Move them around until the color distribution pleases you, then photograph the layout so you remember it.
Step 3: Join the squares using your preferred method. Whip stitch on the wrong side gives a tidy seam, while single crochet join creates a raised, decorative ridge on the right side.
Step 4: Add a border of two or three rounds of double crochet around the whole blanket to frame your work and even out the edges.
This project is the definition of a weekend project: each square takes about twenty minutes, so you can crochet a few each evening and join them all in a satisfying afternoon.
Project 2: Cushion Covers
Cushion covers are the quickest win in granny square decor. Because they only need four squares, they are perfect for trying new color palettes without committing to a whole blanket.
What you need: four granny squares, each five rounds, plus a cushion insert or pillow form to fit.
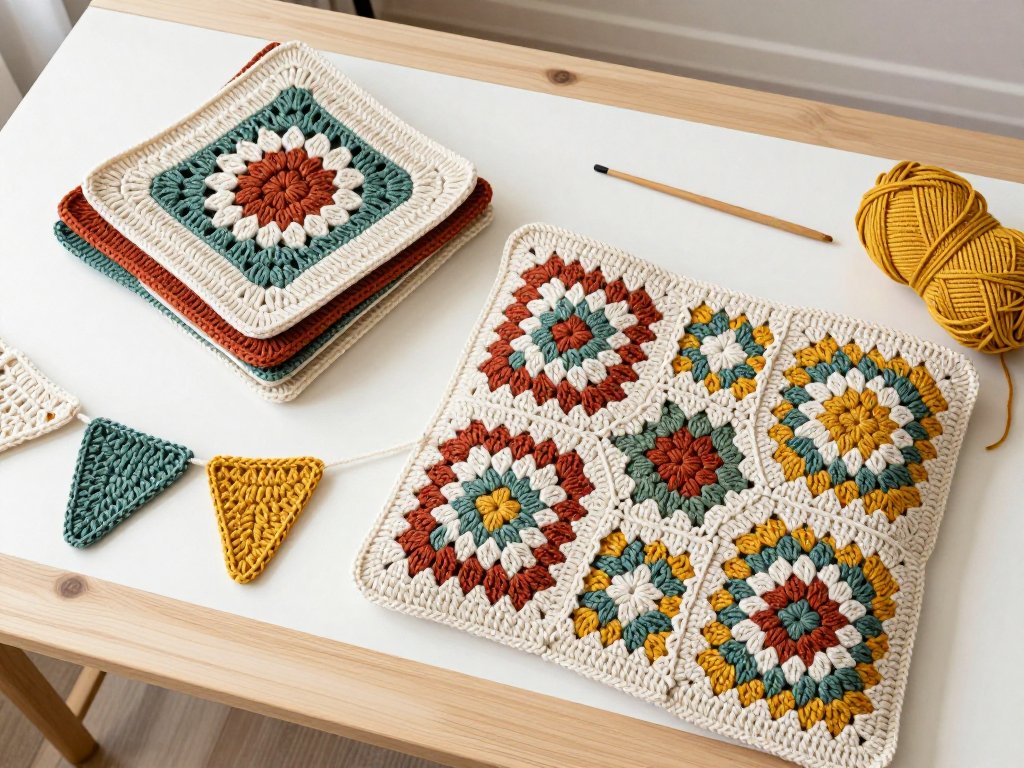
Step 1: Crochet four squares in a coordinated palette. For a modern statement, try two squares in a warm cream and two in a deep terracotta.
Step 2: Join the four squares into a larger square, matching the colors diagonally.
Step 3: Crochet a simple backing panel in a matching color, or crochet an envelope-style back with a button closure.
Step 4: Seam three sides together, insert the cushion form, and seam the fourth side. Add a button and loop for a removable cover you can wash.
One evening of crocheting and an afternoon of assembly is all it takes, and two cushions instantly give a plain sofa a handmade, designer feel.
Project 3: Bunting Banner
Bunting is the most forgiving granny square project you will ever make, and it is endlessly charming. Small squares on a string add color and personality to a nursery, a porch, or a party table.
What you need: twelve to sixteen small granny squares of three rounds, yarn for joining, and a length of cotton cord or ribbon.
Step 1: Crochet your small squares, mixing colors and even using the sunburst variation for variety.
Step 2: Weave in all ends neatly, because both sides will be visible.
Step 3: Lay the squares in a pleasing order, then single crochet them together at the corners, or whip stitch them to a length of cord.
Step 4: Hang the bunting and enjoy. It stores flat, so you can bring it out for every season and celebration.
Because the squares are tiny, this project is ideal for using up scraps. Every leftover bit of yarn can find a home in a cheerful strand of bunting.
Project 4: Table Runner
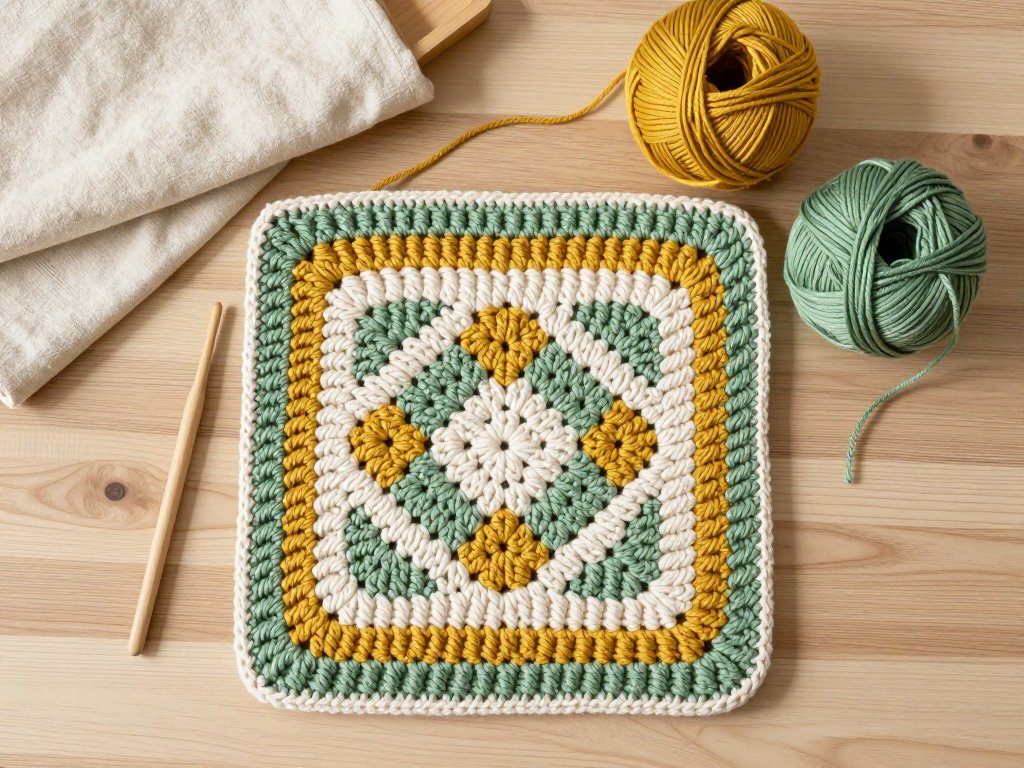
For a more refined take on granny squares, look to the table runner. Using finer yarn and a smaller hook, or simply a tighter color palette, transforms the humble motif into an heirloom-quality piece.
What you need: DK weight cotton yarn in a neutral palette, a 4mm hook, and a yarn needle.
Step 1: Crochet ten to fourteen squares of four rounds each, using only two or three harmonious colors. Cream, sage, and a soft mustard make a lovely combination.
Step 2: Join the squares in a single row using whip stitch or a flat join, creating a long rectangular runner.
Step 3: Work a single crochet border around the entire runner to neaten the edges.
Step 4: Block the runner gently so it lies flat, then dress your table.
Cotton absorbs spills beautifully and washes well, which makes this project as practical as it is pretty. Guests will never guess it started as a pile of tiny squares.
Project 5: Wall Hanging
Wall art is one of the trendiest uses for granny squares, and it requires no joining at all. A single oversized square, or a small cluster, becomes a sculptural textile piece when hung on a dowel.
What you need: one large granny square of eight or more rounds, a wooden dowel, and a few inches of yarn for hanging.
Step 1: Crochet a large square in a bold color or an ombre effect by changing shades each round.
Step 2: Weave in your ends and block the square so it hangs straight.
Step 3: Fold the top edge over the dowel and stitch it in place, or crochet a row of loops for the dowel to pass through.
Step 4: Tie a length of yarn to each end of the dowel to create a hanging loop.
Hang one square alone above a bed for a statement piece, or group three in graduated sizes for a gallery wall. The texture of the crochet brings warmth that a printed poster simply cannot match.
Project 6: Modern Tote Bag
Your granny squares can leave the house, too. A lined tote bag made from sturdy squares is a satisfying project that combines crochet with a little simple sewing.
What you need: ten squares of five rounds in a sturdy cotton or cotton blend yarn, a 5mm hook, fabric for a lining, and a sewing needle and thread.
Step 1: Crochet ten squares and join them into a box shape: four squares for the front, four for the back, and two for the base. Alternatively, use eight squares and seam the sides directly.
Step 2: Crochet two long straps, or crochet the sides of the bag and attach purchased handles.
Step 3: Sew a fabric lining with a simple pocket, and stitch it inside the bag.
Step 4: Reinforce the top edge with a round of single crochet so the bag holds its shape.
This tote is sturdy enough for farmers market runs and pretty enough for a day out. Making it yourself means choosing colors that match your coat, your kitchen, or your mood.
Finishing, Blocking, and Care
A few finishing habits will make every granny square project look professionally made.
Weave in ends as you go. Thread each tail onto a yarn needle and weave it through the backs of several stitches, then trim. Doing this after every square saves a daunting pile of ends at the finish line.
Block your squares. Wet blocking transforms wobbly squares into perfect, flat shapes. Soak the squares in lukewarm water, gently squeeze out the excess, pin them to their intended size on a towel, and let them dry. Matching sizes make joining infinitely easier.
Join with intention. Your joining method affects both strength and looks. Whip stitch is fast and nearly invisible; mattress stitch creates a perfectly flat seam; and a single crochet join adds a decorative ridge that suits modern designs.
Care for your work. Acrylic pieces can usually be machine washed on a gentle cycle and dried flat. Cotton can handle warmer washes. Always follow your yarn label, and lay finished pieces flat to dry so they keep their shape.
Final Thoughts
There is something deeply satisfying about a granny square. Each one is small enough to finish in an evening, yet it belongs to a tradition that spans more than a century.
And when your squares come together into a blanket, a cushion, or a bag, you will feel the quiet pride that makers have known for generations.
Start with one square in a color you love. Then make another. Before you know it, you will have a stack of them, and a dozen ideas for what they might become.
Happy crocheting, and may your corners always lie flat.