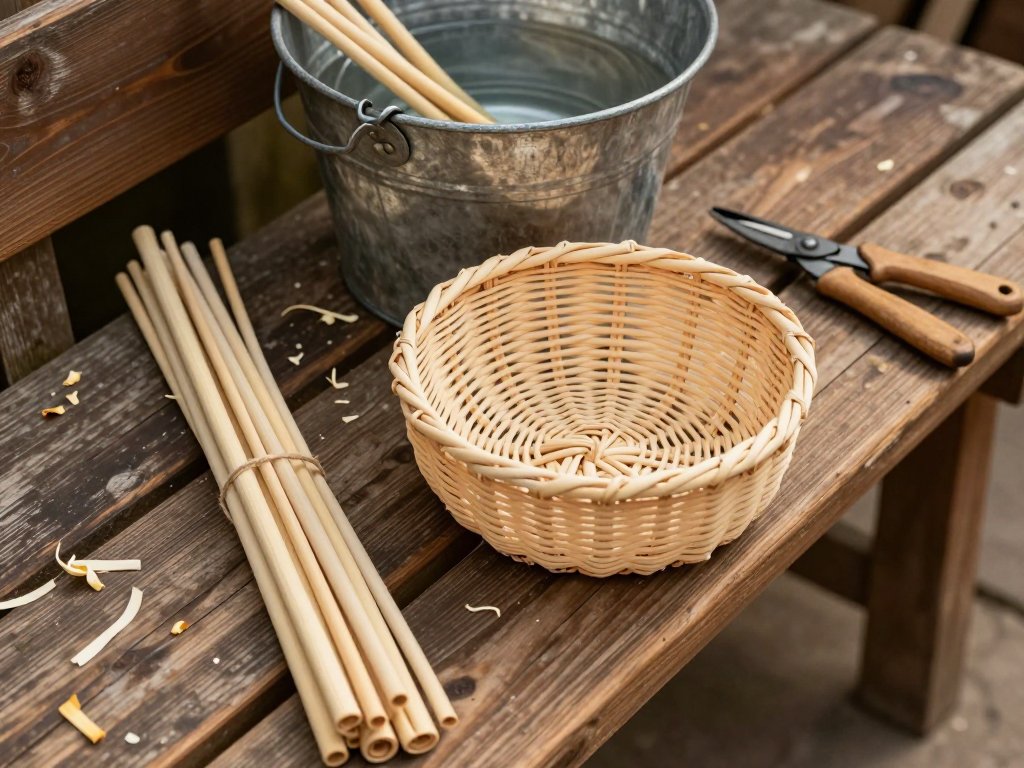
Introduction
For four centuries willow basketry was a trade, and a busy one. Withy beds along the Somerset levels and the Cambridgeshire fens grew rods on purpose, coppiced each winter and cut by hand while the sap was down.
The baskets went wherever work went: eel traps and herring measures for the fishing ports, bread baskets and laundry skeps for the house, saddle baskets for the carrier's pony, and the Sussex trug for the garden.
Nearly all of it is gone now, because willow wears out and gets burned. What survives is the method. That is why a bundle of rods on your kitchen table puts you in a very old line of work.
What follows is one round basket, about a foot across, made from buff willow in five stages that each have a name. You do not need speed or strong hands. You need wet rods and a willingness to be slow.
A Trade Grown in Wet Fields
The word withy comes from the Old English wīthig, meaning willow, and a withy bed is simply ground too wet for much else.
Growers planted almond-leaved and osier willow close together, cut the stools back to the stump every winter, and harvested the new rods a year later. A good stool lives for decades.
Damp ground gave long, straight, supple rods. Dry ground gave short rods that split at the first bend. That is why the levels, the fens and the Somerset moors became the heart of the trade.
Every village had a basketmaker working from a shed, and rods arrived sorted by length, because a basket is designed around rod length before it is designed around anything else.
Plastic crates ended most of that work after the war. The withy beds that remain are still cut by hand between November and March, and the craft has quietly refilled with people making baskets at kitchen tables.
Brown, Buff and White
Willow reaches you in three states, and the difference matters far more than the price.
Brown willow is unpeeled: bark left on, dried, and darker than it looked growing. It is strong, weatherproof and stiff, which is why garden structures and heavy carrying baskets are built from it.
Buff willow has been peeled and then boiled, which cooks the sap out and turns the wood a warm honey colour. The rods become supple, forgiving, and even in colour from one to the next.
White willow is peeled and dried without boiling, so it stays pale, almost bone-coloured, and slightly firmer than buff. It suits fine pale work and shows every mark you make.
For a first basket, buff is the friendliest material there is. It bends without fighting you, it forgives a clumsy pairing, and it looks handsome even when the weave wanders.
A bundle of five-foot buff rods, sorted roughly by thickness, will see you through a basket this size. Ask for basket grade and you will get rods long enough for base, stakes and border with waste to spare.
Buy more than you think you need. Running short halfway along a row is the most common beginner's grief, and a spare bundle costs very little.
Judging a Rod by Hand
Pick up a rod and sight along it. A good rod tapers steadily from butt to tip: thick where it was cut, fine at the other end.
Bend it gently between both hands. It should curve in a smooth arc and come back straight. A rod that bends and stays bent has been kinked, and the kink will break later.
Run your thumb down the length, feeling for flat spots, scars and side shoots. A small blemish is nothing; a hard node the size of a pea will snap when you bend it around a stake.
Colour should be even, with no grey bloom or black patches. That is damp and mould, not character.
Soaking and Mellowing
Dry willow is brittle. A rod straight from the bundle will crack at the first sharp bend, and no amount of care at the bench will rescue it afterwards.
The old rule of thumb is one day of soaking for every foot of rod length, so five-foot rods want about five days under water. Buff willow, boiled and dried hard, usually needs the longer end of that estimate.
Weight the bundle down with a brick so it stays submerged, butt ends at the bottom. A bath, a water trough, or a length of gutter with the ends blocked will all do.
Lift the rods out, shake them, and wrap them in a damp cloth or an old towel. This is mellowing: the water spreads evenly through the whole rod instead of sitting in the outer layer.
Leave the bundle wrapped overnight, or at least a few hours. A mellowed rod feels cool and faintly leathery, and bends like a whip rather than a stick.
Test one before you commit. Bend the butt end into a half circle. If it cracks, back into the water it goes; if it curves and holds, you are ready to weave.
Skip the soaking and you will lose a third of your rods to splitting. The basket gets built from short, patched pieces that never sit true, and the weave stays loose for good. Preparation is most of this craft.
Five Tools, Nothing Fancy
You need five things, and four of them are probably already in the house.
- A sharp knife. A sturdy craft knife or a sharp penknife. Secateurs are kinder to weak hands and cut just as cleanly. Whatever you use must sever a rod in one pass, not saw at it.
- A bodkin or packing tool. A blunt tapered steel spike, called a rapping iron when it has a flat head. It opens a gap between rods so another rod can pass through. A blunt knitting needle will stand in.
- A weight. A brick, a bag of sand, a heavy book. It holds the base still while both your hands are busy.
- A bucket or trough. One for soaking, one for keeping the rods you are working with damp at the bench.
- A cleave, or a bodkin for splitting. A cleave is a small block with a blade that splits a thick rod into three even sections. You need it only for base and border, and a knife will do the same job slowly.
That is the entire kit. Nothing is expensive and nothing needs replacing each season. A basketmaker's tools fit in a canvas bag the size of a lunchbox.
The Words You Need First
Basketmakers use a small, exact vocabulary, and it is worth learning before your hands are wet.
- Stake. An upright rod. The stakes are the ribs of the basket, running from the base edge to the border.
- Slath. The cross of stout rods at the centre of the base, bound together, that everything else is built around.
- Pairing. Two rods woven together, one passing in front of a stake while the other passes behind. It is the tightest weave and it is what holds a base flat.
- Upsett. The moment the flat base becomes a wall, when the stakes are bent up and tied at the top.
- Waling. Three or more rods woven at once, each row stepping along one stake. It locks a corner and stiffens a side.
- Randing. One rod, over one stake and under the next, all the way round, then the next rod. This is the ordinary basket weave.
- Rod border. The plaited finish at the top, made by bending the stakes down over a rod and weaving them back into the wall.
- Fitching. Packing the weave tight by driving the last rod down with the bodkin. In finer work it also means a decorative wrap; here it means the tightening.
Willow is a plant with a season and a grain, and it behaves quite unlike a manufactured material.
If you have tried basket weaving with reed, you already know the rhythm of over and under. But that material is uniform and softens in minutes, while willow is graded, soaked for days and full of small stubbornness.
The five stages below, in the order you will work them, are not arbitrary. Each one exists to solve a problem the previous stage would otherwise leave open.
- The base. A flat disc bound with pairing, because a basket is only as steady as its floor.
- The upsett. Bending the stakes upright, because a wall has to start somewhere with a curve.
- Waling. Three rods worked as one, because the corner is the weakest point in the basket.
- Randing. One rod over and under, because this is the weave that actually makes the sides.
- The rod border. Stakes turned down over a rod, because every cut end must be hidden and the rim must hold.
Step One: The Slath and the Base
Choose eight of your stoutest rods for base sticks, four laid one way and four across, making a cross. Bind the crossing point tightly with string to hold it while you work.
Take two fine rods and pair them around the cross: one in front, one behind, crossing over each other between passes. Work two or three times around the arms of the cross, pulling each pass snug.
This binding is the slath, and its job is to stop the base twisting out of shape. Now open the arms out like a star, spacing them evenly, and carry on pairing around each individual stick rather than around the bundles.
Go round and round in a flat spiral, adding a fresh pair behind a stick whenever the old pair runs out, hiding the butt ends under the weave. Keep the base on the bench, not in the air.
Weave until the disc measures about a foot across, roughly a third of the basket's final width. Press it flat with your palm every few passes; a base that dries cupped will never sit true on a table.
When the disc is the size you want, you have a choice. Either the protruding base stick ends become your uprights, or you drive a slender stake in alongside each one, doubling the number of ribs.
Staking up doubles the uprights and gives you a rounder, finer wall. For a first basket it is worth the extra twenty minutes, because more stakes mean smaller gaps and a tidier weave.
Step Two: The Upsett
The upsett is the hinge of the whole basket, and the place where beginners lose their nerve. Every stake has to turn from horizontal to vertical without snapping.
Bend them a little at a time, working round the circle, then come back and bend a little more. Willow has memory, and a slow curve holds where a sharp fold breaks.
As the stakes rise, tie a loop of string or soft rod around them at the height you want the basket, and use it as a gauge. The tie holds the shape while your hands are occupied.
Stand back and look. The rim should be a circle, not an oval, and the wall should lean very slightly outward. Fix it now, because a leaning wall only gets worse as the basket grows.
Step Three: Waling the Corner
Waling follows the upsett, and it exists to stop the corner opening up under load. The join where base meets wall is the hardest-working part of any basket.
Take three slender rods, tuck their butt ends down beside three consecutive stakes, and weave them as a set: each rod passes in front of two stakes and behind one, then the next rod does the same one stake along.
The rods chase each other around the circle, so the weave looks like a rope laid on its side. Two rows are enough for a small basket; three give a sturdier one.
Pull each row down hard against the one below as you finish it. Waling that sits loosely is worse than no waling at all, because it slides upward under the next weave.
Step Four: Randing the Sides
Randing is the weave everyone recognises: one rod at a time, over one stake, under the next, round and round. It is slower than waling and far more forgiving.
Start a new rod by laying its butt end behind a stake and weaving the tip onwards, so the join hides inside the wall. Always work with the smoothest side of the rod facing out.
Keep the rod at a slight downward angle as you weave. Willow wants to ride upward, and a rod pulled level makes a basket that flares like a bucket.
Work right round the basket in one direction, then begin the next rod where the last one finished. Small overlaps are invisible; a big one leaves a bulge you will see forever.
Packing Down Every Few Rows
Every three or four rows, stop and pack the weave down with the bodkin. Push the rod you have just woven firmly against the row beneath, all the way round.
This is the step beginners skip, and it is the difference between a basket and a loose nest of sticks. Willow shrinks as it dries, but it cannot close a gap you left.
You will feel the weave tighten and the wall stiffen as you pack. When a basket starts to feel solid under the thumb, you are doing it right.
Step Five: The Rod Border
Stop randing when the wall reaches the height you planned, ideally ending with a rod that finishes at a stake rather than in the middle of a gap.
Trim the stakes to a hand's length above the last row. Then lay a stout rod around the outside of the top, just below the stake ends, and hold it in place with a temporary tie.
Bend each stake down over that rod, in threes, and weave the ends back into the waling: over the next stake, behind the one after, and down into the wall. Pull each one through with the bodkin.
This is the rod border, and it does two jobs. It covers every sharp cut end so nothing scratches a hand, and it puts a rigid ring at the rim so the basket keeps its shape for years.
Trim the last tails flush with the wall, not proud of it. Anything sticking out will catch on sleeves and eventually work loose.
When It Goes Wrong
Rods crack as you bend them. They are under-soaked, or you are bending too fast at a single point. Rewrap them in a wet cloth for an hour and bend in stages.
The weave goes loose. You are not packing down, or you are pulling the rod sideways instead of down. Unpick two rows and re-weave them tight; ten minutes now saves the basket.
The sides lean. The upsett was uneven, or the tie slipped. Push the wall upright with your palm while it is still wet, then re-tie and carry on.
The base rocks. It dried cupped, or the pairing was slack at the centre. Set it on a flat board and press it while damp; if it still rocks, a felt pad underneath hides the fault.
You run out of rod mid-row. Never stretch a rod to reach a stake. Lay in a new one behind the last stake you passed and carry on; the join disappears into the wall.
Grey mould appears. The basket was stored damp, or the rods were left wrapped too long. Wipe it off with a cloth wrung out in vinegar and dry the basket somewhere airy.
After the Last Rod: Time, Hands and Care
How Long It Takes
Expect four to six hours of actual weaving for this basket, spread over two or three sittings. The soaking takes days, but it asks nothing of you.
Split the work where the basket naturally pauses: base and upsett in one session, waling and the first rand in the next, border in the last. Nothing is lost by stopping, as long as the rods stay wrapped.
Sore Hands Are Normal
Your hands will ache, and that is ordinary rather than a sign of failure. The pads of the thumbs and the base of the index finger take the pressure, and they harden after two or three baskets.
A bowl of warm water beside you helps: dip your fingers now and then, and the rods stay damp at the same time. Keep a towel on your lap, because wet willow marks fabric.
Your first basket will be slightly wonky. One side will be taller, the weave will tighten towards the end, and the rim will not be perfectly round.
That is not a flaw to hide. It is the record of the afternoon you learned what tension feels like, and every basketmaker's first attempt looks much the same.
Drying and Storing
Dry the basket slowly, in a room with moving air, away from radiators and direct sun. A fortnight is not too long. Fast drying shrinks the outside before the inside and opens cracks at the stakes.
As it dries, the weave tightens by itself and the basket stiffens. That slight shrinkage is why packing down matters so much while the willow is wet.
Store it dry, off the floor, out of sunlight. Damp brings mould, and sunlight bleaches buff willow to a pale straw colour within a season.
The Oil Question
Traditional makers usually do not oil a buff basket. The surface hardens with use, and oil darkens it, holds dust and can turn tacky in a warm kitchen.
A little linseed on brown willow garden work is a different matter, but for a buff basket the honest answer is to leave it alone and let handling do the work.
When this one is finished, the natural next step is a shallow oval of the same construction, or a small garden trug.