Introduction
There is something deeply satisfying about shaping a lump of clay into something beautiful with your own two hands.
No wheel, no electricity, no expensive equipment — just you, the clay, and the quiet joy of creating.
If the idea of pottery has always appealed to you but the thought of learning to throw on a wheel feels intimidating, hand-building is your perfect starting point.
Hand-building is the oldest form of pottery making, and it is exactly what it sounds like: forming clay objects using your hands and simple tools.
You do not need a pottery wheel, a kiln in your garage, or years of training.
What you need is a willingness to get your hands dirty and the knowledge of a few basic techniques that have been passed down through thousands of years of human creativity.
In this article, I will walk you through three beginner-friendly hand-building projects: a simple pinch pot, a coiled planter, and a slab-built trinket tray.
Each project builds on the skills of the one before it, and by the end you will have the confidence to create your own designs.
Whether you are looking for a quiet weekend activity, a way to make handmade gifts, or simply a new creative outlet, these projects will get you started.
Why Hand-Building?
Before we dive into the projects, let us talk about why hand-building is such a wonderful choice for beginners.
The most obvious reason is accessibility. While wheel-throwing requires a pottery wheel (which can cost anywhere from four hundred to well over a thousand dollars) and a fair amount of studio space, hand-building requires only clay, your hands, and a few inexpensive tools you probably already have around the house.
There is also something deeply meditative about the process. When you work clay with your hands, you connect with a craft that humans have practiced for over twenty thousand years.
The slow, deliberate movements have a grounding effect. Many potters describe hand-building as a form of moving meditation, and I have to agree.
There is a particular kind of peace that comes from focusing entirely on the feel of the clay, shaping it slowly, watching it transform under your fingers.
Hand-building also gives you tremendous creative freedom. Without the constraints of a spinning wheel, you can create organic, asymmetrical shapes that have their own unique charm.
A slightly wonky mug or a lopsided bowl is not a mistake — it is evidence that something was made by hand, by a real person, with all the beautiful imperfection that implies.
What You Will Need
One of the best things about starting hand-building is how short the supply list is. Here is what you need to get started:
Clay. For beginners, I recommend starting with a low-fire clay body such as earthenware. It is soft, easy to work with, and readily available at most craft stores or online.
A five-pound block is plenty for your first few projects. If you do not have access to a kiln, look for air-dry clay, which hardens without firing.
It is not food-safe or waterproof, but it is perfect for decorative projects and practice.
Basic tools. A wooden modeling tool, a small sponge, a needle tool (essentially a long needle on a handle), and a rolling pin.
If you do not have a rolling pin, a smooth glass bottle works beautifully. A butter knife from your kitchen drawer can substitute for several clay tools in a pinch.
A work surface. A piece of canvas, a wooden board, or even a smooth section of countertop. Clay will not stick to canvas or wood the way it sticks to plastic or laminate, making it easier to lift your finished pieces.
A spray bottle and plastic bags. Clay dries out as you work with it, so you will need to keep it moist. A spray bottle filled with water and a plastic grocery bag to cover unfinished pieces will keep your clay workable between sessions.
A container of water. You will use this to moisten your hands and to create slip, which is a liquid clay mixture used like glue to attach pieces together.
That is genuinely all you need to begin. If you already have these basics, you are ready to make your first piece of pottery.
Project 1: The Pinch Pot
The pinch pot is the very first project taught in almost every pottery class, and for good reason.
It teaches you the most fundamental skill in hand-building: learning to feel the clay and control its thickness with your fingers.
Despite its simplicity, a well-made pinch pot can be a beautiful object in its own right, and mastering this technique opens the door to dozens of other projects.
Step 1: Prepare Your Clay
Take a lump of clay about the size of a tennis ball. Knead it gently in your hands for a minute or two to warm it up and make it pliable.
This process, called wedging, also removes air bubbles. You are not looking for perfection here — just a smooth, malleable ball that feels comfortable in your hands.
Step 2: Form the Opening
Hold the ball of clay in the palm of one hand. Press your opposite thumb into the center of the ball, stopping about half an inch from the bottom.
You have just created the interior of your pot. Do not push all the way through — you want a solid base.
Step 3: Shape the Walls
Now the real work begins. Hold the clay in one hand and use the thumb and fingers of your other hand to gently squeeze the walls, rotating the pot as you go.
Think of it as a slow, rhythmic pinching motion. You are working the clay outward and upward, creating the walls of your pot.
The key here is even pressure. If you press harder in one spot, that wall will become thinner than the rest.
Rotate the pot constantly, and check the thickness by occasionally pressing gently from both sides.
You are aiming for walls about a quarter of an inch thick. A common beginner mistake is to make the walls too thick at the bottom and too thin at the rim.
Your goal is consistent thickness throughout, but do not stress if your first attempt is uneven.
Every potter's first pinch pot looks more like a lumpy rock than a vessel, and that is perfectly fine.
Step 4: Smooth and Refine
Once you are happy with the shape, dip your finger in water and gently smooth the interior and exterior surfaces.
You can also use a small sponge to wipe away any rough spots or finger marks.
If the rim is uneven, place the pot upside down on a flat surface and gently press it level.
Let your pinch pot dry slowly, covered loosely with a plastic bag for the first day or two.
If you are using kiln-fire clay, it will need to be bisque-fired, glazed, and glaze-fired.
If you are using air-dry clay, simply let it cure according to the manufacturer's instructions, usually about twenty-four to forty-eight hours.
A single pinch pot is a humble thing, but it is also a monumental achievement. You have taken raw earth and shaped it with your own hands into a vessel. That is something humans have done since the beginning of civilization, and now you are part of that tradition.
Project 2: The Coiled Planter
Once you have mastered the pinch pot, coiling is a natural next step. Coiling allows you to build taller, more ambitious forms by stacking ropes of clay on top of each other. A small planter is a perfect first coiled project — practical, forgiving, and endlessly customizable.
Step 1: Roll Your Coils
Start with a lump of clay about the size of a fist. On your canvas work surface, use both hands to roll it into a long rope, or coil, about half an inch in diameter.
Begin in the center and work your way outward, applying even pressure. If the coil gets too long to manage, cut it in half and work with shorter pieces.
You will need enough coils to form the base and walls of your planter. For a small planter about four inches tall, you will need roughly six feet of coiled clay in total. Roll all your coils before you start building so you do not have to stop mid-project.
Step 2: Create the Base
Take one coil and spiral it into a flat circle, starting from the center and working outward.
This is the base of your planter. Keep the coils tight against each other — there should be no gaps.
Once the base reaches your desired size (about three to four inches in diameter), use your fingertips to blend the coils together so the base becomes a single, unified disk.
Smooth the bottom and the top surfaces.
Step 3: Build the Walls
Now for the exciting part. Take a fresh coil and lay it along the edge of the base, forming the first ring of your wall.
Press it gently into place. To attach it securely, use a small amount of slip (clay mixed with water to a yogurt-like consistency) as glue.
Apply a thin line of slip along the top edge of the base, then set the coil on top.
Blend the coil into the base using your finger, working your way around the entire circumference.
Continue adding coils one at a time, stacking them to build your walls upward. Here is a trick that makes a huge difference: stagger the joints where your coils meet.
If every coil joins at the same spot, you create a weak point. By offsetting the ends, you distribute the stress and create a stronger vessel.
As you build, periodically smooth the interior walls with your finger or a small wooden rib tool. Leave the exterior coils visible if you like the textured look, or smooth them for a cleaner finish. Both approaches are valid, and many potters prefer the rustic appearance of visible coils.
Step 4: Add the Drainage Hole
Since this is a planter, it needs a drainage hole. Before the clay hardens, use a chopstick or the end of a paintbrush to poke a few small holes through the bottom. Smooth the edges with a wet finger.
Step 5: Finishing Touches
Once your planter is complete, let it dry slowly under plastic for a day or two, then uncover and let it dry completely.
If you plan to paint it, use acrylic paints for air-dry clay or underglazes for kiln-fire clay.
A clear sealant will protect the surface if you are using air-dry clay.
A coiled planter makes a wonderful gift, especially when you include a small succulent or herb plant. It is the kind of handmade object that friends and family treasure because it carries the warmth of being made by someone who cared enough to create it by hand.
Project 3: The Slab-Built Trinket Tray
Slab-building is the third foundational hand-building technique, and it is one of the most versatile.
By rolling clay into flat slabs, you can construct everything from simple trays to complex geometric sculptures.
A trinket tray is a perfect slab project — flat, straightforward, and immediately useful. Use it to hold your jewelry, keys, or small craft supplies.
Step 1: Roll Your Slab
Take a lump of clay about the size of a large apple and flatten it into a disk with your hands.
Place it on your canvas work surface and use a rolling pin to roll it out into a slab about a quarter of an inch thick.
To ensure even thickness, place two popsicle sticks or wooden dowels on either side of the clay as guides.
This is a simple trick that professional potters use, and it works beautifully.
Roll from the center outward, rotating the slab a quarter turn after each pass. If the clay sticks, lift it gently and dust the surface with a tiny bit of cornstarch or flour. Go easy on the dusting — too much will prevent pieces from sticking together later.
Step 2: Cut Your Shapes
For a basic rectangular tray, you need a base and four walls. Using a butter knife or needle tool, cut the following pieces from your slab:
- One base rectangle, about 6 by 4 inches
- Two long wall strips, about 6 by 1.5 inches
- Two short wall strips, about 4 by 1.5 inches
If you prefer a rounded or oval tray, you can cut a single large shape for the base and use a single long strip to form the walls around the edge. Cookie cutters work wonderfully for shaping slab clay, so feel free to experiment with interesting shapes.
Step 3: Score and Slip
This is the most important step in slab construction. To attach the walls to the base, you need to score both surfaces and apply slip.
Scoring means scratching hatch marks into the clay where two pieces will join. Use your needle tool or a fork to create a crosshatch pattern on the bottom edge of each wall strip and along the corresponding edge of the base.
Apply a thin layer of slip to the scored areas, then press the wall pieces firmly onto the base.
Use your finger to blend the seam on the inside of the tray, creating a smooth transition between the wall and the base.
On the outside, you can leave the seam visible or smooth it for a cleaner look.
Where the wall pieces meet at the corners, bevel the ends at 45-degree angles so they fit together neatly. Score and slip these joints as well. A small coil of clay pressed into each inside corner and smoothed will reinforce the joint and prevent cracking.
Step 4: Smooth and Decorate
Once all pieces are attached, go over the entire tray with a damp sponge to smooth the surfaces and remove any fingerprints or tool marks. Pay special attention to the rim — a smooth, even rim makes the tray look finished and professional.
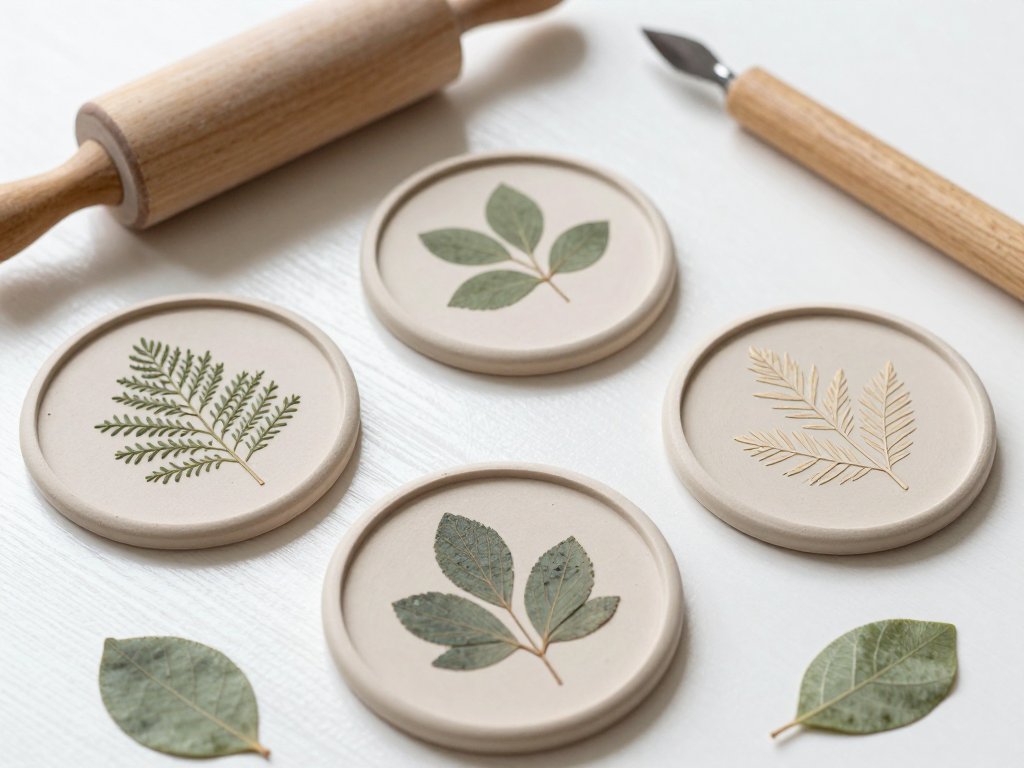
Before the clay hardens completely, you can add decorative touches: press a leaf into the bottom for an organic texture, stamp patterns into the walls using rubber stamps, or carve a simple design with your needle tool. These small details transform a simple tray into a personal keepsake.
Step 5: Let It Dry
Slab projects are prone to warping because different parts dry at different rates. To minimize warping, cover your tray loosely with plastic and let it dry slowly over several days, rotating it occasionally so all sides dry evenly.
If you notice a corner starting to lift, gently press it back down.
Glazing and Finishing Your Pieces
If you are using kiln-fire clay, glazing is the final step that turns your bisque-fired piece into a functional, waterproof object.
Glazing can feel intimidating at first, but it does not have to be complicated. For your first pieces, I recommend brushing on a single color of food-safe glaze.
One coat is usually enough for a translucent effect; two coats give more opacity. Follow the glaze manufacturer's instructions for firing temperature, and make sure your clay and glaze are compatible.
If you are using air-dry clay, you have several finishing options. Acrylic paint with a clear sealant works beautifully and gives you access to any color imaginable.
A matte sealant preserves a natural, earthy look, while glossy sealant gives a glazed ceramic appearance.
You can also use metallic waxes or decoupage to add patterns and imagery.
Here is a gentle reminder: your first pieces do not need to be perfect. A slightly uneven glaze or a visible brush stroke is not a flaw — it is evidence of the human hand.
Some of the most treasured pottery in the world is far from technically perfect, and that is precisely what makes it special.
Troubleshooting Common Beginner Problems
Even with the best instructions, things will go wrong, especially at the beginning. Here are the most common problems beginners face and how to handle them.
Cracks. Cracks almost always come from clay drying too quickly. If your piece develops small cracks, you can fill them with slip while the clay is still leather-hard (firm but still slightly damp).
If the cracks are large, it is usually better to start over. Prevent cracks by covering your work with plastic between sessions and drying pieces slowly.
Warping. Uneven drying causes warping. Rotate your pieces during the drying process and make sure all sides are exposed to the air equally. For slab pieces, drying on a flat surface and occasionally flipping them helps maintain shape.
Air bubbles. Tiny bubbles in the clay can cause pieces to explode in the kiln. Wedging your clay thoroughly before you start is the best prevention. If you find a bubble in a finished piece, you can poke it with a needle tool and fill the hole with slip.
Sticky clay. If your clay feels too wet and sticky, it has absorbed too much water. Let it sit uncovered for an hour or two to firm up, or wedge it on a plaster bat (if you have one) to draw out moisture.
Pieces not sticking together. This is almost always a scoring problem. If your slip is too thin, the joint will fail.
Make sure you score deeply enough to create a good mechanical bond, and use slip that has a creamy, yogurt-like consistency.
Press the joint firmly and give it a few minutes to set before moving the piece.
Building Your Hand-Building Toolkit Over Time
As you fall in love with hand-building — and I suspect you will — you may want to invest in a few tools that make the process easier and more enjoyable. Start with the basics and add tools as you discover what you need.
A wooden rib is one of the most useful tools you will ever buy. It shapes and smooths clay walls without tearing the surface.
A metal rib is excellent for trimming and refining shapes. A wire cutter is essential for cutting clay from larger blocks.
A small wooden paddle helps you shape and compress coils without using your bare hands, which can leave deep fingerprints.
If you decide to invest in a kiln, a small tabletop kiln that plugs into a standard household outlet costs between three hundred and six hundred dollars.
Many communities also have pottery studios where you can fire your pieces for a small fee.
Check with local art centers, community colleges, or ceramic supply stores — you may be surprised at the resources available in your area.
From One Beginner to Another
I remember my first pinch pot. It was lumpy, uneven, and the rim looked like a mountain range.
I kept it on my windowsill for years not because it was beautiful, but because it reminded me that starting something new is always awkward, and that is okay.
That lumpy little pot represented a willingness to learn, to get my hands messy, and to create something where nothing existed before.
Hand-building pottery has taught me patience, humility, and the beauty of imperfection. When you work with clay, you learn to listen with your hands.
You learn that not everything needs to be perfect to be valuable. You learn that the process itself — the quiet focus, the feel of the clay, the slow transformation — is the real reward.
I hope these three projects give you a gentle, encouraging start. Start with the pinch pot.
Let yourself make something imperfect. Then keep going. Before you know it, you will be making coil pots for your plants and slab trays for your treasures, and you will wonder why you did not start hand-building years ago.