Introduction
My grandmother kept a leather notebook on the shelf above the kettle. It was meant for recipes, but somewhere around page twelve the recipes stop. What follows are forty pages of strange beasts, drawn by me at eight years old.
Most of them were rabbits with lion tails. One had wings, badly attached near the shoulder. She never corrected me. She just turned the page and asked, "What does this one eat?"
That question is the whole craft, really. Drawing imaginary animals is the most forgiving kind of drawing there is. There is no reference photograph to get wrong, because the creature you are drawing has never been photographed.
Why Made-Up Animals Are the Kindest Place to Start
If you have ever tried to draw a real horse, you know the feeling. You get the legs right and the neck wrong. You measure, you re-measure, and the horse stares back at you, unconvinced.
A made-up animal has no such standard to fail. If its ears are too big, that is a design choice. If its neck is too long, you have invented something new. Nobody can tell you it does not look like itself.
My daughter asked me last spring to draw her a dragon-bunny. I drew one, and it was genuinely awful. She taped it to the fridge anyway, because it was hers. That is the freedom this subject hands you.
Start With Two or Three Real Animals
Imaginary animals are almost always built from real ones. Not one animal stretched into fantasy, but two or three chosen deliberately and then combined. That is the entire method, and everything else is detail.
Pick one animal as the dominant body. This animal gives the whole shape: the weight, the silhouette, the way the creature stands. Take its proportions from a real photograph or field guide, never from memory.
The other animals are borrowed from, part by part. A lion body with an eagle's forelegs and a deer's antlers is no longer a lion. It is something your viewer has never met before.
Think of the ratio as seventy percent dominant animal, twenty percent second animal, and ten percent surprise. The dominant animal is the reason the creature still looks possible.
Where to Find Honest Reference
You need real photographs. A children's zoo book from a thrift shop works better than a fantasy art book, because it shows real anatomy instead of somebody else's imagination.
The internet works, a library field guide works. Spend ten minutes looking at the actual animal before you sketch its eye or its hoof. The detail you remember will be far better than the detail you invent.
A Parts Checklist to Fill In
Before you draw anything, decide who supplies what. I still write this list out in the margin, because deciding on paper saves an hour of redrawing later.
- Head — the animal with the most interesting face (a barn owl, say, for round eyes and a beak)
- Body — the dominant animal, the one that sets the proportions and stance
- Legs — hooves, paws or claws? A big cat gives a grounded, believable walking pose
- Tail — a lion's tufted tail, a rabbit's puff, or something long and balancing
- Wings — bat wings for a heavier creature, bird wings for a light one
- Horns or antlers — deer antlers read as gentle, ram horns read as stubborn
- Ears — large and upright for alertness, small and tucked for a calm creature
- Eyes — round pupils for gentleness, slit pupils for watchfulness
Notice how much of that list is a decision rather than a drawing problem. By the time you pick up the pencil, the creature already exists on the page in words.
Six Tiny Sketches in the Corner of the Page
This is the step everyone skips, and it is the one that saves the drawing. Before committing to a large sheet, fill a corner with six or ten tiny heads, or just quick silhouettes.
Thirty seconds each. Fast and loose, no erasing, no fussing. You are not making finished drawings here. You are shopping for an idea, and you cannot shop if you spend twenty minutes on the first one.
Keep every thumbnail roughly the same size, in a neat row if you can manage it. Comparing them side by side is much easier than hunting across a busy page for the one you liked.
If loose warm-up marks feel strange to your hand, spend a week on continuous line drawing before you come back to creatures. It retrains the hand to keep moving.
Then look at your row of small sketches and pick the one that makes you smile. Nine times out of ten, the one you smile at is the one worth an hour of your afternoon.
Circle that favourite lightly in pencil instead of erasing the others. The leftovers have a habit of becoming the next creature on a completely different day.
Shape Language: Why Some Creatures Look Believable
Here is the quiet rule that separates a creature that works from a pile of parts. Every feature should speak the same visual language as the rest.
If the body is rounded and soft, the legs should be rounded, the horns should curve smoothly, and the ears should be plump. Everything soft, all the way to the toes.
If the head is angular and blocky, the rest should be angular too, with straight leg joints, pointed ears and horns that come to hard edges. Pick one language and stay inside it.
Mixed shape languages are what make a creature look assembled from spare parts. A soft, round body with sharp geometric legs reads as a mistake rather than a monster.
Test It in Silhouette
A fast way to check your shape language is to squint at the drawing until the detail disappears. If the solid shape still reads as one creature, you are doing well.
Draw the Skeleton Before the Fur
Under every believable creature sits a very simple structure, and it takes about ninety seconds. A spine line for the back. An oval for the ribcage. A circle for the hips.
Then add joint dots: one where each shoulder sits, one at each hip, and dots for knees, ankles and elbows. Connect them with straight lines at this stage, not curved ones.
This is why proportions stay honest. Building from the structure outward means the legs attach to joints you have already placed, instead of floating somewhere near the belly.
Limbs that drift off the body are the single most common flaw in beginner fantasy animals. A ninety-second skeleton drawing prevents the problem before it can happen.
Transitions: The Detail That Sells It
Now the part that turns a sketch into a creature. Wings must grow out of the shoulder blades, not sit on the back like a sticker. Draw a shoulder joint, then a muscle line, then the wing.
The same is true of horns. They emerge from the skull, so the skull needs a visible curve where they begin. Antlers that appear from nowhere look pasted on, however neatly they are drawn.
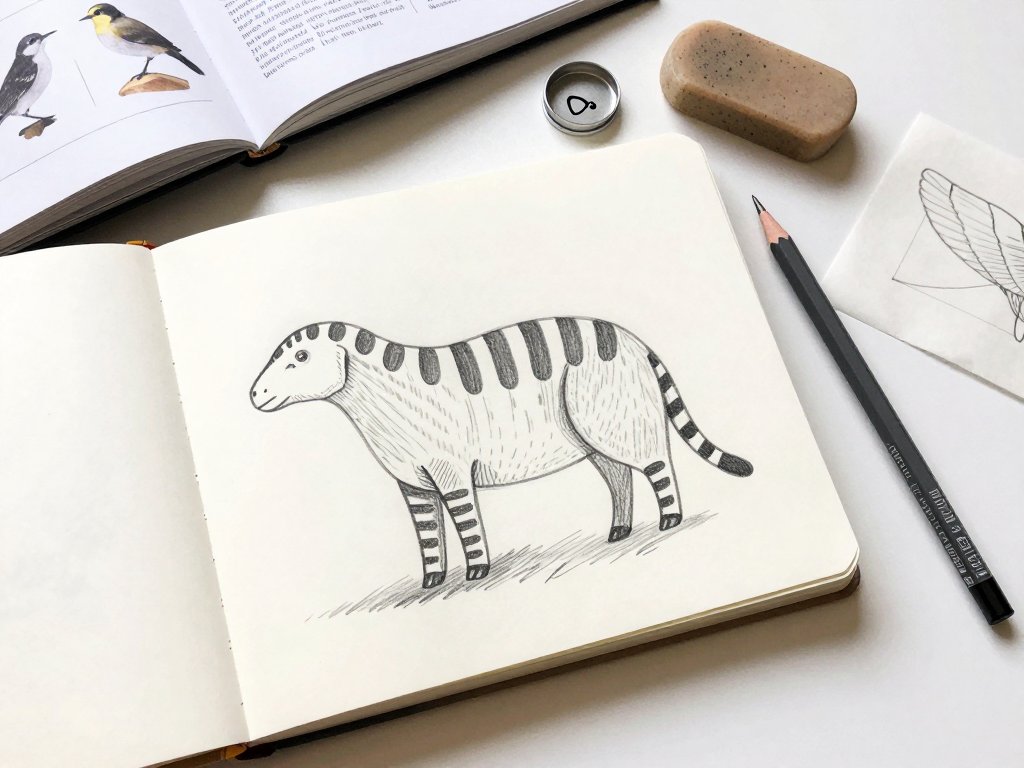
Patterns need the same treatment. If your creature has stripes, repeat that pattern across the tail and legs. A zebra-striped tail on a zebra-striped body reads as one animal.
Tracing paper earns its keep here. Sketch the wing on a separate sheet, slide it over the body, and shift it up or down until the join looks like it grew there rather than landed there.
Four Textures, Four Hand Movements
Texture is mostly about direction and patience, not talent. Fur is short strokes that follow the curve of the body. Over the shoulder, down the leg, outward across the ribs.
Feathers are overlapping curved lines, drawn from the back of the wing toward the front, so each new feather sits over the last one. Work back to front and the layering takes care of itself.
Scales are rows of half-circles, slightly offset like roof tiles or brickwork. Keep the rows a consistent size and the eye reads reptile immediately, even in a rough sketch.
Smooth skin is the easiest of the four: leave it mostly bare and add one soft shadow at the edges where the body turns away from the light. Resist filling it in.
Whatever texture you choose, keep the strokes smaller near the feet and the face, and larger across the back and haunches. That change of scale alone creates a sense of weight.
Give It Somewhere to Live
Ask where the creature lives before you finish it, because the answer changes the drawing. A snowy mountain creature gets thicker fur, shorter ears and pale colours that blend into rock and snow.
A wetland creature goes the other way, with webbed feet, a long neck and a body that sits low in the reeds. A desert animal tends toward loose skin and large ears that shed heat.
Then sketch a few plants or rocks behind it. Two strokes of grass or one grey boulder tells the reader exactly where they are standing, and the creature stops looking like a cut-out.
Colour follows the same logic. Two or three tones borrowed from the habitat keep a creature grounded, while a rainbow of unrelated hues makes it look like a toy from a machine.
The Function Rule: Give Every Part a Job
This is my favourite part, and the one that makes a creature feel designed rather than random. Give each invented feature a reason for existing, even if only you know it.
Big ears shed heat. Webbed feet push through water. A long snout reaches fruit too high for other animals to bother with. Horns defend territory, or push through brush on a forest path.
You never have to write the reasons down. But keeping them in mind makes the parts agree with each other, so the creature looks like it evolved somewhere rather than being assembled on a Tuesday afternoon.
Put the Personality in the Eyes
The eye is small and it carries the entire character of the drawing. A large, round pupil reads as gentle. A narrow slit reads as watchful, or slightly dangerous.
A small iris floating in a lot of white reads as startled. And here is the trick that makes any drawn eye look alive: leave one tiny bright highlight of unshaded paper, slightly off-centre.
Place the eyes where the skull actually is, on the front or the side of the head as the real animal's anatomy dictates. Eyes floating on the cheek undo everything else you have built.
Five Mistakes I Still Make
I have drawn imaginary animals for thirty years and I still catch myself doing these. Knowing them ahead of time will save you a surprising amount of frustration on your first creatures.
- Using all three animals in equal amounts, so the result looks like a confused version of one of them. Let one animal lead and the others contribute single parts.
- Mismatched part scale, such as a mouse head on a horse body. Decide the creature's overall size first, then size every borrowed part to match it.
- No repeated pattern anywhere, so the parts never unify into one animal. Carry one marking across at least two sections of the body.
- Limbs attached at the middle of the body instead of a shoulder or hip joint. Mark the joints before you draw, not after.
- Drawing tiny on a huge page. Fill the paper, because small drawings hide your good detail and make proportion almost impossible to judge.
A Fifteen-Minute Practice Game
Here is an exercise I use whenever I feel stuck, and it works for adults and children alike. Write five animals on separate slips of paper and fold them into a bowl.
Pull three at random. Set a timer for fifteen minutes and design a creature from exactly those three parts, with no substitutions allowed. The randomness does the creative work for you.
Do it again on three more days, and you will have four finished creatures, a faster pencil and far less fear of the blank page than you started with.
For Kids at the Kitchen Table
Let them pull the slips, and let them announce the dominant animal out loud. Hand them a soft pencil and no eraser at all. The no-eraser rule keeps the mood light.
When they finish, ask my grandmother's question: what does it eat, and where does it sleep? The drawing stops being a drawing and becomes a place they want to revisit.
What You'll Want on the Table
None of this needs an art studio. A modest pile of tools will carry you through dozens of creatures, and every one of them is inexpensive and easy to replace.
- A sketchbook with paper heavy enough to survive erasing without going shiny or tearing
- An HB pencil for light structural lines, and a 2B for darker texture work
- A kneaded eraser, which lifts shading away without smudging the page around it
- Tracing paper for layering experiments: sketch a wing, slide it over the body, try another scale
- A fine liner pen for committing to line work, used only after the pencil drawing is finished
Keep the pen closed until the pencil work is done. Once ink is down, the drawing stops being adjustable, and beginners need the adjustable stage for longer than they think.
Part of a Very Long Tradition
None of this is new, and that is the comforting part. Medieval bestiaries are full of creatures invented from parts of real animals, drawn by illustrators who had never seen the originals.
Travellers brought home accounts of far-off beasts, and the artists filled in the gaps with whatever animal they did know. Folklore did the same patient work for centuries, one village at a time.
Every child who has ever sketched a made-up animal in a notebook margin joined that long line. Your dragon-bunny sits on the same shelf as the griffin, and it belongs there.
So take a pencil and pull two animals out of the air. Start the skeleton, decide who owns the ears, and see what wanders onto the page. It has never been done quite this way before.
