Introduction
Long before the knitted hood filled our feeds, it was keeping heads warm at the edges of history.
In the fourteenth century, fashionable Europeans wore the chaperon, a draped hood with a long trailing tail called a liripipe, twisted and pinned into a dozen different shapes.
Monks took their word for shelter from the cowl, the hooded robe whose name still lives in the cowls we knit today.
On the storm coasts of the North Sea, fishermen pulled knitted hoods over their caps, wool worked by the women at home to turn wind and spray. By the 1930s, the hood had left the cloister for the factory floor, warming American laborers in the first hooded sweatshirts.
The hood has never truly gone away. It simply waits for winters to call it back.
Now it is having a knitting revival, and the timing makes sense. We want clothes that feel like a hug, and a hood is a hug you can put on.
So here is the promise: one piece, one simple stitch, no shaping, and at most a single seam. If you have never finished a wearable, this pattern will break the spell.
Why a Hooded Cowl?
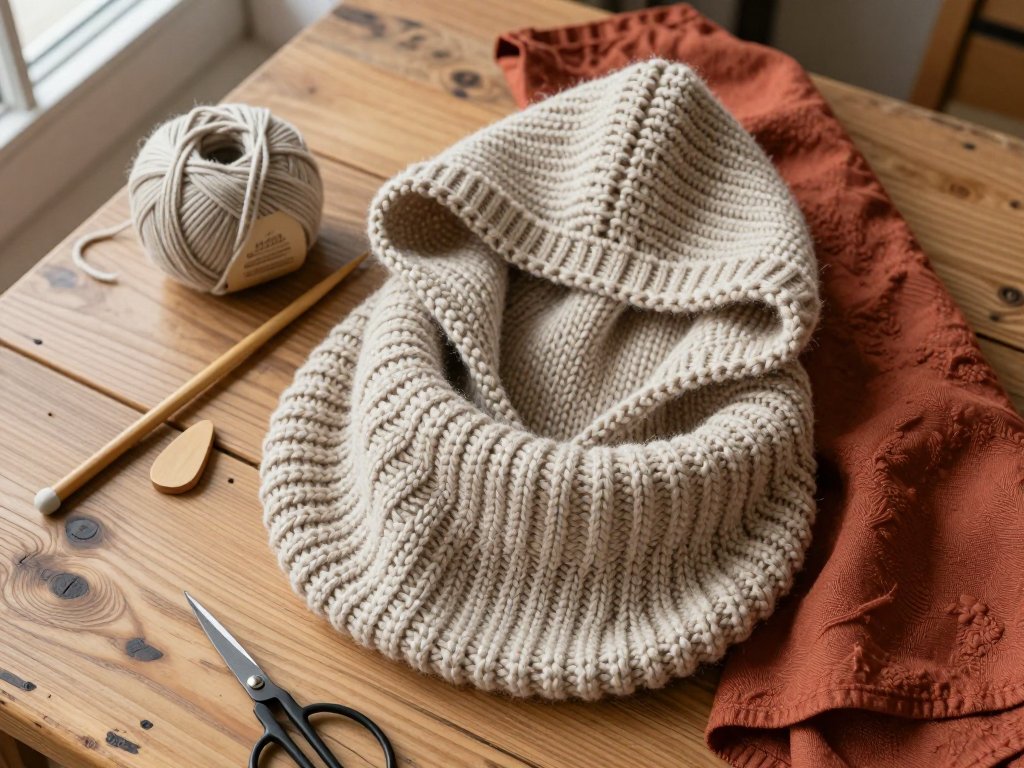
A hooded cowl is exactly what it sounds like: the snug ring of a cowl and the shelter of a hood, knit together in a single cozy piece.
Think about how a scarf fails you. It slips, unwinds, and leaves your ears cold while it bunches under your coat. A cowl stays put because it has no loose ends.
Add a hood and you gain the one thing a scarf can never give: coverage for your crown and your ears the moment the wind turns.
You may have noticed the knitted hood trend rolling through craft social media these past winters. Chunky hooded cowls keep appearing in finished-object posts, and the comments always ask the same question: is it hard?
The answer is no, and that is the whole beauty of the design. This is a rectangle project: you knit a flat piece, fold it, and join it with one seam. There is no increasing, no decreasing, and no set-in shaping.
Because the garment is meant to be loose and drapey, gauge is forgiving. If your stitches run a little big or small, the cowl simply turns out roomier or snugger, and both are lovely.
For a beginner, that is the difference between a project and an ordeal. This one stays a project — the satisfying kind you can finish in a few evenings.
Choosing Yarn and Needles
The right yarn makes this pattern feel like cheating. Chunky yarn grows so quickly that you can watch your cowl appear row by row.
Yarn Weights
Super bulky yarn is the fastest choice, knitting up on big needles in a weekend. Bulky yarn is only a little slower and gives the fabric more drape.
Aran or worsted weight works beautifully too, if you do not mind extra rows and a finer fabric. Whichever weight you choose, keep it consistent throughout.
The pattern itself is not fussy. It simply asks for a rectangle about 24 to 26 inches wide and 22 to 24 inches long.
Fiber Talk
Wool is the traditional fiber for hoods for good reason. It stays warm when damp, springs back into shape, and lets the skin breathe.
A wool blend with a little nylon or alpaca is durable and soft against the forehead, which matters when a hood rests on bare skin.
Knitting for a child, or for anyone who will toss the cowl in the wash? Choose machine-washable acrylic or superwash wool, because a hood that cannot survive laundry will not get worn.
Needles and Gauge
For bulky yarn, start with a US 11 (8 mm) needle. For super bulky, try a US 13 (9 mm). The honest rule is simpler: use the size your ball band recommends.
Use a circular needle even though we are knitting flat. A long cord holds the many stitches of a wide piece comfortably and is gentler on the wrists than straight needles.
You need not obsess over gauge here. The cowl is meant to be loose, so a stitch or two per inch either way simply changes the fit slightly.
The one gauge question that matters: will the ring slip over your head? Cast on 24 to 26 inches of width and the answer is yes.
How Much Yarn
Plan on two to three skeins of bulky yarn, roughly 250 to 400 yards in total. At about ten to twelve dollars a skein, the whole cowl costs less than a casual dinner out.
Buy an extra skein anyway, because matching dye lots later is a headache. The spare becomes a pom-pom, matching mitts, or a second cowl for a friend.
Anatomy of the Project
Before you cast on, picture the finished piece. If you understand the shape, every row makes sense.
You will knit one long rectangle. That rectangle becomes a tube, and that tube is folded double to form the cowl, with the top fold as the home of your hood.
Because the design is a rectangle, the hood needs no shaping. Folding creates it, with at most a single seam to help it along.
There are two popular ways to build a hooded cowl, and both are beginner friendly.
The first is the fold-and-seam method used here. You knit one long piece, join its side edges into a tube, and fold the tube in half so the fold sits at the top.
Pull the back of that folded top up over your head and the doubled fabric caps your crown. The fold-over creates the hood opening around your face, while the front drapes across your chest.
The second method is the tube-and-cinch. You knit a tube and gather the top with a drawstring or a few decreasing rounds to shape a closer cap.
Both methods make a warm, wearable cowl. This pattern uses the fold-over method because it asks the least of you: one seam, no gathers, no drawstrings.
Knitters who work in the round can cast on the same number of stitches and knit the tube seamlessly, with no seaming at all.
Stitches You Need
If you can knit and purl, you can make this cowl. Those two stitches are the entire curriculum, and everything else is just arrangement.
The Knit and Purl Stitches
To knit, insert the right needle into the front of a loop from left to right, wrap the yarn, and pull a new loop through. To purl, bring the yarn to the front and enter the loop from above.
That is the whole difference. The purl is simply the knit stitch seen from the other side.
Garter, Stockinette, and Seed
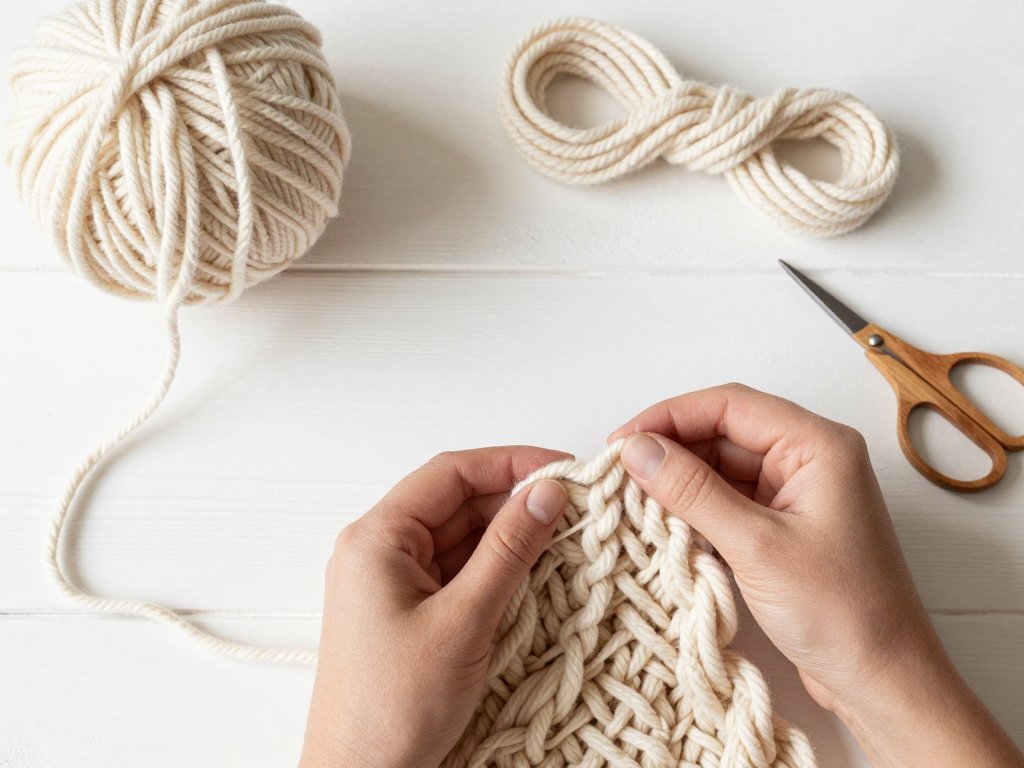
Knit every row and you make garter stitch, the squishy, ridged fabric that looks wonderful in chunky yarn and lies perfectly flat.
Alternate a knit row with a purl row and you make stockinette, the smooth fabric that curls at the edges unless you frame it with another stitch.
Work k1, p1 across every row, knitting the purls and purling the knits as they face you, and you make seed stitch — nubbly, pebbly, and far more impressive than it is.
This pattern uses garter stitch for the body, the easiest possible choice. Prefer a denser, pebbly texture? Substitute seed stitch row for row; the measurements stay the same.
Ribbing
Work the ends in k1, p1 rib. It pulls in slightly and gives the neckline a tidy, stretchy finish, and it is just knit and purl alternating across the row.
Casting On and Binding Off
Use the long-tail cast on. It is stretchy, sturdy, and the first method most knitters learn, which makes it the right method here.
Bind off loosely, and when in doubt, use a needle a size or two larger than the one you knit with. A tight bind-off is the most common reason a cowl will not slip over the head.
Keeping Edges Tidy
Keep your tension even at the start and end of each row and the side edges stay neat enough to seam beautifully. The seam will hide small sins.
The Pattern: One-Piece Hooded Cowl
Here is the pattern itself. Read it once, then let your hands learn it while your mind wanders.
Finished Measurements
Knit flat, the piece measures about 24 to 26 inches wide and 22 to 24 inches long. Seamed and folded double, it becomes a cowl about 24 to 26 inches around and 11 to 12 inches deep.
What You Need
- Two to three skeins of bulky or super bulky yarn, roughly 250 to 400 yards
- US 11 (8 mm) circular needle, 24 inches or longer, or the size your ball band recommends
- A tapestry needle for seaming and weaving ends
- Scissors, and stitch markers if you like them
Abbreviations
k is knit, p is purl, st is stitch, and rep is repeat. That is the entire vocabulary of this pattern.
Instructions
- Cast on 24 to 26 inches of stitches, using an even number. In bulky yarn on a US 11 needle, that is roughly 70 to 80 stitches.
- Work k1, p1 rib for 3 inches. This ribbed end will sit at your neckline once the cowl is folded double.
- Switch to garter stitch and knit every row until the piece measures about 3 inches short of your total length, roughly 19 to 21 inches from the cast-on edge.
- Work k1, p1 rib for 3 more inches, then bind off loosely in rib. Leave a long tail for seaming.
Seaming and Folding
- Fold the rectangle with right sides together so the two long side edges meet. Seam them from end to end with mattress stitch or a simple backstitch.
- Turn the tube right side out. Fold it in half so the ribbed ends meet at the bottom and the soft fold sits at the top.
- Slip the doubled cowl over your head and let it settle around your neck, with the fold riding high at the chin.
- To make the hood, reach behind you, gather the back half of the top fold, and pull it up and forward over your crown.
- Let the hood rest where it feels right, arrange the front drape across your chest, and enjoy the fold-over hood opening around your face.
If you would like the hood to hug your head more closely, lay the folded cowl flat with the seam at one side.
Seam the two layers together along the top for about 5 to 6 inches at the center back, and you will have a shallow fitted cap.
Skipped the end ribbing? Pick up stitches around the neck edge of the finished cowl and knit a ribbed band instead, catching both layers so the band joins them neatly.
Try the cowl on before weaving in the last ends. Gauge is forgiving, so adjust the fold, the seam, or the hood's depth until it feels right.
Finishing Touches
Finishing is where a handmade cowl becomes heirloom-adjacent, so take your time.
Weaving in Ends
Thread a tapestry needle and weave each tail along the wrong side of the fabric, catching the bumps of the stitches. Weave one way, double back the other, and trim close.
Blocking
Blocking is gentle here. Soak the cowl in cool water with a little wool wash for twenty minutes, press the water out in a towel without wringing, and lay it flat to dry.
Pat the seams and the fold into place as it dries. Garter stitch needs no heavy blocking, but a soak evens out tension and makes the fabric bloom.
Prefer a quick finish? Hold a steam iron an inch above the surface and let the steam relax the fibers. Do not press hard on garter ridges.
Buttons, Toggles, and Pom-Poms
A toggle and a knitted loop at the front let you close the cowl under the chin on bitter days. Sew the loop to one front edge and the toggle to the other, then check the fit.
A pom-pom at the back of the hood nods to the chaperon's liripipe tail. Make one with a pom-pom maker or cardboard circles and sew it on firmly.
Lengthen the rectangle next time and a simple knitted square sewn to the front makes a pocket for cold hands.
Care
Hand wash the cowl in cool water with a gentle wool wash and dry it flat, reshaping as it dries. Never hang it, because wet wool stretches, and store it folded on a shelf.
For machine-washable yarns, follow the ball band and use a cold, gentle cycle.
Wearing and Styling
The hooded cowl is one of those rare knits that looks intentional however you arrange it.
With the hood down, it reads as a generously deep cowl, the kind you can burrow into on the walk to school. With the hood up, it becomes a sheltered little room for your head.
To adjust the depth of the hood, pull the fold further forward over your forehead for more shelter, or let it rest at the crown for a lighter look.
The cowl layers beautifully over a turtleneck, under an open coat, or over a flannel shirt on a cool morning. In chunky yarn it is the statement piece, so keep the rest simple.
It is also a wonderful gift knit: a few evenings of work, a fit that suits nearly everyone, and colors matched to a loved one's coat.
A hand-knit hood carries a particular warmth. Give one and you give a small history of shelter.
Troubleshooting
Every knitter hits snags, and almost every snag has a simple remedy. Here are the ones this pattern tends to meet.
Curling Edges
If you chose stockinette for the body, the edges will curl. Garter and seed stitch lie flat, so the easiest fix is choosing one of those for the body.
Blocking tames mild curling too: soak, lay flat, and pin the edges gently until dry.
A Cast-On or Bind-Off Too Tight
A too-tight edge makes the cowl hard to pull over your head. Bind off with a larger needle, or use a stretchy bind-off method.
If the cast-on is the culprit, cast on over a larger needle and switch to your working needle for the first row.
Holes at the Seams
Seam holes usually mean the mattress stitch skipped a bar or the thread pulled too tight. Work slowly, matching bar to bar and easing the tension as you go.
If a small hole appears anyway, darn it closed with the tail before weaving it in. Only you will ever find it.
Yarn Twisting and Kinking
If your yarn twists on itself as you work, stop every few rows and let the ball unwind. A kinked skein can be rewound, or soaked and dried to relax.
Knots are normal. Untangle patiently, and if one appears mid-row, treat it as a new ball and weave both ends in later.
Running Out of Yarn
Running out of yarn is a rite of passage. If it happens, bind off in rib a few rows early, or finish the last rib in a contrast color and call it a design choice.
Prevention is better: buy an extra skein and keep the receipt. Join a new ball at the start of a row and weave the ends in neatly.
Most of all, let your first wearable be imperfect. The lumpy seam, the slightly uneven row, the hood that sits a little to one side — these are the fingerprints of a thing made by hand, and they make it yours.
Conclusion
Hoods have sheltered heads for centuries, from medieval chaperons to monastic cowls, from fishermen's storm gear to the hooded sweaters of the last century.
When you pull your hand-knit hood up against the wind, you join that long line — a tradition that was old before the first knitting needles were forged, made new in your hands.
And because the pattern is one rectangle and one simple stitch, the door is wide open for what comes next.
Knit a second cowl in a new color for the car. Knit matching mitts from the leftover yarn, or a smaller version for a child who will live in it all winter.
Every one of those projects will be easy now, because you will have learned the quiet truth of this one: a hood is just a rectangle that learned to love you back.