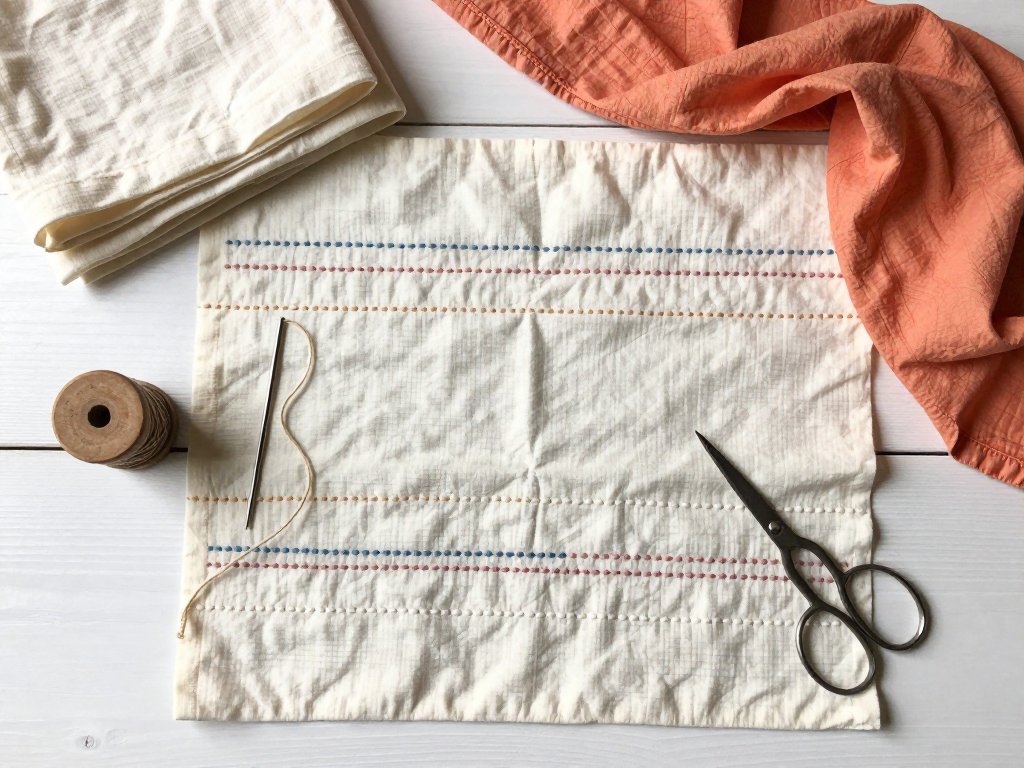
Introduction
Somewhere in a quiet Bengali village, a woman is stitching. She is not following a chart. She is not counting threads. She is simply passing a needle in and out of worn cloth, row after row, until fabric that had finished its life begins a second one.
Sit beside her for an afternoon, and you would learn just one motion: the running stitch. That is all kantha embroidery asks of you. With that single humble stitch, generations of women have turned rags into warm blankets, and blankets into art.
Kantha is the traditional embroidery of Bengal, the region shared today by West Bengal in India and Bangladesh. It began as a way to waste nothing. Women saved the softest, most worn cotton saris and dhotis, layered them together, and quilted them with dense running stitches.
The finished cloth was light yet warm — a throw for cool evenings, a wrap for a sleeping child. It asked for nothing but patience and fabric no one else wanted.
Today this ancient women's craft is having a gentle modern revival. Designers sew kantha stitching into jackets and bags. Slow-fashion lovers celebrate it as textile upcycling at its most beautiful. Home crafters are discovering that kantha is one of the most forgiving, meditative ways to embroider.
The best part is that you already own nearly everything you need. An old cotton bedsheet. A needle. Thread. If you can sew a reasonably straight line, you can make kantha.
In this guide, we will trace where kantha comes from, gather simple materials, and learn the stitch step by step. By the end, you will have both the skill and a full plan for your first kantha piece, made from cloth that already has a story.
Where Kantha Comes From: A History in Rags
Kantha's roots run deep in Bengal, the lush delta region where the Ganges meets the sea. For centuries — likely long before written records — the women of Bengali households have quilted old cloth with running stitches. It was domestic work, done in the quiet hours between other duties.
The name itself tells the story. Scholars believe it comes from the Sanskrit word kontha, meaning rags. That humble name is fitting: kantha began not with fine new fabric, but with cloth that had already lived a long life.
Traditionally, a woman gathered four to seven old saris and dhotis. These soft cotton garments had been worn and washed for years, until the weave relaxed. She layered them one on another, aligning the worn patches so the quilt would be strongest where it was thinnest.
Then came the stitching. She often pulled thread from the colored borders of old saris, unravelling the bright edges to reuse the cotton. With this salvaged thread she worked dense rows of running stitches across the whole surface.
The stitches did two jobs at once. They held the layers together so nothing would shift, and they gave soft, tired cloth new strength. The result was a lightweight blanket or throw, just right for cool winter nights.
Not all kantha was plain. In the region around Jessore, now part of Bangladesh, women created what is called nakshi kantha. The word nakshi means embroidered or ornamented, and these pieces were pictorial masterworks.
Nakshi kantha were stitched with motifs drawn from daily life and belief: the lotus, sacred to the goddess Lakshmi; the sun and the moon; the tree of life; boats on the river; fish, birds, and animals; and scenes of women at work and play.
A fine nakshi kantha could take months, even years, of evening stitching. Such pieces were often made for a wedding or a birth and given with love. Today these antique quilts are treasured by collectors and museums.
One detail about traditional kantha moves many people. It is often said that the top layer of cloth was cut or torn before the stitching began, so the finished quilt could never be mistaken for new cloth. Kantha was honest work, and it did not pretend otherwise.
That honesty is part of why kantha speaks to us now. In an age of fast fashion, this is the original slow cloth. It is sustainable by nature: nothing new is bought, nothing is wasted, and worn fabric is honored rather than thrown away.
You may have seen kantha stitching on designer garments, where it appears as rows of gentle ripples across pockets and collars. You may also have seen visible mending, the craft of repairing clothes with decorative stitches. It is kantha's close cousin.
What was once a private village craft is now a worldwide source of calm. Stitchers describe the rhythm of the needle as meditative, a way to slow down with your hands.
Why Kantha Suits Beginners So Well
Most embroidery traditions ask you to master a whole vocabulary of stitches. Kantha asks for exactly one: the running stitch.
Because there is only one stitch to learn, you can spend your energy on rhythm and enjoyment rather than technique.
Kantha is wonderfully forgiving. There is no counted pattern, so there is nothing to miscount. No row has to follow a particular direction. If one stitch is longer here and shorter there, the cloth simply gains character.
Your so-called mistakes become texture. The gentle ripples where your stitches gather the fabric are kantha's signature — proof of a human hand at work.
Kantha also fits real life. You can stitch for five minutes at the kitchen table or for an hour once the children are asleep. There is no hoop to set up and no chart to consult, so you can pick the work up and set it down without ceremony.
You do not need to draw. Your first pieces can be plain rows, and plain rows are genuinely beautiful. When you feel ready, simple motifs use the very same running stitch — you outline a shape instead of filling it in.
Best of all, kantha turns the fabric you already own into treasure. That stained bedsheet, that faded scarf — each becomes a canvas with a past.
Materials and Tools: Simple and Budget-Friendly
Kantha is one of the least expensive crafts you can take up. Recycled fabric is the entire point. Your main material is probably already in your linen cupboard, or one thrift-store trip away.
- Fabric: soft, loosely woven cotton. Old cotton bedsheets, muslin, well-worn cotton shirts, and thrifted cotton scarves are all ideal. Fabric washed many times is supple and easy to needle.
- Thread: cotton thread, so your work softens as it ages. Traditional sari thread is lovely if you can find it. Embroidery floss and cotton quilting thread also work beautifully.
- Needle: a crewel or embroidery needle, size 5 to 7. It is sharp enough to pierce several layers, with an eye large enough to thread easily.
- Small scissors: for trimming thread ends. A thimble is optional but kind to your middle finger as your layers grow thick.
- Optional: an embroidery hoop, though traditional kantha was worked in the hand. Many stitchers find a hoop unnecessary.
A loose weave matters more than you might think. Tight, crisp fabric resists the needle and hides your stitches. A relaxed weave lets the needle glide and allows the kantha ripple to form.
Color is your choice. Many kantha pieces pair pale fabric with colored thread so the stitches show clearly. For a first piece, plain light cloth makes your work easy to see.
Choose thread that gently contrasts with your fabric. If you are unsure, a medium tone — dusty blue, terracotta, or sage — looks lovely on cream or white cotton.
That is the whole list. Fabric, thread, a needle, scissors. If you have a scrap of muslin and a reel of thread, you can begin tonight.
The Technique: One Stitch, Six Easy Steps
Take a deep breath, because this is the entire kantha technique. Everything else in this craft grows from the six steps below.
- Prepare your layers. Wash and dry your fabric first so it will not shrink later and distort your stitching. Cut it to size, then layer two or three pieces: one top layer and one or two backs. Traditional kantha used four to seven layers; two or three are plenty for learning. Baste around the edges with big loose stitches to keep the layers from sliding.
- Thread your needle. Use a single strand of cotton thread, or the full six strands of embroidery floss if you want bolder stitches. Knot the end. Start near the center of your cloth, or at one edge and work across; both ways are traditional.
- Make the running stitch. Bring the needle up through all layers from the back. Rock the needle down and up again, gathering two or three small stitches onto the needle before pulling it through. Aim for small, even stitches of about two to three millimeters.
- Match your spacing. The gap between stitches should be roughly equal to the stitch length itself. Evenness matters far more than speed; a slow, steady rhythm is the heart of kantha. Let your breathing settle into the in-and-out motion.
- Work in parallel rows. At the end of a row, turn and begin the next row a finger's width away. Straight rows, slightly wavy rows, and diagonal rows are all traditional. Rows about a centimeter apart give the classic dense kantha look.
- Let the ripple happen. The fabric will gather into soft puckers as you stitch. This is the famous kantha ripple, the hallmark of the craft — not a flaw. Do not pull your thread tight, and do not press the cloth flat later.
If your puckers feel too strong, loosen your tension or space your stitches farther apart. If you want more texture, stitch more densely. You will quickly find your own balance.
When you are comfortable with rows, try a simple motif. Lightly draw a leaf, a flower, or a small sun on your top layer with a fabric pencil. Then outline the shape with running stitches, echoing the line once or twice just inside it.
That is how many traditional kantha flowers and leaves are made: line beside line, in thread. You now know everything the craft requires. The rest is practice, and practice in kantha feels remarkably like rest.
Your First Project: A Kantha Scarf or Mug Rug
Let us put the stitch to work. The project below can be a generous recycled scarf or a quick mug rug. The steps are identical; only the size changes.
For the scarf: choose a soft cotton scarf, or cut a piece from an old cotton bedsheet about 45 by 160 centimeters. For a mug rug: cut two pieces of soft cotton about 20 by 25 centimeters and layer them. Wash and iron your fabric first.
- Layer your fabric. If you are making the mug rug, place the two cotton pieces together. If you are using a single sturdy scarf, it is ready as is. Baste around the edges to hold everything steady.
- Thread your needle with a single strand and knot the end. Start about two centimeters from one short edge of your piece.
- Work a first row of small running stitches straight across the width. When you reach the far side, leave a thread tail and begin the next row a centimeter below, heading back the other way.
- Continue row by row across the whole piece. A mug rug takes one relaxed evening. A scarf is a lovely companion for your evenings; a few rows at a time will finish it within a week or two.
- When the surface is fully stitched, remove the basting. Turn under the raw edges and hem them with small slip stitches, or stitch a border row of running stitches around the perimeter.
- Weave in or trim any loose ends. Lay your finished piece flat and admire it: the gentle ripples, the soft drape, the small unevenness that is entirely yours.
Making It Your Own
Plain rows are complete and beautiful. If you would like more, add one motif in a corner — a small leaf, a tiny sun, a child's initial. Outline it once or twice with the same running stitch.
For a cushion cover, stitch your kantha panel first. Then sew it into a simple envelope-style cover with an opening at the back. The technique never changes; only the finished object does.
Caring for Your Kantha
Kantha is sturdy cloth, made to be used and loved. When your piece needs washing, hand wash it in cool water with a drop of mild soap.
Press the water out gently. Do not wring or twist, which would strain the stitches. Rinse in cool water, press again, then roll the piece in a towel to draw out remaining moisture.
Dry your kantha flat, out of direct sunlight, reshaping it gently with your hands as it dries.
Resist the urge to iron it flat. The ripples are the point of kantha, and pressing them out would erase the very texture you worked to create.
Here is the craft's lovely secret: kantha improves with use. The cotton softens, the stitches settle, and the cloth grows more beautiful each season, like a favorite quilt.
If a stitch ever loosens, re-stitch that short section. Because every part of kantha is the same simple running stitch, repair is as easy as making it in the first place.
Carrying the Thread Forward
Think of the women who first made kantha. They worked by lamplight, after the cooking, the children, and the fields. They had no new cloth and no spare money — only worn saris, salvaged thread, and an evening's quiet.
Out of those small resources they made warmth, and out of warmth they made art. Nakshi kantha from Jessore now hangs in museums, stitched by hands no one remembers. The cloth remembers them.
You do not need a museum piece. You need an old sheet, a needle, and the knowledge that one stitch, repeated with care, is enough to make something lasting.
When you sit down with your fabric this week — even for ten minutes — you are practicing a craft that has calmed busy hands for centuries. You are also choosing to make and mend instead of buying new.
Start small. Let the first rows be imperfect. Notice the ripple forming under your fingers, and how your breathing slows to match the needle.
Somewhere in Bengal, a woman is still stitching, row after row, in cloth that has lived before. Tonight, so will you. Your hands are part of her story now, and hers is part of yours.
