Introduction
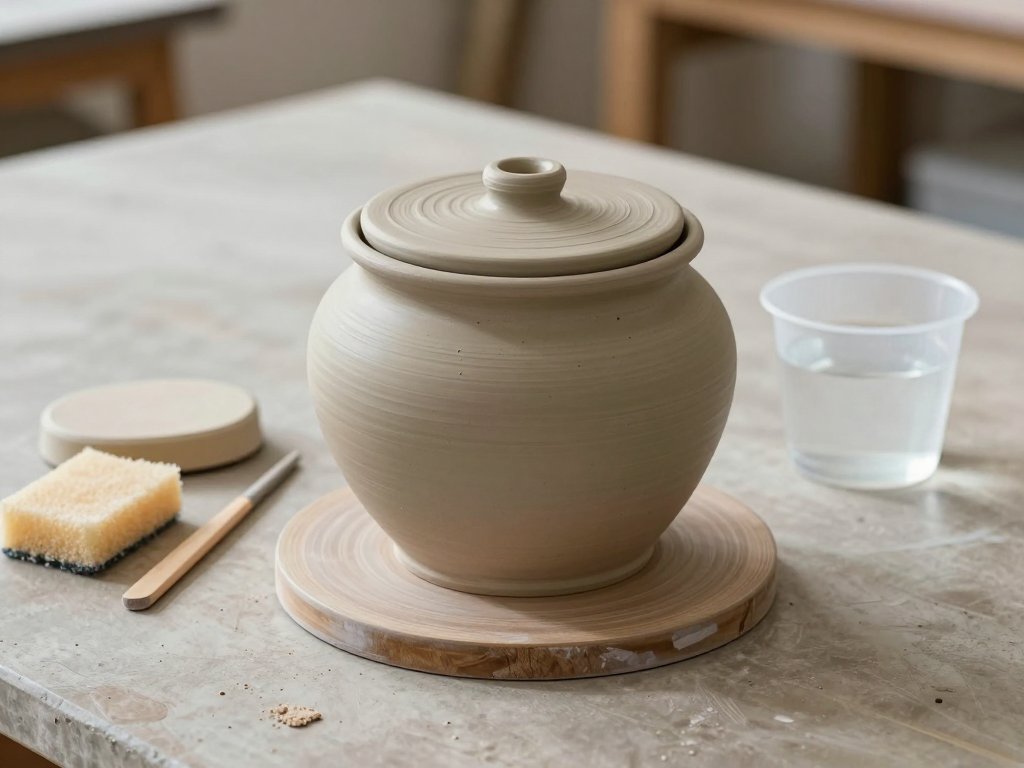
A lid that fits is the difference between a jar you reach for and a jar that lives at the back of the shelf. It is also the first time the wheel asks you to make two separate objects agree with each other.
Most beginners assume a good lid is a matter of luck, or of exceptionally steady hands. It is neither. A lid that seats properly is the result of three measurable decisions: how deep you cut the gallery, how wide you throw the flange, and how honestly you measure both.
This guide walks through the whole sequence at a calm pace, from a lump of clay to a glazed jar with a lid that lifts with a soft thunk. You can throw the body one afternoon and the lid the next. Nothing here needs a production potter's setup.
If you can center clay and pull a cylinder, you already have every skill required. What changes is your attention. A lidded jar rewards the potter who stops to measure.
Why the Lidded Jar Comes Next
The cylinder teaches you to raise a wall. The lidded jar teaches you to plan. From the first pull, you are holding two futures in mind at once: the opening you are leaving behind and the lid that will eventually sit in it.
That is why teachers introduce lids shortly after cylinders. The form itself is not difficult. The discipline is. You must leave clay where you would normally thin it, cut a ledge you cannot see from above, and trust a number instead of your eye.
There is also a design pleasure here that open forms do not offer. A lid gives a pot a horizon line. The knob becomes a small piece of sculpture, and the proportion between belly, shoulder, and lid is what makes a jar feel settled rather than top-heavy.
If you are still shaky on centering and pulling even walls, spend one more session on cylinders first. The wheel-throwing basics in this beginner's guide to throwing on the wheel will give you the foundation the rest of this article assumes.
The Anatomy of a Lidded Jar
Potters use a small, precise vocabulary for lids, and learning it makes every instruction that follows easier to picture. Five parts do all the work.
- The body — the thrown jar itself, with an opening wide enough to be useful and a rim thick enough to be cut into.
- The gallery — an inner ledge cut down inside the rim, a step on which the lid rests. It is recessed, not raised.
- The lid seat — the flat ring of the gallery that actually carries the lid's weight. It must be level, or the lid will rock.
- The flange — the ring of clay on the underside of the lid that drops down into the gallery and keeps the lid from sliding sideways.
- The knob — the pulled handle at the center, sized for two fingers and a thumb.
The logic is simple and forgiving. The flange locates the lid horizontally, the seat supports it vertically, and the gallery hides the joint so the silhouette stays clean. When all three agree, the lid feels like it belongs.
Clay, Wedging, and Centering
For a one-quart jar, weigh out roughly 1.5 to 2 pounds of clay, about 700 to 900 grams. A stoneware or mid-range stoneware body with some grog is more forgiving than porcelain, which moves under a rib and punishes hesitation.
Wedge the clay properly, whether spiral or Rams-head, until the mass feels uniform and slightly warm. Wedging is not ceremony. It evens out moisture and drives trapped air to the surface, and trapped air is the most common cause of a gallery that cracks as it dries.
Center with more care than you think the job requires. A body thrown slightly off-center produces a rim that is thicker on one side. Cut a gallery into that rim and the ledge is uneven before the lid even exists.
Set the lid clay aside while you work: a ball about half the weight of the body, roughly three-quarters of a pound or 340 grams. Cover it so it stays soft. A lid thrown from stiffer clay than its jar will shrink at a different rate.
Throwing the Body
Open the clay and leave a floor about a quarter inch thick, then pull the walls to roughly a quarter inch, or six millimeters. Even walls matter more here than on an open bowl, because the rim has to be cut and still hold its shape.
At the top, stop thinning a little early. Leave about three-eighths of an inch of clay at the rim, a band thick enough to carve a gallery into without breaking through the outer wall. Think of it as reserving material rather than wasting it.
Shape the belly with the heel of your hand and a rib, keeping the shoulder gently rounded. A jar that flares wide at the shoulder and then narrows abruptly makes the lid look borrowed from another pot. Aim for a smooth curve that the lid can conclude.
Compress the rim with a chamois or a soft rib, then sponge it dry enough to see the profile clearly. Before you wire the jar off the bat, measure the opening at the rim and write the number down. Wet clay remembers nothing, and your eye is a poor caliper.
Cutting the Gallery
A gallery is a step cut down inside the rim, leaving a narrow shelf. Its depth is about a quarter inch, or six millimeters, and its width a quarter to three-eighths of an inch. Deep enough to hold the lid, shallow enough to keep the rim strong.
Use a chamfer tool, a loop tool, or simply the corner of a wooden rib. Hold it against the inner wall at a consistent height and let the spinning wheel do the cutting, with light, steady pressure. Two slow passes remove clay more predictably than one aggressive one.
Check the depth as you go. A needle tool scratched against the ledge, or a small stick marked with a pencil line, will tell you when you have arrived. Potters who cut by feel alone usually end up too deep on one side.
Then compress the ledge with the back of a fingernail or a small rib. Compressing aligns the clay particles and closes surface pores, which reduces the chance of a hairline crack forming where the gallery meets the wall.
Finally, true the rim. Run a damp sponge around the top edge, then lay a straight edge or a rib across the opening. Any light showing under it means the seat is not level, and the lid will rock no matter how carefully you throw it.
Measuring the Opening Accurately
Measure the gallery's inner diameter, never the outer rim. The flange fits inside the gallery, so the outer measurement includes wall thickness that varies from pot to pot and even around a single pot.
Use calipers, and take the measurement in two directions at right angles. Hand-thrown rims are rarely perfectly round; if the two numbers differ, use the smaller one and expect to shave the flange slightly during trimming.
Write the figure on your workboard in pencil. You will need it when you throw the lid, and possibly again a week later when you trim. Guessing from memory is how a promising jar ends up with a lid that rocks.
Throwing the Lid
Center the lid ball and open it only slightly, leaving a shallow dome rather than a deep dish. Aim for a wall about a quarter inch thick, with the center a little thicker where the knob will rise.
Now form the flange. Leave a ring of clay at the outer edge, then cut a step beneath it with a wooden rib so a short skirt stands proud below the dome. That skirt is the flange, finishing about two to three millimeters smaller than the gallery opening.
Test the fit while both parts are still on the wheel. Lift the lid into the jar's gallery and spin slowly. If the lid turns with the jar without wobbling, it is centered. If it wanders, the flange is out of round or the seat is not level.
Add the knob by leaving a small cone of clay at the center and pulling it up between thumb and forefinger. Pinch and compress its base so it will not crack away later. A knob too small is a nuisance; one too tall makes the jar look like a finial.
Wire the lid off with a careful, flat pass and set it aside under plastic. It will be trimmed at leather hard, when the flange can be refined and the underside cleaned.
The Three Fits
Every lid you make will fall into one of three categories, and learning to recognize them early saves a lot of disappointment.
Too tight. The flange binds in the gallery. As the jar dries, the lid can lock in place and hold moisture in the rim, which may crack trying to shrink around it. Glaze makes it worse. A lid that needs a tug when wet will need a chisel when fired.
Too loose. The lid rocks from side to side with a click. The flange is undersized, or the gallery is too wide, and the lid slides until the flange hits the wall. It will not hold freshness and it sounds cheap in the hand.
Snug. The lid drops in with slight resistance and settles with a soft thunk as air escapes past the flange. Lift it and you feel a gentle suction. This is the fit to aim for, and it is a matter of millimeters.
To tighten, add a thin coil around the flange and blend it in, or throw the flange wider next time. To loosen, shave it with a rib or trimming loop. Test with a strip of paper: it should slide in with a little drag, not fall through.
Shrinkage, Drying, and the Fired Fit
Clay shrinks roughly ten to twelve percent from wet to fired. That sounds alarming when you are trying to hold a tolerance of two millimeters, but the arithmetic is kinder than it looks.
Both parts shrink by the same percentage if they are made from the same clay and dry at similar rates. A snug wet fit scales down proportionally, so a lid that fits at throwing stage still fits after the glaze fire. The gap neither vanishes nor grows.
What breaks the arithmetic is unequal drying. Dry the jar and lid slowly and together, loosely covered with plastic for the first few days, the lid resting on the jar but propped slightly open. If one part dries faster, it shrinks ahead and the fit changes.
Never force the pace with a heat gun or a warm radiator. Fast drying also sets up the tension that cracks galleries, and a cracked gallery is the one flaw you cannot repair invisibly.
At the bisque stage, wax the gallery so glaze cannot pool there. Glaze the flange thinly or not at all, since a fraction of a millimeter closes the clearance you worked for. Fire the lid beside the jar, or on kiln posts, whenever the glaze might run.
Troubleshooting a Stubborn Lid
Most lid problems announce themselves before the glaze fire, and almost all of them have a workable response.
- The lid rocks. The seat is not level, or the gallery is uneven. At leather hard, set the lid in place with a smear of clay slurry and spin the wheel gently; the high spots will mark themselves and can be shaved.
- The lid seized after firing. Glaze bridged the gap. A light tap with a wooden mallet, or a few minutes in the freezer, often frees it. Prevent it next time by waxing the gallery and keeping the flange dry.
- The gallery cracked. Usually too deep a cut, or clay that was too dry when trimmed. Fill with a soft clay and vinegar slip before bisque, and accept a slightly wider lid next time.
- The lid warped. It was too thin, or dried flat on an uneven surface. Fire warped lids dome-up on a bed of kiln wash or grog so they can relax without slumping further.
- The lid will not stay centered. The flange is out of round. Re-cut it at leather hard with a sharp loop tool while the lid spins, which restores a true circle.
None of these failures is wasted. Each one teaches you which measurement you skipped.
Variations, and a Jar to Keep
The flange lid is the most secure design, but not the only one. A cap lid sits over the rim like a hat, with no flange at all. It is faster to throw and handsome on wide storage jars, though it slides if the jar is tipped.
Once the fit is reliable, add a pulled handle for a honey or preserve jar, attaching it at the shoulder and opposite the lid's natural lift. The handle changes how the jar is held, so check that your thumb still finds the knob comfortably.
Kitchen jars deserve slightly different proportions: a wider mouth for a spoon, a deeper gallery for a heavier lid, and a knob large enough for a floury hand. These are the jars that earn their shelf space every week.
Keep the first one. Not the best one, the first one. Set it on your own counter, use it for tea or rice or buttons, and notice the thunk each time you lift the lid. That sound is the whole lesson, made audible.