Introduction
There is a moment in pottery that every beginner remembers: the first time a lump of spinning clay moves under your hands and becomes centered.
It feels like a small miracle. The wobble disappears, the clay becomes still and true at the center of the wheel, and for just an instant, you understand why potters have found this craft so compelling for thousands of years.
Pottery is ancient — the earliest known pottery vessels date back over twenty thousand years — and yet it feels just as fresh and exciting today.
If you have ever watched a potter at a wheel and thought, "I would love to try that," this guide is for you.
We will walk through everything you need to know to throw your first pot, from setting up your workspace to pulling up the walls of your very first cylinder.
What You Will Need
Before you sit down at the wheel, let us gather the essentials. Pottery requires some specialized equipment, but the good news is that most community studios offer all of it for a reasonable fee.
A typical drop-in session at a ceramics studio costs between twenty-five and forty dollars and includes clay, tools, glazes, and firing.
This is an excellent way to try pottery without a large upfront investment.
Clay. For beginners, a smooth stoneware or earthenware clay in a medium consistency is ideal.
Your studio will likely have a standard throwing clay available. Avoid clay with large grog (added particles) for your first attempts — smooth clay is more forgiving for centering and shaping.
A standard lump of clay for a small bowl or cup is about one to two pounds.
A potter's wheel. Most community studios have electric wheels available for use. A good wheel will have a speed control pedal and a smooth, level wheel head. The brand is less important than whether the wheel runs quietly and smoothly.
Basic tools. A small sponge for adding water and smoothing, a wooden rib for shaping, a needle tool for cutting and trimming, and a length of wire for cutting the pot off the wheel.
Most studios provide these tools, or you can buy a beginner's pottery tool kit for about fifteen dollars. Many potters also recommend a chamois leather piece for smoothing the rim — it creates a beautifully soft edge that no other tool can replicate.'s pottery tool kit for about fifteen dollars.
A bucket of water. You will need water to keep your hands and the clay moist. Keep a small bucket of clean water beside you at all times. A spray bottle is also handy for keeping the clay surface damp between steps.
An apron and towel. Pottery is messy in the most wonderful way. An apron protects your clothes, and a towel keeps your hands dry between steps. Old towels that you do not mind getting stained are perfect.
Understanding the Clay
Before you start the wheel, spend a few minutes getting to know your clay. This step is called wedging, and it is essential.
Wedging removes air bubbles from the clay, ensures an even consistency, and warms the clay to make it more pliable.
To wedge, pick up your lump of clay and press it firmly onto a plaster or canvas surface.
Push it away from you with the heels of your hands, then pick it up, turn it, and repeat.
Think of it as kneading bread dough. After five to ten repetitions, the clay should feel smooth, uniform, and warm in your hands.
To test for air bubbles, cut the wedged lump in half with your wire tool and inspect the cross-section.
If you see small pockets of air, wedge more. Air bubbles in your clay will cause your pot to explode in the kiln — it is worth taking this step seriously.
Centering: The Most Important Skill
Centering is the foundation of all wheel throwing. A centered piece of clay spins without wobbling, and every subsequent step depends on it.
Place your wedged clay firmly onto the center of the wheel head. Wet your hands thoroughly with water from your bucket.
Start the wheel at a medium speed — fast enough that the clay spins steadily but not so fast that water flies everywhere.
With both hands cupped around the clay, press gently inward and downward. The heels of your palms do most of the work.
Keep your elbows braced against your body or against the edge of the wheel pan for stability.
The clay will wobble at first, but as you maintain steady, even pressure from all sides, the wobble will diminish.
When the clay spins as a smooth, still cone without any visible movement, you have achieved center.
This moment of stillness in the spinning clay is deeply satisfying. Congratulations — this is the hardest part, and you have done it.
Do not be discouraged if centering takes several attempts. Even experienced potters sometimes struggle with a stubborn lump of clay.
The secret is consistent, gentle pressure and a willingness to try again. If the clay becomes too dry, wet your hands again.
If it becomes too wet, let it spin for a few seconds without touching it to dry slightly.
Opening the Clay
Once your clay is centered, you will open it to create the hollow interior of your pot.
With the wheel still spinning at medium speed, wet your hands again. Place your left thumb on top of the centered clay and press straight down toward the wheel head.
Do not press at an angle — keep your thumb vertical. Press down until you are about half an inch from the bottom of the clay.
This layer of clay at the bottom will become the floor of your pot. Now, keeping your thumb in the hole, gently push outward from the center toward the edge of the clay.
Use your other hand to guide and support the outside wall. You are creating a donut-shaped ring of clay with a flat floor.
The depth and width of this opening determine the size of your finished pot. For a small bowl or cup, aim for a diameter of about three inches and a depth of about one inch.
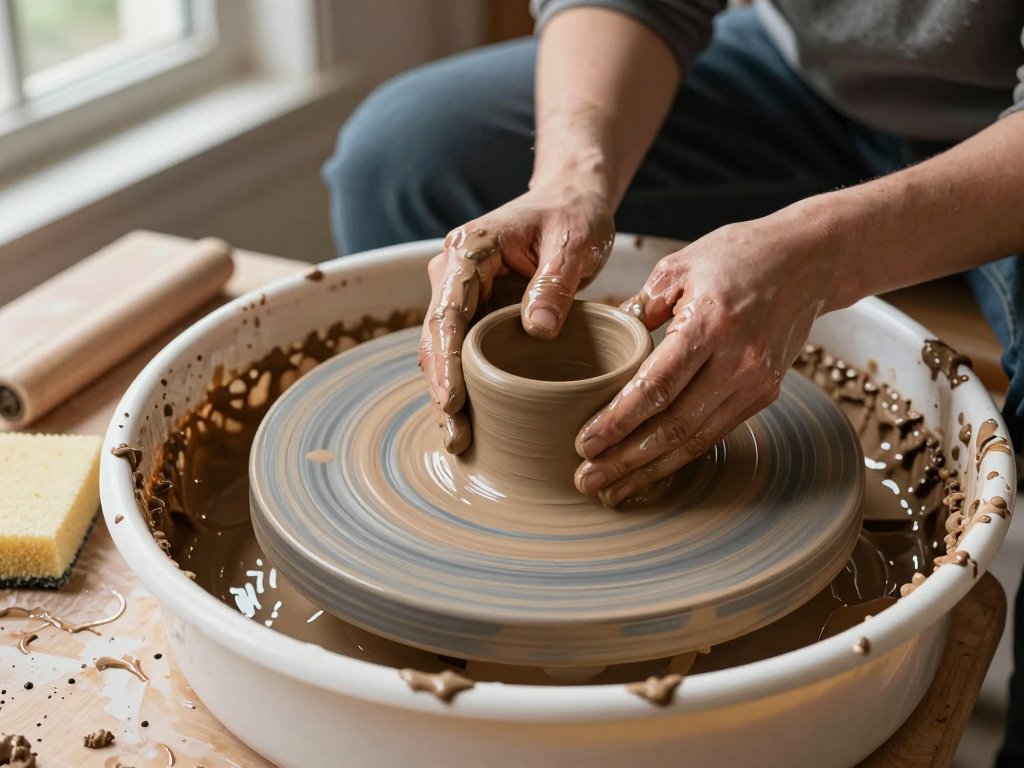
Pulling up the Walls
Now comes the part that feels like real pottery: pulling up the walls of your pot.
With the wheel at medium speed, wet your hands. Place your left hand inside the opening, fingers flat against the inner wall.
Place your right hand on the outside wall directly opposite your left hand. Gently squeeze both hands together, then slowly pull upward.
The clay will rise between your hands, forming a wall. Start at the bottom and pull smoothly to the top.
Repeat this motion, each time raising the wall a little higher. Keep your hands wet and the clay well lubricated.
If the clay starts to wobble or collapse, slow the wheel down or stop and let the clay firm up for a moment before continuing.
Pull the walls evenly all the way around. For a first pot, aim for walls about a quarter-inch thick and about three to four inches tall.
Consistency in wall thickness is more important than height — a thick, sturdy pot is far better than a tall, collapsing one.
Shaping Your Pot
Once the walls are up, you can shape your pot. A simple cylinder is the classic first shape.
To make it, keep the wheel spinning at medium speed. With your hands in the same inside-outside position, gently press outward to widen the middle of the cylinder, creating a gentle curve.
For a bowl shape, press outward more broadly. For a vase, keep the opening narrower and let the middle belly out.
Use a wooden rib in your outside hand to smooth the surface and refine the shape.
The rib removes excess water and creates a clean, even surface. As you shape, keep checking the rim to make sure it stays level and even.
If the rim becomes wavy or uneven, use a needle tool to trim off the uneven edge, then smooth it with a wet finger.
Trimming and Finishing
When your pot is shaped to your liking, use a wire tool to cut it off the wheel head.
Slide the wire under the base of the pot, pulling toward you in a smooth motion.
Then gently lift the pot off the wheel with both hands. Place it on a wooden bat or a piece of clean drywall to dry.
This stage — where the pot dries to leather-hard — is called "leather hard." The clay is firm enough to hold its shape but still damp enough to carve.
After about a day of drying, you can trim the bottom of your pot. Trimming refines the foot (the base) and removes excess clay from the bottom.
Center the leather-hard pot upside down on the wheel using three small coils of clay to hold it in place.
With a trimming tool, shave thin ribbons of clay from the base, creating a neat foot ring.
This step is optional for your first pot. Many beautiful first pots have simple flat bottoms.
Drying, Bisque Firing, Glazing, and Glaze Firing
After trimming, let your pot dry completely. This takes about a week for a small pot.
The clay should be bone dry with no cool spots when held to your cheek.
Your studio will then fire it in a bisque kiln to about 1800 degrees Fahrenheit.
This hardens the clay into a porous, permanent state called bisqueware. After bisque firing, you can glaze your pot.
Glaze is a liquid glass that, when fired again, becomes a smooth, waterproof surface. Glazing is an art in itself.
For a first pot, a simple dip in a clear or colored glaze is all you need.
Your studio will fire it again to about 2200 degrees for stoneware. After this second firing, your pot is food-safe, watertight, and ready to use.
Common Beginner Challenges and How to Handle Them
The clay keeps wobbling off center. This is the most common beginner difficulty. Check your speed — the wheel may be moving too fast.
Slow it down. Also check that your clay is firmly attached to the wheel head.
Apply more downward pressure with the heels of your hands and keep your elbows braced.
The walls collapse. The clay may be too wet. Stop the wheel and let the pot sit for a minute to firm up. If the clay is too soft, you may have added too much water. Use a sponge to remove excess water from the inside of the pot.
Holes appear in the walls. This usually means there is an air bubble in the clay. More thorough wedging will prevent this. Small holes can be patched with a bit of wet clay smoothed over the hole.
The rim is uneven. Use a needle tool to trim the rim level while the wheel is spinning slowly. Then smooth the cut edge with a wet finger. This is a normal part of the process, even for experienced potters.
My pot is lopsided. Gently press on the higher side while the wheel spins slowly. If the asymmetry is too severe, compress the clay back into a centered lump and start again. There is no shame in reclaiming your clay and beginning anew — it is how every potter learns.
Finding Your Rhythm
Pottery is a practice, not a performance. Each time you sit at the wheel, you learn something about the clay, about your hands, and about patience.
Your first pot may be lumpy and thick. Your second may be slightly more even.
By your tenth attempt, you will feel the clay respond before you even touch it.
That is the rhythm of pottery, and it is deeply satisfying.
Conclusion
Throwing a pot on a wheel is one of those rare experiences that feels both ancient and completely new.
The spinning clay, the water on your hands, the quiet focus it demands — these elements combine into something almost meditative.
Your first pot will not be perfect, and that is exactly as it should be.
It will be a record of your first conversation with the clay, full of the wobbles and uncertainties that make handmade objects so precious.
Keep that first pot. Set it on a shelf where you can see it. Then come back to the wheel and make another one.