Introduction
There is a particular pleasure in wearing something you have made yourself. It is not just the compliment you receive at the grocery store, though that is lovely.
It is the quiet knowledge, every time you catch a glimpse of your wrist, that this small object did not exist until your hands shaped it.
Ceramic beads are one of the most accessible ways to enter that world. A bead is small, forgiving, and complete in itself — a single satisfying project you can hold between two fingers.
And when you learn to make them from porcelain and polymer clay, you discover that two very different materials can open two very different doors into the same beautiful craft.
This guide is written for beginners, but it will not talk down to you. We will explore what makes each material special, how to shape and texture beads that look thoughtful rather than accidental, and how to turn your finished beads into jewelry you will actually wear.
Take your time, embrace the imperfect, and let your hands learn.
Porcelain versus Polymer Clay: A Matter of Temperament
Before you touch any clay, it helps to understand what you are working with. The two materials are often mentioned in the same breath because they can produce similar-looking beads, but their personalities are quite different.
Porcelain is a natural ceramic clay. It is pale, fine-grained, and slightly translucent when thin.
It demands patience: you shape it while it is soft, dry it slowly, and then fire it at high temperature to make it permanent.
True porcelain requires a kiln, which most home crafters do not own. Happily, there are alternatives — air-dry porcelain clays that cure at room temperature, and oven-fired ceramic clays that reach maturity in a home oven.
Both give you the luminous, cool, stone-like quality of porcelain without a kiln.
Polymer clay, by contrast, is a synthetic modeling material — PVC particles suspended in a plasticizer.
It is soft and pliable when warm, and it cures into a hard, durable plastic when baked at a low temperature in a regular oven.
It comes in an astonishing range of colors, can be sculpted to fine detail, and is nearly indestructible once cured.
If porcelain is a quiet watercolor, polymer clay is a confident acrylic.
Neither is better than the other. They simply ask different things of you, and many jewelry makers enjoy working with both, letting each material bring its own temperament to a collection.
Gathering Your Supplies
You do not need a studio full of equipment to begin. Here is a thoughtful starter list:
- A block of air-dry or oven-fired porcelain clay, or polymer clay in your chosen colors
- A smooth work surface — a glass cutting board or ceramic tile is ideal
- A small rolling pin or acrylic roller for flattening
- A needle tool, bamboo skewer, or toothpick for making bead holes
- Texture tools: a fork, lace, a textured button, a rubber stamp — anything that leaves a pleasing imprint
- Wet wipes or a damp cloth for cleaning your hands between colors
- Bead cord, elastic cord, earring wires, and findings for the finished jewelry
Most of these items are already in your kitchen or craft bin. The clay itself is the only real purchase, and a single block will make dozens of beads.
If you are trying polymer clay for the first time, start with a small pack of two or three colors that appeal to you; you can always buy more once you know you enjoy the process.
Making Porcelain Beads
Begin with a small piece of porcelain clay, about the size of a marble. Warm it in your hands for a moment — body heat makes it more pliable.
Roll it between your palms in a circular motion until it forms a smooth sphere.
If the clay cracks at the edges, it is too dry; add a drop or two of water and knead it in.
To make a hole, press a bamboo skewer or needle tool gently through the center of the bead.
Twist the tool slowly as you push, which keeps the hole round. For beads that will be strung multiple times, make the hole slightly larger than your cord — it will shrink a little as the clay dries.
Smooth the opening with a wet fingertip so the edges do not crack.
Now comes the delightful part: texture. Press the bead lightly onto a piece of lace and you will leave a delicate woven imprint.
Roll it across the tines of a fork for neat lines. Press a single flower-shaped button into the surface for a subtle motif.
Even the pad of your thumb, pressed gently, leaves a lovely organic dimple. Texture is what turns a plain clay ball into a bead that looks considered.
For a more sculptural shape, make oval beads by rolling the clay between your palms in a back-and-forth motion, or flattened disc beads by pressing a sphere gently between two fingers. Each shape has its own character, and mixing shapes within a single strand creates a much more interesting necklace.
Let your beads dry slowly on a tray lined with parchment paper, away from direct sun and drafts.
Drying too quickly is the most common cause of cracks, so resist the urge to speed things up.
Depending on humidity, small beads may take one to three days to dry fully. They are ready when they feel cool and hard, with no soft spots.
Firing and Finishing Porcelain Beads
Once your beads are completely dry, it is time to make them permanent. If you are using oven-fired porcelain clay, arrange the beads on a baking sheet lined with parchment and follow the temperature and time on the package — most cure between 275 and 300 degrees Fahrenheit.
Let them cool slowly in the oven with the door cracked open to avoid thermal shock.
Air-dry porcelain requires no oven at all, but it benefits from a gentle finish. Once fully cured, sand each bead lightly with fine sandpaper (400 to 600 grit) to remove any rough spots.
Rinse off the dust and let them dry. The surface will have a soft, matte, stone-like quality that is beautiful on its own.
For a subtle sheen, you can seal air-dry beads with a matte or satin acrylic sealant.
Apply it in thin coats with a soft brush, letting each coat dry completely. If you prefer the natural matte look, skip the sealant entirely — porcelain has an understated elegance that needs no help.
Remember that air-dry porcelain remains slightly porous and should be kept dry. It is wonderful for earrings, necklaces, and brooches, but less ideal for rings or pieces that will sit against sweaty skin all day. Knowing these small boundaries is part of working thoughtfully with the material.
Making Polymer Clay Beads
Polymer clay asks you to begin with a different ritual: conditioning. Fresh clay is stiff, so you must warm and knead it until it becomes soft and uniform.
Fold it over itself, press it flat, fold again — repeat until it moves like soft taffy.
This takes a few minutes and is genuinely important. Unconditioned clay is crumbly and will crack as you shape it.
Once conditioned, roll your clay into spheres, ovals, or discs exactly as you did with porcelain.
The material is more forgiving, so you can be bolder. Press textures into the surface — polymer clay holds imprints with beautiful clarity, which is why stamping is so popular with this medium.
A rubber stamp, a piece of burlap, or the patterned sole of a shoe can all leave crisp, satisfying textures.
Polymer clay also rewards you with color. Roll two colors into snakes and twist them together to make a striped cane, then slice thin discs to reveal the pattern inside.
Or make a simple "cane" by stacking colored sheets, compressing them into a log, and slicing cross-sections — each slice is a bead with a tiny mosaic design baked in.
Make your holes with the same needle-tool technique, twisting gently to keep them round. Because polymer clay does not shrink during baking, you can size holes precisely to your cord. This is one of the material's great practical advantages.
Baking Polymer Clay
Polymer clay cures in a home oven at a surprisingly low temperature — usually between 265 and 275 degrees Fahrenheit. Check your package, because brands vary slightly, and an oven thermometer is a wise investment. Many home ovens run hot, and overheated polymer clay darkens, bubbles, or burns.
Place your beads on a baking sheet lined with parchment or a ceramic tile. Bake for the time specified on the package, typically fifteen to thirty minutes depending on thickness.
When the timer rings, leave the beads in the oven until it is fully cool.
Polymer clay reaches its maximum strength only after it cools completely, so patience here is not optional — it is chemistry.
After baking, polymer clay is hard and durable, but it can be sanded for a smoother finish.
Wet-sand with fine grits, working up from 400 to 1000 grit for a glassy polish.
If you want a high shine, buff the cured beads with a soft cloth or apply a polymer-clay-safe gloss varnish.
The transformation from matte to glossy is genuinely satisfying.
Stringing Your First Necklace or Bracelet
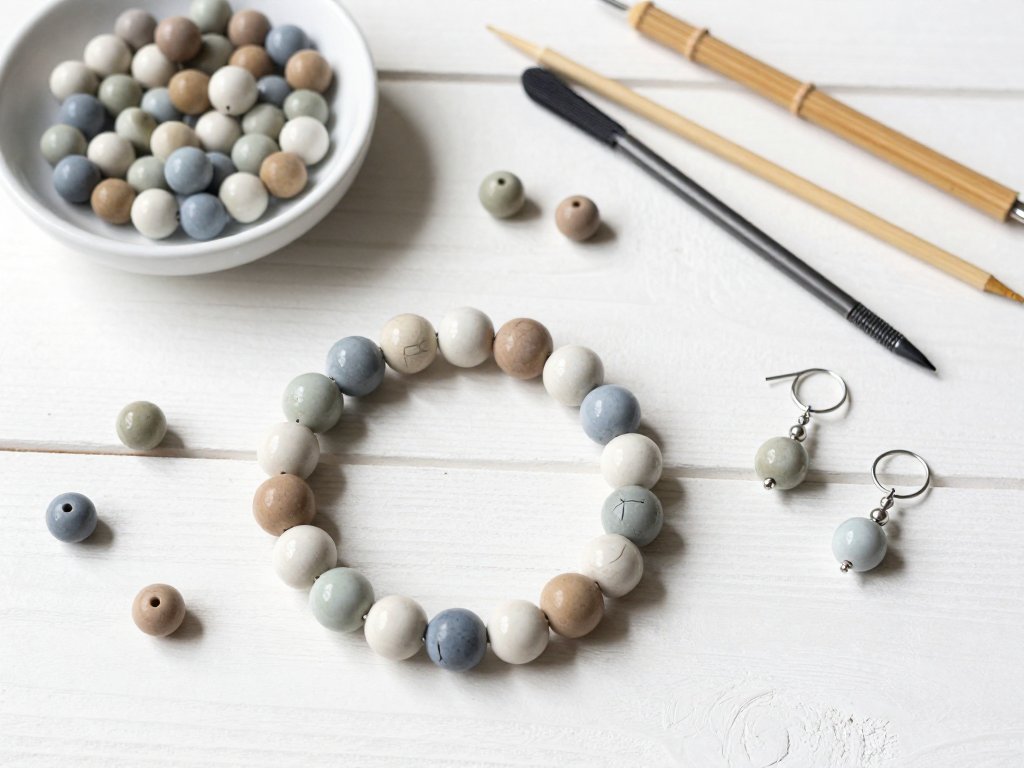
With a small pile of finished beads, you are ready for the jewelry-making half of the craft. For a first project, choose stretchy elastic cord in a color that complements your beads — clear or dark brown elastic is nearly invisible and lets the beads shine.
Lay your beads out on the table and arrange them in the order you like.
This is the moment to play: alternate textures, mix shapes, or group colors in repeating patterns.
A simple rhythm of sphere, disc, sphere, disc looks intentional. When you are happy with the arrangement, thread the beads onto the elastic, leaving a few inches of cord free at each end.
To finish, tie a secure knot — the surgeon's knot is ideal, which is simply a square knot with an extra pass through the first loop.
Pull it tight, dab a tiny drop of clear glue on the knot, and tuck it into the hole of an adjacent bead to hide it.
Trim the ends close, and your bracelet is complete.
For earrings, choose two beads of similar size and shape, thread each onto a head pin, and bend the pin into a loop with round-nose pliers.
Attach the loops to earring wires, and you have a matching pair in minutes. Necklaces with a clasp take a little more practice with crimp beads, but the same principles apply.
Designing with Intention
As you make more beads, you will naturally develop an eye for composition. Here are a few gentle principles that have served me well.
First, let the beads breathe — a necklace with generous spacing feels more elegant than one packed tight.
Second, honor a color story. Limit a strand to two or three related colors, and the result will look curated rather than chaotic.
Third, embrace asymmetry. A single sculptural focal bead flanked by smaller companions creates far more interest than a row of identical spheres.
Consider the relationship between your two materials in one piece. A strand that alternates cool porcelain beads with warm, richly colored polymer beads tells a quiet story of two different makers' hands — yours, working in two mediums at once.
Matching earrings and a bracelet from the same bead batch makes a thoughtful gift, especially when the recipient knows the beads were shaped by you.
And do not underestimate the value of imperfection. A bead that is slightly oval, a texture that stamped unevenly, a color blend that swirled unexpectedly — these are the fingerprints of handwork.
They are what separate your jewelry from a factory strand, and they are precisely what makes handmade pieces so prized.
Caring for Your Ceramic Jewelry
Handmade beads deserve gentle handling. Keep polymer clay jewelry away from extreme heat, which can soften it, and from prolonged sun, which can fade bright colors over time. Porcelain beads are more delicate — store them where they will not knock against harder objects, and keep air-dry pieces dry.
To clean your jewelry, wipe it with a soft, slightly damp cloth and dry it immediately.
Avoid harsh jewelry cleaners and ultrasonic machines, which are far too aggressive for handmade beads.
With reasonable care, polymer clay jewelry can last for years, and porcelain beads, being fired or fully cured, are nearly eternal.
When you are not wearing a piece, store it in a soft pouch or a small box with compartments.
A little cloth bag is perfect. This protects the beads from scratches and keeps your collection organized — and there is a small ceremony to it, tucking your handwork away at the end of the day, that makers understand completely.
Conclusion
Making ceramic beads is a craft of small, repeatable gestures — rolling, pressing, piercing, baking — that add up to something quietly extraordinary.
You learn to see the potential in a lump of clay, to trust your hands, and to wear the evidence of your own patience.
Whether you are drawn to the cool luminosity of porcelain or the vivid confidence of polymer clay, the path begins the same way: with a small piece of clay and a willingness to try.
Start with a single bead, or a handful. Make them for yourself, make them for a friend, make them until your process becomes second nature. And when someone asks where you found your necklace, you will have the particular pleasure of answering, with a small smile, "I made it."
Before you know it, you will be planning your next strand — new colors, new textures, new combinations of two very different clays.
The bead tray on your table will grow, and so will your quiet confidence. That is the real gift of this craft: it teaches you, one small sphere at a time, that your hands can make beautiful things.