Introduction
There is a particular kind of peace that comes from weaving. The loom ticks and taps, the yarn slides through your fingers, and row by row a blank space fills with color and texture. It is slow, deliberate, and deeply satisfying — the perfect antidote to a busy week.
If you have admired the woven wall hangings that fill craft fairs and home decor shops, you might assume they take years of practice.
They do not. A simple frame loom, a few skeins of yarn, and one patient afternoon are all you need to make a wall hanging you will be proud to hang above your sofa.
In this guide, we will weave a small wall hanging from start to finish: warping the loom, learning the plain weave, adding a little texture, and finishing the edges so it hangs beautifully.
By the last row, you will understand why weaving has captivated humans for thousands of years — and why it is making a well-deserved comeback in modern homes.
A Weave as Old as Time
Weaving is one of the oldest crafts in human history. Fragments of woven cloth dating back over twelve thousand years have been found in the Middle East, made long before the wheel or written language.
The earliest looms were simple frames of wood and stone, and the basic principle — two sets of threads crossing at right angles — has not changed since.
Every culture developed its own weaving traditions. Ancient Egyptians wove linen so fine it was used as currency.
Andean weavers created intricate geometric patterns that carried meaning and memory. Scandinavian weavers turned wool into warm, durable textiles for harsh winters.
The loom was, for most of human history, as essential as the hearth.
Wall hangings have a more recent story. In the 1960s and 1970s, handwoven fiber art became a hallmark of bohemian interior design — those iconic textured hangings with fringe and natural wool that decorated living rooms across America and Europe.
After a few quiet decades, the trend has returned with fresh energy. Modern weavers combine the old techniques with contemporary colors and minimal shapes, and the results are stunning.
When you weave, you are continuing that long tradition. Your loom may be a simple wooden frame from a craft store, but the motion of your hands is the same motion used by weavers for twelve thousand years.
How a Loom Works
Before we begin, let us learn the two words that explain all of weaving: warp and weft.
The warp threads are the vertical ones, stretched tightly from the top of the loom to the bottom.
They are the skeleton of your weaving — they stay still and provide the structure.
The weft threads are the horizontal ones, woven over and under the warp. They are the flesh of your weaving — they create the pattern, color, and texture.
That is the whole secret. Weaving is simply passing the weft over and under the warp, row after row, in whatever pattern you choose. Once you understand warp and weft, you understand every woven object ever made, from a silk scarf to a Persian rug.
A frame loom holds the warp threads in place with notches along its top and bottom bars.
The simplest looms have no moving parts at all — you weave by hand with a needle.
For a first wall hanging, this is perfect. No complex mechanisms, no confusing terminology, just you, the yarn, and the rhythm.
Choosing Your First Loom
You have three good options for a first loom, and all of them will produce a lovely wall hanging.
- A lap loom or frame loom. These wooden looms come in sizes from eight inches to twenty-four inches wide, with notches along the top and bottom. A twelve-inch loom is ideal for a first project — big enough to feel substantial, small enough to finish in an afternoon. They cost between fifteen and thirty dollars.
- A DIY cardboard loom. Cut notches into the top and bottom edges of a piece of stiff cardboard, and you have a perfectly functional loom. It is free, surprisingly sturdy for small projects, and a wonderful way to test whether you enjoy weaving before buying anything.
- A branch loom. Find a sturdy forked branch or a simple wooden picture frame, wrap the warp around it, and weave. This rustic approach makes especially charming, organic-looking wall art.
Whichever you choose, the technique is identical. Start with a lap loom if you can — the smooth notches make warping easier — but do not let a tight budget stop you. A cardboard loom and a ball of yarn from the thrift store are enough to begin.
Yarn and Supplies
The beauty of weaving is that you can use almost any yarn, and you probably already own some. Here is what to gather:
- Warp yarn. Cotton or cotton-blend yarn in a light, neutral color works best. It needs to be strong and slightly smooth, since it will take the tension of the loom. Worsted weight cotton like kitchen cotton is ideal.
- Weft yarn. This is where the fun happens. Worsted or bulky weight wool and acrylic yarns are easiest for beginners — they cover the warp quickly and forgivingly. Choose two or three colors you love, plus one textured yarn like boucle or mohair for interest.
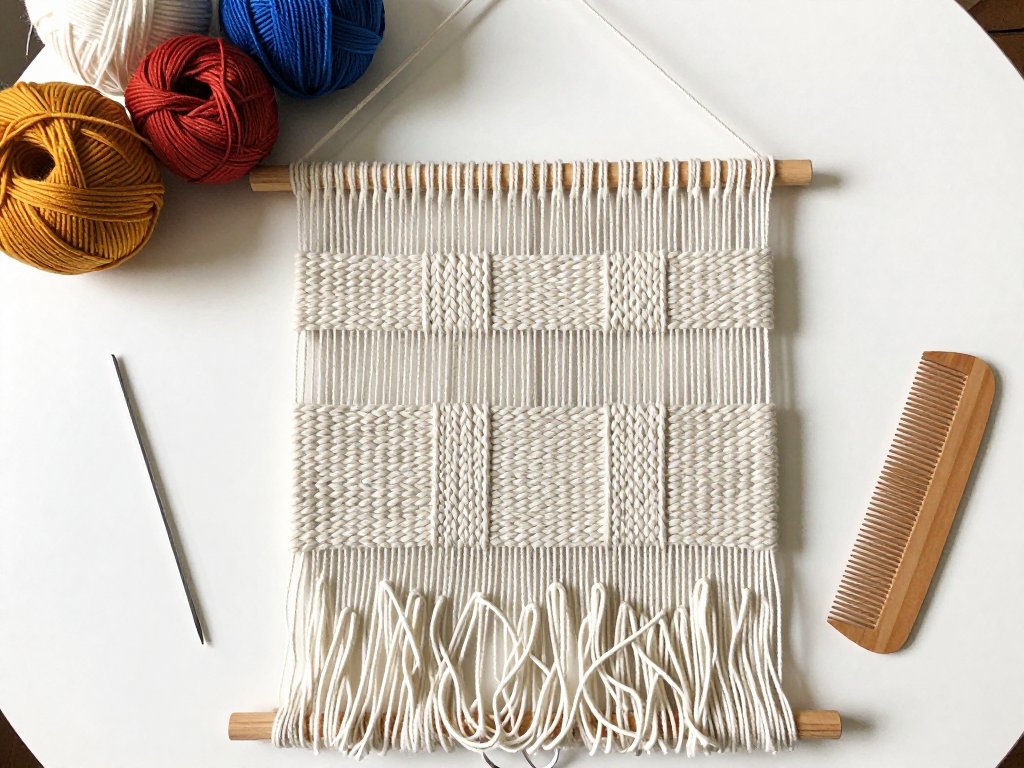
- A tapestry needle. A large-eyed, blunt-tipped needle for weaving the weft.
- A weaving comb or fork. To press each row of weft down snugly against the previous one. A wide-toothed comb from your bathroom works in a pinch.
- Scissors and a dowel or wooden stick for hanging your finished piece.
You do not need a dedicated weaving kit. Raid your yarn stash, or pick up a few skeins on sale. A single wall hanging uses surprisingly little yarn — often less than one skein per color.
Warping the Loom
Warping is the most important step, and the easiest to get wrong. Take your time here; a patient warp makes for a happy weave.
Start at the top left notch. Tie your warp yarn to the loom frame just below the notch, then bring the yarn up over the top notch and straight down to the corresponding bottom notch.
Wrap it around the bottom bar and back up to the next top notch. Continue in this zigzag until you have filled the width of your loom with evenly spaced warp threads.
How many warp threads? Aim for one warp thread per notch, or slightly fewer for a chunky project.
The tension should be firm and even — like a guitar string, not a rubber band.
If some threads are looser than others, adjust them before you start weaving; fixing tension later is frustrating.
When you reach the far side, tie off the warp yarn securely. Then run your hand across the warp threads and give them a gentle pluck. Even, musical tension means you are ready to weave. Loose, floppy threads mean re-tension now.
Your First Rows: Plain Weave
Now for the satisfying part. Thread your tapestry needle with your first weft color and tie a small loop at the end to anchor it to the leftmost warp thread, just above the bottom bar.
Weave the needle over the first warp thread, under the second, over the third, under the fourth — all the way across.
Pull the yarn through, leaving a tail, and then weave back in the opposite direction, this time going under the threads you went over before.
This alternation is called plain weave, or tabby weave, and it is the foundation of all weaving.
After each row, use your comb to press the weft down firmly against the previous row. The combing matters more than you might think — it creates the crisp, even fabric that makes woven pieces look professional rather than loose and messy.
Do not pull the weft too tight as you weave, or the sides of your weaving will pinch inward like an hourglass.
Aim for a gentle, relaxed pull, and let the comb do the tightening. If you notice the edges drawing in, loosen up — this is the most common beginner mistake, and it is easily fixed once you are aware of it.
Weave several inches of plain weave in your first color. Watch how the little striped fabric grows from the bottom of your loom. This is the moment most weavers fall in love.
Adding Texture: Fringe and Rya Knots
A wall hanging becomes truly special when you add texture. The easiest and most striking texture is fringe — and you can create it while you weave.
Cut several pieces of yarn, each about four inches long. Fold one piece in half, place the loop over two adjacent warp threads, and pull the ends through the loop. Pull snug. Congratulations — you have made a rya knot, the same knot used in Scandinavian rya rugs for centuries.
Work a row of rya knots across the width of your weaving, alternating colors for a playful fringe. After the knot row, weave two or three rows of plain weave to lock the knots in place. The fringe will stick out below them like a little skirt of yarn.
You can also add texture with looped stitches: thread your needle, come up through the weaving, make a loose loop with your finger, and stitch it down a few warp threads over.
Rows of loops create a soft, dimensional surface that catches the light beautifully. Roving — unspun wool — woven into a row creates a fluffy cloud effect that is very trendy right now.
Do not be shy with texture. A wall hanging with a mix of plain weave, fringe, and loops looks rich and handmade in the best way.
Weaving Shapes: Triangles and Arches
Once you have mastered plain rows, you can weave simple shapes that give your hanging a modern, intentional design.
To weave a triangle, start with a short row of weft in the center of your weaving, then on each following row add one warp thread on each side, working outward until the triangle reaches its full width.
Then reverse the process, reducing by one warp thread per side, to close the point.
Weave a couple of plain rows between shapes to separate them.
Arches work the same way but with a gentler curve — increase and decrease by half-widths so the shape rounds off at the top. Practicing with one triangle and one arch in contrasting colors gives your wall hanging a graphic, gallery-worthy look.
There is a wonderful rhythm to shaping. You count, you feel the edges with your fingers, and slowly a clean geometric form emerges from the yarn. If it comes out a little wonky, that is fine — organic imperfections are part of the handmade aesthetic.
Finishing: Off the Loom and on the Wall
When your weaving reaches the top of your loom — or simply when you love how it looks — it is time to finish.
First, weave a few final rows of plain weave to secure everything. Then cut the warp threads at the top of the loom, one by one, removing your weaving from the frame. You will be left with a fringe of warp tails at the top and bottom.
At the bottom, tie the warp threads together in pairs, two or three knots down from the weaving, then trim the tails to an even length.
This bottom fringe is a classic wall hanging detail. At the top, tie the warp pairs over a wooden dowel or stick, then tie the ends together in a loop or leave them long for a rustic look.
Finally, trim any stray weft tails and give the whole piece a gentle steam or a light mist of water, patting it flat to relax the yarn.
Hang it on the wall, step back, and admire your work. You made that. From a pile of yarn and a wooden frame, you made something beautiful.
Troubleshooting and Common Mistakes
Every weaver's first piece has a few wobbles. Here is how to handle the usual suspects.
"The sides pull in like an hourglass." You are pulling the weft too tight. Relax your tension and let the comb create the firmness. If the pinch is already there, weave a few loose rows and gently stretch the fabric sideways with your hands — it usually recovers.
"Gaps show between my warp threads." Your weft is not being combed down firmly enough, or your warp is too spread out. Comb each row with deliberate pressure, and consider adding a few extra warp threads next time.
"My edges are wavy." This is the opposite problem — the weft is too loose. Tug gently at the weft after each row, then comb. You are aiming for a happy middle: snug enough to be even, loose enough not to pinch.
"The weaving slides on the warp." Your warp tension was uneven. This is why we fuss over warping. If it slides, weave a few anchoring rows at the bottom and use a thicker weft that grips the warp better.
"I ran out of yarn mid-row." Join a new piece by overlapping the old and new tails inside the row for a few warp threads, then weave on. Trim the tails on the back when finished. The join will be invisible.
Above all, remember that the first piece is about learning, not perfection. Keep it. It will be your favorite reminder of where you began.
Conclusion: Weave Something Beautiful
You have joined one of the oldest human conversations. From ancient Egyptian linen to a cozy modern living room, the loom connects makers across every era — and now you are part of that story.
Your first wall hanging is done, but the possibilities are just beginning. Weave a matching piece in different colors.
Try a larger loom and a more complex pattern. Experiment with natural wool, cotton rope, or even strips of old fabric for a zero-waste project.
Each piece teaches your hands something new.
Hang your weaving somewhere you will see it every day. Let it remind you that you can make beautiful things with your own hands, one quiet row at a time — and that the slow, ancient craft of weaving is always there when you need it.