Introduction
I have a confession to make. I did not start drawing mushrooms because I was interested in botany. I started because of a rainy afternoon, a toddler with a red raincoat, and a cluster of tiny mushrooms growing at the base of an old oak tree in our backyard.
My daughter crouched down and whispered, "They're fairy umbrellas." And she was absolutely right. The more I looked, the more I saw: little caps like lanterns, stems with delicate skirts, gills that fanned out like the ribs of a tiny parasol.
I went inside, found my sketchbook, and tried to capture just one of them.
That first sketch was terrible. The cap looked like a lumpy hat, and the stem wobbled like it had had a long day.
But I was hooked. Mushrooms are the perfect subject for a beginner artist. They sit still.
They come in every shape imaginable. And they are having a genuine cultural moment, with mushroomcore decorating homes and inspiring crafters everywhere.
This guide is for anyone who has ever wanted to draw a mushroom and felt a little intimidated. We will cover simple shapes, ink techniques, and soft watercolor washes, all at a pace that fits into nap times and quiet evenings.
Why Mushrooms Are the Perfect First Subject
If you are new to sketching, or returning to it after a long break, mushrooms are almost unfairly kind to beginners.
For one thing, they are forgiving. A mushroom is not a face, where a misplaced eye ruins everything. A mushroom with a slightly crooked cap just looks like a mushroom with character. There is no wrong way for a mushroom to be.
They are also wonderfully varied. You could draw a different mushroom every day for a year and never repeat a shape. Tall and elegant, squat and chubby, flat-topped, ruffled, spiky, smooth. Whatever your hand feels like drawing, a mushroom somewhere matches it.
And they connect us to the natural world. Drawing something forces you to really look at it, and looking at mushrooms is a doorway into noticing the small, quiet magic happening under the trees. When you sketch a mushroom, you are not just practicing art. You are practicing attention.
What You Will Need
Here is the good news: mushroom illustration does not require a fancy kit. You can start with supplies you probably already own.
- A sketchbook. Any sketchbook with smooth, sturdy paper will do. Watercolor paper or mixed media paper is ideal if you plan to paint over your ink.
- A pencil. A regular HB pencil for the first light sketch. Nothing fancy.
- Fine liner pens. A set with a couple of nib sizes, like 0.1, 0.3, and 0.5, gives you lovely line variety. Waterproof ink is a bonus if you want to paint over it.
- A small watercolor set. A basic pan set with reds, yellows, browns, and greens will cover almost every mushroom you meet. Add a tube of white gouache later if you want highlights.
- A couple of brushes. A small round brush for details and a slightly larger one for washes. A water brush pen is also lovely for sketching on the go.
- A reference. A photo on your phone, a field guide from the library, or, best of all, a real mushroom you found on a walk. You do not need to know its name to draw it.
That is the entire kit. If you have a pencil and a piece of paper, you can start today.
Learning to See a Mushroom
Before you put pen to paper, spend a few minutes really looking at your mushroom. This is the secret behind every good sketch, and it takes practice, but it is deeply satisfying.
Start with the big shapes. Ask yourself: is the cap round like a dome, flat like a plate, or bell-shaped?
Is the stem straight, curving, or swollen at the base? Most mushrooms can be reduced to a circle or oval on top of a rectangle or curve.
Once you see those simple shapes, the drawing stops being scary.
Now look at the details. Does the cap have a skirt-like ring around the stem? Are there gills underneath, or tiny pores? Is the surface smooth, scaly, or striated? Notice the direction the gills run, from the center of the cap down to the edge.
Finally, notice the light. Where is the highlight on the cap? Which side of the stem is in shadow? Mushrooms are wonderfully three-dimensional, and a little shading makes them pop right off the page.
This looking, by the way, is the part of the craft that stays with you. Once you start seeing mushrooms as collections of shapes and shadows, you will never walk past a mushroom patch the same way again.
Step One: The Gentle Pencil Sketch
Start with a light pencil sketch, pressing softly so you can erase and adjust. This is your chance to make all the mistakes before the permanent ink goes down.
Draw the stem first, a simple line or curve. Then place the cap on top, using the shape you identified earlier.
A dome for a button mushroom, a wide arc for a flat cap, a bell for an elegant little mycena.
Do not worry about details yet. Just get the two main shapes sitting comfortably together.
Check the proportions. Is the stem too thick for the cap? Mushroom stems are often more slender than beginners expect. Is the cap balanced on top, or leaning like it might topple? A tiny bit of lean is charming, but a lot looks accidental.
Once the basic shapes feel right, add the little landmarks: the ring on the stem, the curve where the gills meet the cap, the hint of the base. Erase and adjust freely. This is the cheapest stage of the drawing, so make it messy now, not later.
When you are happy with the pencil sketch, give yourself a moment to admire it. Then get ready for the fun part.
Step Two: Confident Ink Lines
There is something a little thrilling about inking over a pencil sketch. It is the moment the drawing decides to become permanent, and if you are nervous, that is completely normal.
Take a deep breath and follow your pencil lines with your fine liner, using a slow, steady hand.
Rest your wrist on the page if that helps. Let your lines wobble a little if they want to; wobbly lines have more personality than stiff, perfect ones, and they suit the organic feel of mushrooms beautifully.
Use a thicker pen, like a 0.5, for the outer contour of the mushroom, so it reads clearly against the background. Switch to a thinner pen, like a 0.1 or 0.3, for the interior details: the gill lines, the texture on the cap, the little ring around the stem.
Do not outline every single gill. A common beginner instinct is to draw every line you see, but the eye reads suggestion better than clutter.
Draw every third or fourth gill fully, and hint at the ones between. Your brain fills in the rest, and the result looks far more natural.
When the ink is dry, gently erase your pencil lines. You should be holding a clean, confident ink drawing of a mushroom, and it deserves a happy dance.
Adding Texture with Hatching
Texture is what turns a flat mushroom drawing into something you could almost reach out and touch. The easiest way to add it is with hatching: a series of parallel lines that create tone and shadow.
For the underside of the cap, where the gills sit in shadow, use fine lines running outward from the center. A few layers of cross-hatching, lines at a different angle, will deepen the shadow without needing any paint at all.
For the stem, hatch along its curve, following the direction the light wraps around it. Keep the highlight side bare and build up lines on the shadow side. This simple trick gives the stem a lovely roundness.
Stippling, or tiny dots, is another wonderful texture for mushroom caps, especially the speckled look of an amanita. Thousands of tiny dots sounds tedious, but it is strangely meditative, and the result is worth every minute.
Remember that less is usually more. You can always add more lines, but erasing ink is impossible. Build your hatching up slowly, in layers, and stop a little earlier than you think you should.
Step Three: Soft Watercolor Washes
Now for the part that makes mushroom illustrations look like they belong in a storybook: watercolor. The good news is that mushrooms forgive a loose wash better than almost any other subject.
Start with the cap. Mix a soft, watery wash, and paint it in gentle strokes, leaving a little white highlight where the light hits.
Do not fight the water. Let it pool and bloom a little. Mushroom caps are naturally mottled and uneven, so any happy accident works in your favor.
Keep the wash light at first. Watercolor is easier to deepen than to lighten, so build your color in thin layers, letting each one dry before the next. Two or three pale washes will give you a richer, more luminous color than one heavy coat.
For the gills, use a slightly darker, thinner wash, and let it follow the direction of your ink lines. For the stem, a pale wash of the same color, slightly grayed, with a touch more pigment on the shadow side.
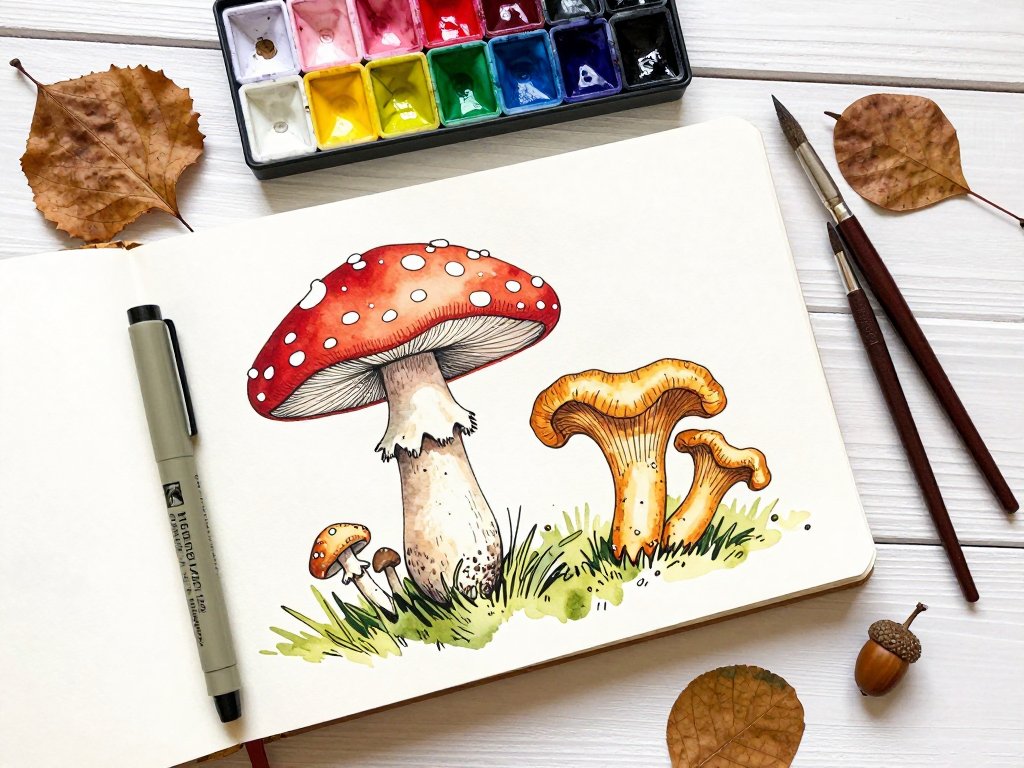
The classic red fly agaric takes a warm red with a hint of orange, softened at the edges.
A brown cap takes a mix of burnt sienna and a touch of blue for depth.
And if you want a whimsical fairy-tale mushroom, do not be afraid to invent the colors entirely.
Nobody is grading your mushroom on species accuracy.
Composition: More Than One Mushroom
Single mushrooms are lovely, but the magic really happens when you arrange several together. A cluster of little mushrooms at different heights tells a story. It looks like a moment from a forest floor, not just a botanical specimen.
Try sketching a tall mushroom in the foreground, a pair of smaller ones tucked behind it, and a tiny baby mushroom peeking from the corner. Overlap them slightly, and place them at different heights so the eye wanders through the group.
You can also draw a mushroom from two angles on the same page: a side view showing the full stem and gills, and a top view showing the cap's circular pattern. This is a classic botanical illustration style, and it is a lovely way to study your subject more deeply.
Add a little ground beneath your mushrooms: a few blades of grass, some mossy bumps, a fallen leaf. These small touches anchor your mushrooms in a world and make the whole drawing feel alive.
Species to Practice With
If you are not sure what to draw first, here are a few friendly characters to start with. Each teaches you something different.
- The fly agaric. The classic red cap with white spots, straight out of a fairy tale. Great for practicing bold color and those wonderful speckles.
- The chanterelle. A golden trumpet with wavy edges and ridges instead of gills. Wonderful for practicing organic, flowing lines.
- The porcini. A stout brown mushroom with a plump cap and a thick stem. Perfect for practicing roundness and shading.
- The fairy bonnet. A tiny, delicate bell-shaped mushroom that grows in clusters. Lovely for practicing fine lines and composition.
- The puffball. A round, smooth sphere with no stem to speak of. The easiest possible shape, ideal for a first attempt at shading.
Each of these teaches a different lesson, and together they build every skill you need. Plus, they are simply delightful to look at.
Making It a Habit
Like any craft, mushroom illustration rewards a little regularity. You do not need to sketch every day, but a small, repeatable habit will do wonders for your confidence.
Try a weekly mushroom sketch date: ten minutes with your sketchbook and one reference, nothing more. Keep a folder of mushroom photos on your phone for days when you cannot get outside. And when you do get outside, bring your sketchbook along.
You might also keep a little visual journal of the mushrooms you spot on walks, with quick sketches and notes about where you found each one. Over a season, this journal becomes a treasure: a record of the small wildness that surrounds you, drawn by your own hand.
If the mushroomcore trend has you enchanted, you will love seeing how others bring fungi into their homes. Take a look at our roundup of mushroomcore decor ideas for a burst of inspiration between sketching sessions.
When It Does Not Look Right
Let me reassure you about the bad sketches, because there will be some, and they are a necessary part of the process.
If your cap looks lopsided, embrace it. Lopsided mushrooms exist, and yours is now one of them. If your stem looks too thin, thicken it next time; every drawing teaches your hand something the previous one did not.
If your watercolor bled all over your nice ink lines, that is a rite of passage. Use waterproof ink next time, and let the paint do what it does. A little bleed often looks like atmosphere rather than error.
And if you draw a mushroom that looks nothing like any mushroom on earth, congratulations. You have invented a new species. That is not a failure. That is what artists do.
Final Thoughts
That first rainy afternoon, I sketched one wobbly mushroom while my daughter watched, and she said it looked like a fairy umbrella. She was right about that, too.
Since then, mushrooms have become my favorite thing to sketch. They are patient, forgiving, and endlessly varied.
They have taught me to slow down, to look closely, and to let my lines be a little imperfect.
They have given me a hundred quiet hours of joy, and they are waiting to do the same for you.
So pick up a pencil. Find a mushroom, real or remembered. And give yourself permission to draw a wobbly little cap on a curving stem. I promise, the second one will be better, and the tenth one will make you smile.
Happy sketching, friend. The fairies are waiting.
