Introduction
Paper mache — or papier-mâché, French for "chewed paper" — is one of the oldest and most forgiving crafts in the world.
For centuries, people have pressed soaked paper and paste into masks, piñatas, decorative boxes, and even furniture.
Carnival masks in Venice, piñatas in Mexico, theatrical props in Europe: all of them began with little more than scraps of paper and a bowl of paste.
The idea is beautifully simple. You cover a form with paper strips and paste, let it dry rock-hard, then paint and decorate the shape you have built. What emerges feels like a light, sturdy little sculpture — made from almost nothing at all.
There are two main methods. The paste method layers newspaper strips dipped in paste over a base, building the surface up coat by coat.
The paper pulp method blends paper into a soft, clay-like mash you can pinch and shape with your hands.
Both are beginner-friendly, and this article covers them both, along with everything else you need: supplies, recipes, techniques, and five projects you can complete over a weekend.
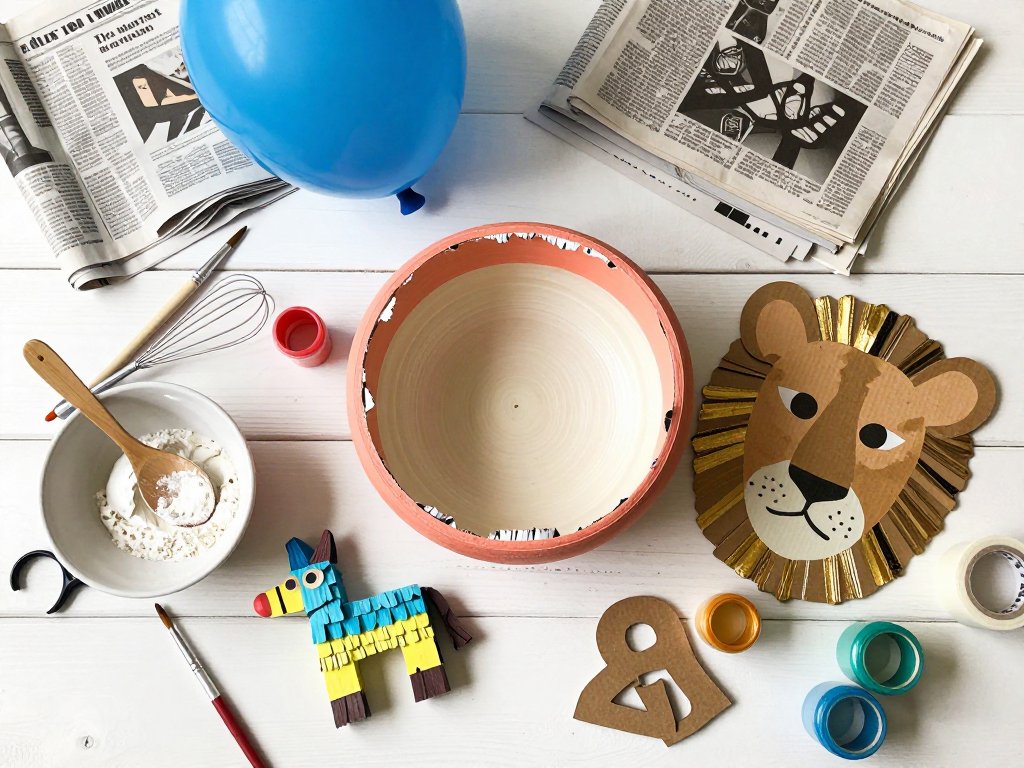
What You'll Need: A Simple Supply List
Good news first: you probably own most of this already. Paper mache is famously low-cost, which is part of its charm. Here is exactly what to gather before you start.
- Newspaper — the plain pages work best. Glossy inserts and color ads resist paste and dry poorly.
- White all-purpose flour and water — for the classic paste, or white school glue if you prefer the glue method.
- A mixing bowl and a whisk — for blending paste until smooth.
- Salt — a spoonful or two in the paste keeps mold away while your piece dries.
- Scissors — for trimming strips and cutting armature pieces.
- Masking tape — to hold armatures together while you work.
- Balloons, cardboard tubes, and wire — the bases your sculpture will grow on.
- Acrylic paint and brushes — for color.
- Mod Podge or clear varnish — to seal the finished piece.
- Fine-grit sandpaper, around 220 grit — for smoothing dried layers.
- Old newspaper or a plastic tablecloth — to protect your work surface.
- An apron or an old T-shirt — the paste will find you.
Set everything out on the table before you begin. A tidy starting point makes the whole project calmer and easier to enjoy.
The Classic Paste Recipe (and Two Alternatives)
The traditional paste is nothing more than flour and water, mixed at about 1 part flour to 2 parts water. It is cheap, safe, and washes off with soap and water — everything you want when crafting with children.
Here is the recipe:
- Measure 1 cup of white all-purpose flour into a mixing bowl.
- Add 2 cups of cool water, whisking as you pour.
- Whisk until the mixture is smooth, about the consistency of thin pancake batter. A few lumps at first are fine — keep whisking.
- Stir in 1 to 2 tablespoons of salt. It slows mold while the paper dries, which matters if you live somewhere damp.
If you want an even smoother paste, cook it. Heat the mixture in a saucepan over medium heat, stirring constantly, until it thickens and turns slightly translucent.
Let it cool completely before using. Cooked paste has almost no lumps and a wonderfully silky feel, though it does take a few extra minutes.
The glue-and-water alternative is just as popular: mix 1 part white school glue with 1 part water.
For a sturdier shell, use 2 parts glue to 1 part water. Glue paste dries clear, bonds a little stronger than flour, and contains no food ingredients — a thoughtful choice if anyone in your house has a wheat allergy.
Store leftover paste in a covered container in the refrigerator and use it within a few days. When it starts to smell sour, throw it out and mix a fresh batch. It costs pennies, so there is no reason to push it.
Paper, Strips, and Armatures: The Building Blocks
Your choice of paper shapes the finished surface. Newspaper is the classic: thin, absorbent, and free.
Brown paper bags make a stronger, slightly textured shell — great for pieces that need to hold up to handling.
Tissue paper is lovely for the final layer, because it smooths over details and takes paint beautifully.
Save paper towels for cleanup; they soak up too much paste and turn to mush.
Always tear your strips rather than cutting them. Torn edges are thin and feathered, so they blend invisibly into the layer beneath.
Cut edges leave visible ridges that show through paint. Aim for strips about 1 to 2 inches wide and 4 to 6 inches long — small enough to shape around curves, large enough to cover ground quickly.
Your armature is the skeleton your paper clings to, and beginners have several easy options:
- Balloons for round forms. Blow one up to the size you want — pinch the sides gently to make an oval. When the paper is dry, pop the balloon and pull it out through an opening.
- Crumpled newspaper taped into shapes for lumpy, organic forms like rocks, fruit, or animal bodies. Crumple, then wrap with masking tape to hold the shape.
- Cardboard tubes for cylinders — candle holders, vases, and towers. Tape several tubes together to build structures.
- Wire for thin, bendable parts like arms, legs, or antennae. Bend it into shape and wrap the joints with masking tape so the paper has something to grip.
- Chicken wire for large pieces bigger than a shoebox. It gives big sculptures a strong, light frame — but wear garden gloves and use pliers, because the cut edges are sharp.
Whatever you choose, tape the armature firmly so it does not shift while you work. The paper does the decorating; the armature does the holding.
Step by Step: From Strips to Sculpture
Follow these steps in order, and you will get a solid, even result every time.
- Prep your work area. Cover the table with newspaper or a plastic tablecloth. Put on your apron. Fill the paste bowl and lay out your strips within easy reach.
- Tear your strips. Tear newspaper into strips about 1 to 2 inches wide and 4 to 6 inches long. You will use more than you think — tear a generous pile before you start.
- Dip and wipe. Hold a strip at both ends, dip it into the paste, then pull it through your pinched fingers to wipe off the excess. The strip should be wet but not dripping. Too much paste is the most common beginner mistake, and it leads to soggy, slow-drying pieces.
- Lay it on. Smooth the strip onto your form, pressing out air bubbles with your fingertips. Overlap each strip with the last by about half its width.
- Build in layers. Aim for 3 to 5 layers on most projects — three for bowls and masks you will handle gently, five for piñatas that need to survive a beating. Change direction with each layer: horizontal, then vertical, then diagonal. Crossed layers make the shell dramatically stronger.
- Let it dry. Set the piece somewhere warm and dry — a drying rack or a sunny windowsill works well — and leave it completely alone for a full 24 hours. Paper mache cannot be rushed. A surface that feels dry can still be damp deep inside.
- Repeat. When a layer is fully dry, add more layers or move on to finishing.
Drying is the step beginners underestimate most. Plan your project across two days: build the layers one day, and paint the next. Some families spread a big project across a whole week, adding a layer each evening after dinner. That rhythm works beautifully and keeps the mess contained.
Finishing Touches: Sanding, Painting, and Sealing
When your piece is completely dry — not just dry on top, but dry all the way through — it is time to make it beautiful.
Sanding. Bumps, ridges, and stray fibers are completely normal. Rub the surface lightly with fine-grit sandpaper, around 220 grit, until it feels smooth to the touch.
Sand gently; you are smoothing, not grinding. If you find a deep dip, add one more layer of paper to that spot, let it dry, and sand again.
Painting. Acrylic paint is the standard choice: water-based, quick-drying, and available in every color imaginable.
Apply two thin coats rather than one thick one, and let the first coat dry before the second.
Light colors may need a third coat. For an especially smooth finish, brush on a layer of gesso first — it primes the surface and covers the newsprint so your colors stay true.
Sealing. Finish the piece with Mod Podge — matte or glossy, whichever you prefer — or a clear acrylic varnish.
Two thin coats protect the paint from moisture and give the piece a polished, professional look.
Sealing matters most for bowls and anything that will be handled often or wiped clean.
Five Beginner Projects
Ready to make something? Here are five projects that use the techniques above, from easiest to most ambitious. Each one can be completed over a weekend, with drying time in between.
1. A Paper Mache Bowl
Blow up a balloon to the size you want your bowl to be — a dinner-plate-sized bowl starts with a balloon about 9 inches across.
Set the balloon in a small bowl or mug so it sits still, then cover the top half with paste strips, stopping right at the widest point.
Build 4 to 5 layers, let it dry completely, then pop the balloon and lift it out through the opening.
Trim the rim with scissors for a neat edge, sand the inside, and paint. This is the perfect first project: quick, forgiving, and genuinely useful once it is finished.
2. Animal Masks
Blow up a balloon and cover the front half with 3 to 4 layers of newspaper.
Once dry, pop the balloon, cut the paper shell in half, and trim one half into a face shape.
Cut the eye holes while the paper is still easy to work — a craft knife or strong scissors works, and an adult should handle this step.
Add ears, a snout, or horns with crumpled newspaper taped on and covered with a final layer of strips.
Paint your mask like a lion, a bear, a cat, or any animal your child loves.
A ribbon tied through holes at the sides lets the mask be worn.
3. A Classic Piñata
Blow up a large balloon and build up 4 to 5 strong layers, finishing with a layer of brown paper bag strips for extra toughness.
Dry it fully — this is the one project where rushing the drying really shows.
Pop the balloon, cut a small flap near the top, fill the shell with wrapped treats, and tape the flap closed.
Cover the outside with colorful tissue paper cut into fringe, and hang it with a loop of string taped inside the top before the last layers go on.
Making a piñata is a two-weekend project with small children, but the payoff at the party is worth every minute.
4. Letters and Numbers for a Kids' Room
Buy cardboard letters at a craft store, or cut your own from a sturdy cardboard box.
Tape over the cut edges with masking tape so they are smooth, then cover the whole letter with 3 layers of newspaper strips.
Dry, sand lightly, and paint in bright, cheerful colors that match the room. These make lovely name initials for a nursery door, or spell out a child's whole name across a wall.
5. Decorative Wall Art
Paper mache is wonderful for sculptural wall pieces. Crumple newspaper into abstract shapes — suns, flowers, waves — tape them to a cardboard backing, and cover everything with strips.
Once dry, paint with acrylics in a palette that suits your living room, and seal with matte Mod Podge.
Hang the piece with a picture hanger attached to the back of the cardboard. You will have original art for a fraction of gallery prices, made by your own hands.
Common Mistakes and How to Fix Them
Every paper mache beginner makes the same handful of mistakes. Knowing them in advance saves you a soggy, flimsy, or moldy project.
- Too much paste. Strips that drip with paste dry slowly, warp, and feel soggy. Fix it at the source: always pull each strip through your pinched fingers before laying it down.
- Too few layers. One or two layers make a flimsy shell that bends and caves in. Stick to 3 to 5 layers, and cross the directions as you go.
- Not letting it dry fully. Sealing damp paper traps moisture, which leads to mold, a musty smell, and collapse. Give every layer a full 24 hours.
- Strips too wide. Wide strips wrinkle and bubble around curves and leave gaps. Keep strips between 1 and 2 inches wide.
- Mold. A few dark spots can appear if your paste had no salt or the room was damp. Prevention is the cure: salt in the paste, and drying in a warm, ventilated spot. If mold appears, let the piece go and start again — it costs almost nothing to redo.
- Bumps and lumps. Sand them smooth with fine-grit paper, or add a thin final layer of tissue paper and let it dry.
- Cracking. Cracks usually mean the shell is too thin or was handled roughly while damp. Add more layers to strengthen it, and let each layer dry slowly in a warm room.
Remember the golden rule of paper mache: when in doubt, add another layer and wait another day. The craft rewards patience more than skill.
Crafting With Kids: Tips for Family Projects
Paper mache is one of the best family crafts there is. The materials cost almost nothing, the mess washes off with soap and water, and the results are something children are genuinely proud of.
A three-year-old can tear strips; a five-year-old can dip and lay them; an eight-year-old can manage the whole process with light supervision.
A few tips keep it calm:
- Cover the floor as well as the table. A plastic painter's drop cloth or an old sheet catches the splashes that miss the table.
- Let the children choose the project and the colors. Ownership makes them patient through the drying wait.
- Make drying part of the fun. Park the piece on a shelf where everyone can peek at it each morning, and celebrate when it finally feels hard.
- Keep the paste bowl small and refill it often. A big bowl of paste tipped over is a sad moment; a small one is a minor splash.
- Use the glue-and-water paste if anyone in the family has a wheat allergy, or use gluten-free flour in the classic recipe.
- Adults should handle cutting, popping inflated balloons, and any hot or sharp tools.
Plan your first project for a weekend when nobody is in a hurry. Make the paste together, tear the strips together, and let the drying time become part of the routine.
The finished piece — lopsided, painted with love, and hung where everyone can see it — will be worth far more than the few dollars it cost to make.
Paper mache is a slow craft in a fast world, and that is exactly its gift. It asks for simple materials, a little patience, and nothing more. Start with a bowl, keep your hands busy, and see where the next weekend takes you.