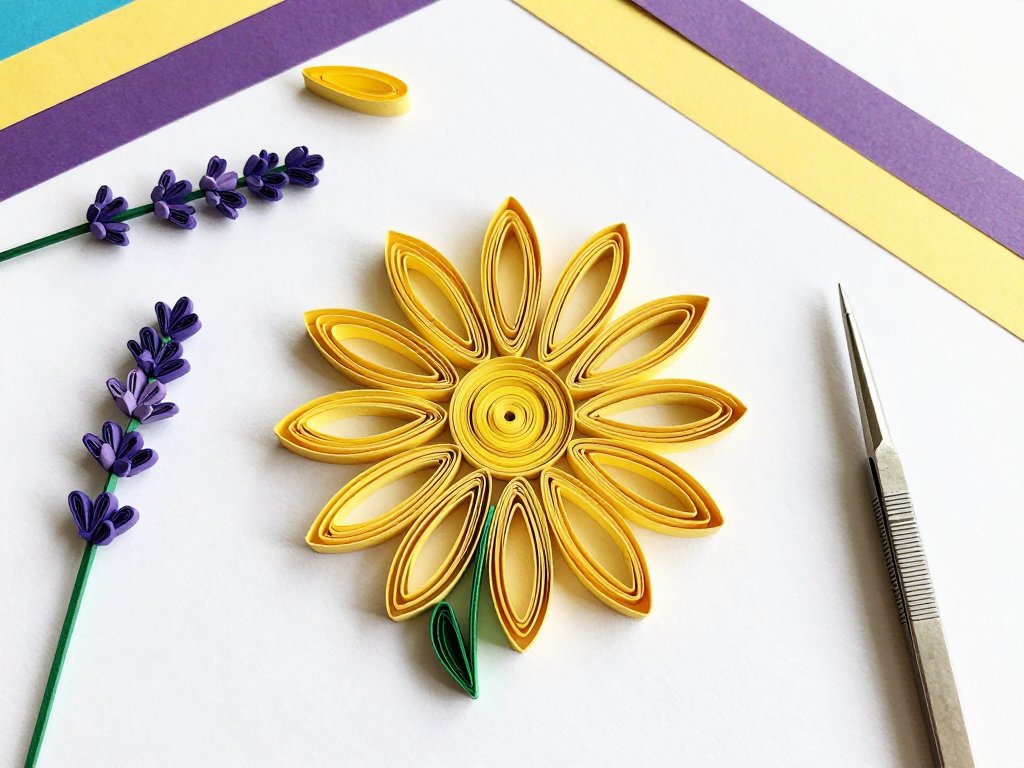
Introduction
You have probably seen paper quilling before without knowing what it was called. Those delicate, tightly rolled strips of paper arranged into intricate floral designs — on greeting cards, wall art, or handmade jewelry — that is quilling.
And here is the good news: it is far easier to learn than it looks.
Paper quilling, also known as paper filigree, is the art of rolling, shaping, and gluing thin strips of paper to create decorative designs.
It originated during the Renaissance when nuns and monks would roll the gilded edges of old books to create religious ornaments.
Today, it has become a beloved craft for its meditative quality and stunning results.
What makes quilling especially appealing for summer is the vibrant color palette you can work with.
Bright yellows, coral pinks, sky blues, and fresh greens come alive when rolled into petals, leaves, and floral motifs.
The projects in this guide are designed for absolute beginners and can be completed in an afternoon with minimal supplies.
Essential Quilling Supplies
One of the best things about paper quilling is how few supplies you need to get started. Here is exactly what you need.
Quilling paper strips. These are precut strips of paper, typically 1/8 inch wide and available in hundreds of colors.
For summer floral projects, grab a pack with bright yellows, warm pinks, soft oranges, sky blues, and several shades of green for leaves and stems.
A standard pack of 100 assorted strips costs about five dollars and will last you through several projects.
Quilling tool. This is a small handheld tool with a split metal tip that grips the end of the paper strip so you can roll it easily.
A slotted quilling tool is the most common type for beginners and costs around four dollars.
You can also use a toothpick with a slit cut into the end, though the proper tool makes a noticeable difference in consistency.
White craft glue. A small bottle of PVA glue with a fine tip applicator is ideal. You want glue that dries clear and does not wrinkle the paper. Aleene's Tacky Glue or a basic crafting PVA work perfectly.
Tweezers. A pair of fine-tipped tweezers helps you place delicate rolled pieces precisely. This is optional for the first project but becomes essential as you work on more complex designs.
Circle sizing board or corkboard. A circle sizing board has graduated circles that let you create uniform rolls of the same size. A flat corkboard with pins is useful for holding shapes in place while the glue dries. For beginners, a simple piece of corrugated cardboard can do the job.
Ruler and scissors. A small ruler helps measure strip lengths, and sharp scissors are useful for trimming excess paper.
That is the complete list. Everything fits in a small pouch, and none of the tools cost more than a few dollars. You can find starter quilling kits online for around twelve dollars that include all the essentials.
Basic Quilling Shapes You Need to Know
Every quilled design, no matter how complex, is built from a handful of basic shapes. Once you master these five, you can create almost any floral pattern you can imagine.
Tight coil. Insert the end of a paper strip into the slot of your quilling tool.
Hold the paper taut with your other hand and rotate the tool to roll the strip tightly around itself.
When you reach the end, apply a small dot of glue to secure the loose end.
The result is a solid circle of rolled paper. Tight coils make excellent flower centers, dots, and decorative accents.
Loose coil. Roll the paper strip the same way you did for the tight coil, but before gluing the end, place the roll in a circle sizing board or simply let it relax in your fingers for a few seconds.
The coil will spring open slightly. Glue the end once it reaches the desired size.
Loose coils are the foundation for most petal shapes.
Teardrop. Start with a loose coil. Gently pinch one side of the circle between your thumb and forefinger to create a point.
The rounded opposite side stays full. This is your basic petal shape and appears in nearly every floral quilling project.
Vary the size by using longer or shorter paper strips.
Eye shape. Make a loose coil and pinch both sides simultaneously to create two points. The result resembles an eye or an elongated leaf. This shape is perfect for leaf accents and elongated petals.
Square or diamond. Make a loose coil and pinch it on four evenly spaced sides. With practice, you will create crisp, symmetrical shapes. Diamonds are beautiful as flower centers or decorative borders.
Practice each shape a few times before starting your first project. You will notice your fingers finding a rhythm after just a few repetitions. Do not worry if the first few are uneven — quilling is forgiving, and slight variations add handmade charm to your finished piece.
Project 1: Simple Daisy Card
This project is the perfect starting point for absolute beginners. You will create a cheerful daisy with six white petals around a yellow center, mounted on a blank greeting card.
Materials needed: White quilling strips (1/8 inch wide, cut to 6 inches long), yellow quilling strip (3 inches long), green quilling strips (4 inches long for leaves), blank greeting card or cardstock, glue, quilling tool.
Step 1: Make six white teardrop petals. Use 6-inch white strips for each petal. Roll each into a loose coil, let it relax to about half an inch in diameter, then pinch one side to form a teardrop.
Apply a tiny dot of glue to the loose end of each coil. Set them aside to dry completely.
Step 2: Make the flower center. Take the 3-inch yellow strip and roll it into a tight coil. Secure the end with glue. This will be the center of your daisy.
Step 3: Assemble the flower. Arrange the six white teardrop petals in a circle with the pointed ends facing outward and the rounded ends meeting in the center.
The petals should overlap slightly at the center. Apply a small dot of glue where each petal meets its neighbor.
Place the yellow tight coil in the center and press gently.
Step 4: Add leaves. Take a green strip and roll it into a loose coil. Pinch both sides to form an eye shape. Make two of these for your daisy. Attach them to opposite sides of the flower base.
Step 5: Mount the daisy. Apply glue to the back of the assembled flower and press it onto your greeting card. Repeat for each leaf. Allow the card to dry flat for thirty minutes.
This same technique can create flowers in any color. Try pink petals with a dark center for a cheerful summer bloom, or mix multiple colors in the same flower for a more whimsical look.
Project 2: Lavender Spray Wall Art
Lavender is a wonderful subject for quilling because its vertical shape and small individual blossoms translate beautifully into rolled paper. This piece makes lovely wall art for a kitchen or entryway.
Materials needed: Purple quilling strips in two shades (light and dark), green strips for stems and leaves, quilling tool, glue, 4x6 inch cardstock or canvas panel, tweezers (recommended).
Step 1: Prepare the lavender blossoms. Cut purple strips into 3-inch lengths. You will need about fifteen to twenty pieces total. Roll each into a tight coil. Do not let them relax — lavender blossoms are small and compact. You should have a mix of light and dark purple coils.
Step 2: Build the stem. Take a full-length green strip and fold it lengthwise to create a thin, rigid stem. Glue it vertically onto your cardstock or canvas panel, starting about one inch from the top and ending one inch from the bottom.
Step 3: Attach the blossoms. Starting at the top of the stem, glue the purple tight coils in a staggered pattern along both sides.
Each blossom should sit slightly above and to the side of the one below it, creating the characteristic lavender spike shape.
Use tweezers for precise placement. Alternate light and dark purple coils for a natural gradient.
Step 4: Add leaves. Roll green strips into loose coils and create elongated eye shapes. These should be longer and narrower than the eye shapes you made for the daisy leaves. Attach two or three leaves near the base of the stem.
Step 5: Second and third stems. Repeat the process to create two or three lavender stems total. Space them evenly across your canvas. A group of three stems arranged at slightly different heights creates the most natural composition.
This project takes about an hour and produces a sophisticated piece of art that looks far more complex than it is. The tight purple coils catch the light beautifully, giving the lavender a soft, textured appearance.
Project 3: Sunflower Wreath
A sunflower wreath is a statement piece that showcases your growing quilling skills. This project combines multiple techniques and makes a stunning gift for summer hostesses.
Materials needed: Yellow quilling strips (12-inch lengths for large petals), brown strips for the center, green strips for leaves, an 8-inch cardboard or foam wreath form, glue, quilling tool, tweezers.
Step 1: Make the sunflower petals. You will need about twenty-four petals total. Use 12-inch yellow strips for each.
Roll each into a loose coil slightly larger than your daisy petals. Pinch one side to form a teardrop, then gently squeeze the rounded end to create a slightly pointed petal shape.
Sunflower petals are wider in the middle and taper at both ends.
Step 2: Make the sunflower centers. Use brown strips. For each sunflower, you will need one large tight coil about an inch in diameter. Use three brown strips glued end to end to create the length needed for a center this size. Roll tightly and secure the end.
Step 3: Create the leaves. Roll green strips into loose coils and pinch both sides for eye shapes.
Make about ten leaves of varying sizes. You can also create leaf shapes using a technique called crimping, where you fold the paper strip back and forth like an accordion before rolling.
This gives the leaves more texture.
Step 4: Assemble the wreath. Arrange the petals in a circle around each brown center before gluing.
A sunflower typically has two layers of petals: an outer layer of twelve petals and an inner layer of twelve petals staggered slightly so they peek through the gaps.
Glue the outer layer first, allow it to dry, then glue the inner layer. Add the brown center last.
Step 5: Attach to the wreath form. Arrange three sunflowers evenly around the wreath form.
Glue them in place. Fill the gaps between sunflowers with leaves, small tight coils (to represent buds), and loose coils in varying shades of green.
The goal is to cover the wreath form completely while creating a balanced composition.
Step 6: Finishing touches. Add a few small yellow loose coils scattered among the leaves to suggest smaller blossoms. If you plan to hang the wreath, attach a ribbon or twine loop to the back before the glue fully sets.
This project will take two to three hours spread over an afternoon. The result is a dimensional, textured wreath that brings a touch of summer sunshine to any wall.
Tips for Clean, Professional Results
A few small habits separate beginner quilling from work that looks polished and intentional. Here are the techniques that will elevate your projects.
Use the right amount of glue. Less is more. A tiny dot applied with the tip of a toothpick or the nozzle of your glue bottle is sufficient.
Too much glue seeps out from under the paper, dries shiny, and attracts dust. If you see excess glue, wipe it away immediately with a damp cotton swab.
Let each layer dry before adding the next. Patience pays off in quilling. If you glue petals to a center while the center is still damp, the whole flower may shift out of shape. Give each layer ten to fifteen minutes to set before moving to the next step.
Use a circle sizing board for consistent shapes. If you want multiple petals of the same size, place each loose coil in the same-sized circle on your board before gluing. This simple tool eliminates the guesswork and ensures uniform flowers.
Handle finished pieces gently. Quilled paper is surprisingly sturdy once the glue is fully dry, but while you are working, the pieces are delicate. Always lift assembled elements by their edges, not their centers, to avoid crushing the coils.
Store unfinished work flat. If you need to step away from a project, place it in a flat container or between the pages of a heavy book. Never stand quilled pieces on their edge, as the paper coils can deform under their own weight.
Experiment with strip widths. While 1/8 inch strips are standard for most quilling, wider strips (1/4 inch) create bolder, more dramatic shapes, while narrower strips (1/16 inch) allow for finer detail. Try different widths as you gain confidence.
Design Ideas for Summer Cards and Gifts
Once you are comfortable with the basic shapes and projects above, the possibilities expand dramatically. Here are some ideas to inspire your next quilling session.
Birthday cards with mixed flower bouquets. Create a cluster of three or four small flowers in different colors — pink roses, blue forget-me-nots, and yellow daisies — arranged as a bouquet on the front of a card. Add green leaf accents and a tiny bow made from a folded strip.
Place cards for summer gatherings. Quill tiny flowers or simple monogram initials onto folded place cards for your next garden party or barbecue. These personalized touches make guests feel special and double as take-home favors.
Gift toppers for hostess presents. Instead of a store-bought bow, attach a quilled flower to the ribbon on a hostess gift. The recipient can remove it and keep it as a small keepsake.
Garden markers for potted plants. Quill a small flower or leaf shape and glue it to the top of a wooden craft stick. Write the plant name on the stick below. These make charming, weather-resistant markers for container gardens.
Framed botanical art. Arrange an assortment of quilled flowers, leaves, and vines inside a shadow box frame. The depth of the frame creates a three-dimensional effect that makes the paper elements appear to float.
Bookmarks. Quill a thin strip of flowers along a cardstock bookmark base. Laminate or cover with clear contact paper for durability. These make excellent stocking stuffers or teacher gifts.
Each of these projects uses the same basic shapes you have already learned. The difference is simply how you combine and arrange them.
Caring for Your Finished Quilled Pieces
Paper quilling is more durable than it looks, but a little care goes a long way in preserving your work. Keep finished pieces away from direct sunlight, which can fade colored paper over time. A UV-protective glass or acrylic frame is ideal for wall art.
Dust quilled pieces gently with a soft, dry paintbrush or use compressed air at a low setting. Never use a damp cloth on quilled paper — moisture causes the coils to lose their shape and can weaken the glue bonds.
If a piece gets crushed or flattened, you can often restore it by gently lifting the affected coils with a pin or tweezers and applying a small dot of fresh glue to re-secure them. Store flat in a box or drawer rather than stacked under heavy items.
With reasonable care, quilled artwork lasts for years. I have seen pieces from the 1970s that are still in excellent condition, their colors only slightly mellowed by age.
Conclusion
Paper quilling is one of those crafts that rewards a calm afternoon and a willingness to start simple.
Those first few coils may feel awkward, but by the time you finish your first daisy card, you will already be thinking about what to make next.
The lavender spray. The sunflower wreath. A gift for a friend. A piece of art for your own wall.
Start with the daisy card this weekend. Gather your strips, your tool, and your glue, and give yourself an hour of quiet focus.
The rhythm of rolling paper — strip by strip, coil by coil — becomes its own form of meditation.
And when you step back and see what your hands have made, you will understand why this centuries-old craft has never gone out of style.
