Introduction
My grandmother never carved a pumpkin in her life. Every October, she would buy three perfect pumpkins, set them on the porch steps, and paint them like they were the finest canvas she owned.
One year they wore tiny polka dots. Another year they had friendly, lopsided faces. And every year, they lasted from the first cool week of autumn all the way to Thanksgiving, glowing on the steps long after the carved jack-o'-lanterns down the street had collapsed into sad, moldy heaps.
She understood what I did not until years later: a painted pumpkin is not a compromise. It is a smarter, longer-lasting, and frankly more beautiful way to celebrate the season. You can start today, finish in an afternoon, and keep your porch looking lovely for weeks.
This guide covers everything you need to know, from choosing the best paints for real and faux pumpkins to five easy design ideas that look far more complicated than they are. No artistic experience required, I promise.
Why Paint Instead of Carve
Carving has its charms, but painting wins on almost every practical front, especially for busy families.
Painted pumpkins last for weeks. A carved pumpkin begins rotting the moment you cut into it, which is why October porch displays turn into November science experiments. A painted pumpkin stays fresh for a month or more, and a painted faux pumpkin lasts forever.
There is no mess. No scooping seeds, no carving knives, no slippery kitchen table. Just paint, a brush, and your hands.
It is child-friendly. A three-year-old can help paint a pumpkin. They cannot safely carve one. Painted pumpkins let the whole family join in.
It works on everything. Real pumpkins, foam craft pumpkins, plastic decorations, even gourds. If it sits still, you can paint it.
It is reversible. Painted a design you dislike? Paint over it. Real pumpkins are one-use, but your brush strokes are not permanent until you say so.
Choosing Your Pumpkin
The pumpkin you choose shapes the project, so let us start there.
Real pumpkins. Look for one with a smooth, unblemished surface and a stem you can grip comfortably. A slightly flat face is actually a bonus, because it gives you a steadier painting surface. Avoid pumpkins with deep ridges for your first project; the valleys are harder to paint evenly.
Foam pumpkins. The craft-store favorite. They are lightweight, last for years, and take paint beautifully, but they need a coat of primer or gesso first, or the paint beads up and refuses to stick. White foam pumpkins are the easiest to paint because they need no base coat.
Plastic pumpkins. Usually pre-colored, so they work best for partial painting or accents. Scuff them lightly with sandpaper if you plan to cover large areas.
Gourds and mini pumpkins. Wonderful for a collection of tiny painted accents. They are small enough that a single design idea can be practiced across a whole family of them.
The Best Paints for Pumpkins
Here is the honest rundown of what works, so you can shop with confidence.
Acrylic craft paint. The workhorse, and my top recommendation. It is cheap, comes in every color imaginable, covers well, and dries quickly. Look for bottles labeled "matte" or "satin" for the nicest finish. FolkArt, Apple Barrel, and DecoArt are all dependable brands available at any craft store.
Chalk paint. Gives a soft, vintage, matte finish that looks lovely on pumpkins, especially in muted seasonal tones. It costs more than acrylic and needs a sealer, but the aesthetic is worth it for farmhouse-style decor.
Paint pens and markers. The secret weapon for details. Oil-based paint pens (Sharpie Oil-Based, Posca) write cleanly on pumpkins and make dots, lines, and lettering effortless. They are the best tool for anyone who is nervous about brush control.
Spray paint. Fast and smooth for a solid base color, especially on foam or plastic pumpkins. Work outdoors with good ventilation and protect the stem with painter's tape. Spray first, then add details by hand.
What to avoid. Watercolor and tempera paint will not hold up outdoors and will smear at the first hint of rain. Regular washable kids' paint is fine for a one-day indoor project, but do not expect it to survive on the porch.
Prep: Clean, Prime, and Dry
Ten minutes of prep saves you an hour of frustration later.
Wipe your pumpkin with a damp cloth to remove dust and dirt, especially if it came from a farm stand. Let it dry completely before you paint. A wet pumpkin is a slippery, patchy pumpkin.
If you are painting a foam pumpkin, apply a thin coat of gesso or matte spray primer and let it dry. This gives the paint something to grip. If you are painting a glossy plastic pumpkin, scuff it lightly with fine sandpaper first.
Real pumpkins need no primer, but they do benefit from a base coat of plain acrylic in a neutral tone if you plan to paint a bright design. The base coat covers the orange and gives your colors true, even results.
Painting Basics: Base Coats and Brushwork
Whether you are painting the whole pumpkin one color or starting a design, the base coat technique is the same.
Use a flat brush and paint in long, even strokes that follow the pumpkin's curve. Do not overload the brush; a thin, even layer is better than a thick, drippy one.
Let the first coat dry completely, then apply a second. Two thin coats give far better coverage than one thick coat, and they dry faster and smoother. Most pumpkins need two coats, and some need three if the orange shows through.
Work around the stem carefully, and use a smaller brush for the creases near it.
If you make a mistake, do not panic; acrylic dries fast, so you can simply paint over it once it is dry, or gently wipe it off with a damp cloth while it is still wet.
Design Idea One: Classic Polka Dots
Polka dots are the perfect first design: elegant, foolproof, and endlessly customizable.
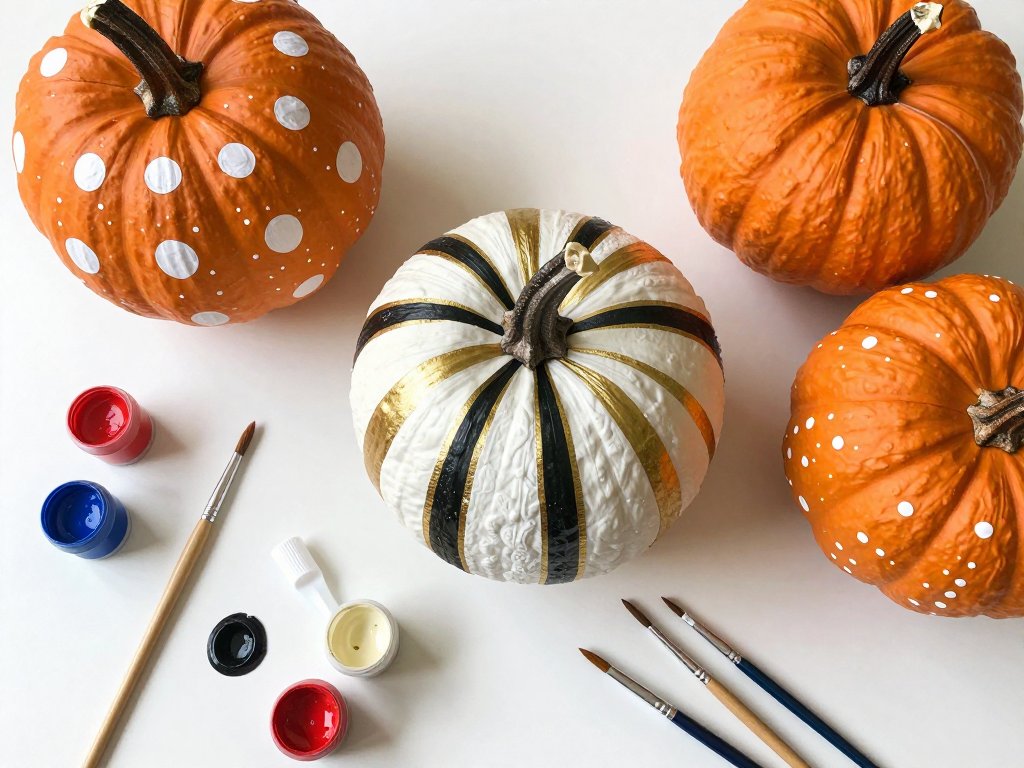
Paint your pumpkin a solid base color and let it dry. Then dip the end of a pencil eraser, a craft dowel, or the handle of a small brush into paint, and stamp dots in rows across the surface.
Keep the dots evenly spaced, or scatter them randomly for a more playful look. You can use one accent color, or several in a coordinated palette.
For a refined version, paint the pumpkin white or cream and stamp dots in black, like a chic dalmatian pumpkin. For a cozy version, use rust and mustard dots on a deep green base. The same ten-minute technique produces completely different moods.
Design Idea Two: Stripes and Chevrons
Clean stripes are easy with painter's tape, and they look like you spent hours.
Paint your base coat and let it dry completely. Then apply strips of low-tack painter's tape vertically over the pumpkin, pressing the edges down firmly so paint cannot bleed underneath.
Paint over the tape with your accent color, let it dry for about fifteen minutes, and peel the tape away slowly at an angle. The result is crisp, professional-looking stripes.
For chevrons, lay the tape in a zigzag pattern instead. For a two-tone look, paint alternating stripes in two accent colors. Just remember to let each coat dry before adding the next piece of tape.
Design Idea Three: Painted Monograms
A monogrammed pumpkin is the hostess-gift of the season, and it is simpler than it looks.
Paint the pumpkin a solid base color. Then find a large letter stencil at a craft store, or print a letter in a pretty font, cut it out, and trace it lightly with chalk.
Fill the letter with paint using a small brush, or trace it with an oil-based paint pen for a cleaner edge. Gold or copper metallic paint looks stunning against a white or deep green base.
Add a small decorative flourish, like a tiny painted leaf or a row of dots under the letter, to finish the design. These make wonderful gifts for neighbors, teachers, and Thanksgiving hosts.
Design Idea Four: No-Carve Faces and Whimsy
You do not need a knife to give a pumpkin a personality. Painted faces are charming, kid-friendly, and completely safe.
The classic approach: paint the whole pumpkin black or leave it natural, then paint a friendly face with white or cream paint. Big simple shapes read best from the porch, so keep the eyes and smile bold.
For a black cat, paint the pumpkin solid black, add pointy ears cut from craft foam, and paint a white chest, whiskers, and a crescent smile.
For a ghost, paint it white and add a sweet sleeping face. For a mummy, wrap white crepe paper strips around a natural pumpkin and paint two big googly eyes.
These designs are perfect for a family painting afternoon, because every member can make their own character and line them up on the steps like a little autumn parade.
Design Idea Five: Modern Minimal, Gold, and Ombre
If your decor leans modern, these three looks will make your pumpkin the most sophisticated on the block.
Gold accents. Paint a pumpkin matte black or white, then paint the stem and a band around the middle in metallic gold. One accent color, one clean line, instant elegance.
Ombre. Choose two shades of the same color, like cream and terracotta or sage and forest green.
Paint the top half with the light shade, the bottom half with the dark shade, then blend the middle while both are still wet with a dry brush.
The soft gradient looks deceptively difficult.
Minimal line art. On a white pumpkin, use a black paint pen to draw a single continuous line, a crescent moon, or a simple botanical leaf. Negative space does the work, and the result is gallery-worthy.
Painting with Kids: Tips for Tiny Helpers
Some of the best pumpkin painting afternoons are the loudest ones. Here is how to keep the fun flowing and the paint mostly on the pumpkins.
Give every child their own pumpkin and their own brush, and cover the table with newspaper or a plastic cloth. Smocks or old shirts are non-negotiable, and so is a bowl of soapy water for quick cleanups.
Let them choose the design, then do the base coats yourself while they watch. Little hands are steadier for dots, stamps, and details than for big, even strokes, so assign tasks to their strengths.
Keep expectations gentle. A pumpkin painted by a four-year-old will not look like a magazine photo, and it should not. It will look like joy, and that is the better decoration anyway.
Sealing and Making It Last
A little sealing keeps your hard work fresh for the whole season.
For outdoor pumpkins, brush on a coat of matte acrylic sealer or a spray sealer designed for outdoor use once the paint is completely dry. This protects against rain, morning dew, and curious squirrels.
Keep painted pumpkins out of direct afternoon sun when you can; intense sun fades even sealed paint over several weeks. Indoors, they need no protection beyond normal care.
Real painted pumpkins last about four to six weeks, which carries most families from the first cool snap to Thanksgiving. When they finally soften, compost them and keep any faux pumpkins for next year.
Foam and plastic pumpkins can be repainted each autumn, which means one ten-dollar pumpkin becomes a different decoration every year. Store them indoors, and they will be waiting for you next October.
A Last Word
My grandmother's painted pumpkins taught me that the season does not have to be carved, cut, and complicated to be beautiful. It can be painted, playful, and personal, and it can last long enough to truly enjoy.
Pick one design from this list, gather your paints, and give yourself an unhurried afternoon with a pumpkin and a brush. If the dots wobble or a stripe wanders, so be it; that is what makes your pumpkin yours.
When the porch lights come on and your painted pumpkin glows in the dusk, you will understand why some of us never pick up a carving knife. And next year, you will already be planning what it will wear.
