Introduction
The first Advent wreath I built leaned like a fence in a windstorm. I had wired four candles onto a cheap foam ring, piled on cedar because it smelled wonderful, and set it on the dining table feeling smug.
By the second week the candles were tilted inward, the foam had softened into a sad grey crater, and half the cedar needles were on the tablecloth. Twelve dollars and three hours, gone by December 10.
I blamed the candles. It was never the candles. The base was wrong, the holders were plastic, and I never thought about heat.
This is the version I build now. It costs about $25 in materials, takes an afternoon, and holds four candles upright for all four weeks of December. Nothing here requires experience. It requires the right order of operations.
What an Advent Wreath Actually Is
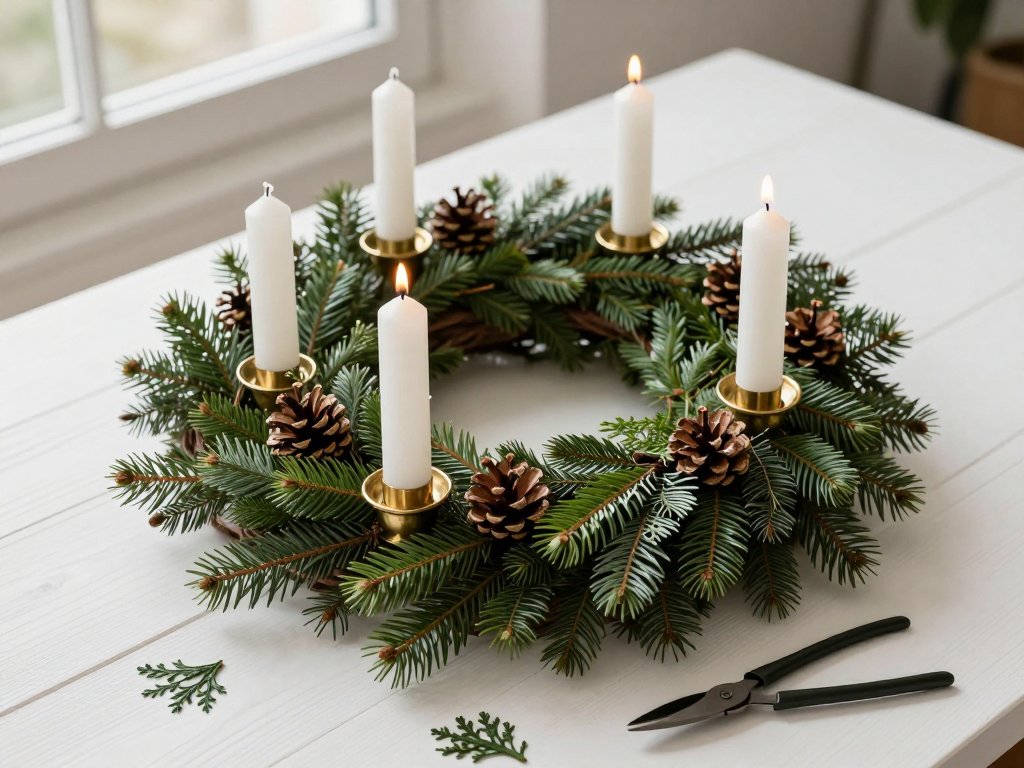
Strip away the ribbon and it's a ring of evergreens holding four candles: three purple or violet, one rose, and often a white candle in the middle for Christmas Day. Each week you light one more candle, working through the season.
The structure matters more than the decoration. A wreath with perfect bows and sagging candles is a fire hazard with a bow on it. A plain wreath with straight candles and clean spacing is the thing you actually want.
That's why we build from the inside out. Base first, then holders, then greenery, then decoration last. Almost every failed wreath I've seen skipped straight to decoration.
One sizing note before you buy anything. Standard Advent tapers are 10 to 12 inches tall with a 7/8-inch base. Those fit most glass cups. If you inherit a set of thin 1/2-inch tapers, check the cup opening first or you'll be wedging them with foil.
Choosing the Base
Three options, and they behave very differently once candle weight and heat enter the picture.
Wire Wreath Ring
A double-rail wire frame, usually 12 to 14 inches, runs $4 to $8. It's light, it holds greenery tightly, and it doesn't care about heat. This is what I use and what I'd hand a beginner.
The trade-off is that wire needs covering. Bare frame shows through if you don't pack your bundles well.
Foam Ring
Green floral foam rings cost $5 to $10 and feel forgiving because stems push straight in. They also collapse. Foam is designed to hold water and stems, not to bear downward load at four points while warm wax sits inches above it.
Once a candle leans, the foam has already compressed. You can't fix it. You can only rebuild.
Grapevine Ring
A grapevine wreath, $10 to $18, is sturdy and beautiful and reusable for years. But it's a rough, uneven surface, and candle cups don't sit flat on it without extra work.
Use grapevine if you want a wreath you'll keep. Use wire if you want a wreath that works this year without fuss.
Weight is the number nobody mentions. Four glass cups plus four tapers plus wet greenery runs about two pounds. That's nothing for wire or grapevine. It's a slow crush for foam, especially once a lit candle softens the top surface.
Picking Greenery That Lasts
Not all evergreens behave the same indoors, and the difference shows up around day ten.
- Balsam fir — holds needles longest, dark green, classic scent. The backbone of the wreath.
- Cedar — gorgeous fragrance and soft drape, but drops needles fast once it dries.
- Boxwood — dense, rounded, and structurally sturdy. Holds shape for weeks.
- Pine — long needles, good volume, but sappy. The resin gums up your snips and your fingers.
The mix I use: roughly 60 percent balsam fir for longevity, 25 percent boxwood for body, and 15 percent cedar for scent. The cedar goes on the outer edge where it can drape and where a few dropped needles won't expose the frame.
Buy two to three bunches. A 14-inch ring takes about one and a half bunches if you bundle tightly, and having extra means you won't stretch material too thin.
Skip anything that's been sitting in a bucket since November. Test a sprig by bending it — a fresh stem flexes, a tired one snaps. Run your hand down the branch and count the needles that fall. More than a few and it's already on its way out.
Candle Holders Are Not Optional
This is the part people cheap out on, and it's the part that matters most.
Glass Candle Cups
Glass cups with a wide base, $2 to $4 each, catch drips and hold a taper upright. They're non-negotiable for me. Wax runs down, hits glass, and stops.
Plastic Inserts
Plastic inserts cost less and look fine for about an hour. Then the candle warms them, they soften, and the taper starts to lean. Some plastics deform outright.
Metal Pricks
A metal prong pushed into the candle base is the old florist's method. It works in a church setting with a metal fixture underneath. On a wreath, a prick alone gives you nothing to catch wax and nothing to spread the load.
Spend the eight dollars. Glass cups are the difference between a wreath and an incident.
Look for cups with a base at least two inches across. A narrow-footed cup concentrates all the load on one point and tips more easily, even on a solid frame. The wide base is doing structural work, not just aesthetic work.
The Spacing Math, Plainly
Four candles around a circle means 360 divided by four. Ninety degrees apart. That's the whole calculation.
Mark it before you wire anything. Set the ring on the table, put a cup at 12 o'clock, one at 3, one at 6, one at 9. Look at it straight down.
Two adjustments to that clean number. First, keep each cup at least two inches in from the outer edge, so greenery has room to breathe and the flame isn't sitting over dry tips.
Second, leave a gap at each cup wide enough for your thumb. You need to reach in to light and snuff candles without crushing the wreath every Sunday.
If your ring is 14 inches across, that puts cups on roughly a 7-inch radius. On a 12-inch ring, closer to 6. Small difference, but it changes how crowded the center feels.
Step by Step: Building the Ring
Work in this order and you won't have to undo anything.
- Mark your four points. Lay the wire ring flat and place the four glass cups at 90-degree intervals. Check the spacing by eye from above before attaching.
- Attach the cups. Cut four 12-inch lengths of 22-gauge wire. Pass each through the cup's base holes or around its foot, then bind it down to both rails of the frame. Pull firm, not brutal. Test each cup by pressing down on it — it should not rock.
- Cut greenery into 6-to-8-inch sprigs. Strip the bottom inch of needles so you have a clean stem to wire against.
- Build bundles of three to five sprigs. Mix fir, boxwood, and cedar in each bundle so the texture is even all the way around, not patchy.
- Wire bundles in one direction only. Pick clockwise and stay clockwise. Consistency is what makes a wreath look intentional.
- Tuck each new bundle's stems under the previous bundle. This hides the wire ends and locks the whole thing into a shingled ring that can't slide.
- Work around the cups, not over them. Greenery should frame each cup, never cross above the rim.
- Fill the inner and outer edges last. Short sprigs tucked underneath close the gaps where the frame shows through.
The Wiring Technique That Doesn't Crush Stems
Two mistakes ruin greenery: wrapping too tight and wrapping in circles.
Use 22 or 24 gauge floral wire. Twenty-two holds heavier bundles; twenty-four is gentler on soft stems like cedar. Cut lengths of about 12 inches and work with one at a time.
Lay the wire along the bundle's stem, not around it. Hold one end against the frame with your thumb, wrap the wire over the bundle in a shallow spiral, and twist the two ends together underneath.
The spiral spreads pressure along the stem instead of pinching one point. Wrapping straight across a stem crimps it, and crimped stems die first.
Two wraps around the rails per bundle, four to five inches apart, is plenty. Give the finished bundle a gentle pull — it should shift a quarter inch and stop. If it slides freely, add a wrap.
To hide the wire, push the tail under the next bundle's foliage. By the time you finish the circle, no wire should be visible from the front or the top. If you can see silver, you wrapped outside the greenery instead of under it.
This is the same shingling logic that makes any evergreen wreath hold together, and if you want the wider version of the technique, my beginner wreath-making guide walks through it for door wreaths. The difference here is that everything has to stay clear of four flames.
Finishing Without Creating a Fire Hazard
Decoration is where a good wreath goes wrong. One rule governs all of it: nothing flammable within three inches of a wick.
Ribbon is fine if you keep it low. Wrap a 1.5-inch wired ribbon around the outer edge, or make a simple bow and wire it to the frame at the 6 o'clock position, well below cup height. Loops that arch upward toward a candle are the classic mistake.
Pinecones and berries belong on the outer ring or tucked low between bundles. Skip anything plastic that will soften, and skip dried elements like cinnamon sticks near the cups — they're kindling with a nice smell.
Small clusters of faux berries at three or four points give the ring rhythm without competing with the candles. Keep the count odd. Three or five reads better than four.
One more cost note. A spool of wired ribbon is $4 and covers two wreaths. Faux berry sprigs run $3 a bunch. If this is your first build, skip both and let the greenery carry it. Add decoration next year, once you know the frame works.
Safety, Stated Plainly
An Advent wreath has open flame inside dry plant material. Treat it that way.
- Never leave burning candles unattended, not even for a quick trip to another room.
- Keep every decoration clear of the flame — three inches minimum, more if the room is drafty.
- Set the wreath on a heatproof mat or a ceramic plate, not directly on wood or a tablecloth.
- Trim wicks to a quarter inch before each lighting so the flame stays small.
- Water the greenery before lighting, and never light a wreath that has gone dry and brittle.
Snuff candles rather than blowing them out. Blowing sends sparks sideways into the needles. A candle snuffer costs five dollars and removes the whole problem.
If you have small children or a cat, put the wreath somewhere it can be seen but not reached. A wreath on a high shelf is a wreath you can actually relax around.
Set a timer if you tend to wander. Twenty minutes is a reasonable burn window for a taper, and a phone alarm costs nothing. That single habit prevents most of what can go wrong here.
Care, Refresh, and Storage
Keeping It Alive Through December
Fresh greenery indoors is dying from the moment you bring it in. Heat, dry air, and time all work against you.
Mist the wreath every two or three days with plain water. A spray bottle on a fine mist is enough. Don't soak it — you'll get water spots on the table and mold in the bundle interiors.
Keep it away from radiators, heating vents, and direct sun. A cool room is a friend here. So is running a humidifier nearby if your house is dry in December.
Expect needle drop from cedar by week two, fir by week three, boxwood barely at all. That's normal, not failure.
To refresh mid-season, tuck fresh sprigs into the bald spots and re-mist. Ten minutes of work buys you another two weeks.
What Survives to Next Year
Most of an Advent wreath is disposable, and knowing which parts aren't saves money.
Keep: the wire frame, the four glass cups, and any wired ribbon you didn't trim short. Rinse the cups, dry them fully, and store them in a small box so they don't chip. The frame goes in a bag flat, not bent.
Compost: all the greenery. It will be dry and brown by January and there's no reviving it.
Replace: the candles, if they burned down more than half, and any berries or pinecones that got waxy.
Realistically, year two costs you about $10 in fresh greenery and candles instead of $25. That's the argument for buying a decent frame once.
A Wreath That Just Stands There
The wreath I build now isn't prettier than the one that collapsed. It's heavier at the base, plainer at the top, and boring in exactly the right way.
Straight candles. Glass cups. Spacing measured instead of guessed. Greenery wired in one direction with the stems tucked under.
That's the whole trick. The first wreath failed because I decorated before I built. Build the structure, keep the flame clear, and the decoration has something solid to sit on.
Twenty-five dollars, one afternoon, four weeks of quiet evenings. That's a good trade.