Introduction
I once paid about $180 for an all-in-one screen printing kit because the box promised everything I needed in one purchase. Half of it was useless. The photo emulsion had expired before I even understood what emulsion was.
The screens were too small for a men's large. The squeegee felt like a plastic toy. And the so-called instructional DVD was little more than a slideshow that skipped every messy step.
What finally worked cost me closer to $25 in hardware I mostly already owned or could buy at a hardware shop. No darkroom, no studio, no three-figure startup fee.
So here is the honest route. A frame, some mesh, a squeegee, and ink that gets ironed so it stays put. That is genuinely the whole setup.
If you sell at craft fairs or run an Etsy shop, the next few hundred words matter more than any glossy tutorial that skips the parts that ruin your first dozen shirts. Your cost per shirt is the whole game.
I am writing this the way I wish someone had explained it to me: what each piece does, what it costs, and where beginners waste money. No hype, no upsell, no pretending you need a workshop.
What Screen Printing Actually Is
Strip away the marketing and screen printing is just a stencil pressed flat against fabric. A fine mesh is stretched tight over a frame, and you block off the parts you do not want printed.
Ink sits on top of the mesh. Pull a squeegee across it and the ink is forced through every open hole onto the shirt below. Nothing else receives any ink at all.
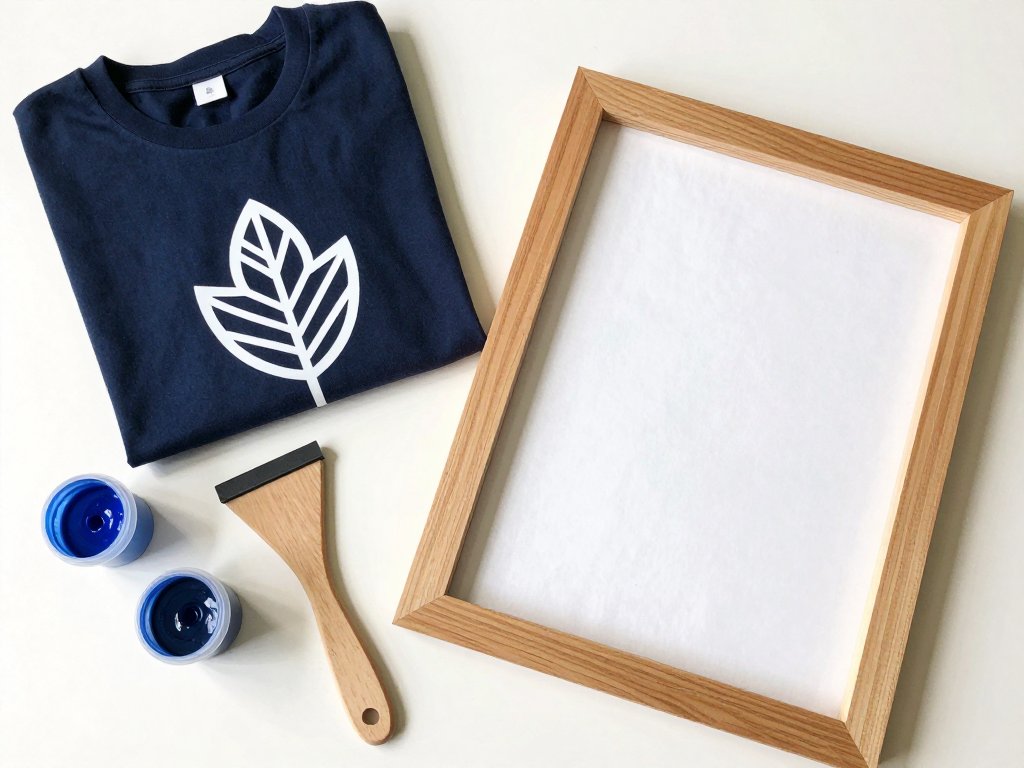
The easiest way to think about it is positive and negative space. The positive is your design — the leaf, the letter, the shape you actually want to see. The negative is everything you block, which stays the shirt's own colour.
A red shirt with a white leaf means the leaf area is open mesh and the rest is sealed shut. Your design is defined entirely by what you cover up, not by what you draw.
That is the entire mechanism. Emulsion, stencils, and squeegee angle are just different tools for controlling the same thing: which holes stay open and which get closed.
Once you picture the mesh as a grid of tiny doors, the rest of this article becomes practical rather than mysterious. Every technique that follows is only deciding which doors to hold shut.
The Two Honest Routes at Home
The stencil or masking route
The stencil route means you physically block off parts of the screen. Freezer paper, contact paper, or cut vinyl is stuck onto a cheap frame that has been stretched with sheer fabric.
Cost is almost nothing — often under $10 if you already have tape and scissors. The trade-off is detail. Simple bold shapes print beautifully. Fine linework and halftones simply do not.
Choose this route for one-off shirts, kid projects, weekend gifts, and any design with clean edges in a single colour. It is the best way to learn the squeeze-and-pull motion.
The photo-emulsion route
The photo-emulsion route coats the mesh with a light-sensitive liquid, exposes a design through a printed transparency, and washes away the unexposed areas. It holds far finer detail than any hand-cut stencil.
A budget kit with emulsion, a scoop coater, and a couple of screens runs about $40 to $70. You also need a way to expose the screen — bright midday sun works fine.
Go this way when you print the same design dozens of times, want crisp small text, or plan to sell. A properly exposed, well-stored screen survives many washes and stays registered.
You can even start on the stencil route and graduate later. The frame, the squeegee, and the ink all carry over, so nothing you buy first goes to waste.
The Cheap Gear List
Here is what actually earns its place on the table, with rough prices. None of this needs a brand name printed on it.
- A wooden or aluminium screen frame: about $8 to $15 each. Buy two if the budget stretches.
- A squeegee with a firm rubber blade: about $7 to $12. A plastic squeegee or a stiff old credit card works for tiny stencils.
- Sheer voile or curtain fabric as cut-price mesh: a few dollars for a metre, enough to re-mesh several frames.
- Water-based fabric ink in a small jar: about $6 to $10 per colour.
- A cheap hair dryer or a household iron you already own: $0 to $15.
- A roll of freezer paper: about $5. Contact paper and cut vinyl are alternatives too.
- A staple gun, wood glue, and painter's tape: usually already sitting in a drawer.
Add it up honestly and a two-screen starter setup lands near $40. Reusing frames and buying ink by the jar drops your per-shirt cost fast.
Notice what is not on the list: an exposure unit, a washout sink, or a drying rack. Those help at volume, but none of them are the reason a beginner fails.
Buy the ink in the largest jar you can justify. Small pots seem cheap until you run out mid-batch and pay shipping again for a few more prints.
Building a DIY Screen
Start with a cheap frame — a sturdy picture frame works if the edges are not flimsy. Remove the glass and the backing board. You only want the open rectangle.
Cut a piece of sheer voile about 5 cm larger than the frame on every side. Voile is the trick here: it is fine, cheap, and takes ink evenly at hobby scale.
Pull the fabric tight across the frame and staple it down, working from the centre outward on opposite sides. Tight means taut enough that you could almost bounce a coin off it.
Now the part people skip. Run a border of wood glue around the inside edge where the mesh meets the frame. Let it cure fully — overnight is safest.
Why does the border matter? Ink travels. Without a sealed edge, ink creeps under the frame and bleeds past your design, leaving fuzzy halos you cannot repair later.
The glued border creates a clean dam. Every print stays inside its intended shape, and the frame wipes clean without ink pooling in the corners.
Let the assembled screen sit flat while it cures so the mesh does not warp. A screen built in an evening and cured overnight is ready to print the next afternoon.
Cutting Your Stencil
The freezer paper method
Draw your design on the matte side of freezer paper and cut it out with scissors or a craft knife. Keep both the pieces you remove and the surrounding sheet.
Place the shiny side down on the shirt and press with a warm iron. The coating melts slightly and sticks to the fabric, sealing the edges against ink.
Print right over the paper. While the ink is still wet, peel the paper away. You get a crisp shape with no sticky residue left behind on the shirt.
The contact-paper method
Contact paper works the same way but sticks on its own. Peel the backing and press it flat onto the screen, starting at one edge and laying it down slowly.
Push out wrinkles as you go with a cloth or a squeegee. A single wrinkle means an ink leak, so take the extra minute here rather than reprinting a shirt.
Its adhesive is gentler than freezer paper's heat bond, which makes it handy for quick repeats and for flatter, less textured fabrics.
When vinyl makes sense
Cut vinyl — the kind used for heat-transfer decals — makes sense when you want fine lettering or a design you will reuse many times over.
Weeding the tiny negative spaces is fiddly the first time. But a vinyl stencil survives repeated printing without tearing or shifting underneath the squeegee.
For a small business printing a logo across a batch, vinyl on a screen pays for itself within the first dozen shirts. That is when it stops being craft and starts being tooling.
Whatever stencil you choose, cut a test version first and print it on a scrap square of the same fabric. Fabric weight changes how much ink soaks in and how sharp the edge looks.
The Actual Printing
Lay the shirt flat on a hard surface and smooth every wrinkle. Tape the shirt down at the edges so it cannot shift between passes and wreck your placement.
Registration means lining up the screen so the design lands in the same spot every time. Mark the frame position with tape so you can drop it back into place exactly.
Now the flood pass: hold the squeegee at about 45 degrees and draw a thin, even layer of ink across the screen without pushing it through. This primes the mesh.
Then the pull pass: with the same 45-degree angle, press down firmly and pull the squeegee toward you in one steady stroke. The ink transfers through in that single motion.
Do not scrub back and forth. Each extra stroke forces more ink through the mesh and muddies the edges. One clean pull beats five messy ones every time.
Lift the screen straight up, never sideways, so wet ink does not smear across the shirt. Check the print before you continue — fixing one shirt beats finding the flaw on twenty.
Between prints, wipe the underside of the screen only if ink has built up. Water-based ink dries in the mesh quickly, so keep printing steadily rather than stopping to fuss.
Heat-Setting (the bit everyone skips)
Here is the mechanism most beginners miss. Water-based fabric ink does not simply dry onto cotton — it cures. Heat bonds the pigment permanently into the fabric fibres.
Air-drying alone leaves the ink sitting on the surface like dried paint. It looks fine for about a week. Then the first proper wash begins the slow damage.
To set it, let the print air-dry completely first, then lay a clean cloth over it and press with a hot iron for about two to three minutes, moving steadily across the design.
The cloth matters. Ironing directly onto wet ink will pick it up and spread it across the shirt — an ugly and expensive lesson to learn on a finished order.
No iron? A heat gun held a few inches away for a couple of minutes does the same job. Keep it moving so you scorch neither the ink nor the shirt.
This single step is the entire difference between a print that survives fifty washes and one that cracks and fades by the fifth. Skip it and you have wasted the ink.
Once cured, the print will stretch and flex with the shirt instead of flaking off the surface. That flexibility is the whole reason pros insist on it.
Common Mistakes
- Too much ink. Flooding and re-pulling pushes ink past the design and blurs edges. Use less than feels natural.
- Poor registration. If the frame shifts between colours, the design doubles up. Tape your marks and check every placement.
- Skipping the heat set. Un-cured ink cracks and fades. Iron it, always, before the first wear or wash.
- Washing too soon. Wait at least three days after heat-setting. The cure keeps strengthening for a while.
- Wrong mesh for the detail. Coarse voile cannot hold fine lines. Bold shapes print crisp; hairlines need a real photo screen.
- A wrinkled stencil. Every fold in freezer paper or contact paper becomes an ink leak. Smooth it flat before you print.
The Cost Math
Let us do the math a print shop will not do for you. A local shop often has a minimum order of twelve to twenty-four shirts at maybe $8 to $14 each. That is $100 or more before you have sold a single piece.
Your DIY setup, starting from nothing, runs about $40 total for a frame, mesh, a squeegee, and one ink colour. After that, each blank shirt costs $3 to $6 and the ink lasts many prints.
Print ten shirts from that setup and your effective cost per shirt is well under $8 — including the gear. Print thirty and it drops toward the price of the blank alone.
For an Etsy seller or craft-fair vendor, that gap is pure margin. A shirt you sell for $25 costs you $4 to make instead of $12, and you control the design and the schedule.
The gear only amortises if you actually batch your work. Five shirts a year is a hobby. Fifty shirts a season is a small business, and the numbers change completely.
Keep a simple tally of blanks, ink, and hours for one batch. Once you see your true cost per shirt, you can price with confidence instead of guessing at a number.
Final Thoughts
Screen printing at home is not complicated once you accept the two non-negotiables: pull the squeegee once, and heat-set the ink. Get those right and your prints look store-bought.
Start with one bold shape, one colour, and a scrap shirt to practise on. You will ruin the first one. Everyone does, and it costs almost nothing to learn.
Then try a two-colour print, registering the second screen over the first once the ink is dry. The day a two-colour design lines up cleanly feels like a real skill clicking into place.
After that, print onto a canvas tote. The same mesh, the same ink, the same heat-set — and a whole second product line with no new gear to buy.
If you enjoy mixing crafts, the same patience that pays off here shows up in handwork like bead embroidery on fabric, where small controlled stitches build something larger.
Buy the cheap frame. Stretch the voile. Print one shirt this weekend and iron it well. That is the whole hobby, and it pays you back per shirt from the first batch.