Introduction
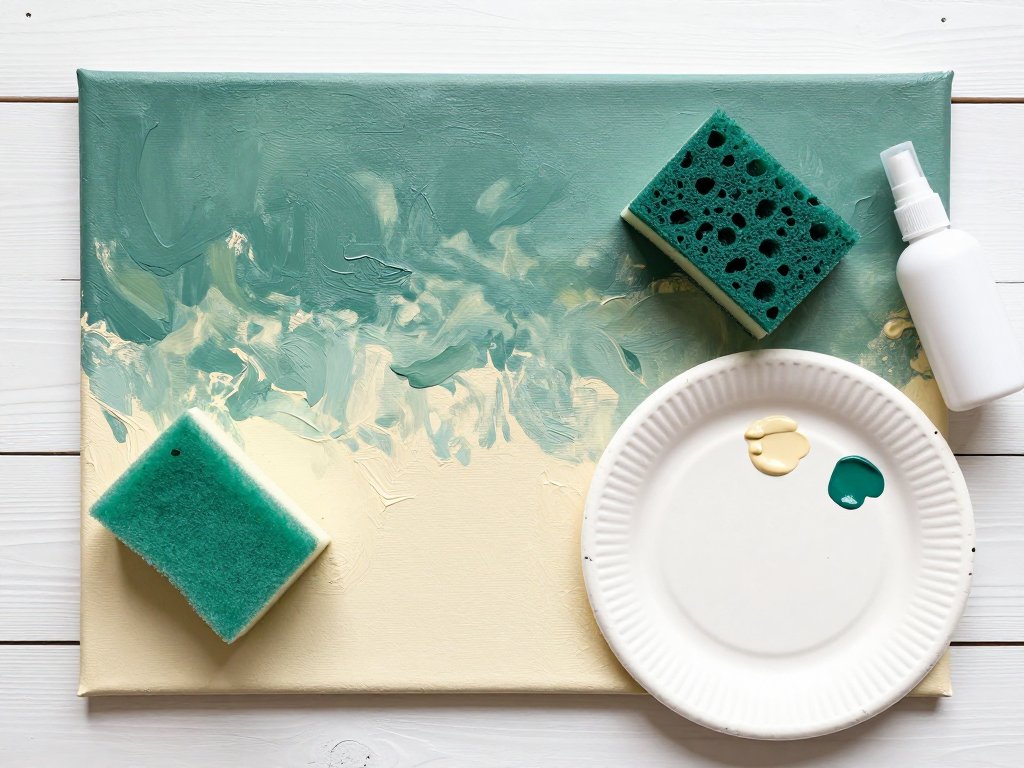
The rain had been falling since lunch, and my daughter was asleep in the next room with one sock half off. I had a canvas I did not like, a jar of leftover teal paint, and a kitchen sponge that had lost its scrubbing corner.
So I cut the sponge into a wedge, squeezed a puddle of paint onto a paper plate, and started tapping. Ten minutes later the canvas had weather on it. A soft, mottled sky that looked like something I had done on purpose.
That is the quiet gift of sponging. It gives a blank canvas depth before you have decided what belongs on top of it.
A textured ground hides brush awkwardness, makes a plain surface feel finished instead of waiting, and carries a painting while you work out the rest. You are not decorating a background. You are giving the subject somewhere to stand.
My grandmother had a kitchen wall sponged in apricot and cream, done sometime in the seventies and never repainted. As a child I thought it was wallpaper. It was not. It was two colors and a sponge, and it held up for forty years.
What follows is the version I use now, after three gray, soupy failures and one very patient afternoon of practice boards.
Three Sponges, Three Different Marks
A sponge is not one tool. The material decides the mark, and the mark decides what kind of background you get.
A natural sea sponge has irregular holes and a soft, unpredictable edge. Press it down and you get organic, cloud-like patches with tiny windows of bare canvas showing through. It is the one I reach for first on skies and old walls.
A household cellulose sponge, the kind under your kitchen sink, has a fine and even pore structure. It leaves a close, regular stipple that reads as haze rather than texture. This is the sponge for soft cloud edges and for settling down an area that got too busy.
A sponge brush or a small roller covers ground quickly and more evenly. Use it when you want a broad field of texture across a large canvas, or when you are laying a base coat and do not need variation.
One habit worth adopting: cut a cellulose sponge into wedges. A wedge gives you a sharp corner for tight spaces and a wide face for open ones, and it costs nothing but thirty seconds with a kitchen knife.
Keep the offcuts. They are the right size for small boards and for testing a color before it touches the real canvas.
Hold whichever sponge you choose between your fingertips, not in a closed fist. Fingertips let you feel how much pressure is going into the canvas, which is the difference between a light dapple and a heavy blot.
Rinse your sponges at the end of a session and squeeze them out properly. Acrylic left to dry in the holes turns them stiff and useless, and a clogged sea sponge never gives you that open, breathing mark again.
Getting the Paint to Heavy-Cream Consistency
Paint straight from the tube is too thick to sponge. It drags across the surface, skips, and leaves little ropes of color that dry with hard edges you cannot soften later.
You want the consistency of heavy cream. Put a blob of paint on your paper plate, add a few drops of water or a little matte medium, and stir until it holds a soft peak but still flows off the sponge.
Fluid and soft-body acrylics are already close to right. Heavy-body paint needs a few more drops and a proper stir, not a lazy swirl.
Too much water is the other failure, and the more common one. Thin paint foams up inside the sponge, dries pale and chalky, and collapses into a washy gray film that looks nothing like the color you chose.
Add water two or three drops at a time. You can always add more. You cannot take it back out.
Aim for a puddle that sits up slightly on the plate. If it runs to the edge and spreads thin, it is already too wet for sponging.
Test the mix on the back edge of the canvas or a scrap of card before you commit. One tap tells you everything: if the mark holds its shape and shows the sponge's pattern, you are right. If it bleeds outward, add paint.
Four Steps Before the Paint Touches Canvas
The order matters more than the paint. These four steps are what separate a dappled background from a smeared one.
- Seal the canvas with a thin base coat and let it dry completely. A coat of gesso or a thin wash of your lightest color gives the sponge something to grab. Dry is not a suggestion. Sponging onto wet paint simply pushes the layers together and you get a flat, smeared film instead of texture.
- Dampen the sponge, then wring it out until it is barely moist. A dry sponge drinks your paint and gives it back unevenly. A dripping sponge is worse, because the water spreads into the paint and ruins the mark. Wet it, squeeze it hard in your fist, and squeeze again.
- Load lightly, then blot two or three times on a paper towel before you touch the canvas. This is the step almost everyone skips first. The first tap on the towel takes off the excess that would otherwise print as a solid blob.
- Tap, do not drag. Set the sponge down, press, lift. Keep your wrist loose, and vary the pressure from tap to tap so the pattern breaks up and breathes. Dragging turns texture into a streak.
That is the whole mechanical skill. Everything after this is color and patience.
If you only remember one thing, remember the blotting. It fixes more bad backgrounds than any other single habit.
One load of paint on a sponge covers roughly a hand-sized area before it needs reloading. You will reload constantly at first, and that is normal. Constant reloading is what keeps the marks light and separate.
Two or Three Colors, and the Mud Problem
Two colors will carry a background. Three is generous. More than three and you are asking for gray.
Choose colors that sit near each other on the wheel: a teal and a soft blue-green, a warm cream and an ochre, a dusty rose and a muted coral. Analogous families layer without turning to mud.
Decide your direction before the sponge is wet. Work light over dark, or dark over a mid-tone, rather than bouncing back and forth between the two.
Here is the mud problem in plain terms. Complementary colors, mixed while both are still wet, make gray. Sponging mixes them for you whether you meant it or not, because every tap presses one layer into the last.
The fix is not a secret medium. It is drying time and a narrow family of color. Let each layer dry to the touch, keep the hues close, and wipe the sponge on a paper towel between colors.
A pairing that has never once gone gray on me: raw umber, a warm cream, and a touch of ochre. Another: phthalo green cut with white, plus a pale blue-gray. Both are quiet enough to sit behind almost any subject.
Layer, Dry, Repeat
Three layers is usually enough for a background. Four if you want real depth.
Each layer needs to be dry to the touch before the next one begins. Not dry on the surface you can see, but dry enough that a finger pressed gently leaves no mark and no tack.
Impatient? A hair dryer on its lowest heat setting, held well back from the canvas and kept moving, will set a thin layer in a couple of minutes. Do not hold it still in one spot, and do not use high heat.
Thin layers dry quickly and stay flexible. One heavy pass of sponged paint looks lumpy, takes hours to set, and can crack later when the canvas flexes.
If a layer is not working, stop adding. Let it dry and sponge over it. Wet paint plus more wet paint is how a background turns into a single flat color.
Do not reach for a heat gun, even if it is sitting right there. It is hot enough to skin the surface while the paint underneath is still soft, and the texture will blister instead of set.
Softening, Masking, and Lifting
Texture does not have to cover the entire canvas. Sometimes the most useful thing a sponge does is leave a space.
Mask a shape with masking tape, freezer paper, or a stencil, sponge over it, then peel the mask away while the paint is still slightly tacky.
What remains is a clean edge surrounded by texture. That is negative sponging, and it is how you get a moon, a window, or a quiet shape behind a subject.
A damp cloth pressed and lifted will take texture back off. Use it around the outer edges to fade the pattern toward the corners for a vignette.
A light mist from a spray bottle, held a foot away, softens hard sponge edges before they set. One pass is usually enough. Two turns the paint to soup and you will be starting over.
Both of these moves are corrections, so make them early. Once acrylic is fully cured, lifting texture means scrubbing, and scrubbing takes the canvas tooth with it.
Layering Ideas for Real Projects
This is where sponging starts to earn its place in your studio.
A mottled sky under a landscape. Sponge a pale blue-gray over cream and let it dry. Then tap a slightly deeper blue into the upper third only. You now have weather, and the landscape sits under it instead of floating on white.
A soft vignette behind a floral subject. A warm neutral sponged around the edges of the canvas, fading inward, gives a flower somewhere to sit. The centre stays quiet and the subject gets all the attention.
A stone or plaster look for a still life. Gray tapped over cream with a sea sponge reads as an old wall. Two or three layers and it stops looking like a color and starts looking like a surface.
A gradient for a quote canvas. Sponge one color along the bottom, a lighter one along the top, and blend the middle with a sponge that is almost empty. The transition stays soft because the tool never has a hard edge.
Then there is the glazing trick. Once the sponged texture is bone dry, brush a thin translucent wash over the whole thing. The wash settles into the dips, deepens the dapple, and pulls every color into one family.
Mix that wash thin, with more medium than paint. One coat. If it pools, lift the excess with a dry brush corner while it is still wet.
A portrait benefits from the same idea in reverse. Sponge a soft, low-contrast background around the head and keep the face completely free of texture, so the eye has one calm place to land.
Tools and Cheap Supplies
Almost none of this needs to be bought. The list below is what I actually keep on the table.
- A household cellulose sponge, cut into wedges
- A natural sea sponge, if you have one or find one cheaply
- A sponge brush or a small roller for broad areas
- Paper plates for palettes, one per color family
- A spray bottle of clean water
- Masking tape
- Freezer paper for masks and for protecting the table
- Paper towels, more than you think you need
- Acrylic paint in two or three related colors
- Gesso or a thin base coat color
Paper plates matter more than they sound. They give you a wide, flat puddle and you can throw them away instead of washing paint down the sink.
Freezer paper is the quiet hero of this list. It lies flat, cuts cleanly, and peels off without leaving adhesive behind.
Troubleshooting
The pattern looks like polka dots. Too much paint on the sponge. Blot more firmly and more often, and tap with a lighter hand. Uniform circles mean uniform pressure.
The colors go gray. Too many colors, or too much working back into wet paint. Let the layer dry, narrow the palette, and stop tapping an area once it has started to settle.
The texture disappears under later paint. You covered it with a loaded brush. Either paint the subject with a lighter touch, or reserve the texture for the sky and background and keep the foreground smoother on purpose.
The sponge dries and skips. Re-dampen it, wring it out again, and reload. A sponge that has been sitting for ten minutes is no longer the tool you started with.
The background looks patchy in a bad way. Usually a wet base coat underneath. Let the base dry fully, then begin again with a lighter load.
None of these are ruined paintings. Every one of them is fixable with a dry layer and a lighter hand.
Five-Minute Practice Board
Before you commit a background to a real canvas, spend five minutes comparing marks. It will teach you more than another hour of reading.
Cut three small boards from a cereal box or a scrap of canvas board. Same two colors on all three. One sponge per board.
Give each board roughly the same number of taps and the same pressure. Then line them up side by side and look at what each tool actually did.
The sea sponge will be the loosest and most organic. The cellulose will be the tightest and most even. The brush will be the flattest and the fastest.
Write the sponge type and the date on the back in pencil. These boards become a reference you will reach for again, and they take less time than choosing a background color.
Conclusion
Sponging is one of the few techniques that is genuinely faster than it sounds. A background takes ten minutes, and it dries while you make tea and answer the same question for the fourth time.
Start with one color and a kitchen sponge. Tap lightly, let it dry, and see what the second color does over the top of it.
If you want another way to build texture into a canvas, palette knife painting is the natural next step: thicker, more physical, and just as forgiving of a heavy hand.
Then put the sponge down and step back. The background will look intentional, even though you made it in the time it took the kettle to boil.